Salvar um notebook no GitHub
Para fazer backup da instância de notebooks gerenciada pelo usuário e disponibilizá-la para outras pessoas, salve o conteúdo dessa instância no GitHub.
Crie um repositório do GitHub
Se você ainda não tiver um repositório do GitHub, crie um.
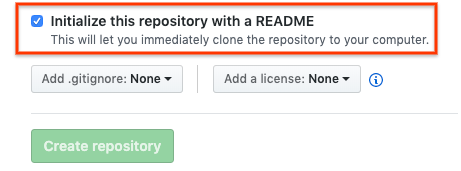
Ao criar um repositório do GitHub, verifique se o repositório do GitHub pode ser clonado marcando a caixa de seleção Inicializar este repositório com um README.
Clone o repositório do GitHub na instância dos notebooks gerenciados pelo usuário
Para clonar o repositório do GitHub na instância de notebooks gerenciados pelo usuário, conclua as seguintes etapas:
No seu repositório do GitHub, clique no botão Code e na guia Local.
Copie o URL em HTTPS.
No console Google Cloud , acesse a página Notebooks gerenciados.
Clique em Abrir o JupyterLab para abrir a instância de notebooks gerenciados pelo usuário.
No Navegador de arquivos do JupyterLab, selecione a pasta em que você quer clonar o repositório do GitHub. Por exemplo, a pasta inicial.

No JupyterLab, selecione Git > Clonar um repositório.
Se solicitado, digite suas credenciais.
Se você usa um nome de usuário e uma senha do GitHub, digite-os.
Se você usa a autenticação de dois fatores com o GitHub, crie e use um token de acesso pessoal.
Na caixa de diálogo Clone o repo, cole o URL HTTPS do seu repositório do GitHub.
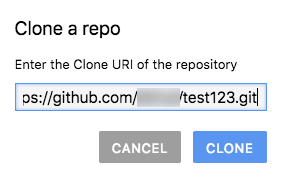
Clique em Clone.
Configure a instância de notebooks gerenciados pelo usuário com as informações do usuário do GitHub
No JupyterLab, selecione Git > Open Git Repository in Terminal para abrir uma janela de terminal do Git.
Na janela do terminal do Git, digite os seguintes comandos para configurar o nome de usuário e o e-mail do Git:
git config --global user.name "YOUR_NAME"
git config --global user.email "YOUR_EMAIL"
Se a conta do GitHub exigir autenticação SSH, siga estas etapas para conectar a conta:
No terminal do Git na instância dos notebooks gerenciados pelo usuário, siga as instruções do GitHub para gerar uma nova chave SSH.
Depois, siga as instruções para adicionar essa chave SSH à sua conta do GitHub.
Feche a janela de terminal do Git.
Adicionar seus arquivos confirmados ao repositório do GitHub
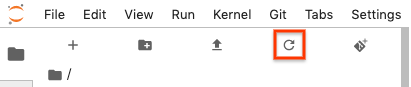
Sua instância de notebooks gerenciados pelo usuário mostra o repositório como uma nova pasta. Se você não vir seu repositório clonado do GitHub como uma pasta, clique no botão Atualizar lista de arquivos.
Clique duas vezes na pasta do repositório para abri-la.
Adicione um novo notebook à instância de notebooks gerenciados pelo usuário.
Para adicionar um arquivo do notebook, use o menu ou o acesso rápido.
Menu
Para adicionar um novo arquivo de notebook no menu, selecione Arquivo > Novo > Notebook.
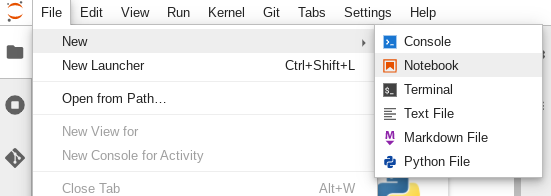
Na caixa de diálogo Selecionar kernel, selecione o kernel do novo notebook, como o Python 3, e clique em Selecionar.
O novo arquivo do notebook será aberto.
Launcher
Para adicionar um novo arquivo de notebook no acesso rápido, selecione File > New > Launcher.
Clique no bloco para o kernel que você quer usar.
O novo arquivo do notebook será aberto.
Renomeie o novo arquivo do notebook.
Menu
Selecione Arquivo > Renomear notebook. A caixa de diálogo Rename file é aberta.
No campo Novo nome, altere
Untitled.ipynbpara algo significativo, comoinstall.ipynb.Clique em Renomear.
Launcher
Clique com o botão direito do mouse na guia
Untitled.ipynbe clique em Renomear notebook. A caixa de diálogo Rename file é aberta.No campo Novo nome, altere
Untitled.ipynbpara algo significativo, comoinstall.ipynb.Clique em Renomear.
Selecione a guia Git. O novo notebook é apresentado no grupo Não rastreado.
Para adicionar o novo notebook como um arquivo no repositório do GitHub, clique com o botão direito do mouse no novo notebook e selecione Rastrear. Na guia Git, o notebook será adicionado ao agrupamento Staged.
Para enviar o novo notebook ao repositório do GitHub, na guia Git, adicione um comentário de confirmação e clique em Confirmar.
Para abrir uma janela de terminal do Git, selecione Git > Abrir repositório Git no terminal.
Na janela de terminal do Git, digite o comando
git push.Se você usar um nome de usuário e uma senha do GitHub, quando solicitado, digite o nome de usuário e a senha do GitHub.
Se você usar a autenticação de dois fatores com o GitHub, crie um token de acesso pessoal para uso.
Quando o comando
git pushfor concluído, seus arquivos confirmados estarão no repositório do GitHub.