Mantieni tutto organizzato con le raccolte
Salva e classifica i contenuti in base alle tue preferenze.
Crea un'istanza di notebook gestiti utilizzando la console Google Cloud
Scopri come creare un'istanza di Notebooks gestita di Vertex AI Workbench
e aprire JupyterLab utilizzando la console Google Cloud .
Questa pagina descrive anche come arrestare, avviare, reimpostare o eliminare
un'istanza di Managed Notebooks.
Per seguire le indicazioni dettagliate per questa attività direttamente nella Google Cloud console, fai clic su Procedura guidata:
Sign in to your Google Cloud account. If you're new to
Google Cloud,
create an account to evaluate how our products perform in
real-world scenarios. New customers also get $300 in free credits to
run, test, and deploy workloads.
In the Google Cloud console, on the project selector page,
select or create a Google Cloud project.
Nella finestra Crea istanza, inserisci my-instance nel campo Nome.
Fai clic su Crea.
Al termine delle attività descritte in questo documento, puoi evitare
l'addebito di ulteriori costi eliminando le risorse che hai creato. Per ulteriori informazioni, vedi
Pulizia.
Apri JupyterLab
Dopo aver creato l'istanza, Vertex AI Workbench la avvia
automaticamente. Quando l'istanza è pronta per l'uso, Vertex AI Workbench
attiva un link Apri JupyterLab.
Fai clic su Apri JupyterLab accanto al nome dell'istanza di blocchi note gestiti.
Nella finestra di dialogo Autentica il blocco note gestito, fai clic sul pulsante
per ricevere un codice di autenticazione.
Scegli un account e fai clic su Consenti. Copia il codice di autenticazione.
Nella finestra di dialogo Autentica il blocco note gestito,
incolla il codice di autenticazione e fai clic su Autentica.
L'istanza di blocco note gestita apre JupyterLab.
Aprire un nuovo file del notebook
Seleziona File > Nuovo > Blocco note.
Nella finestra di dialogo Seleziona kernel, seleziona Python,
quindi fai clic su Seleziona.
Si apre il nuovo file del notebook.
Modificare il kernel
Puoi modificare il kernel del file del blocco note JupyterLab dal menu
o nel file.
Menu
In JupyterLab, nel menu Kernel, fai clic su Cambia kernel.
Nella finestra di dialogo Seleziona kernel, seleziona un altro kernel da utilizzare.
Fai clic su Seleziona.
Nel file
Nel file del blocco note JupyterLab, fai clic sul nome del kernel.
Nella finestra di dialogo Seleziona kernel, seleziona un altro kernel da utilizzare.
Fai clic su Seleziona.
Arresta l'istanza
Nella console Google Cloud , vai alla pagina Blocchi note gestiti.
Il reset di un'istanza cancella forzatamente i contenuti della memoria dell'istanza e
la reimposta allo stato iniziale. Per scoprire di più su come funziona il ripristino di un'istanza, consulta Ripristino di un'istanza.
Nella console Google Cloud , vai alla pagina Blocchi note gestiti.
Fai clic su
Reimposta, quindi fai clic su Reimposta per confermare.
Esegui la pulizia
Per evitare che al tuo account Google Cloud vengano addebitati costi relativi alle risorse utilizzate in questa pagina, segui questi passaggi.
Se hai creato un nuovo progetto per prendere dimestichezza con i notebook gestiti di Vertex AI Workbench, ma non ne hai più bisogno, elimina il progetto.
Se hai utilizzato un progetto Google Cloud esistente, elimina le risorse che hai creato per evitare addebiti sul tuo account:
Nella console Google Cloud , vai alla pagina Blocchi note gestiti.
Seleziona la riga contenente l'istanza da eliminare.
Fai clic su deleteElimina
(a seconda delle dimensioni della finestra, il pulsante Elimina potrebbe essere visualizzato nel menu opzioni more_vert).
Per confermare, fai clic su Elimina.
Passaggi successivi
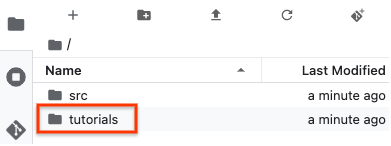
Prova uno dei tutorial inclusi
nella nuova istanza di blocchi note gestiti.
In JupyterLab folderFile Browser, apri la cartella tutorials
e apri uno dei file del blocco note.
[[["Facile da capire","easyToUnderstand","thumb-up"],["Il problema è stato risolto","solvedMyProblem","thumb-up"],["Altra","otherUp","thumb-up"]],[["Difficile da capire","hardToUnderstand","thumb-down"],["Informazioni o codice di esempio errati","incorrectInformationOrSampleCode","thumb-down"],["Mancano le informazioni o gli esempi di cui ho bisogno","missingTheInformationSamplesINeed","thumb-down"],["Problema di traduzione","translationIssue","thumb-down"],["Altra","otherDown","thumb-down"]],["Ultimo aggiornamento 2025-09-04 UTC."],[],[],null,["# Quickstart: Create a managed notebooks instance by using the Google Cloud console\n\nCreate a managed notebooks instance\nby using the Google Cloud console\n=====================================================================\n\n\n| Vertex AI Workbench managed notebooks is\n| [deprecated](/vertex-ai/docs/deprecations). On\n| April 14, 2025, support for\n| managed notebooks will end and the ability to create managed notebooks instances\n| will be removed. Existing instances will continue to function\n| but patches, updates, and upgrades won't be available. To continue using\n| Vertex AI Workbench, we recommend that you\n| [migrate\n| your managed notebooks instances to Vertex AI Workbench instances](/vertex-ai/docs/workbench/managed/migrate-to-instances).\n\n\u003cbr /\u003e\n\nLearn how to create a Vertex AI Workbench managed notebooks instance\nand open JupyterLab by using the Google Cloud console.\nThis page also describes how to stop, start, reset, or delete\na managed notebooks instance.\n\n*** ** * ** ***\n\nTo follow step-by-step guidance for this task directly in the\nGoogle Cloud console, click **Guide me**:\n\n[Guide me](https://console.cloud.google.com/freetrial?redirectPath=/?walkthrough_id=vertex-ai--workbench--managed--create-managed-notebooks-instance-console-quickstart)\n\n*** ** * ** ***\n\n\u003cbr /\u003e\n\nBefore you begin\n----------------\n\n- Sign in to your Google Cloud account. If you're new to Google Cloud, [create an account](https://console.cloud.google.com/freetrial) to evaluate how our products perform in real-world scenarios. New customers also get $300 in free credits to run, test, and deploy workloads.\n- In the Google Cloud console, on the project selector page,\n select or create a Google Cloud project.\n\n | **Note**: If you don't plan to keep the resources that you create in this procedure, create a project instead of selecting an existing project. After you finish these steps, you can delete the project, removing all resources associated with the project.\n\n [Go to project selector](https://console.cloud.google.com/projectselector2/home/dashboard)\n-\n [Verify that billing is enabled for your Google Cloud project](/billing/docs/how-to/verify-billing-enabled#confirm_billing_is_enabled_on_a_project).\n\n-\n\n\n Enable the Notebooks API.\n\n\n [Enable the API](https://console.cloud.google.com/flows/enableapi?apiid=notebooks.googleapis.com&redirect=https://console.cloud.google.com)\n\n- In the Google Cloud console, on the project selector page,\n select or create a Google Cloud project.\n\n | **Note**: If you don't plan to keep the resources that you create in this procedure, create a project instead of selecting an existing project. After you finish these steps, you can delete the project, removing all resources associated with the project.\n\n [Go to project selector](https://console.cloud.google.com/projectselector2/home/dashboard)\n-\n [Verify that billing is enabled for your Google Cloud project](/billing/docs/how-to/verify-billing-enabled#confirm_billing_is_enabled_on_a_project).\n\n-\n\n\n Enable the Notebooks API.\n\n\n [Enable the API](https://console.cloud.google.com/flows/enableapi?apiid=notebooks.googleapis.com&redirect=https://console.cloud.google.com)\n\n\u003cbr /\u003e\n\nCreate an instance\n------------------\n\n1. In the Google Cloud console,\n go to the **Managed notebooks** page.\n\n [Go to Managed notebooks](https://console.cloud.google.com/vertex-ai/workbench/managed)\n2. Click add_box **Create new**.\n\n3. In the **Create instance** window, in the **Name** field,\n enter `my-instance`.\n\n4. Click **Create**.\n\nWhen you finish the tasks that are described in this document, you can avoid\ncontinued billing by deleting the resources that you created. For more information, see\n[Clean up](#clean-up).\n\nOpen JupyterLab\n---------------\n\nAfter you create your instance, Vertex AI Workbench automatically starts\nthe instance. When the instance is ready to use, Vertex AI Workbench\nactivates an **Open JupyterLab** link.\n\n1. Next to your managed notebooks instance's name,\n click **Open JupyterLab**.\n\n2. In the **Authenticate your managed notebook** dialog, click the button\n to get an authentication code.\n\n3. Choose an account and click **Allow**. Copy the authentication code.\n\n4. In the **Authenticate your managed notebook** dialog,\n paste the authentication code, and then click **Authenticate**.\n\n Your managed notebooks instance opens JupyterLab.\n\nOpen a new notebook file\n------------------------\n\n1. Select **File \\\u003e New \\\u003e Notebook**.\n\n2. In the **Select kernel** dialog, select **Python** ,\n and then click **Select**.\n\n Your new notebook file opens.\n\nChange the kernel\n-----------------\n\nYou can change the kernel of your JupyterLab notebook file from the menu\nor in the file. \n\n### Menu\n\n1. In JupyterLab, on the **Kernel** menu, click **Change kernel**.\n\n2. In the **Select kernel** dialog, select another kernel to use.\n\n3. Click **Select**.\n\n### In the file\n\n1. In your JupyterLab notebook file, click the kernel name.\n\n2. In the **Select kernel** dialog, select another kernel to use.\n\n3. Click **Select**.\n\nStop your instance\n------------------\n\n1. In the Google Cloud console, go to the **Managed notebooks** page.\n\n [Go to Managed notebooks](https://console.cloud.google.com/vertex-ai/workbench/managed)\n2. Select the instance that you want to stop.\n\n3. Click square **Stop**.\n\nStart your instance\n-------------------\n\n1. In the Google Cloud console, go to the **Managed notebooks** page.\n\n [Go to Managed notebooks](https://console.cloud.google.com/vertex-ai/workbench/managed)\n2. Select the instance that you want to start.\n\n3. Click arrow_right **Start**.\n\nReset your instance\n-------------------\n\nResetting an instance forcibly wipes the memory contents of your instance and\nresets the instance to its initial state. To learn more about how resetting an\ninstance works, see\n[Resetting an instance](/compute/docs/instances/suspend-stop-reset-instances-overview#resetting-instance).\n\n1. In the Google Cloud console, go to the **Managed notebooks** page.\n\n [Go to Managed notebooks](https://console.cloud.google.com/vertex-ai/workbench/managed)\n2. Select the instance that you want to reset.\n\n3. Click\n\n **Reset** , and then click **Reset** to confirm.\n\nClean up\n--------\n\n\nTo avoid incurring charges to your Google Cloud account for\nthe resources used on this page, follow these steps.\n\nIf you created a new project to learn about\nVertex AI Workbench managed notebooks\nand you no longer need the project, then\n[delete the project](https://console.cloud.google.com/cloud-resource-manager).\n\nIf you used an existing Google Cloud project, then delete the resources\nyou created to avoid incurring charges to your account:\n\n1. In the Google Cloud console, go to the **Managed notebooks** page.\n\n [Go to Managed notebooks](https://console.cloud.google.com/vertex-ai/workbench/managed)\n2. Select the row containing the instance that you want to delete.\n\n3. Click delete **Delete** .\n (Depending on the size of your window,\n the **Delete** button might be in\n the more_vert options menu.)\n\n4. To confirm, click **Delete**.\n\nWhat's next\n-----------\n\n- Try one of the tutorials that is included\n in your new managed notebooks instance.\n In the JupyterLab folder **File Browser** , open the **tutorials** folder,\n and open one of the notebook files.\n\n- Read the [Introduction to managed notebooks](/vertex-ai/docs/workbench/managed/introduction).\n\n- To learn more about advanced settings\n for managed notebooks instances, see [Create\n a managed notebooks instance](/vertex-ai/docs/workbench/managed/create-instance)."]]

 Reimposta, quindi fai clic su Reimposta per confermare.