Mantenha tudo organizado com as coleções
Salve e categorize o conteúdo com base nas suas preferências.
Salvar um notebook no GitHub
Nesta página, descrevemos como salvar os arquivos
de notebook da instância do Vertex AI Workbench no GitHub usando a extensão jupyterlab-git. Isso
pode ser feito para criar um backup do notebook ou disponibilizá-lo
para outras pessoas.
Nas instâncias do Vertex AI Workbench, é possível usar a extensão
jupyterlab-git para ajudar você com o controle de versões. Para saber mais, consulte
jupyterlab-git
no GitHub.
Crie um repositório do GitHub
Se você ainda não tiver um repositório do GitHub, crie um.
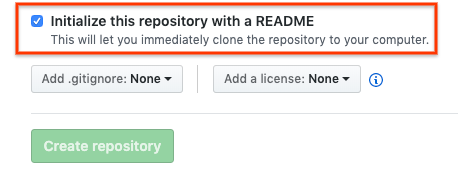
Ao criar um repositório do GitHub, verifique se o repositório do GitHub pode ser clonado marcando a caixa de seleção Inicializar este repositório com um README.
Clonar o repositório do GitHub na sua instância do Vertex AI Workbench
Para clonar o repositório do GitHub na sua instância do Vertex AI Workbench, siga estas etapas:
No seu repositório do GitHub, clique no botão Code e na guia Local.
Copie o URL em HTTPS.
No console Google Cloud , acesse a página Instâncias.
Clique em Abrir JupyterLab para abrir sua instância do Vertex AI Workbench.
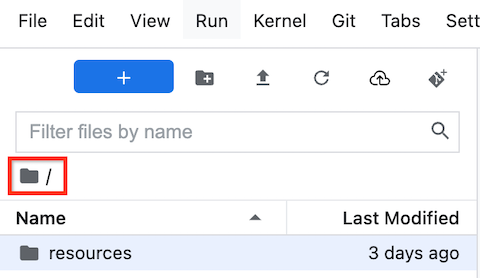
No
folderNavegador de arquivos do JupyterLab, selecione
a pasta em que você quer clonar o repositório do GitHub. Por exemplo,
a pasta inicial.
No JupyterLab, selecione
Git > Clonar um repositório.
Na caixa de diálogo Clonar um repo, cole o URL HTTPS do seu repositório do GitHub.
Se solicitado, digite suas credenciais.
Se você usa um nome de usuário e uma senha do GitHub, digite-os.
Se você usa a autenticação de dois fatores com o GitHub, crie e use um token de acesso pessoal.
Clique em Clone.
Sua instância do Vertex AI Workbench mostra o repositório como uma nova pasta. Se você não vir o repositório clonado do GitHub como uma pasta, clique no botão Atualizar lista de arquivos.
Configurar a instância com as informações do usuário do GitHub
No JupyterLab, abra a pasta em que o repositório está localizado.
Selecione Git > Open Git Repository in Terminal para abrir uma janela do terminal do Git.
Na janela do terminal do Git, digite os seguintes comandos para configurar o nome de usuário e o e-mail do Git:
Selecione a guia Git. O novo notebook é apresentado no grupo Não rastreado.
Para adicionar o novo notebook como um arquivo no repositório do GitHub, clique com o botão direito do mouse no novo notebook e selecione Rastrear. Na guia Git, o notebook será adicionado ao agrupamento Staged.
Para fazer commit do seu novo notebook no repositório do GitHub, na guia Git, no campo Resumo, adicione um comentário de commit e clique em Commit.
Selecione Git > Push to Remote.
Se você usar um nome de usuário e uma senha do GitHub, quando solicitado, digite o nome de usuário e a senha do GitHub.
Se você usa a autenticação de dois fatores com o GitHub, insira seu nome de usuário e token de acesso pessoal do GitHub.
Quando o comando git push for concluído, seus arquivos com commit estarão no repositório do GitHub.
[[["Fácil de entender","easyToUnderstand","thumb-up"],["Meu problema foi resolvido","solvedMyProblem","thumb-up"],["Outro","otherUp","thumb-up"]],[["Difícil de entender","hardToUnderstand","thumb-down"],["Informações incorretas ou exemplo de código","incorrectInformationOrSampleCode","thumb-down"],["Não contém as informações/amostras de que eu preciso","missingTheInformationSamplesINeed","thumb-down"],["Problema na tradução","translationIssue","thumb-down"],["Outro","otherDown","thumb-down"]],["Última atualização 2025-09-04 UTC."],[],[],null,["# Save a notebook to GitHub\n=========================\n\nThis page describes how you can save your Vertex AI Workbench instance's\nnotebook files to GitHub by using the `jupyterlab-git` extension. You might\ndo this to create a backup of the notebook or to make the notebook\navailable to others.\n\nIn Vertex AI Workbench instances, you can use the `jupyterlab-git`\nextension to help you with version control. To learn more, see\n[`jupyterlab-git`](https://github.com/jupyterlab/jupyterlab-git/blob/main/README.md)\non GitHub.\n\nCreate a GitHub repository\n--------------------------\n\nIf you don't already have\na [GitHub](https://github.com/) repository,\nyou must create one.\n\nWhen you create your GitHub repository make sure that your GitHub repository\ncan be cloned by selecting the **Initialize this repository with a README**\ncheckbox.\n\nClone your GitHub repository in your Vertex AI Workbench instance\n-----------------------------------------------------------------\n\nTo clone your GitHub repository in your Vertex AI Workbench instance,\ncomplete the following steps:\n\n1. In your GitHub repository, click the **Code** button,\n and then click the **Local** tab.\n\n2. Copy the **HTTPS** URL.\n\n3. In the Google Cloud console, go to the **Instances** page.\n\n [Go to Instances](https://console.cloud.google.com/vertex-ai/workbench/instances)\n4. Click **Open JupyterLab** to open\n your Vertex AI Workbench instance.\n\n5. In the JupyterLab\n folder **File Browser**, select\n the folder where you want to clone the GitHub repository. For example,\n the home folder.\n\n6. In JupyterLab, select\n **Git \\\u003e Clone a Repository**.\n\n7. In the **Clone a repo** dialog, paste the HTTPS URL for\n your GitHub repository.\n\n8. If prompted, enter your credentials.\n\n - If you use a GitHub username and password, enter your\n GitHub username and password.\n\n - If you use two-factor authentication with GitHub,\n create and use a [personal access\n token](https://help.github.com/en/articles/creating-a-personal-access-token-for-the-command-line).\n\n9. Click **Clone**.\n\n10. Your Vertex AI Workbench instance shows your repository\n as a new folder. If you don't see your cloned GitHub repository\n as a folder, click the **Refresh File List** button.\n\nConfigure your instance with your GitHub user information\n---------------------------------------------------------\n\n1. In JupyterLab, open the folder where your repository is located.\n\n2. Select **Git \\\u003e Open Git Repository in Terminal**\n to open a Git terminal window.\n\n3. In the Git terminal window, enter the following commands to configure\n your Git username and email:\n\n ```scdoc\n git config --global user.name \"USERNAME\"\n git config --global user.email \"EMAIL_ADDRESS\"\n ```\n\n Replace the following:\n - \u003cvar translate=\"no\"\u003eUSERNAME\u003c/var\u003e: your GitHub username\n - \u003cvar translate=\"no\"\u003eEMAIL_ADDRESS\u003c/var\u003e: your GitHub account email address\n4. If your GitHub account requires SSH authentication, complete\n the following steps to connect your account:\n\n 1. From your Git terminal in your Vertex AI Workbench\n instance, follow GitHub's [instructions for generating a new\n SSH key](https://help.github.com/en/github/authenticating-to-github/generating-a-new-ssh-key-and-adding-it-to-the-ssh-agent).\n\n 2. Follow the [instructions for adding that SSH key to your GitHub\n account](https://help.github.com/en/github/authenticating-to-github/adding-a-new-ssh-key-to-your-github-account).\n\n5. Close the Git terminal window.\n\nAdd your committed files to your GitHub repository\n--------------------------------------------------\n\n1. In JupyterLab, open the folder where your repository is located.\n\n2. [Add a new notebook](/vertex-ai/docs/workbench/instances/create-console-quickstart#open-a-new-notebook-file).\n\n3. Select the **Git** tab. Your new notebook is listed in the **Untracked**\n grouping.\n\n4. To add the new notebook as a file for your GitHub repository, right-click\n the new notebook and select **Track** . On the **Git** tab, your notebook\n is now added to the **Staged** grouping.\n\n5. To commit your new notebook to your GitHub repository, on the **Git** tab,\n in the **Summary** field, add a commit comment, and then click **Commit**.\n\n6. Select **Git \\\u003e Push to Remote**.\n\n - If you use a GitHub username and password, when prompted, enter your\n GitHub username and password.\n\n - If you use two-factor authentication with GitHub, enter your\n GitHub username and personal access token.\n\n After the `git push` command completes, your committed files are in\n your GitHub repository.\n\nWhat's next\n-----------\n\n- [Use Cloud Storage to back up and restore\n files](/vertex-ai/docs/workbench/instances/restore-cloud-storage)\n\n- [Use a snapshot to back up and restore\n data](/vertex-ai/docs/workbench/instances/restore-snapshot)"]]