Restez organisé à l'aide des collections
Enregistrez et classez les contenus selon vos préférences.
Enregistrer un notebook sur GitHub
Cette page explique comment enregistrer les fichiers notebook de votre instance Vertex AI Workbench sur GitHub à l'aide de l'extension jupyterlab-git. Cela peut vous servir à créer une sauvegarde du notebook ou à le mettre à la disposition d'autres utilisateurs.
Dans les instances Vertex AI Workbench, vous pouvez utiliser l'extension jupyterlab-git pour faciliter le contrôle des versions. Pour en savoir plus, consultez jupyterlab-git sur GitHub.
Créer un dépôt GitHub
Si vous n'avez pas encore de dépôt GitHub, vous devez en créer un.
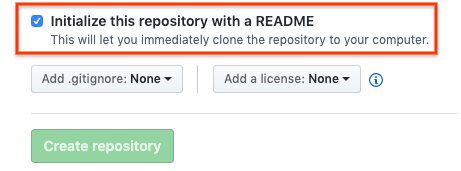
Lorsque vous créez votre dépôt GitHub, assurez-vous qu'il peut être cloné en cochant la case Initialize this repository with a README (Initialiser ce dépôt avec un fichier README).
Cloner votre dépôt GitHub dans votre instance Vertex AI Workbench
Pour cloner votre dépôt GitHub dans votre instance Vertex AI Workbench, procédez comme suit :
Dans votre dépôt GitHub, cliquez sur le bouton Code, puis sur l'onglet Local.
Copiez l'URL HTTPS.
Dans la console Google Cloud, accédez à la page Instances.
Cliquez sur Ouvrir JupyterLab pour ouvrir votre instance Vertex AI Workbench.
Dans le Navigateur de fichiersfolder de JupyterLab, sélectionnez le dossier dans lequel vous souhaitez cloner le dépôt GitHub. Par exemple, le dossier de base.
Dans JupyterLab, sélectionnez Git > Cloner un dépôt.
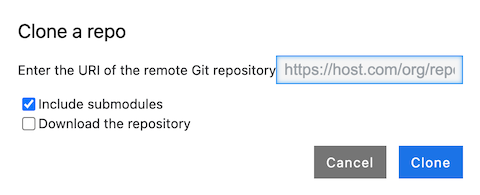
Dans la boîte de dialogue Cloner un dépôt, collez l'URL HTTPS de votre dépôt GitHub.
Si vous y êtes invité, saisissez vos identifiants.
Si vous utilisez un nom d'utilisateur et un mot de passe GitHub, saisissez-les.
Si vous utilisez une authentification à deux facteurs avec GitHub, créez un jeton d'accès personnel et utilisez-le.
Cliquez sur Clone (Cloner).
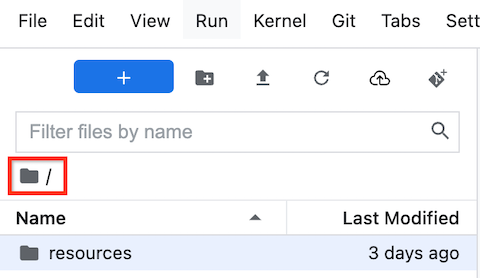
Votre instance Vertex AI Workbench affiche votre dépôt en tant que nouveau dossier. Si vous ne voyez pas votre dépôt GitHub cloné sous forme de dossier, cliquez sur le bouton Actualiser la liste des fichiers.
Configurer votre instance Vertex AI Workbench avec vos informations utilisateur GitHub
Dans JupyterLab, ouvrez le dossier dans lequel se trouve votre dépôt.
Sélectionnez Git > Ouvrir le dépôt Git dans le terminal pour ouvrir une fenêtre de terminal Git.
Dans la fenêtre du terminal Git, entrez les commandes suivantes pour configurer votre nom d'utilisateur et votre adresse e-mail Git :
Sélectionnez l'onglet Git. Votre nouveau notebook est répertorié dans le groupe
Non suivi.
Pour ajouter le nouveau notebook en tant que fichier dans votre dépôt GitHub, faites un clic droit sur le nouveau notebook et sélectionnez Suivre. Dans l'onglet Git, votre notebook est maintenant ajouté au regroupement par étapes.
Pour valider votre nouveau notebook dans votre dépôt GitHub, dans l'onglet Git, dans le champ Résumé, ajoutez un commentaire de validation et cliquez sur Valider.
Sélectionnez Git > Transférer vers la branche distante.
Si vous utilisez un nom d'utilisateur et un mot de passe GitHub, saisissez-les lorsque vous y êtes invité.
Si vous utilisez l'authentification à deux facteurs avec GitHub, saisissez votre nom d'utilisateur GitHub et votre jeton d'accès personnel.
Lorsque la commande git push se termine, vos fichiers validés se trouvent dans votre dépôt GitHub.
Sauf indication contraire, le contenu de cette page est régi par une licence Creative Commons Attribution 4.0, et les échantillons de code sont régis par une licence Apache 2.0. Pour en savoir plus, consultez les Règles du site Google Developers. Java est une marque déposée d'Oracle et/ou de ses sociétés affiliées.
Dernière mise à jour le 2024/07/24 (UTC).
[[["Facile à comprendre","easyToUnderstand","thumb-up"],["J'ai pu résoudre mon problème","solvedMyProblem","thumb-up"],["Autre","otherUp","thumb-up"]],[["Difficile à comprendre","hardToUnderstand","thumb-down"],["Informations ou exemple de code incorrects","incorrectInformationOrSampleCode","thumb-down"],["Il n'y a pas l'information/les exemples dont j'ai besoin","missingTheInformationSamplesINeed","thumb-down"],["Problème de traduction","translationIssue","thumb-down"],["Autre","otherDown","thumb-down"]],["Dernière mise à jour le 2024/07/24 (UTC)."],[],[],null,["# Save a notebook to GitHub\n=========================\n\nThis page describes how you can save your Vertex AI Workbench instance's\nnotebook files to GitHub by using the `jupyterlab-git` extension. You might\ndo this to create a backup of the notebook or to make the notebook\navailable to others.\n\nIn Vertex AI Workbench instances, you can use the `jupyterlab-git`\nextension to help you with version control. To learn more, see\n[`jupyterlab-git`](https://github.com/jupyterlab/jupyterlab-git/blob/main/README.md)\non GitHub.\n\nCreate a GitHub repository\n--------------------------\n\nIf you don't already have\na [GitHub](https://github.com/) repository,\nyou must create one.\n\nWhen you create your GitHub repository make sure that your GitHub repository\ncan be cloned by selecting the **Initialize this repository with a README**\ncheckbox.\n\nClone your GitHub repository in your Vertex AI Workbench instance\n-----------------------------------------------------------------\n\nTo clone your GitHub repository in your Vertex AI Workbench instance,\ncomplete the following steps:\n\n1. In your GitHub repository, click the **Code** button,\n and then click the **Local** tab.\n\n2. Copy the **HTTPS** URL.\n\n3. In the Google Cloud console, go to the **Instances** page.\n\n [Go to Instances](https://console.cloud.google.com/vertex-ai/workbench/instances)\n4. Click **Open JupyterLab** to open\n your Vertex AI Workbench instance.\n\n5. In the JupyterLab\n folder **File Browser**, select\n the folder where you want to clone the GitHub repository. For example,\n the home folder.\n\n6. In JupyterLab, select\n **Git \\\u003e Clone a Repository**.\n\n7. In the **Clone a repo** dialog, paste the HTTPS URL for\n your GitHub repository.\n\n8. If prompted, enter your credentials.\n\n - If you use a GitHub username and password, enter your\n GitHub username and password.\n\n - If you use two-factor authentication with GitHub,\n create and use a [personal access\n token](https://help.github.com/en/articles/creating-a-personal-access-token-for-the-command-line).\n\n9. Click **Clone**.\n\n10. Your Vertex AI Workbench instance shows your repository\n as a new folder. If you don't see your cloned GitHub repository\n as a folder, click the **Refresh File List** button.\n\nConfigure your instance with your GitHub user information\n---------------------------------------------------------\n\n1. In JupyterLab, open the folder where your repository is located.\n\n2. Select **Git \\\u003e Open Git Repository in Terminal**\n to open a Git terminal window.\n\n3. In the Git terminal window, enter the following commands to configure\n your Git username and email:\n\n ```scdoc\n git config --global user.name \"USERNAME\"\n git config --global user.email \"EMAIL_ADDRESS\"\n ```\n\n Replace the following:\n - \u003cvar translate=\"no\"\u003eUSERNAME\u003c/var\u003e: your GitHub username\n - \u003cvar translate=\"no\"\u003eEMAIL_ADDRESS\u003c/var\u003e: your GitHub account email address\n4. If your GitHub account requires SSH authentication, complete\n the following steps to connect your account:\n\n 1. From your Git terminal in your Vertex AI Workbench\n instance, follow GitHub's [instructions for generating a new\n SSH key](https://help.github.com/en/github/authenticating-to-github/generating-a-new-ssh-key-and-adding-it-to-the-ssh-agent).\n\n 2. Follow the [instructions for adding that SSH key to your GitHub\n account](https://help.github.com/en/github/authenticating-to-github/adding-a-new-ssh-key-to-your-github-account).\n\n5. Close the Git terminal window.\n\nAdd your committed files to your GitHub repository\n--------------------------------------------------\n\n1. In JupyterLab, open the folder where your repository is located.\n\n2. [Add a new notebook](/vertex-ai/docs/workbench/instances/create-console-quickstart#open-a-new-notebook-file).\n\n3. Select the **Git** tab. Your new notebook is listed in the **Untracked**\n grouping.\n\n4. To add the new notebook as a file for your GitHub repository, right-click\n the new notebook and select **Track** . On the **Git** tab, your notebook\n is now added to the **Staged** grouping.\n\n5. To commit your new notebook to your GitHub repository, on the **Git** tab,\n in the **Summary** field, add a commit comment, and then click **Commit**.\n\n6. Select **Git \\\u003e Push to Remote**.\n\n - If you use a GitHub username and password, when prompted, enter your\n GitHub username and password.\n\n - If you use two-factor authentication with GitHub, enter your\n GitHub username and personal access token.\n\n After the `git push` command completes, your committed files are in\n your GitHub repository.\n\nWhat's next\n-----------\n\n- [Use Cloud Storage to back up and restore\n files](/vertex-ai/docs/workbench/instances/restore-cloud-storage)\n\n- [Use a snapshot to back up and restore\n data](/vertex-ai/docs/workbench/instances/restore-snapshot)"]]