Datos de imagen: Entrena un modelo de clasificación de imágenes de AutoML
Organiza tus páginas con colecciones
Guarda y categoriza el contenido según tus preferencias.
Usa la consola de Google Cloud para entrenar un modelo de clasificación de imágenes de AutoML.
Después de crear el conjunto e importar tus datos, usa la consola deGoogle Cloud para revisar las imágenes de entrenamiento y comenzar el entrenamiento de modelos.
En este instructivo, se incluyen las siguientes páginas:
En cada página, se supone que ya realizaste las instrucciones de las páginas anteriores del instructivo.
Revise las imágenes importadas
Una vez importado el conjunto de datos, se te dirigirá a la pestaña Browse (Explorar). También puedes acceder a esta pestaña si seleccionas Conjuntos de datos en el menú. Selecciona el conjunto de anotaciones (conjunto de anotaciones de imágenes con una sola etiqueta) asociado con tu nuevo conjunto de datos.
Selecciona Crear para abrir la ventana Entrenar modelo nuevo.
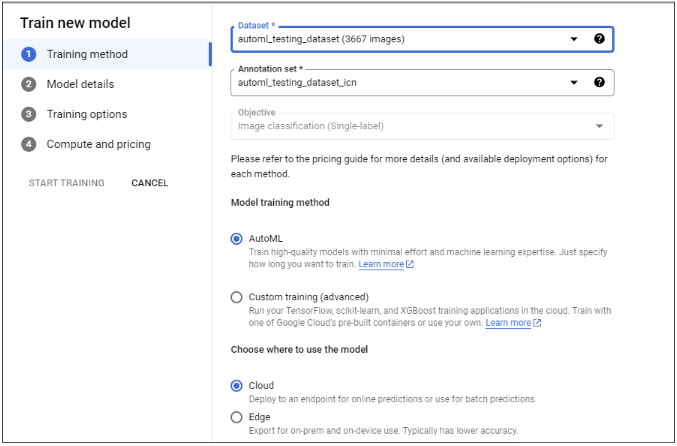
Selecciona Seleccionar método de entrenamiento y, luego el Conjunto de datos de destino si no se seleccionó de forma automática. Asegúrate de que el botón de selección de radio_button_checkedAutoML esté marcado y, luego, elige CONTINUAR.
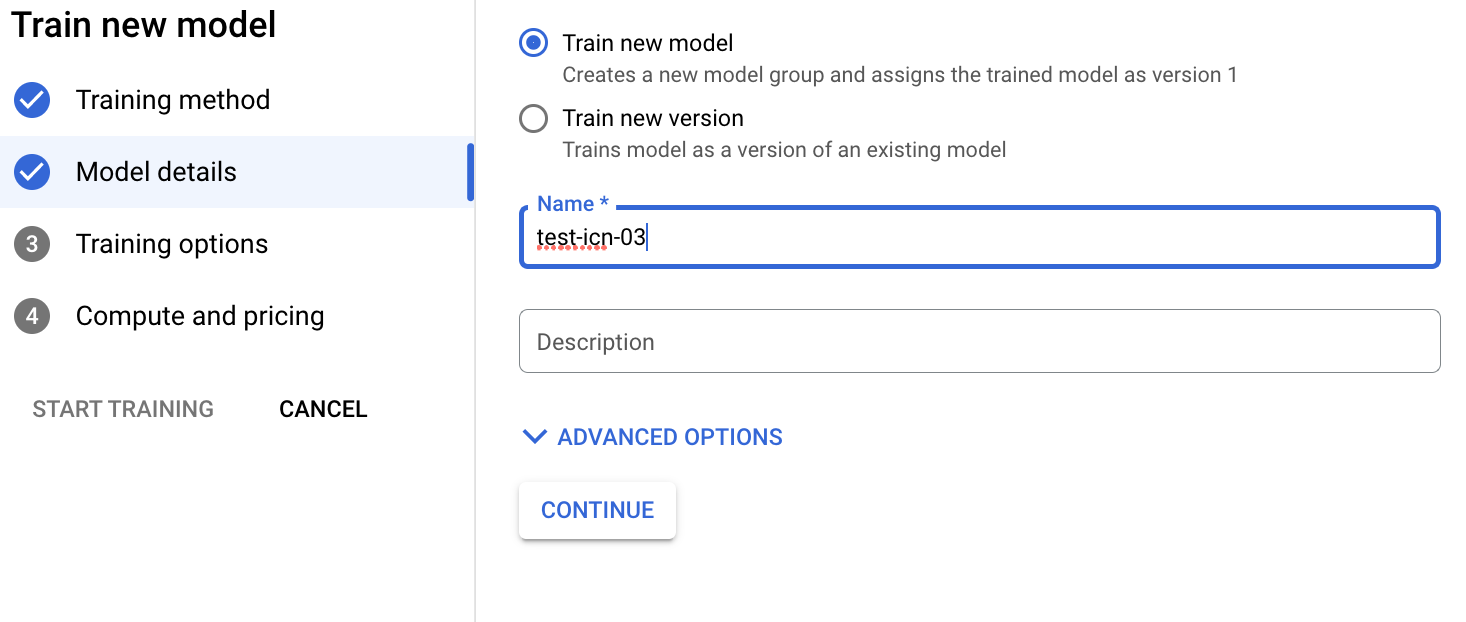
Selecciona Definir tu modelo y, luego, ingresa el Nombre del modelo (opcional). Haz clic en CONTINUAR.
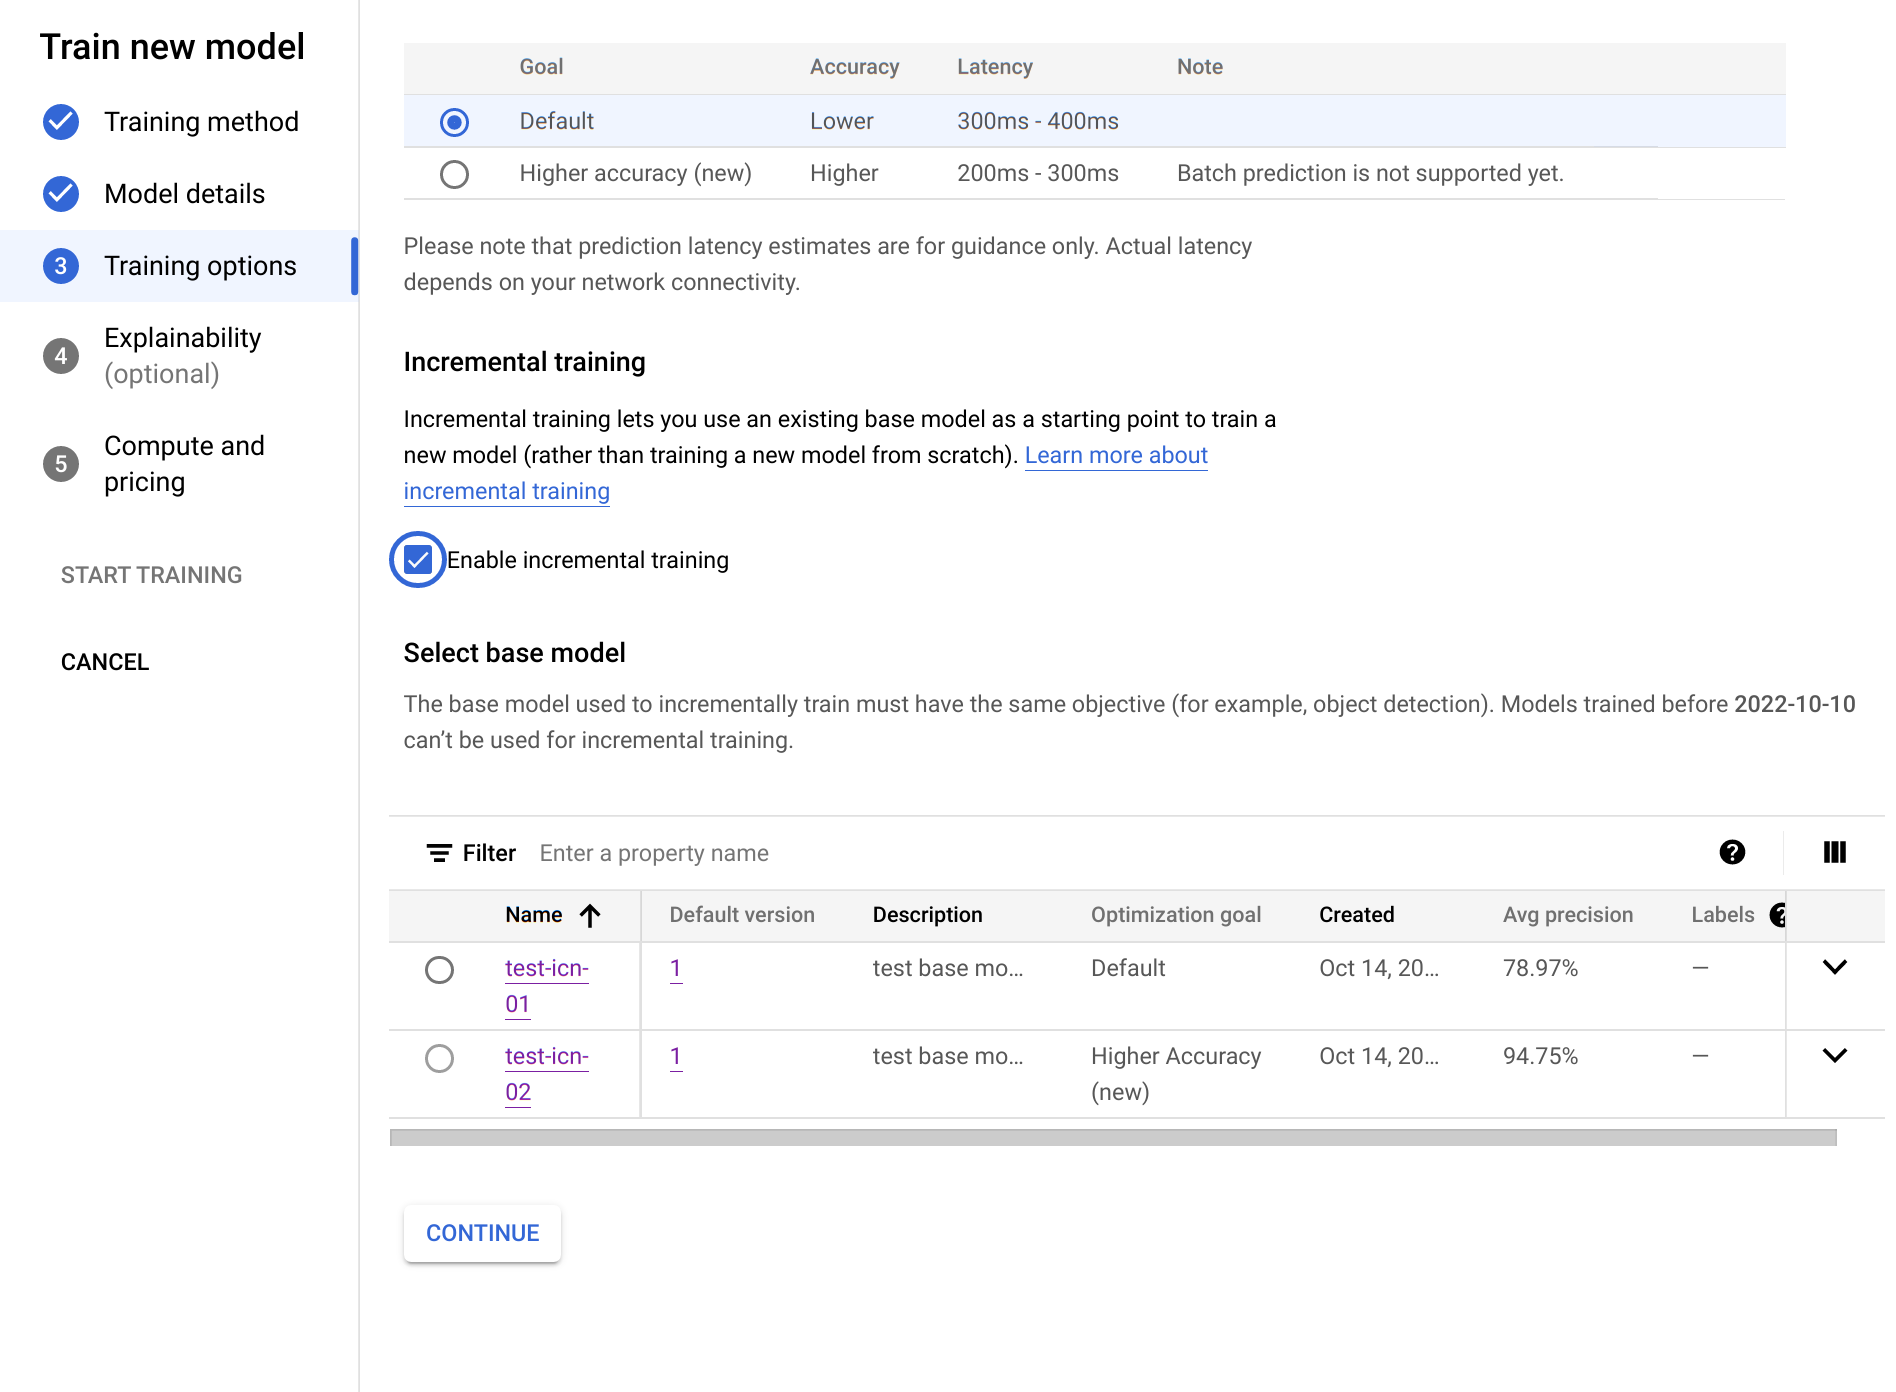
Selecciona Opciones de entrenamiento. Selecciona una opción de modelo según tus necesidades de precisión y latencia. De manera opcional, habilita el entrenamiento incremental y haz clic en CONTINUAR.
Las consideraciones de entrenamiento incrementales son las siguientes:
El entrenamiento incremental se puede habilitar cuando hay al menos un modelo base que se entrenó en este proyecto con el mismo objetivo.
El entrenamiento incremental te permite usar un modelo base existente como punto de partida para entrenar un modelo nuevo en lugar de entrenarlo desde cero.
El entrenamiento incremental suele ayudar a que el entrenamiento se realice más rápido y ahorra tiempo.
El modelo base se puede entrenar a partir de un conjunto de datos diferente.
Selecciona Procesamiento y precios. Especifica un presupuesto de 8 horas de procesamiento de nodo. Selecciona Iniciar entrenamiento.
El presupuesto por hora de procesamiento de nodo es el tiempo máximo (puede variar ligeramente) que el modelo dedica al entrenamiento. Este valor se multiplica por el precio por hora de nodo para calcular el costo total del entrenamiento. Más horas de entrenamiento generan un modelo más preciso (hasta cierto punto), pero con un costo más alto. Para fines de desarrollo, un presupuesto bajo es adecuado, pero para la producción, es importante encontrar un equilibrio entre el costo y la precisión.
El entrenamiento toma varias horas. Se envía una notificación por correo electrónico cuando se completa el entrenamiento del modelo.
¿Qué sigue?
Sigue la página siguiente de este instructivo para verificar el rendimiento de tu modelo entrenado de AutoML y explorar las formas de mejorarlo.
[[["Fácil de comprender","easyToUnderstand","thumb-up"],["Resolvió mi problema","solvedMyProblem","thumb-up"],["Otro","otherUp","thumb-up"]],[["Difícil de entender","hardToUnderstand","thumb-down"],["Información o código de muestra incorrectos","incorrectInformationOrSampleCode","thumb-down"],["Faltan la información o los ejemplos que necesito","missingTheInformationSamplesINeed","thumb-down"],["Problema de traducción","translationIssue","thumb-down"],["Otro","otherDown","thumb-down"]],["Última actualización: 2025-09-04 (UTC)"],[],[],null,["# Hello image data: Train an AutoML image classification model\n\nUse the Google Cloud console to train an AutoML image classification model.\nAfter your dataset is created and data is imported, use the\nGoogle Cloud console to review the training images and begin model\ntraining.\n\nThis tutorial has several pages:\n\n1. [Set up your project and environment.](/vertex-ai/docs/tutorials/image-classification-automl)\n\n2. [Create an image classification dataset, and\n import images.](/vertex-ai/docs/tutorials/image-classification-automl/dataset)\n\n3. Train an AutoML image classification\n model.\n\n4. [Evaluate and analyze model performance.](/vertex-ai/docs/tutorials/image-classification-automl/error-analysis)\n\n5. [Deploy a model to an endpoint, and send a\n prediction.](/vertex-ai/docs/tutorials/image-classification-automl/deploy-predict)\n\n6. [Clean up your project.](/vertex-ai/docs/tutorials/image-classification-automl/cleanup)\n\nEach page assumes that you have already performed the instructions from the\nprevious pages of the tutorial.\n\nReview imported images\n----------------------\n\nAfter the dataset import, you are taken to the **Browse** tab. You can also access\nthis tab by selecting **Datasets** from the menu. Select the\n**annotation set** (set of single-label image annotations) associated with your\nnew dataset.\n| **Key point:** An *annotation set* is the collection of annotations associated with a data type and a specific objective (image data type, classification objective in this case). For more information about *annotation sets* , see [Creating an annotation\n| set](/vertex-ai/docs/datasets/create-annotation-set).\n\n[Go to the Datasets page](https://console.cloud.google.com/vertex-ai/datasets)\n\nBegin AutoML model training\n---------------------------\n\nChoose one of the following options to begin training:\n\n- Choose **Train new model**.\n\n- Select **Models** from the menu, and select **Create**.\n\n1. [Go to the Models page](https://console.cloud.google.com/vertex-ai/models)\n\n2. Select **Create** to open the **Train new model** window.\n\n3. Select **Select Training method** , and select the **target Dataset**\n if they are not automatically selected. Make sure\n the radio_button_checked**AutoML**\n radio button is selected, and then choose **CONTINUE**.\n\n4. (Optional) Select **Define your model** , and enter the **Model name** . Click **CONTINUE**.\n\n5. Select **Train options** . Select a model option according to your accuracy and latency needs. Optionally, enable incremental training and click **CONTINUE**.\n\n Incremental training considerations follow:\n - Incremental training can be enabled when there is at least one base model that has been trained in this project with the same objective.\n - Incremental training lets you use an existing base model as a starting point to train a new model rather than training a new model from scratch.\n - Incremental training generally helps training to occur faster and saves training time.\n - The base model can be trained from a different dataset.\n\n6. Select **Compute and pricing** . Specify a node-hour budget of **8 node hours** . Select **Start training**.\n\n Node-hour budget is the maximum time (may vary slightly) that the model\n spends training. This value is multiplied by the\n [price per node hour](/vertex-ai/pricing#automl_models)\n to calculate to total training cost. More training hours results in a more\n accurate (up to a point) model but results in a higher cost. For development\n purposes, a low budget is fine but for production it's important to strike a\n balance between cost and accuracy.\n\nTraining takes several hours. An email notification is sent when the model training completes.\n\nWhat's next\n-----------\n\nFollow the [next page of this tutorial](/vertex-ai/docs/tutorials/image-classification-automl/error-analysis) to check the\nperformance of your trained AutoML model and explore ways of making it better.\n\nFollow [Deploy a model to an endpoint and make a prediction](/vertex-ai/docs/tutorials/image-classification-automl/deploy-predict) to deploy your trained AutoML model. An image is sent to the model for prediction."]]