Données d'images Hello : entraîner un modèle de classification d'images AutoML
Restez organisé à l'aide des collections
Enregistrez et classez les contenus selon vos préférences.
Utilisez la console Google Cloud pour entraîner un modèle de classification d'images AutoML.
Une fois votre ensemble de données créé et les données importées, utilisez la consoleGoogle Cloud pour examiner les images d'entraînement et commencer l'entraînement du modèle.
Chaque page suppose que vous avez déjà effectué les instructions des pages précédentes du tutoriel.
Vérifier les images importées
Après l'importation de l'ensemble de données, vous êtes redirigé vers l'onglet Parcourir. Vous pouvez également accéder à cet onglet en sélectionnant Ensembles de données dans le menu. Sélectionnez l'ensemble d'annotations (ensemble d'annotations d'images à libellé unique) associé à votre nouvel ensemble de données.
Sélectionnez Créer pour ouvrir la fenêtre Entraîner le nouveau modèle.
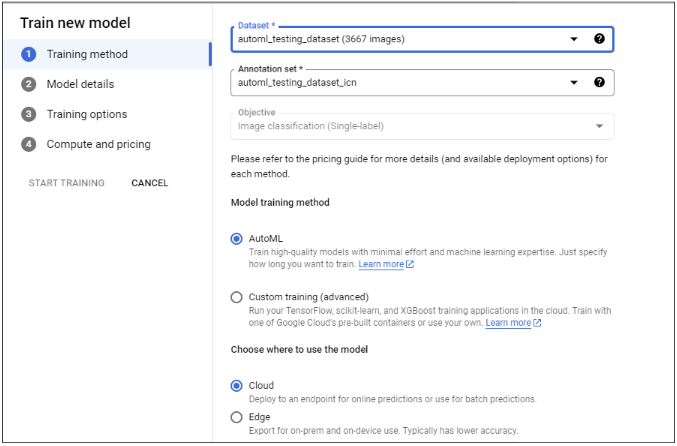
Sélectionnez Choisir une méthode d'entraînement, puis sélectionnez l'ensemble de données cible si celui-ci n'a pas déjà été défini automatiquement. Assurez-vous que la case d'option radio_button_checkedAutoML est cochée, puis cliquez sur CONTINUER.
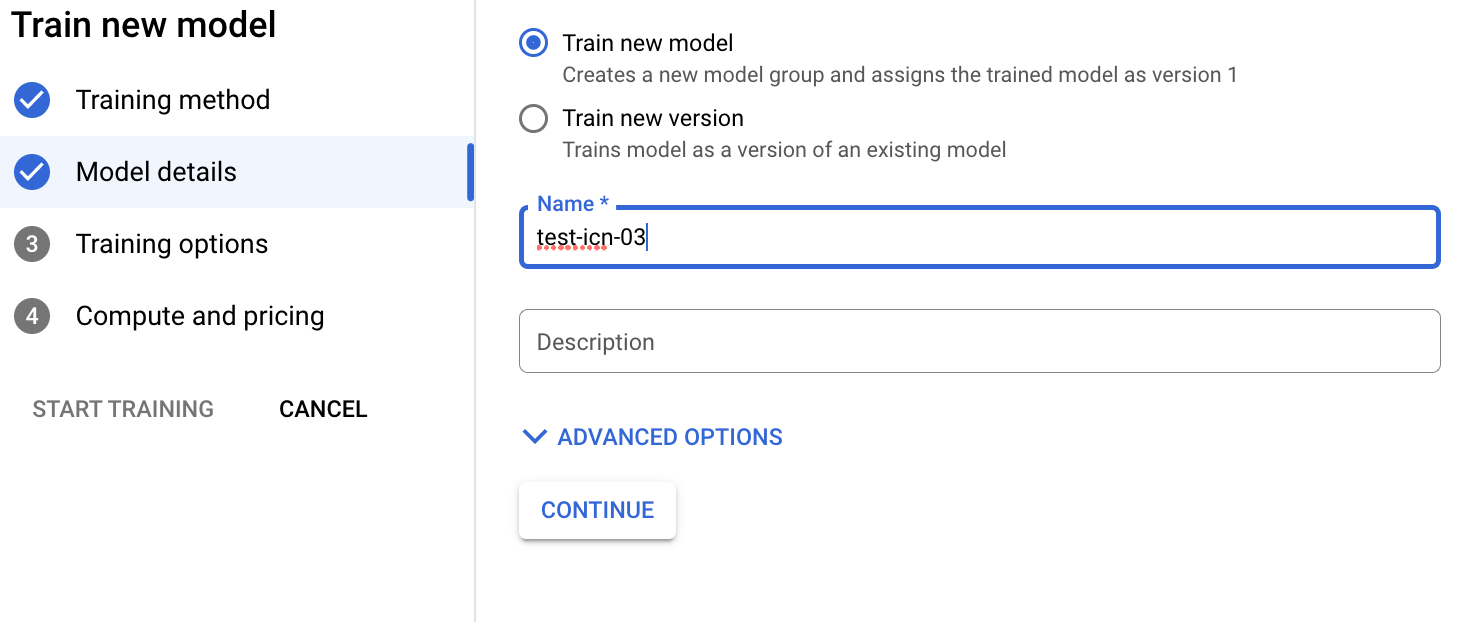
(Facultatif) Sélectionnez Définir votre modèle, puis saisissez le nom du modèle. Cliquez sur Continuer.
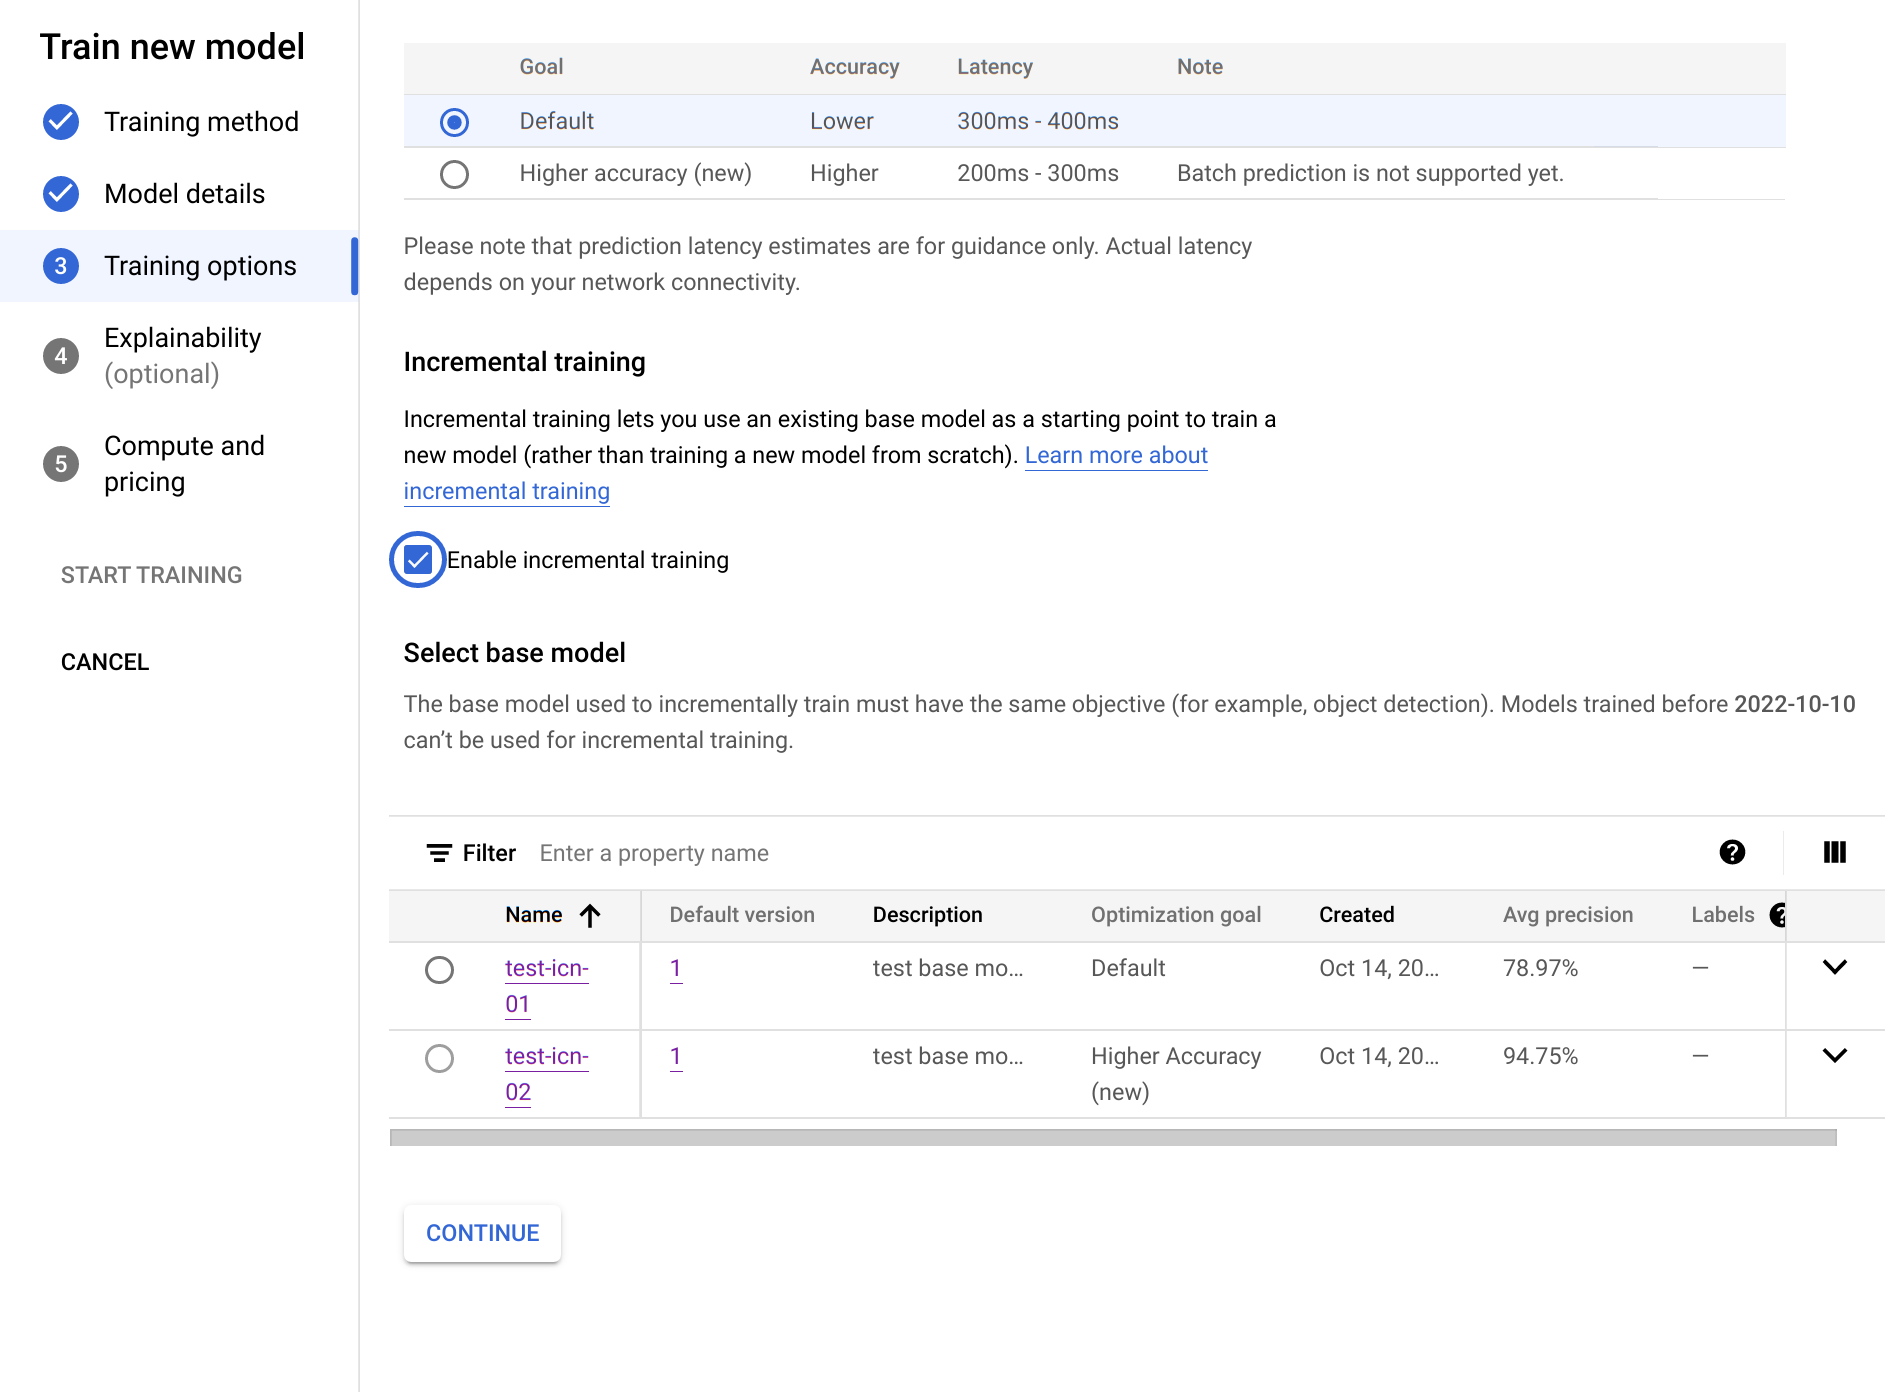
Sélectionnez Options d'entraînement. Sélectionnez une option de modèle en fonction de vos besoins en matière de précision et de latence. Vous pouvez également activer l'entraînement incrémentiel et cliquer sur CONTINUER.
Les points à prendre en compte concernant l'entraînement incrémentiel sont les suivants :
L'entraînement incrémentiel peut être activé lorsqu'au moins un modèle de base a été entraîné dans ce projet avec le même objectif.
L'entraînement incrémentiel vous permet d'utiliser un modèle de base existant pour commencer à entraîner un nouveau modèle plutôt que de partir de zéro.
L'entraînement incrémentiel permet généralement d'accélérer l'entraînement et de gagner du temps.
Le modèle de base peut être entraîné à partir d'un ensemble de données différent.
Sélectionnez Options de calcul et tarifs. Spécifiez un budget en heure-nœud de 8 heures-nœud. Sélectionnez Démarrer l'entraînement.
Le budget par heure de nœud correspond à la durée maximale (peut varier légèrement) pendant laquelle le modèle est entraîné. Cette valeur est multipliée par le prix par nœud et heure pour calculer le coût total de l'entraînement. Plus le nombre d'heures d'entraînement est élevé, plus le modèle est précis (jusqu'à un certain point), mais plus le coût est élevé. Pour le développement, un budget faible est acceptable, mais pour la production, il est important de trouver un équilibre entre le coût et la précision.
L'entraînement prend plusieurs heures. Une notification est envoyée par e-mail à la fin de l'entraînement du modèle.
Étapes suivantes
Suivez la page suivante de ce tutoriel pour vérifier les performances de votre modèle AutoML entraîné et découvrir comment l'améliorer.
Sauf indication contraire, le contenu de cette page est régi par une licence Creative Commons Attribution 4.0, et les échantillons de code sont régis par une licence Apache 2.0. Pour en savoir plus, consultez les Règles du site Google Developers. Java est une marque déposée d'Oracle et/ou de ses sociétés affiliées.
Dernière mise à jour le 2025/09/04 (UTC).
[[["Facile à comprendre","easyToUnderstand","thumb-up"],["J'ai pu résoudre mon problème","solvedMyProblem","thumb-up"],["Autre","otherUp","thumb-up"]],[["Difficile à comprendre","hardToUnderstand","thumb-down"],["Informations ou exemple de code incorrects","incorrectInformationOrSampleCode","thumb-down"],["Il n'y a pas l'information/les exemples dont j'ai besoin","missingTheInformationSamplesINeed","thumb-down"],["Problème de traduction","translationIssue","thumb-down"],["Autre","otherDown","thumb-down"]],["Dernière mise à jour le 2025/09/04 (UTC)."],[],[],null,["# Hello image data: Train an AutoML image classification model\n\nUse the Google Cloud console to train an AutoML image classification model.\nAfter your dataset is created and data is imported, use the\nGoogle Cloud console to review the training images and begin model\ntraining.\n\nThis tutorial has several pages:\n\n1. [Set up your project and environment.](/vertex-ai/docs/tutorials/image-classification-automl)\n\n2. [Create an image classification dataset, and\n import images.](/vertex-ai/docs/tutorials/image-classification-automl/dataset)\n\n3. Train an AutoML image classification\n model.\n\n4. [Evaluate and analyze model performance.](/vertex-ai/docs/tutorials/image-classification-automl/error-analysis)\n\n5. [Deploy a model to an endpoint, and send a\n prediction.](/vertex-ai/docs/tutorials/image-classification-automl/deploy-predict)\n\n6. [Clean up your project.](/vertex-ai/docs/tutorials/image-classification-automl/cleanup)\n\nEach page assumes that you have already performed the instructions from the\nprevious pages of the tutorial.\n\nReview imported images\n----------------------\n\nAfter the dataset import, you are taken to the **Browse** tab. You can also access\nthis tab by selecting **Datasets** from the menu. Select the\n**annotation set** (set of single-label image annotations) associated with your\nnew dataset.\n| **Key point:** An *annotation set* is the collection of annotations associated with a data type and a specific objective (image data type, classification objective in this case). For more information about *annotation sets* , see [Creating an annotation\n| set](/vertex-ai/docs/datasets/create-annotation-set).\n\n[Go to the Datasets page](https://console.cloud.google.com/vertex-ai/datasets)\n\nBegin AutoML model training\n---------------------------\n\nChoose one of the following options to begin training:\n\n- Choose **Train new model**.\n\n- Select **Models** from the menu, and select **Create**.\n\n1. [Go to the Models page](https://console.cloud.google.com/vertex-ai/models)\n\n2. Select **Create** to open the **Train new model** window.\n\n3. Select **Select Training method** , and select the **target Dataset**\n if they are not automatically selected. Make sure\n the radio_button_checked**AutoML**\n radio button is selected, and then choose **CONTINUE**.\n\n4. (Optional) Select **Define your model** , and enter the **Model name** . Click **CONTINUE**.\n\n5. Select **Train options** . Select a model option according to your accuracy and latency needs. Optionally, enable incremental training and click **CONTINUE**.\n\n Incremental training considerations follow:\n - Incremental training can be enabled when there is at least one base model that has been trained in this project with the same objective.\n - Incremental training lets you use an existing base model as a starting point to train a new model rather than training a new model from scratch.\n - Incremental training generally helps training to occur faster and saves training time.\n - The base model can be trained from a different dataset.\n\n6. Select **Compute and pricing** . Specify a node-hour budget of **8 node hours** . Select **Start training**.\n\n Node-hour budget is the maximum time (may vary slightly) that the model\n spends training. This value is multiplied by the\n [price per node hour](/vertex-ai/pricing#automl_models)\n to calculate to total training cost. More training hours results in a more\n accurate (up to a point) model but results in a higher cost. For development\n purposes, a low budget is fine but for production it's important to strike a\n balance between cost and accuracy.\n\nTraining takes several hours. An email notification is sent when the model training completes.\n\nWhat's next\n-----------\n\nFollow the [next page of this tutorial](/vertex-ai/docs/tutorials/image-classification-automl/error-analysis) to check the\nperformance of your trained AutoML model and explore ways of making it better.\n\nFollow [Deploy a model to an endpoint and make a prediction](/vertex-ai/docs/tutorials/image-classification-automl/deploy-predict) to deploy your trained AutoML model. An image is sent to the model for prediction."]]