Google Cloud 콘솔을 사용하여 모델 성능을 확인합니다. 테스트 오류를 분석하여 데이터 문제를 해결해 모델 품질을 반복적으로 개선합니다.
이 튜토리얼은 여러 페이지로 이루어져 있습니다.
모델 성능 평가 및 분석
각 페이지에서는 이 튜토리얼의 이전 페이지에서 안내를 이미 수행했다고 가정합니다.
1. AutoML 모델 평가 결과 이해
학습이 완료되면 모델이 테스트 데이터 분할에 따라 자동으로 평가됩니다. Model Registry 페이지 또는 데이터 세트 페이지에서 모델 이름을 클릭하면 해당 평가 결과가 제공됩니다.
여기에서 모델의 성능을 측정하는 측정항목을 확인할 수 있습니다.
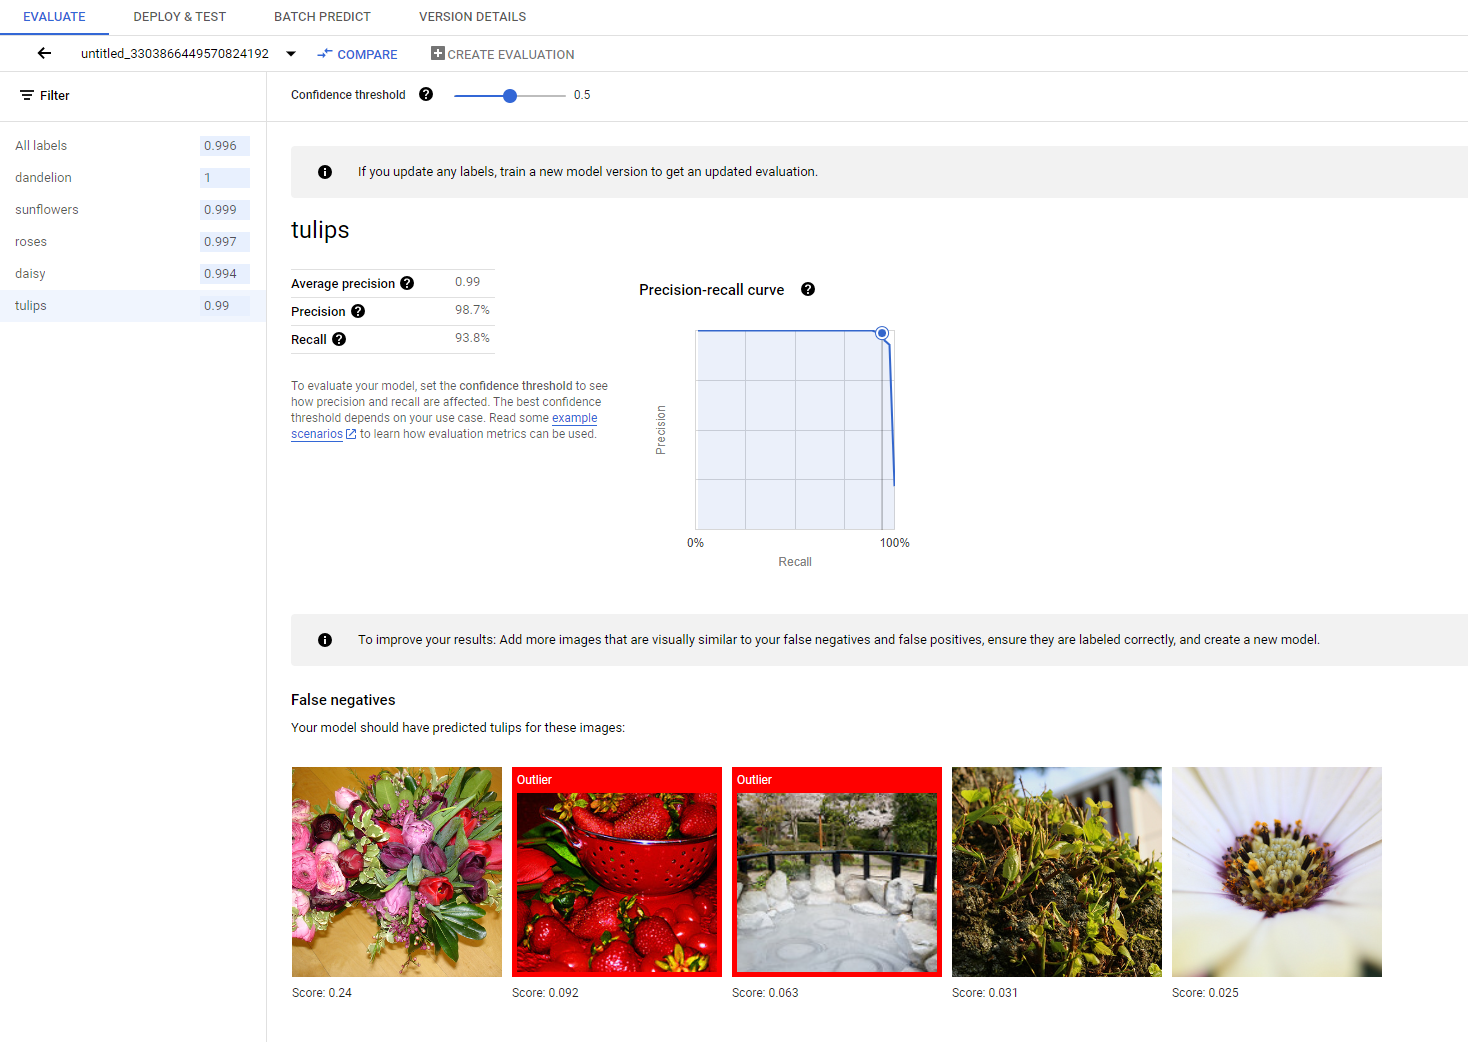
모델 평가, 테스트, 배포 섹션에서 다양한 평가 측정항목에 대한 자세한 내용을 확인할 수 있습니다.
2. 테스트 결과 분석
모델 성능을 지속적으로 개선하려는 경우 첫 번째 단계로 오류 케이스를 검사하고 잠재적 원인을 조사하는 것입니다. 각 클래스의 평가 페이지에는 거짓음성, 거짓양성, 참양성으로 분류된 특정 클래스의 자세한 테스트 이미지가 제공됩니다. 각 카테고리의 정의는 모델 평가, 테스트, 배포 섹션에서 확인할 수 있습니다.
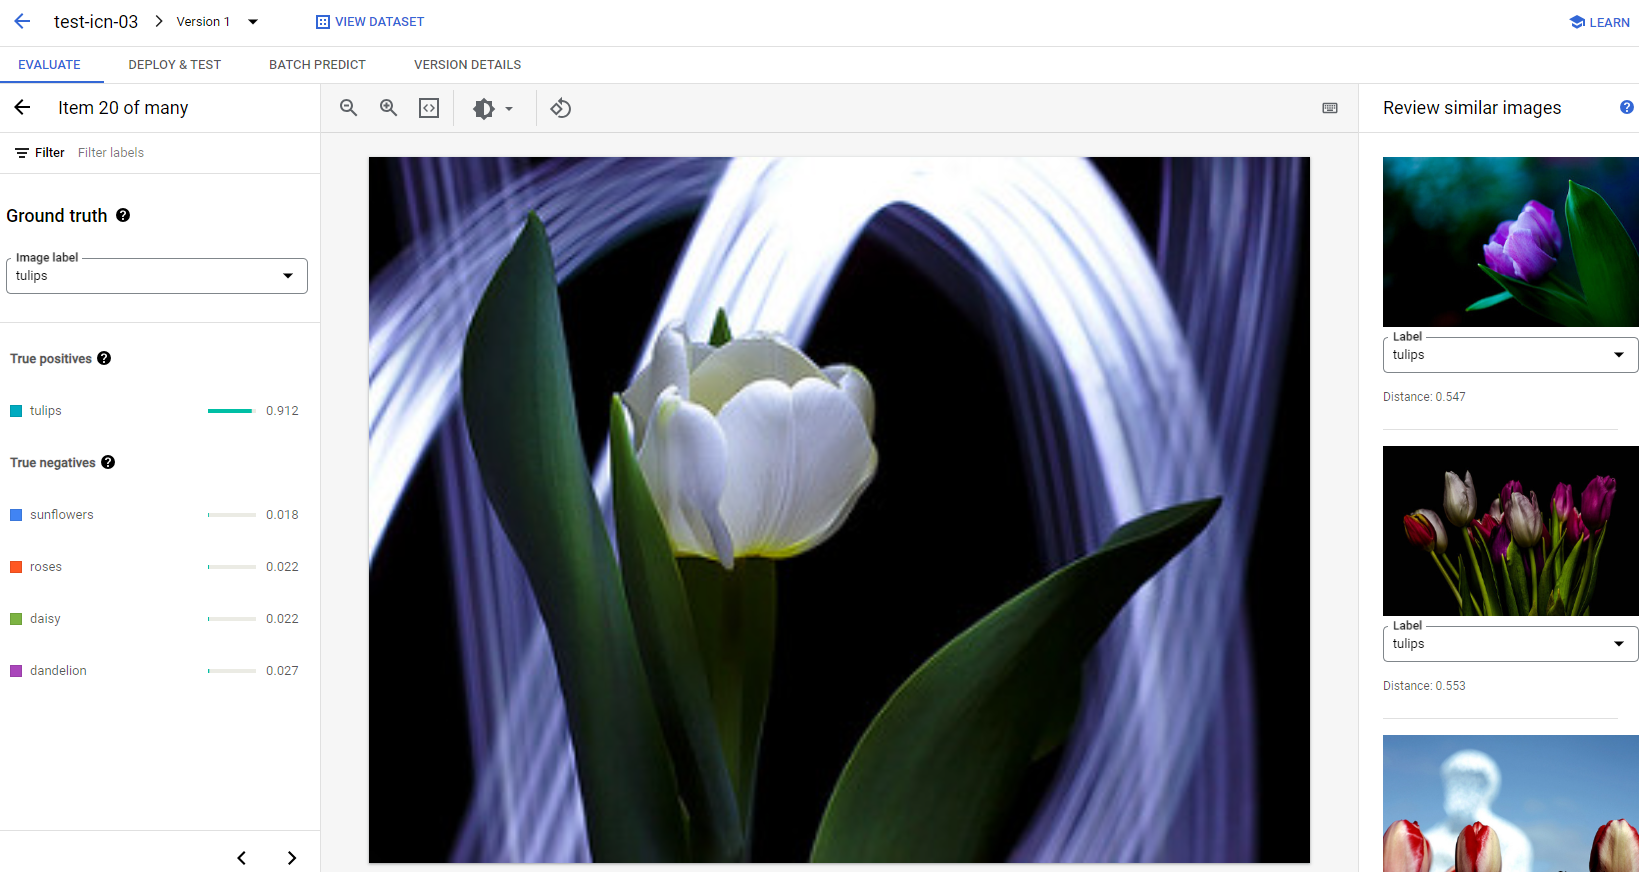
각 카테고리의 각 이미지에 대해 이미지를 클릭하여 예측 세부정보를 자세히 확인하고 세부 분석 결과에 액세스할 수 있습니다. 페이지 오른쪽에 유사한 이미지 검토 패널이 표시됩니다. 여기에서 학습 세트에서 가장 가까운 샘플이 특성 공간에서 측정된 거리로 제공됩니다.
주의해야 할 수 있는 데이터 문제에는 두 가지이 있습니다.
라벨 불일치. 학습 세트의 시각적으로 유사한 샘플의 라벨이 테스트 샘플의 라벨과 다른 경우, 그 샘플 중 하나가 잘못되었거나, 모델 학습에 더 많은 데이터가 필요한 미묘한 차이가 있거나, 현재 클래스 라벨이 정확하지 않아 지정된 샘플을 설명할 수 없는 경우입니다. 유사한 이미지를 검토하면 오류 케이스를 수정하거나 테스트 세트에서 문제가 있는 샘플을 제외하여 라벨 정보를 정확하게 얻을 수 있습니다. 같은 페이지의 유사한 이미지 검토 패널에서 테스트 이미지 또는 학습 이미지의 라벨을 쉽게 변경할 수 있습니다.
이상점. 테스트 샘플이 이상점으로 표시되는 경우, 학습 세트에 모델을 학습시키는 데 도움이 되는 시각적으로 유사한 샘플이 없을 가능성이 높습니다. 학습 세트에서 유사한 이미지를 검토하면 이러한 샘플을 식별하고 유사한 이미지를 학습 이미지에 추가하여 모델 성능을 더욱 향상시킬 수 있습니다.
다음 단계
모델 성능이 만족스러우면 이 튜토리얼의 다음 페이지를 따라 학습된 AutoML 모델을 엔드포인트에 배포하고 예측을 위해 이미지를 모델로 보내세요. 데이터에 대한 수정 사항이 있는 경우 AutoML 이미지 분류 모델 학습 튜토리얼을 사용하여 새 모델을 학습시키세요.