Se anexou um disco novo e vazio à sua VM, antes de o poder usar, tem de o formatar e montar. Se anexou um disco que já contém dados, tem de montar o disco antes de o poder usar.
Antes de começar
-
Se ainda não o tiver feito, configure a autenticação.
A autenticação valida a sua identidade para aceder a Google Cloud serviços e APIs. Para executar código ou exemplos a partir de um ambiente de desenvolvimento local, pode autenticar-se no Compute Engine selecionando uma das seguintes opções:
Select the tab for how you plan to use the samples on this page:
Console
When you use the Google Cloud console to access Google Cloud services and APIs, you don't need to set up authentication.
gcloud
-
Instale a CLI Google Cloud e, em seguida, inicie sessão na CLI gcloud com a sua identidade federada. Depois de iniciar sessão, inicialize a CLI gcloud executando o seguinte comando:
gcloud init - Set a default region and zone.
REST
Para usar os exemplos da API REST nesta página num ambiente de desenvolvimento local, usa as credenciais que fornece à CLI gcloud.
Instale a CLI Google Cloud e, em seguida, inicie sessão na CLI gcloud com a sua identidade federada. Depois de iniciar sessão, inicialize a CLI gcloud executando o seguinte comando:
gcloud initPara mais informações, consulte o artigo Autenticar para usar REST na Google Cloud documentação de autenticação.
Estabeleça ligação à VM
Aceda à página Instâncias de VM.
Clique no botão RDP junto à VM que tem o novo disco em branco anexado. O navegador abre uma ligação RDP à instância.
Formate e monte um disco não de arranque numa VM do Windows
Use o utilitário de gestão de discos do Windows para formatar e montar o novo disco numa VM do Windows.
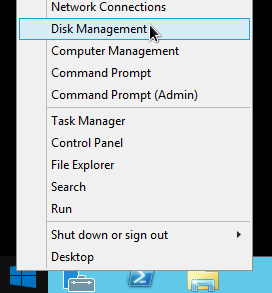
Clique com o botão direito do rato no botão Iniciar do Windows e selecione Gestão de discos.
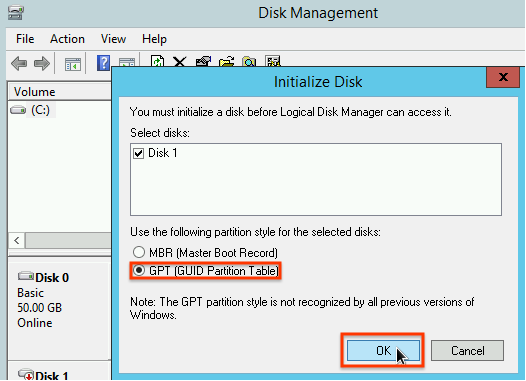
A gestão de discos pede-lhe que selecione um esquema de partição para o novo disco. Selecione GPT e clique em OK.
Depois de o disco ser inicializado, clique com o botão direito do rato no espaço não atribuído do disco e selecione New Simple Volume.

Siga as instruções no New Simple Volume Wizard para configurar o novo volume. Pode usar qualquer formato de partição que quiser, mas, para este exemplo, selecione
NTFS. Além disso, selecione Perform a quick format para acelerar o processo de formatação. Opcionalmente, defina o tamanho do cluster no campo Tamanho da unidade de alocação. O tamanho do cluster limita o tamanho máximo da partição. Tenha isto em atenção se tentar redimensionar o disco persistente zonal e esta partição mais tarde.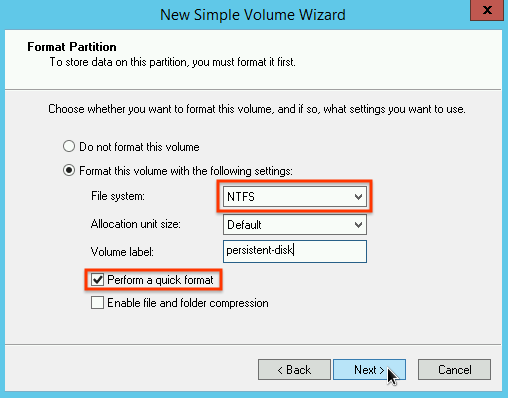
Depois de concluir o assistente e o volume ser formatado, verifique a coluna
Statusna lista de discos anexados para garantir que o novo disco tem o estadoHealthy.
Agora, pode escrever ficheiros no disco.
O que se segue?
- Saiba como redimensionar os seus discos persistentes.
- Saiba como fazer regularmente cópias de segurança dos seus discos através de instantâneos para evitar a perda não intencional de dados.
Exceto em caso de indicação contrária, o conteúdo desta página é licenciado de acordo com a Licença de atribuição 4.0 do Creative Commons, e as amostras de código são licenciadas de acordo com a Licença Apache 2.0. Para mais detalhes, consulte as políticas do site do Google Developers. Java é uma marca registrada da Oracle e/ou afiliadas.
Última atualização 2025-10-19 UTC.
-