Certains produits et fonctionnalités sont en cours de changement de nom. Les fonctionnalités de playbook et de flux génératifs sont également en cours de migration vers une console unique. Consultez les détails.
Restez organisé à l'aide des collections
Enregistrez et classez les contenus selon vos préférences.
Une intégration gère les interactions des utilisateurs finaux à votre place.
Il vous suffit de créer un agent, d'implémenter éventuellement un webhook et de configurer l'intégration.
Ce guide vous explique comment utiliser l'intégration Dialogflow CX Messenger pour fournir une interface utilisateur de chat écrit simple pour votre agent.
Avant de commencer
Si vous ne prévoyez pas d'utiliser d'intégration, vous pouvez ignorer ce guide de démarrage rapide.
Suivez la procédure décrite dans le guide de démarrage rapide Créer un agent à l'aide de flux.
Les étapes ci-dessous continuent d'utiliser le même agent.
Si vous n'avez plus cet agent, vous pouvez le télécharger et le restaurer.
Configuration
Pour configurer un accès non authentifié à votre agent Dialogflow CX Messenger:
Cliquez sur Integrations (Intégrations) dans le menu de la barre latérale gauche.
Cliquez sur Connect (Connecter) sur Dialogflow CX Messenger.
Une boîte de dialogue de configuration s'ouvre.
Si l'intégration a déjà été configurée pour cet agent, un code HTML intégré s'affiche.
Que vous souhaitiez activer ou désactiver l'authentification, cliquez sur le bouton Désactiver en bas de la boîte de dialogue pour pouvoir reconfigurer les paramètres à l'étape suivante.
Sélectionnez un environnement.
Sélectionnez API non authentifiée.
Sélectionnez un style.
Vous pouvez éventuellement limiter l'accès au domaine.
Cliquez sur Activer l'API non authentifiée.
La boîte de dialogue affiche le code HTML pouvant être intégré à votre site Web.
Copiez ce code.
Cliquez sur OK.
Intégrer
Collez le code d'intégration que vous avez copié ci-dessus dans une page Web de votre site Web.
Les éléments HTML <script> et <df-messenger> doivent se trouver dans l'élément <body> de votre page.
Si vous utilisez une intégration authentifiée, définissez l'attribut oauth-client-id pour <df-messenger> sur votre ID client OAuth. Si vous souhaitez utiliser les identités des utilisateurs finaux pour l'authentification des outils, définissez l'attribut access-token-name avec le nom de votre choix.
Utilisez ensuite le jeton porteur avec la valeur $session.params.ACCESS_TOKEN_NAME pour l'authentification de l'outil.
Mettez à jour les autres attributs à modifier.
Pour autoriser les mises en page dynamiques, ajoutez également les éléments suivants à votre élément <head>:
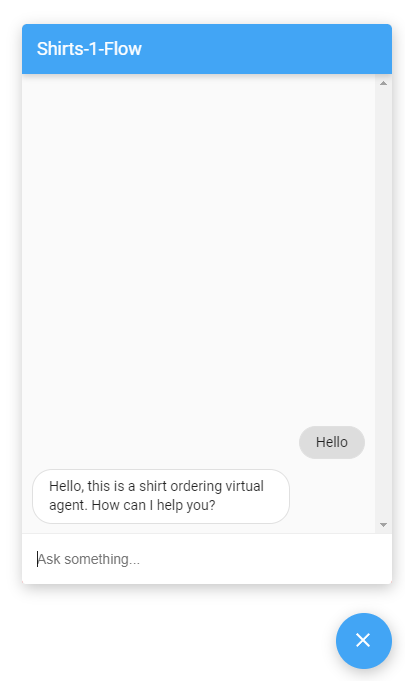
Une fois l'intégration effectuée, vous pouvez interagir avec votre agent via la page Web en cliquant sur l'icône de chat en bas à droite.
Personnaliser
Vous pouvez personnaliser l'apparence et le comportement de cette interface utilisateur de différentes manières.
Pour en savoir plus, consultez la documentation Dialogflow CX Messenger.
Sauf indication contraire, le contenu de cette page est régi par une licence Creative Commons Attribution 4.0, et les échantillons de code sont régis par une licence Apache 2.0. Pour en savoir plus, consultez les Règles du site Google Developers. Java est une marque déposée d'Oracle et/ou de ses sociétés affiliées.
Dernière mise à jour le 2025/09/04 (UTC).
[[["Facile à comprendre","easyToUnderstand","thumb-up"],["J'ai pu résoudre mon problème","solvedMyProblem","thumb-up"],["Autre","otherUp","thumb-up"]],[["Difficile à comprendre","hardToUnderstand","thumb-down"],["Informations ou exemple de code incorrects","incorrectInformationOrSampleCode","thumb-down"],["Il n'y a pas l'information/les exemples dont j'ai besoin","missingTheInformationSamplesINeed","thumb-down"],["Problème de traduction","translationIssue","thumb-down"],["Autre","otherDown","thumb-down"]],["Dernière mise à jour le 2025/09/04 (UTC)."],[[["\u003cp\u003eThis guide details how to use the Dialogflow CX Messenger integration to create a text-based chat interface for your agent.\u003c/p\u003e\n"],["\u003cp\u003eSetting up the integration requires you to have already completed agent setup, flow basics, and general setup steps, and it also requires billing to be enabled.\u003c/p\u003e\n"],["\u003cp\u003eThe process involves navigating the Dialogflow CX console, selecting your agent, and configuring the Dialogflow CX Messenger integration for unauthenticated access.\u003c/p\u003e\n"],["\u003cp\u003eYou can embed the chat interface by pasting the provided HTML code into the \u003ccode\u003e<body>\u003c/code\u003e of your website, and modify some settings according to your preferences.\u003c/p\u003e\n"],["\u003cp\u003eOnce embedded, users can interact with the agent via a chat icon that will appear in the lower right corner of the page.\u003c/p\u003e\n"]]],[],null,["# Interactions with an integration\n\nWith an\n[integration](/dialogflow/cx/docs/concept/integration),\nend-user interactions are handled for you.\nYou just need to build an agent, optionally implement a webhook,\nand configure the integration.\n\nThis guide shows you how to use the\n[Dialogflow CX Messenger](/dialogflow/cx/docs/concept/integration/dialogflow-messenger)\nintegration to provide a simple text chat user interface\nfor your agent.\n\nBefore you begin\n----------------\n\nIf you don't plan on using an integration, you can skip this quickstart.\n\nYou should do the following before reading this guide:\n\n1. Read [flow basics](/dialogflow/cx/docs/basics).\n2. Perform [setup steps](/dialogflow/cx/docs/quick/setup).\n3. Perform steps in the [Build an agent using flows](/dialogflow/cx/docs/quick/build-agent) quickstart guide. Steps below continue working on the same agent. If you no longer have that agent, you can [download the agent](/static/dialogflow/cx/docs/data/agent-shirts-1-flow.zip) and [restore it](/dialogflow/cx/docs/concept/agent#export).\n\nSetup\n-----\n\n| **Note:** The steps below create an integration that allows unauthenticated agent query access. See the [Dialogflow CX Messenger documentation](/dialogflow/cx/docs/concept/integration/dialogflow-messenger) for instructions to create an authenticated integration.\n\n\n| **Note:** Make sure [billing is enabled](/dialogflow/cx/docs/quick/setup#billing) on your project before testing the integration.\n\nTo set up unauthenticated access to your Dialogflow CX Messenger agent:\n\n1. Go to the [Dialogflow CX console](https://dialogflow.cloud.google.com/cx/projects).\n2. Choose your Google Cloud project.\n3. Select your agent.\n4. Select the **Manage** tab.\n5. Click **Integrations** in the left sidebar menu.\n6. Click **Connect** on **Dialogflow CX Messenger**.\n7. A configuration dialog opens.\n8. If the integration was previously setup for this agent, you will see embeddable HTML code. Regardless of whether you want what authenticated or unauthenticated, click the **Disable...** button at the bottom of the dialog, so you can reconfigure the settings in the next step.\n9. Select an **Environment**.\n10. Select **Unauthenticated API**.\n11. Select a style.\n12. Optionally restrict domain access.\n13. Click **Enable the unauthenticated API**.\n14. The dialog will show the embeddable HTML code that can be embedded on your website. Copy this code.\n15. Click **Done**.\n\n\u003cbr /\u003e\n\nEmbed\n-----\n\n\nPaste the embed code you copied above in a webpage on your website.\nThe `\u003cscript\u003e` and `\u003cdf-messenger\u003e` HTML elements\nshould be in the `\u003cbody\u003e` element of your page.\n\nIf you are using an authenticated integration,\nset the `oauth-client-id` attribute for `\u003cdf-messenger\u003e`\nto your Oauth client id. And if you want to use end-users' identities for [tool\nauthentication](/dialogflow/cx/docs/concept/playbook/tool#openapi_tool_api_authentication),\nset the `access-token-name` attribute with any name you like.\nThen use Bearer Token with value `$session.params.`\u003cvar class=\"edit\" label=\"the access token name you set\" translate=\"no\"\u003eACCESS_TOKEN_NAME\u003c/var\u003e\nfor tool authentication.\n\nUpdate any other attributes that require updating.\n\nTo allow for responsive layouts,\nalso add the following to your `\u003chead\u003e` element: \n\n \u003cmeta name=\"viewport\" content=\"width=device-width, initial-scale=1\"\u003e\n\n\u003cbr /\u003e\n\nOnce embedded,\nyou can interact with your agent through the webpage\nby clicking the chat icon in the lower right corner.\n\nCustomize\n---------\n\nYou can customize the appearance and behavior of this user interface\nin many ways.\nSee the\n[Dialogflow CX Messenger documentation](/dialogflow/cx/docs/concept/integration/dialogflow-messenger)\nfor more information."]]