Questa pagina descrive come connettersi a un database Spanner in IntelliJ e in altri prodotti JetBrains.
IntelliJ IDEA è un ambiente di sviluppo integrato per lo sviluppo di software in Java, Kotlin, Groovy e altri linguaggi basati su JVM.
Questa pagina presuppone che tu abbia già installato IntelliJ o un altro IDE JetBrains sul tuo computer.
Connettiti a Spanner
La connessione di IntelliJ al tuo database Spanner ti consente di eseguire query e altre istruzioni SQL sul tuo database Spanner direttamente da IntelliJ. Inoltre, consente il completamento e la convalida del codice per i nomi di tabelle e colonne nel codice.
Per connetterti ai database in dialetto GoogleSQL e PostgreSQL, segui questi passaggi:
In IntelliJ, fai clic sull'opzione di menu
File > New > Datasource > Google Spanner. Il driverGoogle Spannersi trova nel sottomenuOtherse non lo hai mai utilizzato.Nella finestra Origini dati, inserisci l'ID progetto, l'istanza e il database.
(Facoltativo) Seleziona un file della chiave dell'account di servizio se vuoi autenticarti utilizzando un account di servizio. Seleziona
No Authnel menu a discesa Credenziali se vuoi utilizzare le tue credenziali predefinite.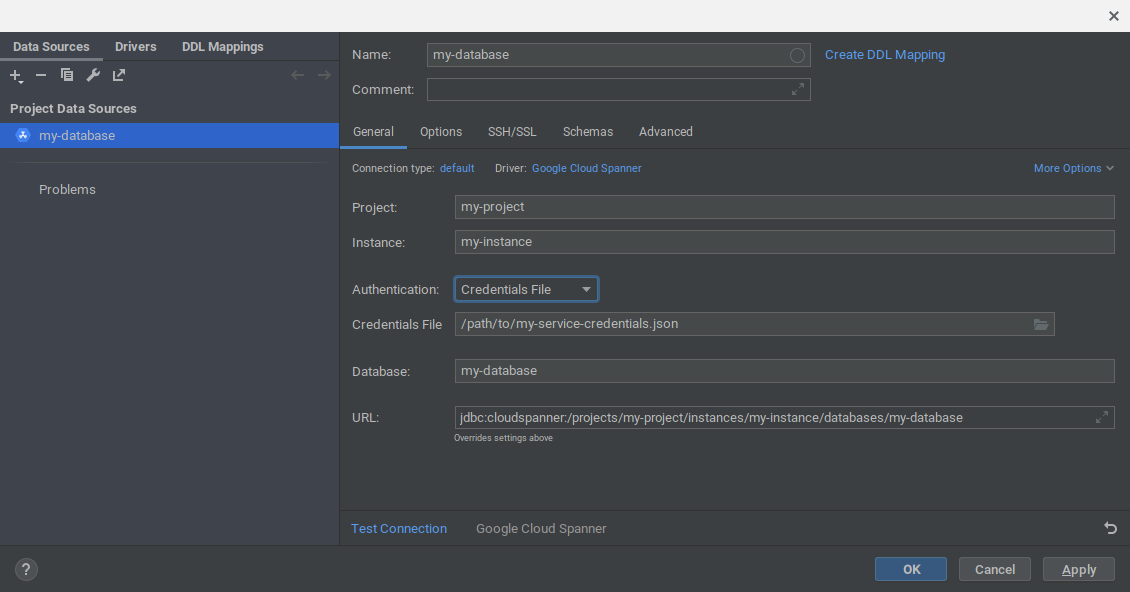
Fai clic su OK per creare l'origine dati. Il database Spanner viene aggiunto alla finestra Database in IntelliJ.
Nella finestra Database, espandi l'origine dati appena aggiunta. Quindi, fai clic sul pulsante
...accanto al testoNo schemas selected.Seleziona l'opzione
All schemasper indicare a IntelliJ di eseguire l'introspezione di tutti gli schemi nel database. IntelliJ completerà quindi la vista del database con tutte le tabelle e le viste del database.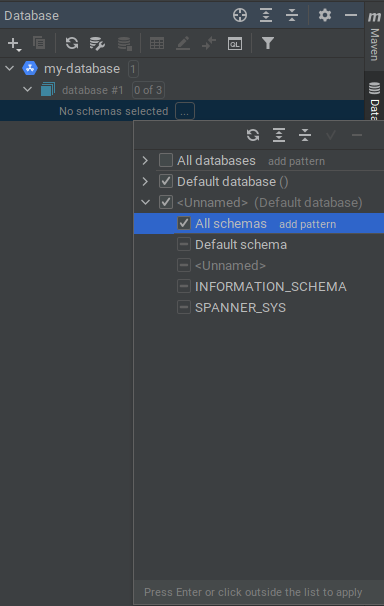
Connettiti all'emulatore Spanner
Puoi anche collegare IntelliJ a un database nell'emulatore Spanner:
Per prima cosa, avvia l'emulatore con uno dei seguenti comandi:
gcloud emulators spanner startdocker run -p 9010:9010 -p 9020:9020 gcr.io/cloud-spanner-emulator/emulator
Fai clic sull'opzione di menu
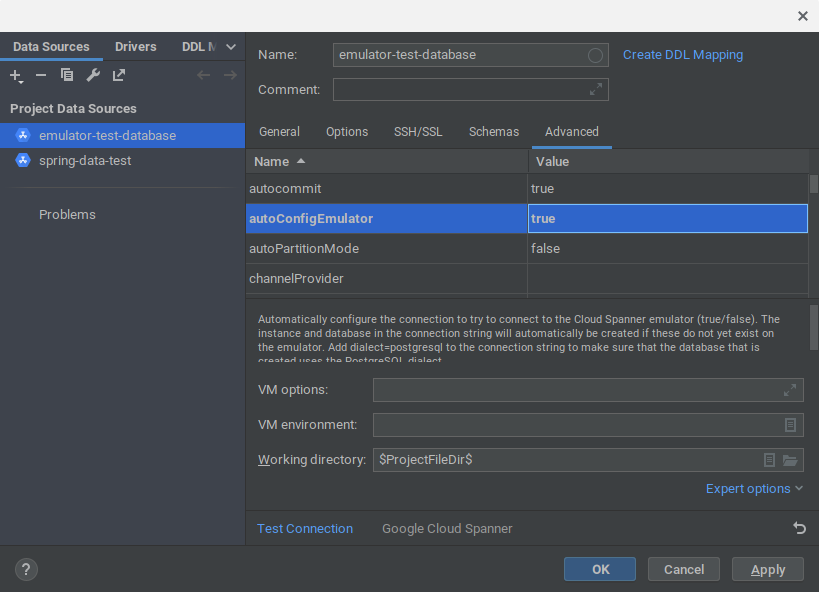
File > New > Datasource > Google Spanner. Il driverGoogle Spannersi trova nel sottomenuOtherse non lo hai mai utilizzato.Inserisci l'ID progetto, istanza e database. NOTA: il progetto, l'istanza e il database non devono necessariamente esistere nell'emulatore.
Seleziona
No Authnel menu a discesa Credenziali.Fai clic sulla scheda
Advancednella finestra Origini dati.Modifica il valore di
autoConfigEmulatorintrue.Fai clic su OK per accettare tutte le modifiche. Se non esistono già, il progetto, l'istanza e il database verranno creati automaticamente nell'emulatore.
Nella finestra Database, espandi l'origine dati appena aggiunta. Fai clic sul pulsante
...accanto al testoNo schemas selected.Seleziona l'opzione
All schemasper indicare a IntelliJ di eseguire l'introspezione di tutti gli schemi nel database. IntelliJ completerà quindi la vista del database con tutte le tabelle e le viste del database.
Passaggi successivi
- Per ulteriori informazioni su come aggiungere e utilizzare le origini dati in IntelliJ, consulta Origini dati di IntelliJ.
- Scopri di più sull'emulatore Spanner.