什麼是應用程式監控?
應用程式監控功能可讓您從應用程式的角度監控資源和基礎架構。也就是說,您不會先搜尋資源,找出應用程式使用的資源,再開始調查。您會先從應用程式開始調查,然後找出應用程式使用的資源和基礎架構相關資訊。Application Monitoring 為應用程式產生的資訊主頁,可協助您瞭解應用程式及其服務和工作負載的運作狀態。
舉例來說,下方的螢幕截圖顯示應用程式監控功能為特定應用程式提供的摘要資訊:
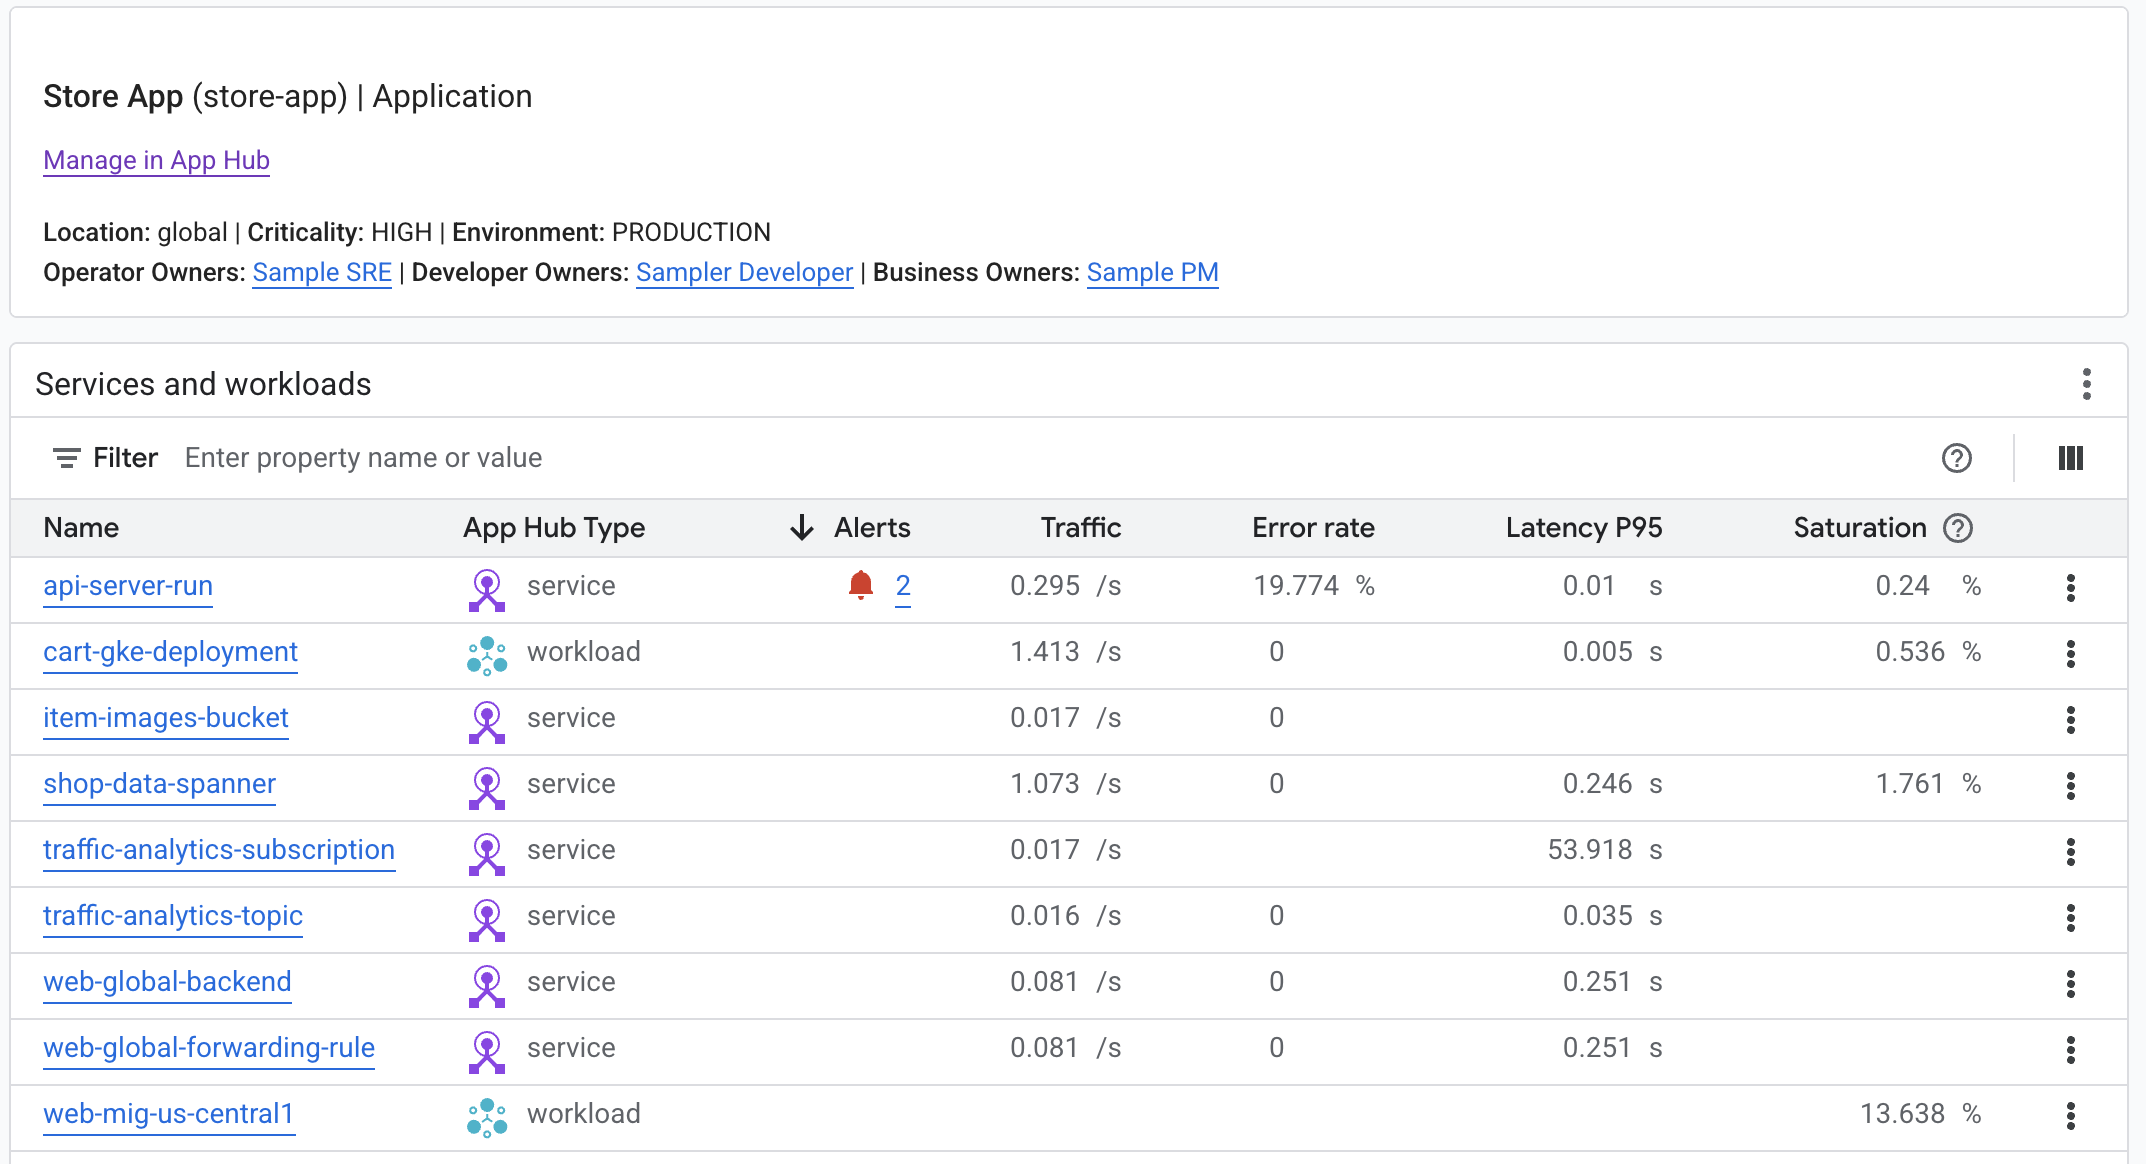
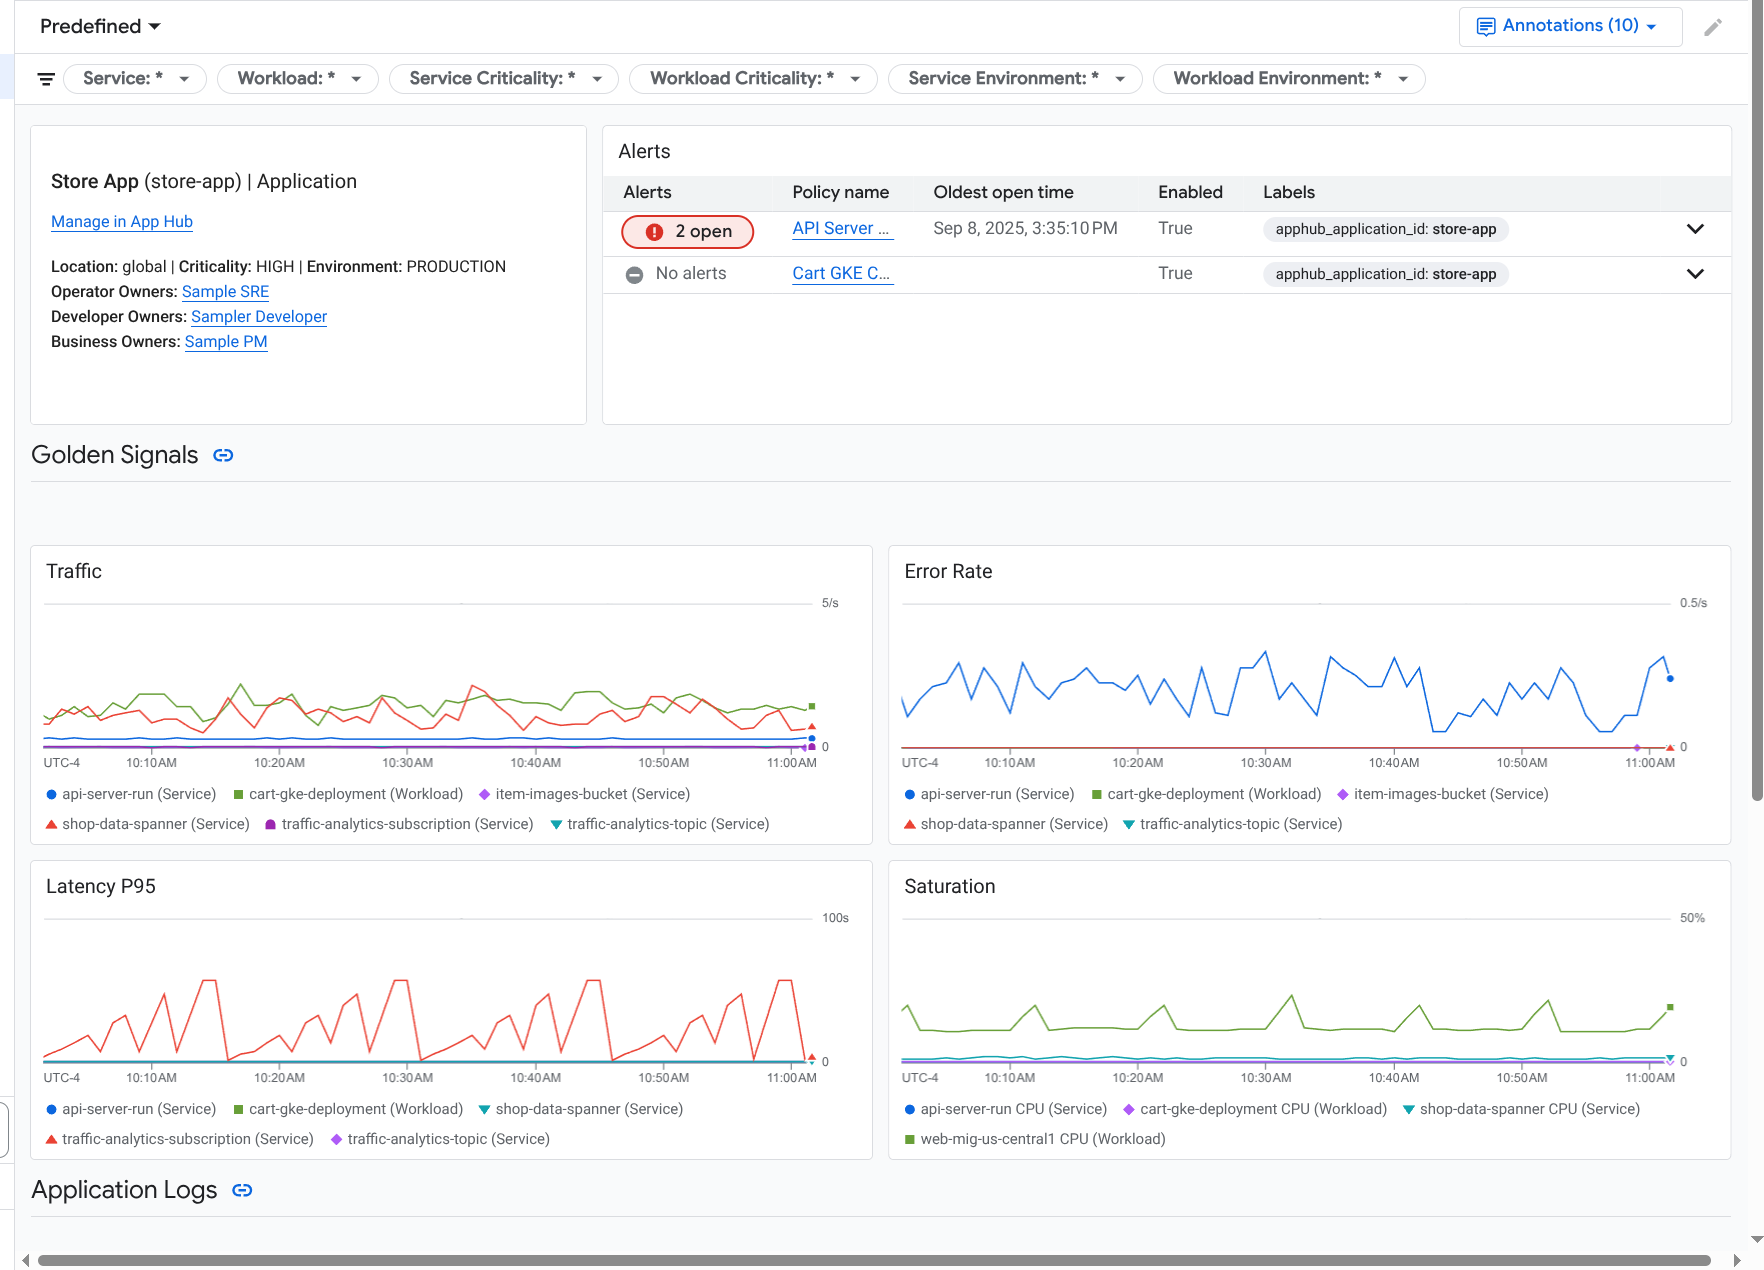
針對這個應用程式,應用程式監控功能也會建立資訊主頁,顯示更詳細的資訊,例如黃金信號、記錄資料和未解決事件的相關資訊:
如要使用應用程式監控功能,請建立應用程式,並向應用程式註冊服務和工作負載,然後設定可觀測範圍。如要建立應用程式並向其中註冊服務和工作負載,可以使用 App Hub,也可以使用 Application Design Center 部署應用程式。
為什麼要採用應用程式監控功能
使用應用程式監控功能可節省時間和精力。舉例來說,假設您使用 Application Design Center 協助設計及部署應用程式。接著,您可以使用 App Hub 整理及管理該應用程式,並使用 Application Monitoring 瞭解應用程式的效能,以及診斷失敗情形:
- 應用程式、服務和工作負載資訊主頁
- 為 App Hub 應用程式的服務和工作負載傳播標籤。
- 依重要性和環境篩選遙測資料。
- 與開放原始碼完美整合
部署應用程式後,Application Monitoring 服務會探索您的應用程式,並自動建構適合您環境的資訊主頁。為協助您調查事件,這些資訊主頁支援搜尋和篩選功能。
應用程式監控功能建立的資訊主頁會顯示下列內容:
- 位置、重要性和擁有者等資訊。
- 未結案事件的相關資訊。
- 支援的基礎架構產生的記錄和指標資料。指標資料包括錯誤率和流量等重要信號,以及所選指標。
當應用程式在支援的基礎架構上執行時,Google Cloud Observability 會將應用程式專屬標籤附加至遙測資料。這些標籤可識別您的 App Hub 應用程式。 查詢遙測資料時,您可以使用這些應用程式專屬標籤。您可以在「記錄檔探索工具」、「指標探索工具」和「追蹤記錄探索工具」頁面,使用標籤篩選及匯總資料。
開始使用 Application Monitoring
如要使用應用程式監控功能,請按照下列步驟操作:
將應用程式專屬標籤附加至快訊政策。如需這個步驟的相關資訊,請參閱「將快訊政策與 App Hub 應用程式建立關聯」。
如要讓應用程式產生的指標和追蹤記錄資料包含應用程式標籤,請使用 OpenTelemetry 檢測應用程式,或使用 Google Cloud Managed Service for Prometheus。詳情請參閱「檢測應用程式以進行應用程式監控」。
開啟並探索應用程式監控資訊主頁。如要瞭解如何查看這些資訊主頁,請參閱「查看應用程式遙測資料」。