本文說明如何透過 Google Cloud 控制台建立 VM 執行個體時,自動安裝 Ops Agent。在安裝過程中,Compute Engine VM 管理員會建立作業套件代理程式 OS 政策,安裝代理程式並在必要時重新安裝。VM 管理工具可協助您在 VM 上執行作業套件代理程式,並確保代理程式一律會安裝。
總覽
VM 管理員會使用 OS 政策管理作業套件代理程式安裝作業。設定政策會透過稱為「指派 ID」的對應關係套用至 VM,如下列範例所示:
goog-ops-agent-v2-x86-template-1-0-0-ZONE
作業套件代理程式 OS 政策的指派作業 ID 包含下列元件:
政策名稱:「goog-ops-agent」
用於建立政策的範本:「v2-x86-template」
範本的版本字串。這個版本可能會隨時間變更,值類似「1-0-0」。
指派 ID 適用的區域,例如「us-central1-a」。
VM 會透過 VM 執行個體上的標籤與指派 ID 建立關聯。Compute Engine VM 是 gce_instance 類型的受監控資源,且包含 zone 標籤。使用 Google Cloud 控制台建立已安裝作業套件代理程式的 VM 時,VM 管理工具會為 VM 新增另一個標籤,看起來像 goog-ops-agent-policy:v2-x86-template-1-0-0。這個標籤會識別政策、範本和版本:
政策 ID 標籤鍵:goog-ops-agent-policy
標籤值、政策範本和版本:v2-x86-template-1-0-0
在 Google Cloud 控制台中建立 VM 時,可以選取「Install Ops Agent for Monitoring and Logging」(安裝作業套件代理程式來處理監控和記錄工作) 核取方塊。點選「建立」後,VM 管理工具會為 VM 指派 goog-ops-agent-policy:v2-x86-template-1-0-0 標籤,並安裝 Ops Agent。如果 VM 是所在可用區的第一部 VM,VM 管理員也會為該可用區建立作業套件代理程式 OS 政策和作業套件代理程式 OS 政策指派。
如果可用區已指派作業套件代理程式 OS 政策,作業套件代理程式 OS 政策會監控具有下列特徵的 VM:
VM 具有 goog-ops-agent-policy:v2-x86-template-1-0-0 標籤。
VM 與 Ops Agent OS 政策指派項目位於相同可用區。
作業套件代理程式 OS 政策每小時會檢查一次,確認涵蓋的 VM 是否已安裝作業套件代理程式。如果尚未安裝作業套件代理程式,作業套件代理程式 OS 政策會安裝最新版本的代理程式。
建立 VM 並自動安裝作業套件代理程式
如要在建立 VM 時自動安裝作業套件代理程式,並將作業套件代理程式 OS 政策指派作業套用至 VM,請按照下列步驟操作:
Grant roles to your user account. Run the following command once for each of the following
IAM roles:
roles/osconfig.osPolicyAssignmentEditor
為可用區建立 Ops Agent OS 政策和 Ops Agent OS 政策指派作業。作業套件代理程式 OS 政策是政策指派作業的欄位。
將 VM 中繼資料標籤 enable-osconfig 設為 TRUE,即可啟用修補程式、OS 政策和 OS 庫存管理功能。
建立 VM,並指派作業套件代理程式 OS 政策標籤。
如果您在已指派作業套件代理程式 OS 政策的可用區中建立 VM 並自動安裝作業套件代理程式,VM 建立程序會建立 VM,並為其指派作業套件代理程式 OS 政策標籤。
範例
您的 Google Cloud 專案沒有任何 Ops Agent OS 政策指派項目。您在 us-central1-a 區域中建立兩個 VM,分別是 instance-1 和 instance-2。接著在 us-east1-b 區域中建立 instance-3 和 instance-4。建立 instance-1、instance-2 和 instance-3 時,已選取「Install Ops Agent for Monitoring and Logging」(安裝作業套件代理程式來處理監控和記錄工作) 核取方塊。
建立 instance-1 時,VM 管理員會為 us-central1-a 可用區建立 Ops Agent OS 政策,並指派 ID 為 goog-ops-agent-v2-x86-template-1-0-0-us-central1-a 的 OS 政策。
VM 管理工具隨後會在 instance-1 上設定政策標籤。
建立 instance-2 時,VM 管理員會在 instance-2 上設定相同的政策標籤。
建立 instance-3 時,VM 管理員會為 us-east1-b 區域建立作業套件代理程式 OS 政策,以及 ID 為 goog-ops-agent-v2-x86-template-1-0-0-us-east1-b 的 OS 政策指派作業。VM 管理工具隨後會將政策標籤指派給 instance-3。
根據預設,instance-4 不在涵蓋範圍內,因為您未選取「Install Ops Agent for Monitoring and Logging」(安裝作業套件代理程式來處理監控和記錄工作),因此沒有 goog-ops-agent-policy:v2-x86-template-1-0-0 標籤。如果您也想將作業套件代理程式 OS 政策套用至instance-4,請參閱「將作業套件代理程式 OS 政策涵蓋範圍新增至現有 VM」。
管理作業套件代理程式 OS 政策涵蓋的 VM 中的作業套件代理程式版本
發布新版作業套件代理程式時,作業套件代理程式 OS 政策不會更新代理程式。只要 VM 安裝了某個版本的作業套件代理程式,政策就不會執行任何動作。如果您解除安裝作業套件代理程式,政策會偵測到作業套件代理程式未安裝,然後安裝最新版本。
如要將 VM 升級至最新版作業套件代理程式,請解除安裝目前執行的版本,然後讓作業套件代理程式 OS 政策安裝最新版本。
[[["容易理解","easyToUnderstand","thumb-up"],["確實解決了我的問題","solvedMyProblem","thumb-up"],["其他","otherUp","thumb-up"]],[["難以理解","hardToUnderstand","thumb-down"],["資訊或程式碼範例有誤","incorrectInformationOrSampleCode","thumb-down"],["缺少我需要的資訊/範例","missingTheInformationSamplesINeed","thumb-down"],["翻譯問題","translationIssue","thumb-down"],["其他","otherDown","thumb-down"]],["上次更新時間:2025-09-04 (世界標準時間)。"],[],[],null,["# Install the Ops Agent during VM creation\n\nThis document describes how the Google Cloud console can automatically install the\nOps Agent for you when you create a VM instance. During the installation\nprocess, the Compute Engine [VM Manager](/compute/docs/vm-manager) creates an\nOps Agent OS policy\nthat installs the agent and reinstalls it when necessary. The\nVM Manager helps you get the Ops Agent running on your VM and ensures\nthat the agent is always installed.\n\nOverview\n--------\n\nThe VM Manager uses OS policies to manage the Ops Agent\ninstallation. A configuration policy is applied to a VM by using a mapping\ncalled an *assignment ID*, which looks like the following example: \n\n```\ngoog-ops-agent-v2-x86-template-1-0-0-ZONE\n```\n\nAn assignment ID for an Ops Agent OS policy consists of the following\ncomponents:\n\n- The name of the policy: \"goog-ops-agent\"\n- A template for creating the policy: \"v2-x86-template\"\n- A version string for the template. The version, which might change over time, is a value like \"\u003cvar translate=\"no\"\u003e1-0-0\u003c/var\u003e\".\n- The zone to which the assignment ID applies, a value like \"us-central1-a\".\n\nA VM is associated with an assignment ID by using the labels on the VM instance.\nA Compute Engine VM is a monitored resource of type\n[`gce_instance`](/monitoring/api/resources#tag_gce_instance)\nand includes a `zone` label. When you use the Google Cloud console to\ncreate a VM with the Ops Agent installed, the VM Manager adds another\nlabel to the VM, which looks like `goog-ops-agent-policy:v2-x86-template-`\u003cvar translate=\"no\"\u003e1-0-0\u003c/var\u003e. This label identifies the\npolicy, template, and version:\n\n- Label key, the identifier for the policy: `goog-ops-agent-policy`\n- Label value, the policy template and version: `v2-x86-template-`\u003cvar translate=\"no\"\u003e1-0-0\u003c/var\u003e\n\nWhen you create a VM in the Google Cloud console, you can select the\n**Install Ops Agent for Monitoring and Logging** checkbox. When you click\n**Create** , VM Manager assigns the VM a label of `goog-ops-agent-policy:v2-x86-template-`\u003cvar translate=\"no\"\u003e1-0-0\u003c/var\u003e and\ninstalls the Ops Agent. If the VM is the first VM in its zone, then\nVM Manager also creates an Ops Agent OS policy and an Ops Agent OS\npolicy assignment for that zone.\n\nWhile a zone has an Ops Agent OS policy assignment, the Ops Agent OS policy\nmonitors VMs that have the following characteristics:\n\n- The VM has the `goog-ops-agent-policy:v2-x86-template-`\u003cvar translate=\"no\"\u003e1-0-0\u003c/var\u003e label.\n- The VM is in the same zone as the Ops Agent OS policy assignment.\n\nThe Ops Agent OS policy checks every hour whether its\ncovered VMs have the Ops Agent installed. If the Ops Agent isn't\ninstalled, then the Ops Agent OS policy installs the latest version\nof the agent.\n\nCreate a VM with automatic installation of the Ops Agent\n--------------------------------------------------------\n\nTo install the Ops Agent automatically during VM creation and apply the\nOps Agent OS policy assignment to the VM, do the following:\n\n1.\n Grant roles to your user account. Run the following command once for each of the following\n IAM roles:\n `roles/osconfig.osPolicyAssignmentEditor`\n\n ```bash\n gcloud projects add-iam-policy-binding PROJECT_ID --member=\"user:\u003cvar translate=\"no\"\u003eUSER_IDENTIFIER\u003c/var\u003e\" --role=ROLE\n ```\n\n Replace the following:\n - \u003cvar translate=\"no\"\u003ePROJECT_ID\u003c/var\u003e: your project ID.\n - \u003cvar translate=\"no\"\u003eUSER_IDENTIFIER\u003c/var\u003e: the identifier for your user account---for example, `myemail@example.com`.\n - \u003cvar translate=\"no\"\u003eROLE\u003c/var\u003e: the IAM role that you grant to your user account.
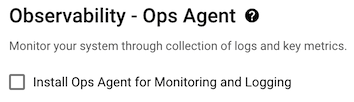
\n2. Follow the steps in [Create a VM instance from a public image](/compute/docs/instances/create-start-instance#publicimage). Before you click **Create** , select the **Install Ops Agent for Monitoring and Logging** checkbox:\n\n | **Note:** When you select the **Install Ops Agent for Monitoring and Logging** checkbox during VM creation, the examples on the tabs in the **Equivalent code** flyout are updated to include the steps for creating the Ops Agent OS policy. There is no REST equivalent for creating an Ops Agent OS policy.\n3. Click **Create** .\n\n When you install the Ops Agent automatically for the first time in a zone,\n if you don't have VM Manager enabled for your Google Cloud project,\n then the VM-creation process does the following:\n 1. Enables VM Manager to operate in [restricted mode](/compute/docs/vm-manager#pricing).\n 2. Creates the Ops Agent OS policy and an Ops Agent OS policy assignment for the zone. The Ops Agent OS policy is a field of the policy assignment.\n 3. Enables Patch, OS policies, and OS inventory management by setting the VM metadata label `enable-osconfig` to `TRUE`.\n 4. Creates the VM and assigns it the Ops Agent OS policy label.\n\n \u003cbr /\u003e\n\n If you create a VM and automatically install the Ops Agent in a zone\n where an Ops Agent OS policy assignment already exists, then the VM-creation\n process creates the VM and assigns it the Ops Agent OS policy label.\n\n \u003cbr /\u003e\n\n \u003cbr /\u003e\n\n\u003cbr /\u003e\n\nExample\n-------\n\nYour Google Cloud project doesn't have any Ops Agent OS\npolicy assignments. You create two VMs, *instance-1* and *instance-2* in the\n`us-central1-a` zone. You\nthen create *instance-3* and *instance-4* in the `us-east1-b` zone. *instance-1* , *instance-2* , and\n*instance-3* had the **Install Ops Agent for Monitoring and Logging** checkbox\nselected during creation.\n\n- When you create *instance-1* , VM Manager creates an Ops Agent OS policy for the `us-central1-a` zone and an OS policy assignment with the ID `goog-ops-agent-v2-x86-template-`\u003cvar translate=\"no\"\u003e1-0-0\u003c/var\u003e`-us-central1-a`. VM Manager then sets the policy label on *instance-1*.\n- When you create *instance-2* , VM Manager sets the same policy label on *instance-2*.\n- When you create *instance-3* , VM Manager creates an Ops Agent OS policy for the `us-east1-b` zone and an OS policy assignment with the ID `goog-ops-agent-v2-x86-template-`\u003cvar translate=\"no\"\u003e1-0-0\u003c/var\u003e`-us-east1-b`. VM Manager then assigns the policy label to *instance-3*.\n\nThe Ops Agent OS policies then cover the following VMs based on the\nOps Agent OS policy assignment IDs:\n\nBy default, *instance-4* isn't covered because you didn't select\n**Install Ops Agent for Monitoring and Logging** , so it doesn't have the\n`goog-ops-agent-policy:v2-x86-template-`\u003cvar translate=\"no\"\u003e1-0-0\u003c/var\u003e label. If you also want to apply the Ops Agent OS policy to\n*instance-4* , then see\n[Add Ops Agent OS policy coverage to an existing VM](/monitoring/agent/ops-agent/manage-policies-auto-install#add-coverage).\n\nManage Ops Agent versions on VMs covered by the Ops Agent OS policy\n-------------------------------------------------------------------\n\nThe Ops Agent OS policy doesn't update the Ops Agent when new versions of the\nagent are released. As long as the VM has some version of the Ops Agent\ninstalled, the policy does nothing. If you uninstall the Ops Agent, then the\npolicy detects that the Ops Agent isn't installed and then installs the latest\nversion.\n\nTo upgrade your VM to the latest version of the Ops Agent, uninstall the\nversion that you are currently running and let the Ops Agent OS policy\ninstall the latest version.\n\nIf you need to install a previous version of the Ops Agent, you can\n[uninstall the Ops Agent on VMs covered by the Ops Agent OS policy](/monitoring/agent/ops-agent/manage-policies-auto-install#uninstall)\nand then [install a specific version of the agent](/monitoring/agent/ops-agent/installation#install-specific-version).\n\nTroubleshooting\n---------------\n\nFor information about troubleshooting agent installation and Ops Agent OS\npolicies, see [Manage VMs covered by the Ops Agent OS policy](/monitoring/agent/ops-agent/manage-policies-auto-install)\nand\n[Agent diagnostics tool for automatic installation policies](/monitoring/agent/ops-agent/troubleshoot-find-info#agent_diagnostics_tool_for_automatic_installation_policies).\n\nPricing\n-------\n\nOS policies are generic tools for installing packages. By default, when\nVM Manager is enabled because you've created a VM with the Ops Agent\nautomatically installed, VM Manager is enabled in the limited mode.\nFor information about VM Manager modes and pricing, see\n[VM Manager Pricing](/compute/docs/vm-manager#pricing).\n\nWhat's next\n-----------\n\nFor information about managing VMs covered by the Ops Agent OS policy, see\n[Manage VMs covered by the Ops Agent OS policy](/monitoring/agent/ops-agent/manage-policies-auto-install)."]]