In dieser Anleitung wird die Verwendung von Schutz sensibler Daten in Verbindung mit Cloud Data Fusion erläutert.
Cloud Data Fusion bietet ein Plug-in zum Schutz sensibler Daten mit drei Transformationen zum Filtern, Entfernen oder Entschlüsseln sensibler Daten:
Mit der PII-Filter-Transformation können Sie vertrauliche Datensätze aus einem Eingabedatenstrom herausfiltern.
Mit der Redact-Transformation können Sie vertrauliche Daten transformieren, z. B. durch Maskieren oder Verschlüsseln.
Mit der Decrypt-Transformation können Sie vertrauliche Daten entschlüsseln, die zuvor mit der Redact-Transformation verschlüsselt wurden.
Kosten
In diesem Dokument verwenden Sie die folgenden kostenpflichtigen Komponenten von Google Cloud:
Mit dem Preisrechner können Sie eine Kostenschätzung für Ihre voraussichtliche Nutzung vornehmen.
Hinweise
Rufen Sie in der Google Cloud Console die Seite für die Projektauswahl auf und wählen Sie ein Projekt aus oder erstellen Sie eines.
Aktivieren Sie die Cloud Data Fusion API für Ihr Projekt.
Aktivieren Sie die DLP API (Teil des Schutzes sensibler Daten) für Ihr Projekt.
Berechtigungen für Sensitive Data Protection gewähren
Rufen Sie in der Google Cloud Console die IAM-Seite auf.
Wählen Sie in der Berechtigungstabelle in der Spalte Hauptkonto eines der folgenden Dienstkonten aus:
Wenn Sie Berechtigungen für Ressourcen zur Laufzeit benötigen, wählen Sie das Dienstkonto aus, das von Ihrem Dataproc-Cluster verwendet wird. Standardmäßig wird das Compute Engine-Dienstkonto verwendet, was aus Sicherheitsgründen nicht empfohlen wird.
Wenn Sie Berechtigungen für Ressourcen benötigen, wenn Sie Wrangler oder die Vorschaufunktion in Cloud Data Fusion verwenden (nicht zur Laufzeit), wählen Sie stattdessen das Dienstkonto aus, das dem Format
service-project-number@gcp-sa-datafusion.iam.gserviceaccount.comentspricht.

Klicken Sie auf das Stiftsymbol rechts neben dem Dienstkonto.
Klicken Sie auf Weitere Rolle hinzufügen.
Klicken Sie auf das Drop-down-Menü, das daraufhin angezeigt wird.
Wählen Sie mithilfe der Suchleiste DLP-Administrator aus.
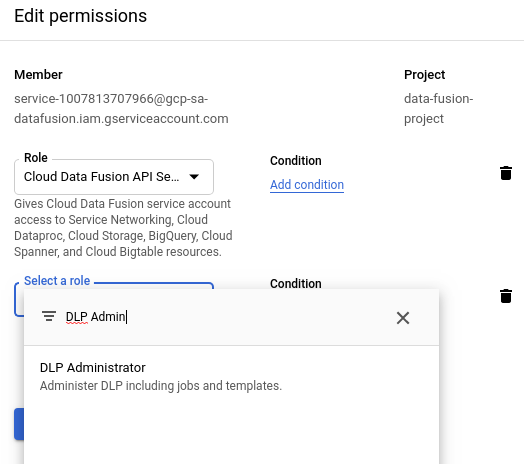
Klicken Sie auf Speichern. Prüfen Sie, ob der DLP-Administrator in der Spalte Rolle angezeigt wird.

Plug-in für Schutz sensibler Daten bereitstellen
Rufen Sie Ihre Instanz auf:
Rufen Sie in der Google Cloud Console die Seite „Cloud Data Fusion“ auf.
Wenn Sie die Instanz in Cloud Data Fusion Studio öffnen möchten, klicken Sie auf Instanzen und dann auf Instanz anzeigen.
Klicken Sie in der Cloud Data Fusion-Web-UI rechts oben auf Hub.
Klicken Sie auf das Plug-in Schutz vor Datenverlust.
Klicken Sie auf Deploy.
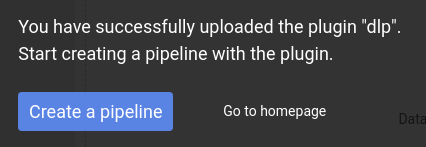
Klicken Sie auf Beenden.
Klicken Sie auf Pipeline erstellen.
PII-Filter-Transformation verwenden
Diese Transformation trennt vertrauliche Datensätze von nicht vertraulichen Einträgen. Ein Datensatz gilt als vertraulich, wenn er mit Kriterien übereinstimmt, die Sie in einer Vorlage für den Schutz sensibler Daten definieren. Beispielsweise können Sie beim Erstellen einer Vorlage sensible Daten als Kreditkartendaten oder Sozialversicherungsnummern definieren.
Öffnen Sie Ihre Pipeline in Cloud Data Fusion und klicken Sie auf Studio > Transformieren.
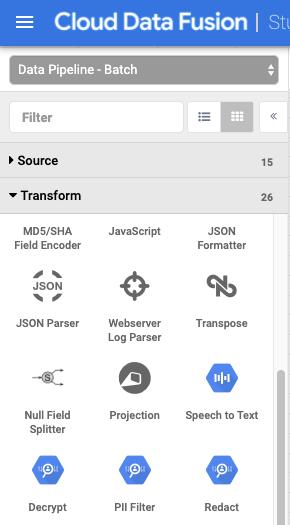
Klicken Sie auf die PII-Filter-Transformation.
Halten Sie den Mauszeiger auf den Knoten PII-Filter und klicken Sie auf Attribute.
Wählen Sie unter Filtern nach aus, ob Sie nach Datensätze oder Felder filtern möchten.
Unter Einhaltung der Sensitive Data Protection-Limits schlägt die Pipeline von Cloud Data Fusion fehl, wenn ein Eintrag 0, 5 MB überschreitet. Um einen solchen Fehler zu vermeiden, filtern Sie nicht nach Eintrag, sondern nach Feld.
Geben Sie unter Vorlagen-ID die Vorlagen-ID der von Ihnen erstellten Sensitive Data Protection-Vorlage ein.
Legen Sie unter Fehlerbehandlung fest, wie der Vorgang fortgesetzt werden soll, wenn in der Pipeline vertrauliche Daten gefunden werden. Wählen Sie eine der folgenden Optionen zur Fehlerbehandlung:
- Pipeline anhalten: stoppt die Pipeline, sobald ein Fehler auftritt.
- Überspringen: Überspringen Sie den Eintrag, der den Fehler verursacht hat. Die Pipeline wird weiterhin ausgeführt und es wird kein Fehler gemeldet.
- An Fehler senden: Fehler an den Fehlerport senden. Die Pipeline wird weiterhin ausgeführt.
Klicken Sie auf die Schaltfläche X.
Redact-Transformation verwenden
Diese Transformation identifiziert vertrauliche Einträge im Eingabestream und wendet Transformationen an, die Sie für diese Einträge definieren. Ein Datensatz gilt als vertraulich, wenn er mit vordefinierten Filtern für den Schutz sensibler Daten oder einer von Ihnen definierten benutzerdefinierten Vorlage übereinstimmt.
Klicken Sie auf der Seite Studio der Cloud Data Fusion-Web-UI auf das Menü Transformieren, um es zu maximieren.
Klicken Sie auf die Transformation Redact (entfernen).
Halten Sie den Mauszeiger über den Knoten Redact und klicken Sie auf Attribute.
Wählen Sie aus, ob Sie Transformationen auf vordefinierte Filter anwenden möchten oder ob Sie eigene Filter erstellen möchten.
Diese beiden Optionen können nicht kombiniert werden. Sie können entweder vordefinierte Filter verwenden oder eine benutzerdefinierte Vorlage erstellen.
Vordefinierte Filter
Wenn Sie Transformationen auf vordefinierte Filter anwenden möchten, lassen Sie die benutzerdefinierte Vorlage auf Nein gesetzt und definieren Sie unter Übereinstimmung eine Regel:
Nachdem Sie auf Anwenden geklickt haben, wählen Sie im Drop-down-Menü eine Transformation aus. Weitere Informationen zu den verfügbaren Transformationen erhalten Sie im Tab Dokumentation des Plug-ins unter Beschreibung.
Klicken Sie nach on auf das Drop-down-Menü und wählen Sie eine Kategorie aus. Dabei handelt es sich um eine Reihe vordefinierter Filter für den Schutz sensibler Daten, die nach Typ gruppiert sind. Eine vollständige Liste der bereitgestellten Kategorien und der darin enthaltenen Filter finden Sie im Tab Dokumentation des Plug-ins unter DLP-Filterzuordnung.
Klicken Sie auf +, um mehrere Abgleichsregeln festzulegen.

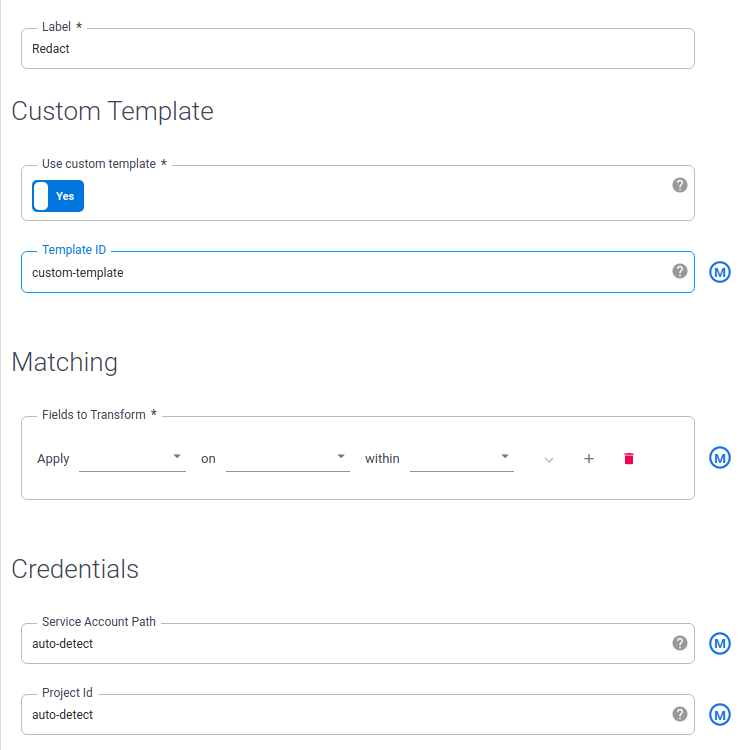
Benutzerdefinierte Vorlage
Wenn Sie Transformationen gemäß einer benutzerdefinierten Vorlage anwenden möchten, setzen Sie die Benutzerdefinierte Vorlage auf Ja.
Benutzerdefinierte Vorlage für den Schutz sensibler Daten erstellen
Zurück in der Cloud Data Fusion-Web-UI geben Sie im Redact-Attributmenü unter Vorlagen-ID die Vorlagen-ID der von Ihnen erstellten benutzerdefinierten Vorlage ein.
Klicken Sie auf die Schaltfläche X.
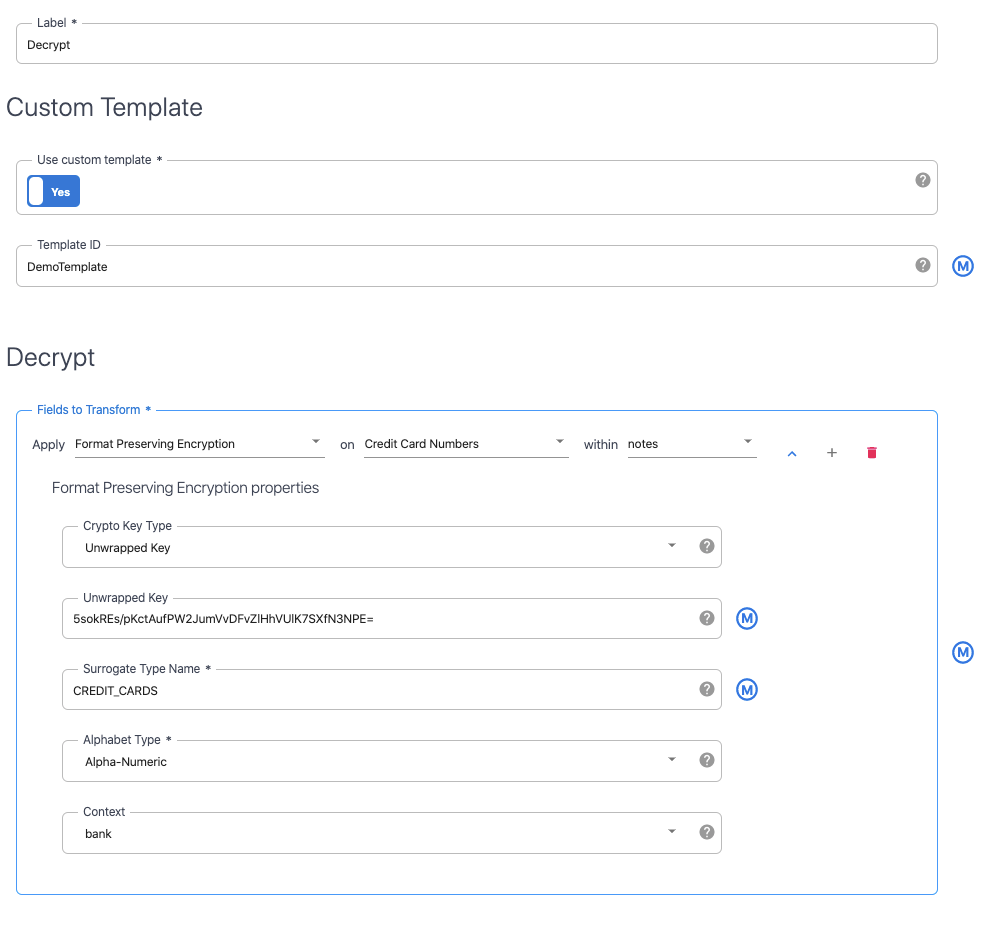
Decrypt-Transformation verwenden
Diese Transformation identifiziert Datensätze, die mit Sensitive Data Protection im Eingabestream verschlüsselt wurden, und wendet die Entschlüsselung an. Nur Datensätze, die mit einem umkehrbaren Algorithmus wie Formaterhaltende Verschlüsselung oder Deterministische Verschlüsselung verschlüsselt wurden, können entschlüsselt werden.
Klicken Sie auf der Seite Studio der Cloud Data Fusion-Web-UI auf das Menü Transformieren, um es zu maximieren.
Klicken Sie auf die Transformation Decrypt.
Halten Sie den Mauszeiger über den Knoten Decrypt und klicken Sie auf Attribute.
Geben Sie dieselben Werte ein, die auch zum Konfigurieren des Redact-Plug-ins verwendet wurden, mit dem diese Daten verschlüsselt wurden. Die Attribute dieses Plug-ins sind mit dem Redact-Plug-in identisch.
Klicken Sie auf die Schaltfläche X.