This page describes how you read data from a PostgreSQL database in a Cloud Data Fusion instance.
Before you begin
- Create a Cloud Data Fusion instance.
- Enable your PostgreSQL database to accept connections from Cloud Data Fusion. To do this securely, we recommend that you use a private Cloud Data Fusion instance.
Required roles
To get the permissions that you need to connect to a PostgreSQL database, ask your administrator to grant you the following IAM roles:
-
Dataproc Worker (
roles/dataproc.worker) on the Dataproc service account in the project that contains the cluster -
Cloud Data Fusion Runner (
roles/datafusion.runner) on the Dataproc service account in the project that contains the cluster -
To use Cloud SQL without the Cloud SQL Auth Proxy:
Cloud SQL Client (
roles/cloudsql.client) on the project that contains the Cloud SQL instance
For more information about granting roles, see Manage access to projects, folders, and organizations.
You might also be able to get the required permissions through custom roles or other predefined roles.
Open your instance in Cloud Data Fusion
In the Google Cloud console, go to the Cloud Data Fusion page.
To open the instance in the Cloud Data Fusion Studio, click Instances, and then click View instance.
Store your PostgreSQL password as a secure key
Enter your PostgreSQL password as a secure key to encrypt in your Cloud Data Fusion instance. For more information about keys, see Cloud KMS.
In the Cloud Data Fusion UI, click System admin > Configuration.
Click Make HTTP Calls.

In the dropdown menu, choose PUT.
In the path field, enter
namespaces/default/securekeys/pg_password.In the Body field, enter
{"data":"POSTGRESQL_PASSWORD"}. ReplacePOSTGRESQL_PASSWORDwith your PostgreSQL password.Click Send.
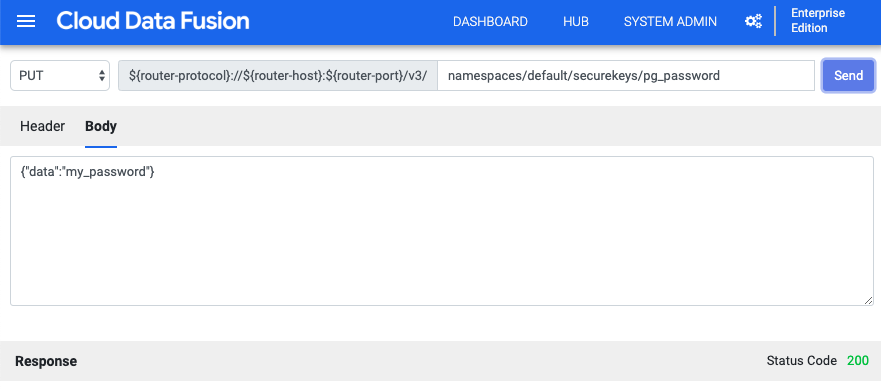
The Response field notifies you of any errors.
Connect to Cloud SQL for PostgreSQL
In the Cloud Data Fusion UI, click the menu menu and navigate to the Wrangler page.
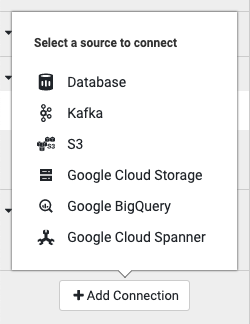
Click Add connection.
Choose Database as the source type to connect.
Under Google Cloud SQL for PostgreSQL, click Upload.
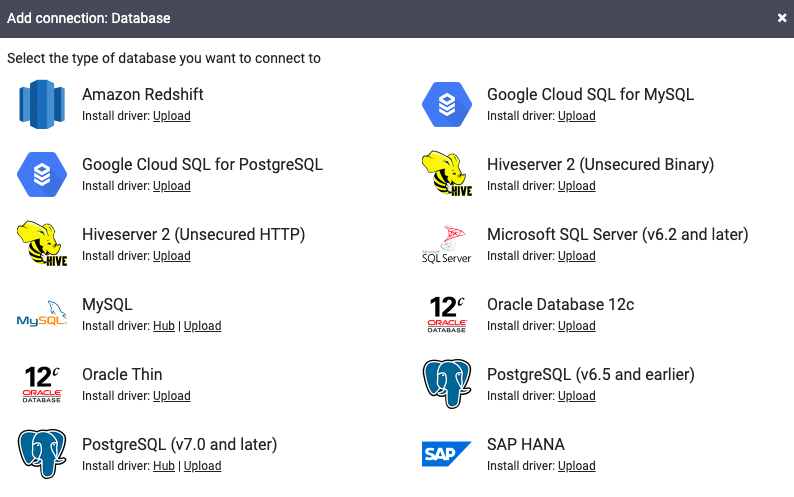
Upload a JAR file that contains your PostgreSQL driver. Your JAR file must follow the format
NAME-VERSION.jar. If your JAR file doesn't follow this format, rename it before you upload.Click Next.
Enter the driver's name, class name, and version in the fields.
Click Finish.
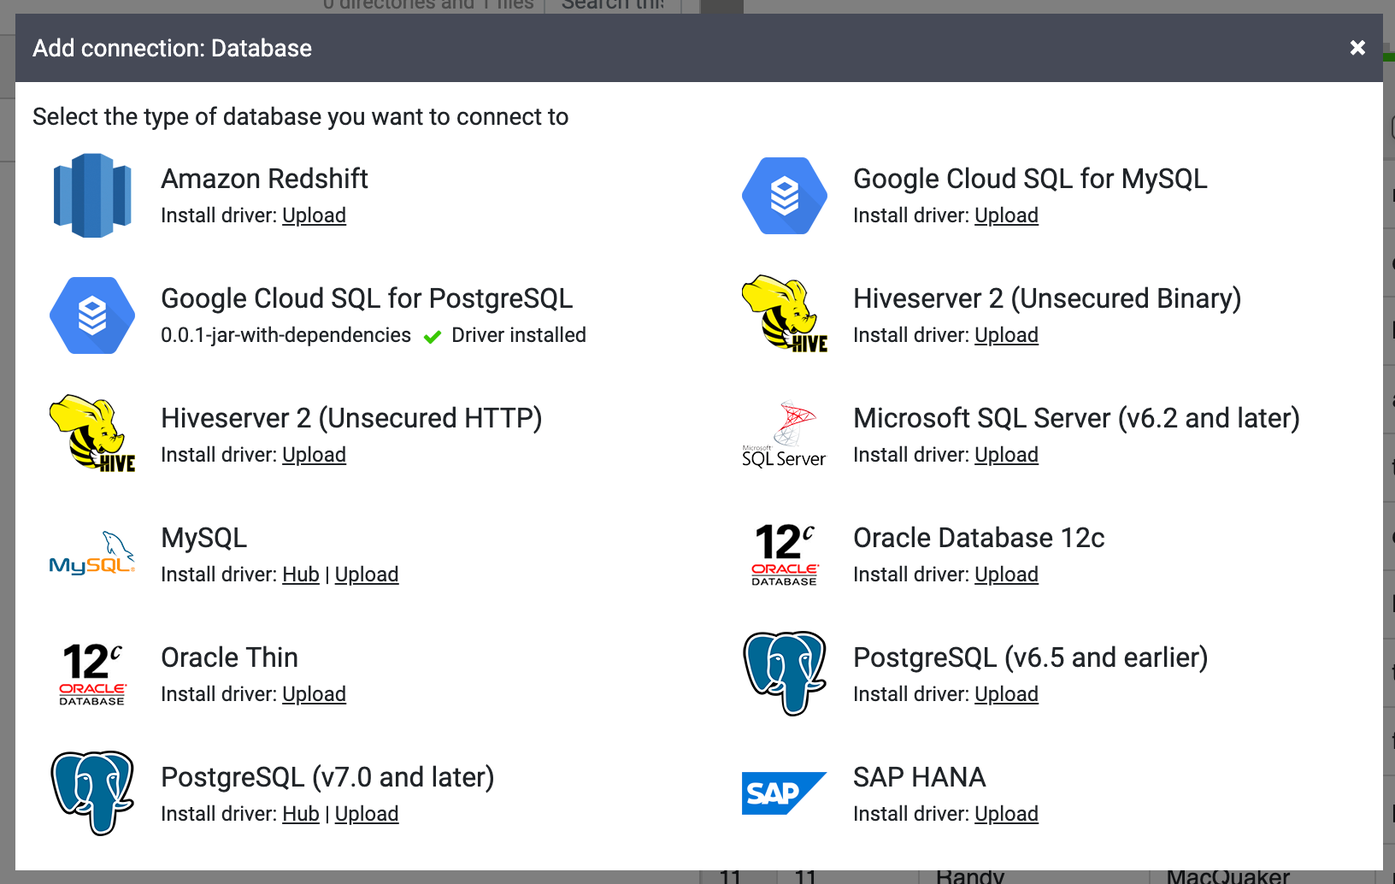
In the Add connection window that opens, click Google Cloud SQL for PostgreSQL. Your JAR name should appear under Google Cloud SQL for PostgreSQL.
Fill in the required connection fields. In the Password field, select the secure key you stored previously. This ensures that your password is retrieved using Cloud KMS.
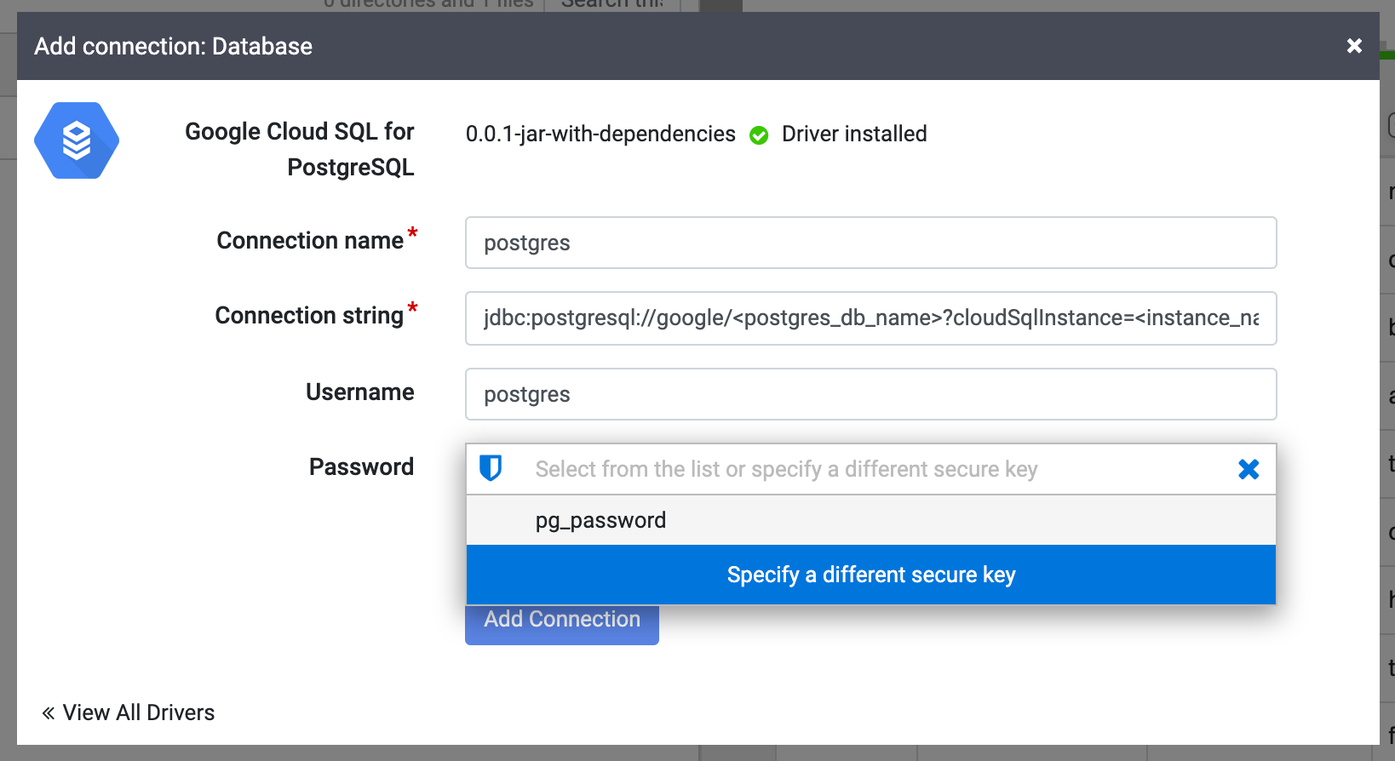
In the Connection string field, enter your connection string as:
jdbc:postgresql://google/DATABASE_NAME?cloudSqlInstance=INSTANCE_CONNECTION_NAME&socketFactory=com.google.cloud.sql.postgres.SocketFactory&useSSL=false
Replace the following:
DATABASE_NAME: the Cloud SQL database name as listed in the Databases tab of the instance details page.INSTANCE_CONNECTION_NAME: the Cloud SQL instance connection name as displayed in the Overview tab of the instance details page.

For example:
jdbc:postgresql://google/postgres?cloudSqlInstance=dis-demo:us-central1:pgsql-1&socketFactory=com.google.cloud.sql.postgres.SocketFactory&useSSL=false
Enable the Cloud SQL Admin API.
Click Test connection to ensure that the connection can be established with the database.
Click Add connection.
After your PostgreSQL database is connected, you can apply transformations to your data (in Wrangler), create a pipeline, and write your output to a sink (in Studio).