This guide describes how to deploy, configure, and run data pipelines that use the SAP OData plugin.
You can use SAP as a source for batch-based data extraction in Cloud Data Fusion using the Open Data Protocol (OData). The SAP OData plugin helps you configure and execute data transfers from SAP OData Catalog Services without any coding.
For more information about the supported SAP OData Catalog Services and DataSources, see the support details. For more information about SAP on Google Cloud, see the Overview of SAP on Google Cloud.
Objectives
- Configure the SAP ERP system (activate DataSources in SAP).
- Deploy the plugin in your Cloud Data Fusion environment.
- Download the SAP transport from Cloud Data Fusion and install it in SAP.
- Use Cloud Data Fusion and SAP OData to create data pipelines for integrating SAP data.
Before you begin
To use this plugin, you will need domain knowledge in the following areas:
- Building pipelines in Cloud Data Fusion
- Access management with IAM
- Configuring SAP Cloud and on-premises enterprise resource planning (ERP) systems
User roles
The tasks on this page are performed by people with the following roles in Google Cloud or in their SAP system:
| User type | Description |
|---|---|
| Google Cloud Admin | Users assigned this role are administrators of Google Cloud accounts. |
| Cloud Data Fusion User | Users assigned this role are authorized to design and run data
pipelines. They are granted, at minimum, the Data Fusion Viewer
(
roles/datafusion.viewer) role. If you are using
role-based access control, you might need
additional
roles.
|
| SAP Admin | Users assigned this role are administrators of the SAP system. They have access to download software from the SAP service site. It is not an IAM role. |
| SAP User | Users assigned this role are authorized to connect to an SAP system. It is not an IAM role. |
Prerequisites for OData extraction
The OData Catalog Service must be activated in the SAP system.
Data must be populated in OData service.
Prerequisites for your SAP system
In SAP NetWeaver 7.02 to SAP NetWeaver release 7.31, the OData and SAP Gateway functionalities are delivered with the following SAP software components:
IW_FNDGW_COREIW_BEP
In SAP NetWeaver release 7.40 and later, all the functionalities are available in the component
SAP_GWFND, which must be made available in SAP NetWeaver.
Optional: Install SAP transport files
The SAP components that are needed for load balancing calls to SAP are delivered as SAP transport files that are archived as a zip file (one transport request, which consists of one cofile and one data file). You can use this step to limit multiple parallel calls to SAP, based on the available work processes in SAP.
The zip file download is available when you deploy the plugin in the Cloud Data Fusion Hub.
When you import the transport files into SAP, the following SAP OData projects are created:
OData projects
/GOOG/GET_STATISTIC/GOOG/TH_WPINFO
ICF service node:
GOOG
To install the SAP transport, follow these steps:
Step 1: Upload the transport request files
- Log into the operating system of the SAP Instance.
- Use the SAP transaction code
AL11to get the path for theDIR_TRANSfolder. Typically, the path is/usr/sap/trans/. - Copy the cofiles to the
DIR_TRANS/cofilesfolder. - Copy the data files to the
DIR_TRANS/datafolder. - Set the User and Group of data and cofile to
<sid>admandsapsys.
Step 2: Import the transport request files
The SAP administrator can import the transport request files by using one of the following options:
Option 1: Import the transport request files by using the SAP transport management system
- Log in to the SAP system as an SAP administrator.
- Enter the transaction STMS.
- Click Overview > Imports.
- In the Queue column, double-click the current SID.
- Click Extras > Other requests > Add.
- Select the transport request ID and click Continue.
- Select the transport request in the import queue, and then click Request > Import.
- Enter the Client number.
On the Options tab, select Overwrite originals and Ignore invalid component version (if available).
(Optional) To schedule a reimport of the transports for a later time, select Leave transport requests in queue for later import and Import transport requests again. This is useful for SAP system upgrades and backup restorations.
Click Continue.
To verify the import, use any transactions, such as
SE80andSU01.
Option 2: Import the transport request files at the operating system level
- Log in to the SAP system as an SAP system administrator.
Add the appropriate requests to the import buffer by running the following command:
tp addtobuffer TRANSPORT_REQUEST_ID SIDFor example:
tp addtobuffer IB1K903958 DD1Import the transport requests by running the following command:
tp import TRANSPORT_REQUEST_ID SID client=NNN U1238Replace
NNNwith the client number. For example:tp import IB1K903958 DD1 client=800 U1238Verify that the function module and authorization roles were imported successfully by using any appropriate transactions, such as
SE80andSU01.
Get a list of filterable columns for an SAP catalog service
Only some DataSource columns can be used for filter conditions (this is an SAP limitation by design).
To get a list of filterable columns for an SAP catalog service, follow these steps:
- Sign in to the SAP system.
- Go to t-code
SEGW. Enter the OData Project name, which is a substring of Service name. For example:
- Service name:
MM_PUR_POITEMS_MONI_SRV - Project name:
MM_PUR_POITEMS_MONI
- Service name:
Click Enter.
Go to the entity that you want to filter and select Properties.
You can use the fields shown in the Properties as filters. Supported operations are Equal and Between (Range).

For a list of operators supported in the expression language, see the OData open source documentation: URI Conventions (OData Version 2.0).
Example URI with filters:
/sap/opu/odata/sap/MM_PUR_POITEMS_MONI_SRV/C_PurchaseOrderItemMoni(P_DisplayCurrency='USD')/Results/?$filter=(PurchaseOrder eq '4500000000')
Configure the SAP ERP system
The SAP OData plugin uses an OData service that is activated on each SAP Server from which the data is extracted. This OData service can be a standard provided by SAP or a custom OData service developed on your SAP system.
Step 1: Install SAP Gateway 2.0
The SAP (Basis) administrator must verify that the SAP Gateway 2.0 components are available in the SAP source system, depending on the NetWeaver release. For more information about installing the SAP Gateway 2.0, sign in to SAP ONE Support Launchpad and see Note 1569624 (login required) .
Step 2: Activate the OData service
Activate the required OData service on the source system. For more information, see Front-end server: Activate OData services.
Step 3: Create an Authorization Role
To connect to the DataSource, create an Authorization Role with the required authorizations in SAP, and then grant it to the SAP user.
To create the Authorization Role in SAP, follow these steps:
- In the SAP GUI, enter the transaction code PFCG to open the Role Maintenance window.
In the Role field, enter a name for the role.
For example:
ZODATA_AUTHClick Single Role.
The Create Roles window opens.
In the Description field, enter a description and click Save.
For example:
Authorizations for SAP OData plugin.Click the Authorizations tab. The title of the window changes to Change Roles.
Under Edit Authorization Data and Generate Profiles, click Change Authorization Data.
The Choose Template window opens.
Click Do not select templates.
The Change role: Authorizations window opens.
Click Manually.
Provide the authorizations shown in the following SAP Authorization table.
Click Save.
To activate the Authorization Role, click the Generate icon.
SAP Authorizations
| Object Class | Object Class Text | Authorization object | Authorization object Text | Authorization | Text | Value |
|---|---|---|---|---|---|---|
| AAAB | Cross-application Authorization Objects | S_SERVICE | Check at Start of External Services | SRV_NAME | Program, transaction or function module name | * |
| AAAB | Cross-application Authorization Objects | S_SERVICE | Check at Start of External Services | SRV_TYPE | Type of Check Flag and Authorization Default Values | HT |
| FI | Financial Accounting | F_UNI_HIER | Universal Hierarchy Access | ACTVT | Activity | 03 |
| FI | Financial Accounting | F_UNI_HIER | Universal Hierarchy Access | HRYTYPE | Hierarchy Type | * |
| FI | Financial Accounting | F_UNI_HIER | Universal Hierarchy Access | HRYID | Hierarchy ID | * |
To design and run a data pipeline in Cloud Data Fusion (as the Cloud Data Fusion user), you need SAP user credentials (username and password) to configure the plugin to connect to the DataSource.
The SAP user must be of the Communications or Dialog types. To avoid using
SAP dialog resources, the Communications type is recommended. Users can be
created using SAP transaction code SU01.
Optional: Step 4: Secure the connection
You can secure the communication over the network between your private Cloud Data Fusion instance and SAP.
To secure the connection, follow these steps:
- The SAP administrator must generate an X509 certificate. To generate the certificate, see Creating an SSL Server PSE.
- The Google Cloud Admin must copy the X509 file to a readable Cloud Storage bucket in the same project as the Cloud Data Fusion instance and give the bucket path to the Cloud Data Fusion user, who enters it when they configure the plugin.
- The Google Cloud Admin must grant read access for the X509 file to the Cloud Data Fusion user who designs and runs pipelines.
Optional: Step 5: Create custom OData services
You can customize how data is extracted by creating custom OData services in SAP:
- To create custom OData services, see Creation of OData services for beginners.
- To create custom OData services using core data services (CDS) views, see How to Create an OData service and Exposing CDS Views as an OData service.
- Any custom OData service must support
$top,$skip, and$countqueries. These queries let the plugin partition the data for sequential and parallel extraction. If used, the$filter,$expand, or$selectqueries must also be supported.
Set up Cloud Data Fusion
Ensure that communication is enabled between the Cloud Data Fusion instance and the SAP server. For private instances, set up network peering. After network peering is established with the project where the SAP Systems are hosted, no additional configuration is required to connect to your Cloud Data Fusion instance. Both the SAP system and Cloud Data Fusion instance need to be inside of the same project.
Step 1: Set up your Cloud Data Fusion environment
To configure your Cloud Data Fusion environment for the plugin:
Go to the instance details:
In the Google Cloud console, go to the Cloud Data Fusion page.
Click Instances, and then click the instance's name to go to the Instance details page.
Check that the instance has been upgraded to version 6.4.0 or later. If the instance is in an earlier version, you need to upgrade it.
Click View instance. When the Cloud Data Fusion UI opens, click Hub.
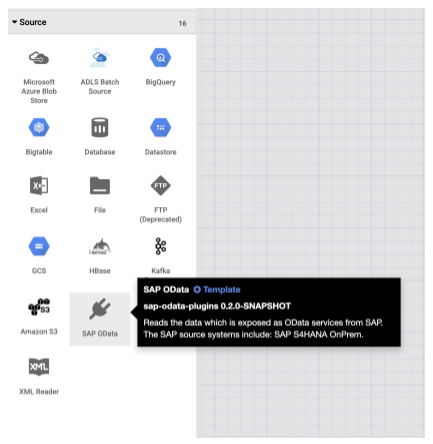
Select the SAP tab > SAP OData.
If the SAP tab is not visible, see Troubleshooting SAP integrations.
Click Deploy SAP OData Plugin.
The plugin now appears in the Source menu on the Studio page.
Step 2: Configure the plugin
The SAP OData plugin reads the content of an SAP DataSource.
To filter the records, you can configure the following properties on the SAP OData Properties page.
| Property name | Description |
|---|---|
| Basic | |
| Reference Name | Name used to uniquely identify this source for lineage or annotating metadata. |
| SAP OData Base URL | SAP Gateway OData Base URL (use the complete URL path, similar to
https://ADDRESS:PORT/sap/opu/odata/sap/).
|
| OData Version | Supported SAP OData version. |
| Service Name | Name of the SAP OData service from which you want to extract an entity. |
| Entity Name | Name of the entity that is being extracted, such as Results. You can use a prefix, such as C_PurchaseOrderItemMoni/Results. This field supports Category and Entity parameters. Examples:
|
| Credentials* | |
| SAP Type | Basic (via Username and Password). |
| SAP Logon Username | SAP Username Recommended: If the SAP Logon Username changes periodically, use a macro. |
| SAP Logon Password | SAP User password Recommended: Use secure macros for sensitive values, such as passwords. |
| SAP X.509 Client Certificate (See Using X.509 Client Certificates on SAP NetWeaver Application Server for ABAP. |
|
| GCP Project ID | A globally unique identifier for your project. This field is mandatory if the X.509 Certificate Cloud Storage Path field does not contain a macro value. |
| GCS Path | The Cloud Storage bucket path that contains the user-uploaded X.509 certificate, which corresponds to the SAP application server for secure calls based on your requirements (see the Secure the connection step). |
| Passphrase | Passphrase corresponding to the provided X.509 certificate. |
| Get Schema button | Generates a schema based on the metadata from SAP, with automatic mapping of SAP data types to corresponding Cloud Data Fusion data types (same functionality as the Validate button). |
| Advanced | |
| Filter Options | Indicates the value a field must have to be read. Use this filter condition to restrict the output data volume. For example: `Price Gt 200` selects the records with a `Price` field value greater than `200`. (See Get a list of filterable columns for an SAP catalog service.) |
| Select Fields | Fields to be preserved in the extracted data (for example: Category, Price, Name, Supplier/Address). |
| Expand Fields | List of complex fields to be expanded in the extracted output data (for example: Products/Suppliers). |
| Number of Rows to Skip | Total number of rows to skip (for example: 10). |
| Number of Rows to Fetch | Total number of rows to be extracted. |
| Number of Splits to Generate | The number of splits used to partition the input data. More partitions
increase the level of parallelism, but require more resources and
overhead. If left blank, the plugin chooses an optimal value (recommended). |
| Batch Size | Number of rows to fetch in each network call to SAP. A small size causes
frequent network calls repeating the associated overhead. A large size
might slow down data retrieval and cause excessive resource usage in SAP.
If the value is set to 0, the default value is
2500, and the limit of rows to fetch in each batch is
5000. |
| Read Timeout | The time, in seconds, to wait for the SAP OData service. The default
value is 300. For no time limit, set to 0. |
Supported OData types
The following table shows the mapping between OData v2 data types used in SAP applications and Cloud Data Fusion data types.
| OData type | Description (SAP) | Cloud Data Fusion data type |
|---|---|---|
| Numeric | ||
| SByte | Signed 8-bit integer value | int |
| Byte | Unsigned 8-bit integer value | int |
| Int16 | Signed 16-bit integer value | int |
| Int32 | Signed 32-bit integer value | int |
| Int64 | Signed 64-bit integer value appended with the character: 'L' Examples: 64L, -352L |
long |
| Single | Floating point number with 7-digit precision that can represent values
with an approximate range of ± 1.18e -38 through ± 3.40e +38, appended
with the character: 'f' Example: 2.0f |
float |
| Double | Floating point number with 15-digit precision that can represent values
with approximate ranges of ± 2.23e -308 through ± 1.79e +308, appended
with the character: 'd' Examples: 1E+10d, 2.029d, 2.0d |
double |
| Decimal | Numeric values with fixed precision and scale describing a numeric value
ranging from negative 10^255 + 1 to positive 10^255 -1, appended with the
character: 'M' or 'm' Example: 2.345M |
decimal |
| Character | ||
| Guid | A 16-byte (128-bit) unique identifier value, starting with the
character: 'guid' Example: guid'12345678-aaaa-bbbb-cccc-ddddeeeeffff' |
string |
| String | Fixed or variable-length character data encoded in UTF-8 | string |
| Byte | ||
| Binary | Fixed or variable-length binary data, starting with either 'X' or
'binary' (both are case-sensitive) Example: X'23AB', binary'23ABFF' |
bytes |
| Logical | ||
| Boolean | Mathematical concept of binary-valued logic | boolean |
| Date/Time | ||
| Date/Time | Date and time with values ranging from 12:00:00 AM on January 1, 1753 to 11:59:59 PM on December 31, 9999 | timestamp |
| Time | Time of day with values ranging from 0:00:00.x to 23:59:59.y, where 'x' and 'y' depend on precision | time |
| DateTimeOffset | Date and time as an Offset, in minutes from GMT, with values ranging from 12:00:00 AM on January 1, 1753 to 11:59:59 PM, December 31, 9999 | timestamp |
| Complex | ||
| Navigation and Non-Navigation Properties (multiplicity = *) | Collections of a type, with a multiplicity of one-to-many. | array,string,int. |
| Properties (multiplicity = 0.1) | References to other complex types with a multiplicity of one-to-one | record |
Validation
Click Validate on the top right or Get Schema.
The plugin validates the properties and generates a schema based on the metadata from SAP. It automatically maps SAP data types to corresponding Cloud Data Fusion data types.
Run a data pipeline
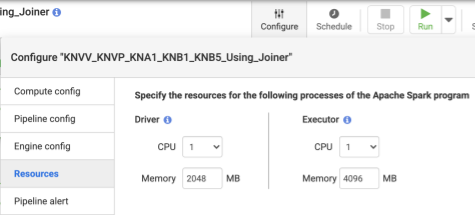
- After deploying the pipeline, click Configure on the top center panel.
- Select Resources.
- If needed, change the Executor CPU and Memory based on the overall data size and the number of transformations used in the pipeline.
- Click Save.
- To start the data pipeline, click Run.
Performance
The plugin uses Cloud Data Fusion's parallelization capabilities. The following guidelines can help you configure the runtime environment so that you provide sufficient resources to the runtime engine to achieve the intended degree of parallelism and performance.
Optimize the plugin configuration
Recommended: Unless you are familiar with your SAP system's memory settings, leave the Number of Splits to Generate and Batch Size blank (unspecified).
For better performance when you run your pipeline, use the following configurations:
Number of Splits to Generate: values between
8and16are recommended. But they can increase to32, or even64, with appropriate configurations on the SAP side (allocating appropriate memory resources for the work processes in SAP). This configuration improves parallelism on the Cloud Data Fusion side. The runtime engine creates the specified number of partitions (and SAP connections) while extracting the records.If the Configuration Service (which comes with the plugin when you import the SAP transport file) is available: the plugin defaults to the SAP system's configuration. The splits are 50% of the available dialog work processes in SAP. Note: The Configuration Service can only be imported from S4HANA systems.
If the Configuration Service isn't available, the default is
7splits.In either case, if you specify a different value, the value you provide prevails over the default split value,except that it is capped by the available dialog processes in SAP, minus two splits.
If the number of records to extract is less than
2500, the number of splits is1.
Batch Size: this is the count of records to fetch in every network call to SAP. A smaller batch size causes frequent network calls, repeating the associated overhead. By default, the minimum count is
1000and the maximum is50000.
For more information, see OData entity limits.
Cloud Data Fusion resource settings
Recommended: Use 1 CPU and 4 GB of memory per Executor (this value applies to each Executor process). Set these in the Configure > Resources dialog.
Dataproc cluster settings
Recommended: At minimum, allocate a total of CPUs (across workers) greater than the intended number of splits (see Plugin configuration).
Each worker must have 6.5 GB or more memory allocated per CPU in the Dataproc settings (this translates to 4 GB or more available per Cloud Data Fusion Executor). Other settings can be kept at the default values.
Recommended: Use a persistent Dataproc cluster to reduce the data pipeline runtime (this eliminates the Provisioning step which might take a few minutes or more). Set this in the Compute Engine configuration section.
Sample configurations and throughput
The following sections describe sample development and production configurations and throughput.
Sample development and test configurations
- Dataproc cluster with 8 workers, each with 4 CPUs and 26 GB memory. Generate up to 28 splits.
- Dataproc cluster with 2 workers, each with 8 CPUs and 52 GB memory. Generate up to 12 splits.
Sample production configurations and throughput
- Dataproc cluster with 8 workers, each with 8 CPUs and 32 GB memory. Generate up to 32 splits (half of the available CPUs).
- Dataproc cluster with 16 workers, each with 8 CPUs and 32 GB memory. Generate up to 64 splits (half the available CPUs).
Sample throughput for an SAP S4HANA 1909 production source system
The following table has sample throughput. Throughput shown is without filter options unless specified otherwise. When using filter options, throughput is reduced.
| Batch size | Splits | OData Service | Total rows | Rows extracted | Throughput (rows per second) |
|---|---|---|---|---|---|
| 1000 | 4 | ZACDOCA_CDS | 5.37 M | 5.37 M | 1069 |
| 2500 | 10 | ZACDOCA_CDS | 5.37 M | 5.37 M | 3384 |
| 5000 | 8 | ZACDOCA_CDS | 5.37 M | 5.37 M | 4630 |
| 5000 | 9 | ZACDOCA_CDS | 5.37 M | 5.37 M | 4817 |
Sample throughput for an SAP S4HANA cloud production source system
| Batch size | Splits | OData Service | Total rows | Rows extracted | Throughput (GB/hour) |
|---|---|---|---|---|---|
| 2500 | 40 | TEST_04_UOM_ODATA_CDS/ | 201 M | 10 M | 25.48 |
| 5000 | 50 | TEST_04_UOM_ODATA_CDS/ | 201 M | 10 M | 26.78 |
Support details
The plugin supports the following use cases.
Supported SAP products and versions
Supported sources include SAP S4/HANA 1909 and later, S4/HANA on SAP cloud, and any SAP application capable of exposing OData Services.
The transport file that contains the custom OData service for load balancing the calls to SAP must be imported in S4/HANA 1909 and later. The service helps calculate the number of splits (data partitions) that the plugin can read in parallel (see number of splits).
OData version 2 is supported.
The plugin was tested with SAP S/4HANA servers deployed on Google Cloud.
SAP OData Catalog Services are supported for extraction
The plugin supports the following DataSource types:
- Transaction data
- CDS views exposed through OData
Master data
- Attributes
- Texts
- Hierarchies
SAP notes
No SAP notes are required before extraction, but the SAP system must have SAP Gateway available. For more information, see note 1560585 (this external site requires an SAP login).
Limits on the volume of data or record width
There is no defined limit to the volume of data extracted. We have tested with up to 6 million rows extracted in one call, with a record width of 1 KB. For SAP S4/HANA on cloud, we have tested with up to 10 million rows extracted in one call, with a record width of 1 KB.
Expected plugin throughput
For an environment configured according to the guidelines in the Performance section, the plugin can extract around 38 GB per hour. Actual performance might vary with the Cloud Data Fusion and SAP system loads or network traffic.
Delta (changed data) extraction
Delta extraction isn't supported.
Error scenarios
At runtime, the plugin writes log entries in the Cloud Data Fusion data pipeline
log. These entries are prefixed with CDF_SAP for identification.
At design time, when you validate the plugin settings, messages are displayed in the Properties tab and are highlighted in red.
The following list describes some of the errors:
| Message ID | Message | Recommended action |
|---|---|---|
| None | Required property 'CONNECTION_PROPERTY' for connection
type 'CONNECTION_PROPERTY_SETTING'. |
Enter an actual value or macro variable. |
| None | Invalid value for property 'PROPERTY_NAME'. |
Enter a non-negative whole number (0 or greater, without a decimal) or macro variable. |
| CDF_SAP_ODATA_01505 | Failed to prepare the Cloud Data Fusion output schema. Please
check the provided runtime macros value. |
Ensure the provided macro values are correct. |
| N/A | SAP X509 certificated 'STORAGE_PATH' is missing. Please
make sure the required X509 certificate is uploaded to your specified
Cloud Storage bucket 'BUCKET_NAME'. |
Ensure the provided Cloud Storage path is correct. |
| CDF_SAP_ODATA_01532 | Generic error code anything related to SAP OData connectivity issuesFailed to call given SAP OData service. Root Cause:
MESSAGE. |
Check the root cause displayed in the message and take appropriate action. |
| CDF_SAP_ODATA_01534 | Generic error code anything related to SAP OData service error.Service validation failed. Root Cause: MESSAGE. |
Check the root cause displayed in the message and take appropriate action. |
| CDF_SAP_ODATA_01503 | Failed to fetch total available record count from
SAP_ODATA_SERVICE_ENTITY_NAME. Root Cause: MESSAGE.
|
Check the root cause displayed in the message and take appropriate action. |
| CDF_SAP_ODATA_01506 | No records found to extract in
SAP_ODATA_SERVICE_ENTITY_NAME.
Please ensure that the provided entity contains records. |
Check the root cause displayed in the message and take appropriate action. |
| CDF_SAP_ODATA_01537 | Failed to process records for
SAP_ODATA_SERVICE_ENTITY_NAME.
Root Cause: MESSAGE. |
Check the root cause displayed in the message and take appropriate action. |
| CDF_SAP_ODATA_01536 | Failed to pull records from
SAP_ODATA_SERVICE_ENTITY_NAME. Root Cause:
MESSAGE. |
Check the root cause displayed in the message and take appropriate action. |
| CDF_SAP_ODATA_01504 | Failed to generate the encoded metadata string for the given OData
service SAP_ODATA_SERVICE_NAME. Root Cause:
MESSAGE. |
Check the root cause displayed in the message and take appropriate action. |
| CDF_SAP_ODATA_01533 | Failed to decode the metadata from the given encoded metadata
string for service SAP_ODATA_SERVICE_NAME. Root Cause:
MESSAGE. |
Check the root cause displayed in the message and take appropriate action. |
What's next
- Learn more about Cloud Data Fusion.
- Learn more about SAP on Google Cloud.