This tutorial shows how to build a reusable pipeline that reads data from Cloud Storage, performs data quality checks, and writes to Cloud Storage.
Reusable pipelines have a regular pipeline structure, but you can change the configuration of each pipeline node based on configurations provided by an HTTP server. For example, a static pipeline might read data from Cloud Storage, apply transformations, and write to a BigQuery output table. If you want the transformation and BigQuery output table to change based on the Cloud Storage file that the pipeline reads, you create a reusable pipeline.
Deploy the Cloud Storage Argument Setter plugin
In the Cloud Data Fusion web interface, go to the Studio page.
In the Actions menu, click GCS Argument Setter.
Read from Cloud Storage
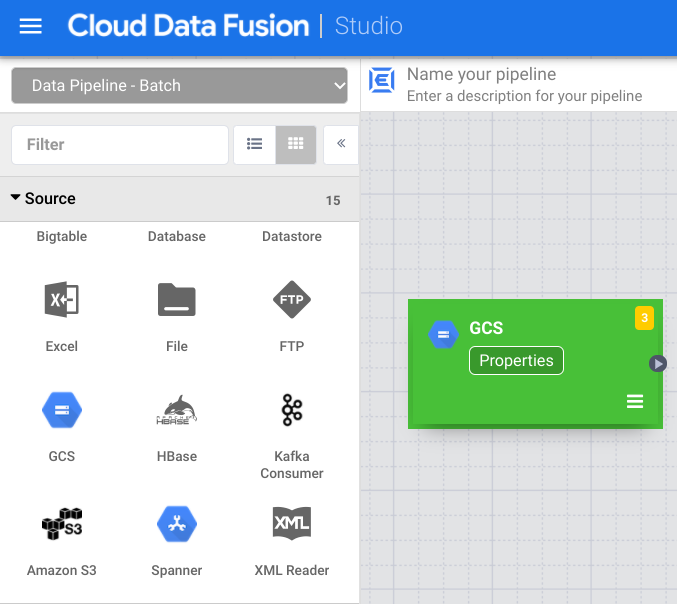
- In the Cloud Data Fusion web interface, go to the Studio page.
- Click arrow_drop_down Source and select Cloud Storage. The node for a Cloud Storage source appears in the pipeline.
On the Cloud Storage node, click Properties.
In the Reference name field, enter a name.
In the Path field, enter
${input.path}. This macro controls what the Cloud Storage input path will be in the different pipeline runs.In the right Output Schema panel, remove the offset field from the output schema by clicking the trash icon in the offset field row.
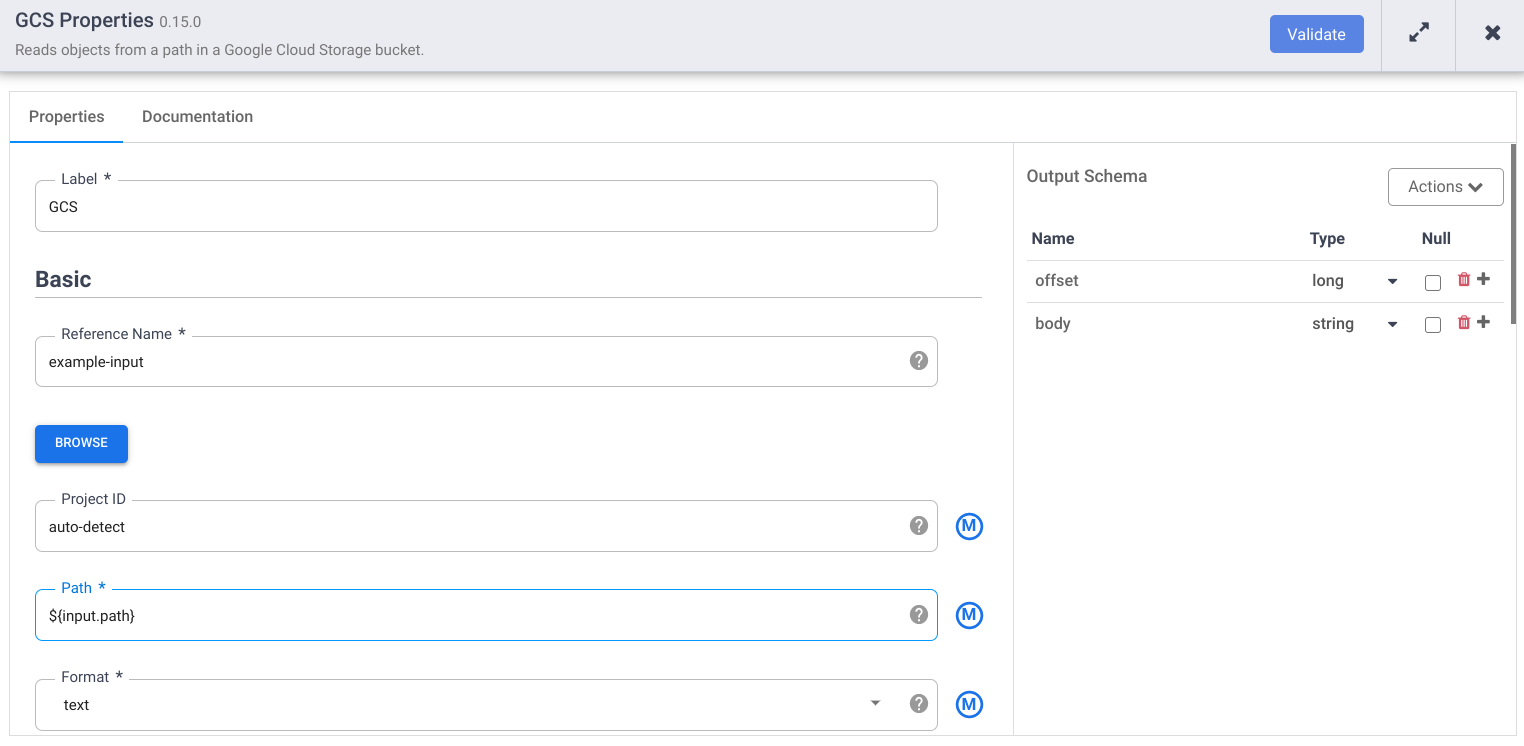
Click Validate and address any errors.
Click the to exit the Properties dialog.
Transform your data
- In the Cloud Data Fusion web interface, go to your data pipeline on the Studio page.
- In the Transform drop-down menu arrow_drop_down, select Wrangler.
- In the Pipeline Studio canvas, drag an arrow from the Cloud Storage node
to the Wrangler node.

- Go to the Wrangler node in your pipeline and click the Properties.
- In the Input field name, enter
body. - In the Recipe field, enter
${directives}. This macro controls what the transform logic will be in the different pipeline runs.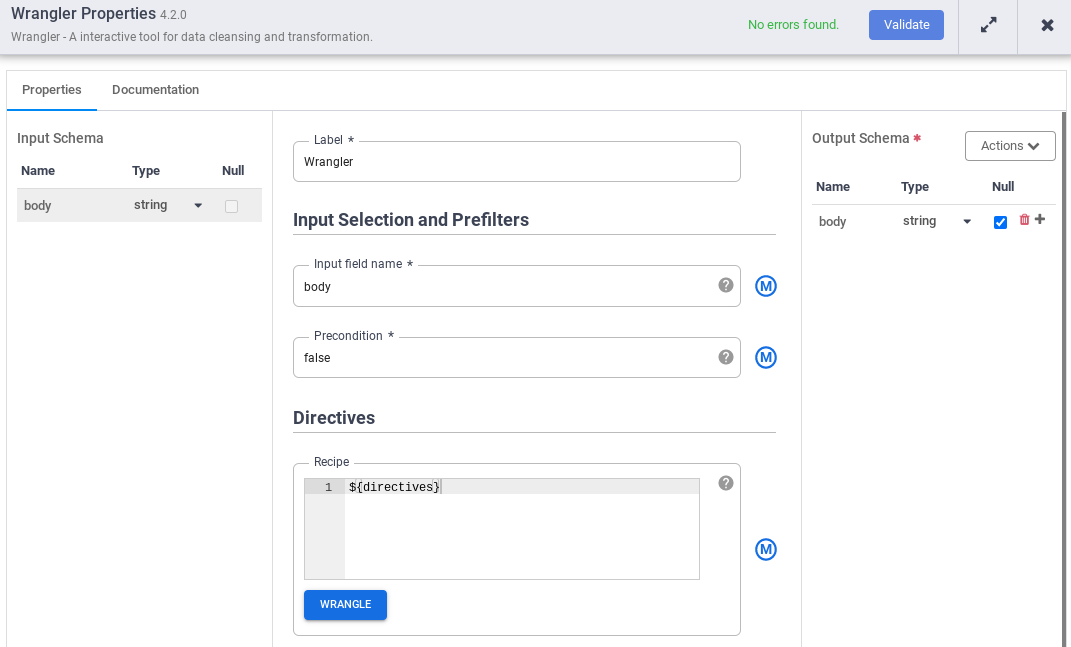
- Click Validate and address any errors.
- Click the to exit the Properties dialog.
Write to Cloud Storage
- In the Cloud Data Fusion web interface, go to your data pipeline on the Studio page.
- In the Sink drop-down menu arrow_drop_down, select Cloud Storage.
- In the Pipeline Studio canvas, drag an arrow from the Wrangler node to the
Cloud Storage node that you just added.
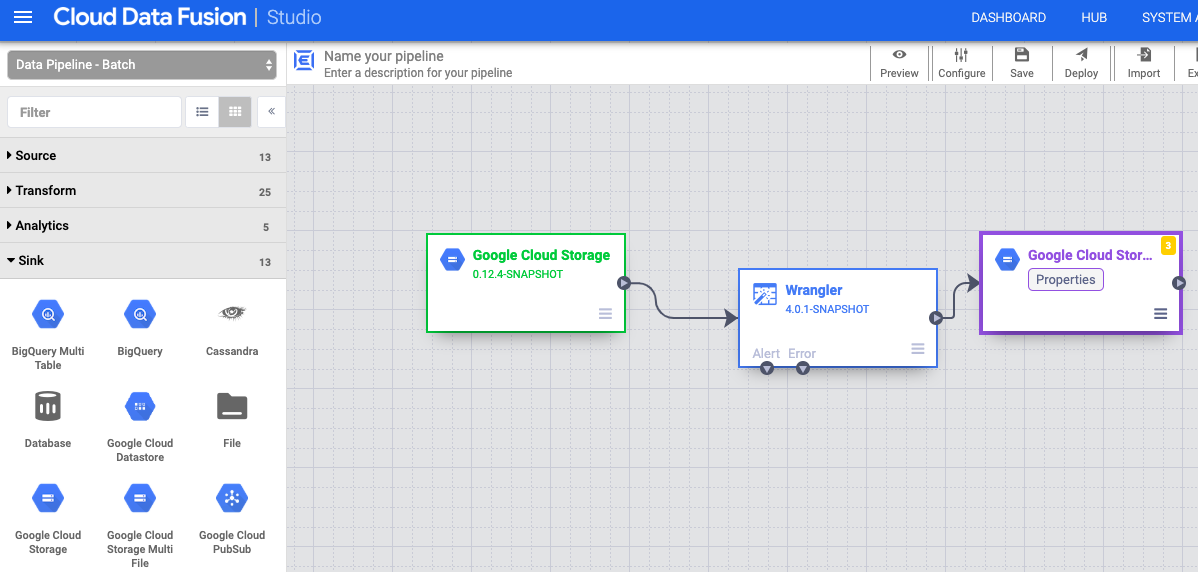
- Go to the Cloud Storage sink node in your pipeline and click Properties.
- In the Reference name field, enter a name.
- In the Path field, enter the path of a Cloud Storage bucket in
your project, where your pipeline can write the output files. If you don't have
a Cloud Storage bucket, create one.

- Click Validate and address any errors.
- Click the to exit the Properties dialog.
Set the macro arguments
- In the Cloud Data Fusion web interface, go to your data pipeline on the Studio page.
- In the arrow_drop_down Conditions and Actions drop-down menu, click GCS Argument Setter.
- In the Pipeline Studio canvas, drag an arrow from the Cloud Storage Argument Setter node to
the Cloud Storage source node.
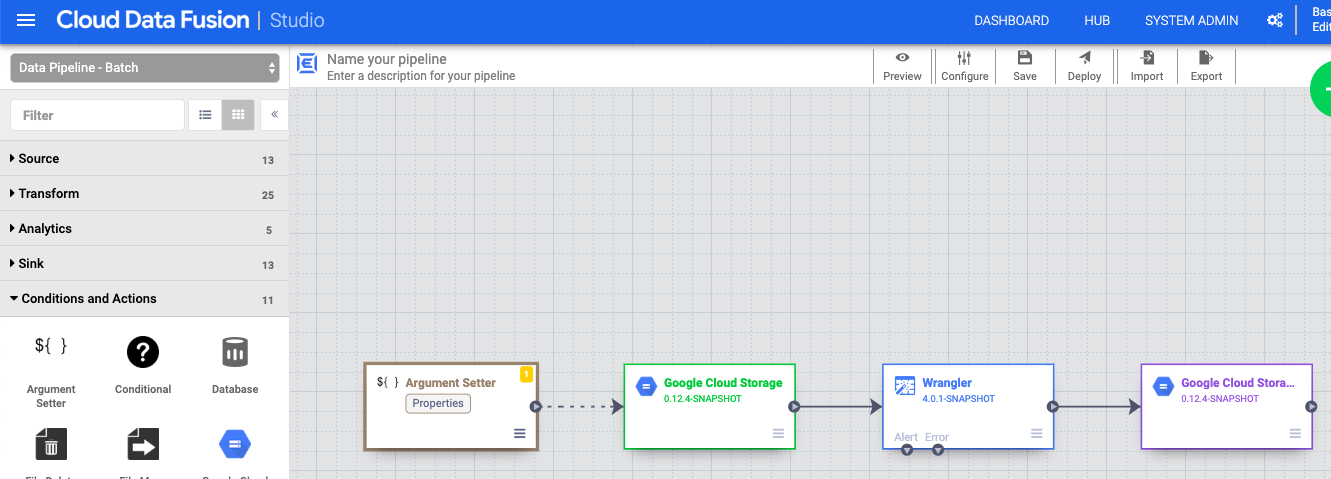
- Go to the Cloud Storage Argument Setter node in your pipeline and click Properties.
In the URL field, enter the following URL:
gs://reusable-pipeline-tutorial/args.jsonThe URL corresponds to a publicly accessible object in Cloud Storage that contains the following content:
{
  "arguments" : [
    {
      "name": "input.path",
      "value": "gs://reusable-pipeline-tutorial/user-emails.txt"
    },
    {
      "name": "directives",
      "value": "send-to-error !dq:isEmail(body)"
    }
  ]
}
The first of the two arguments is the value for
input.path. The pathgs://reusable-pipeline-tutorial/user-emails.txtis a publicly accessible object in Cloud Storage that contains the following test data:alice@example.com bob@example.com craig@invalid@example.comThe second argument is the value for
directives. The valuesend-to-error !dq:isEmail(body)configures Wrangler to filter out any lines that are not a valid email address. For example,craig@invalid@example.comis filtered out.Click Validate to make sure you don't have any errors.
Click the to exit the Properties dialog.
Deploy and run your pipeline
In the top bar of the Pipeline Studio page, click Name your pipeline. Name your pipeline and click Save.
Click Deploy.
To open the Runtime Arguments and view the macro (runtime)
input.pathanddirectivesarguments, click the arrow_drop_down drop-down next to Run.Leave the value fields blank to notify Cloud Data Fusion that the Cloud Storage Argument Setter node in the pipeline will set the values of these arguments during runtime.
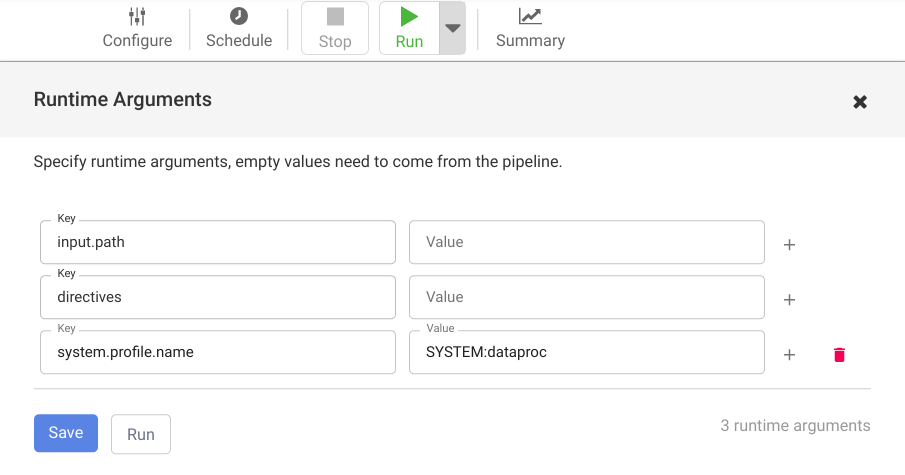
Click Run.