This page describes how to run a pipeline in Cloud Data Fusion against an existing Dataproc cluster.
By default, Cloud Data Fusion creates ephemeral clusters for each pipeline: it creates a cluster at the beginning of the pipeline run, and then deletes it after the pipeline run completes. While this behavior saves costs by ensuring that resources are only created when required, this default behavior might not be desirable in the following scenarios:
If the time it takes to create a new cluster for every pipeline is prohibitive for your use case.
If your organization requires cluster creation to be managed centrally; for example, when you want to enforce certain policies for all Dataproc clusters.
For these scenarios, you instead run pipelines against an existing cluster with the following steps.
Before you begin
You need the following:
A Cloud Data Fusion instance.
An existing Dataproc cluster.
If you run your pipelines in Cloud Data Fusion version 6.2, use an older Dataproc image that runs with Hadoop 2.x (for example, 1.5-debian10), or upgrade to the latest Cloud Data Fusion version.
Connect to the existing cluster
In Cloud Data Fusion versions 6.2.1 and later, you can connect to an existing Dataproc cluster when you create a new Compute Engine profile.
Go to your instance:
In the Google Cloud console, go to the Cloud Data Fusion page.
To open the instance in the Cloud Data Fusion Studio, click Instances, and then click View instance.
Click System admin.
Click the Configuration tab.
Click System compute profiles.
Click Create new profile. A page of provisioners opens.
Click Existing Dataproc.
Enter the profile, cluster, and monitoring information.
Click Create.
Configure your pipeline to use the custom profile
Go to your instance:
In the Google Cloud console, go to the Cloud Data Fusion page.
To open the instance in the Cloud Data Fusion Studio, click Instances, and then click View instance.
Go to your pipeline on the Studio page.
Click Configure.
Click Compute config.
Click the profile that you created.
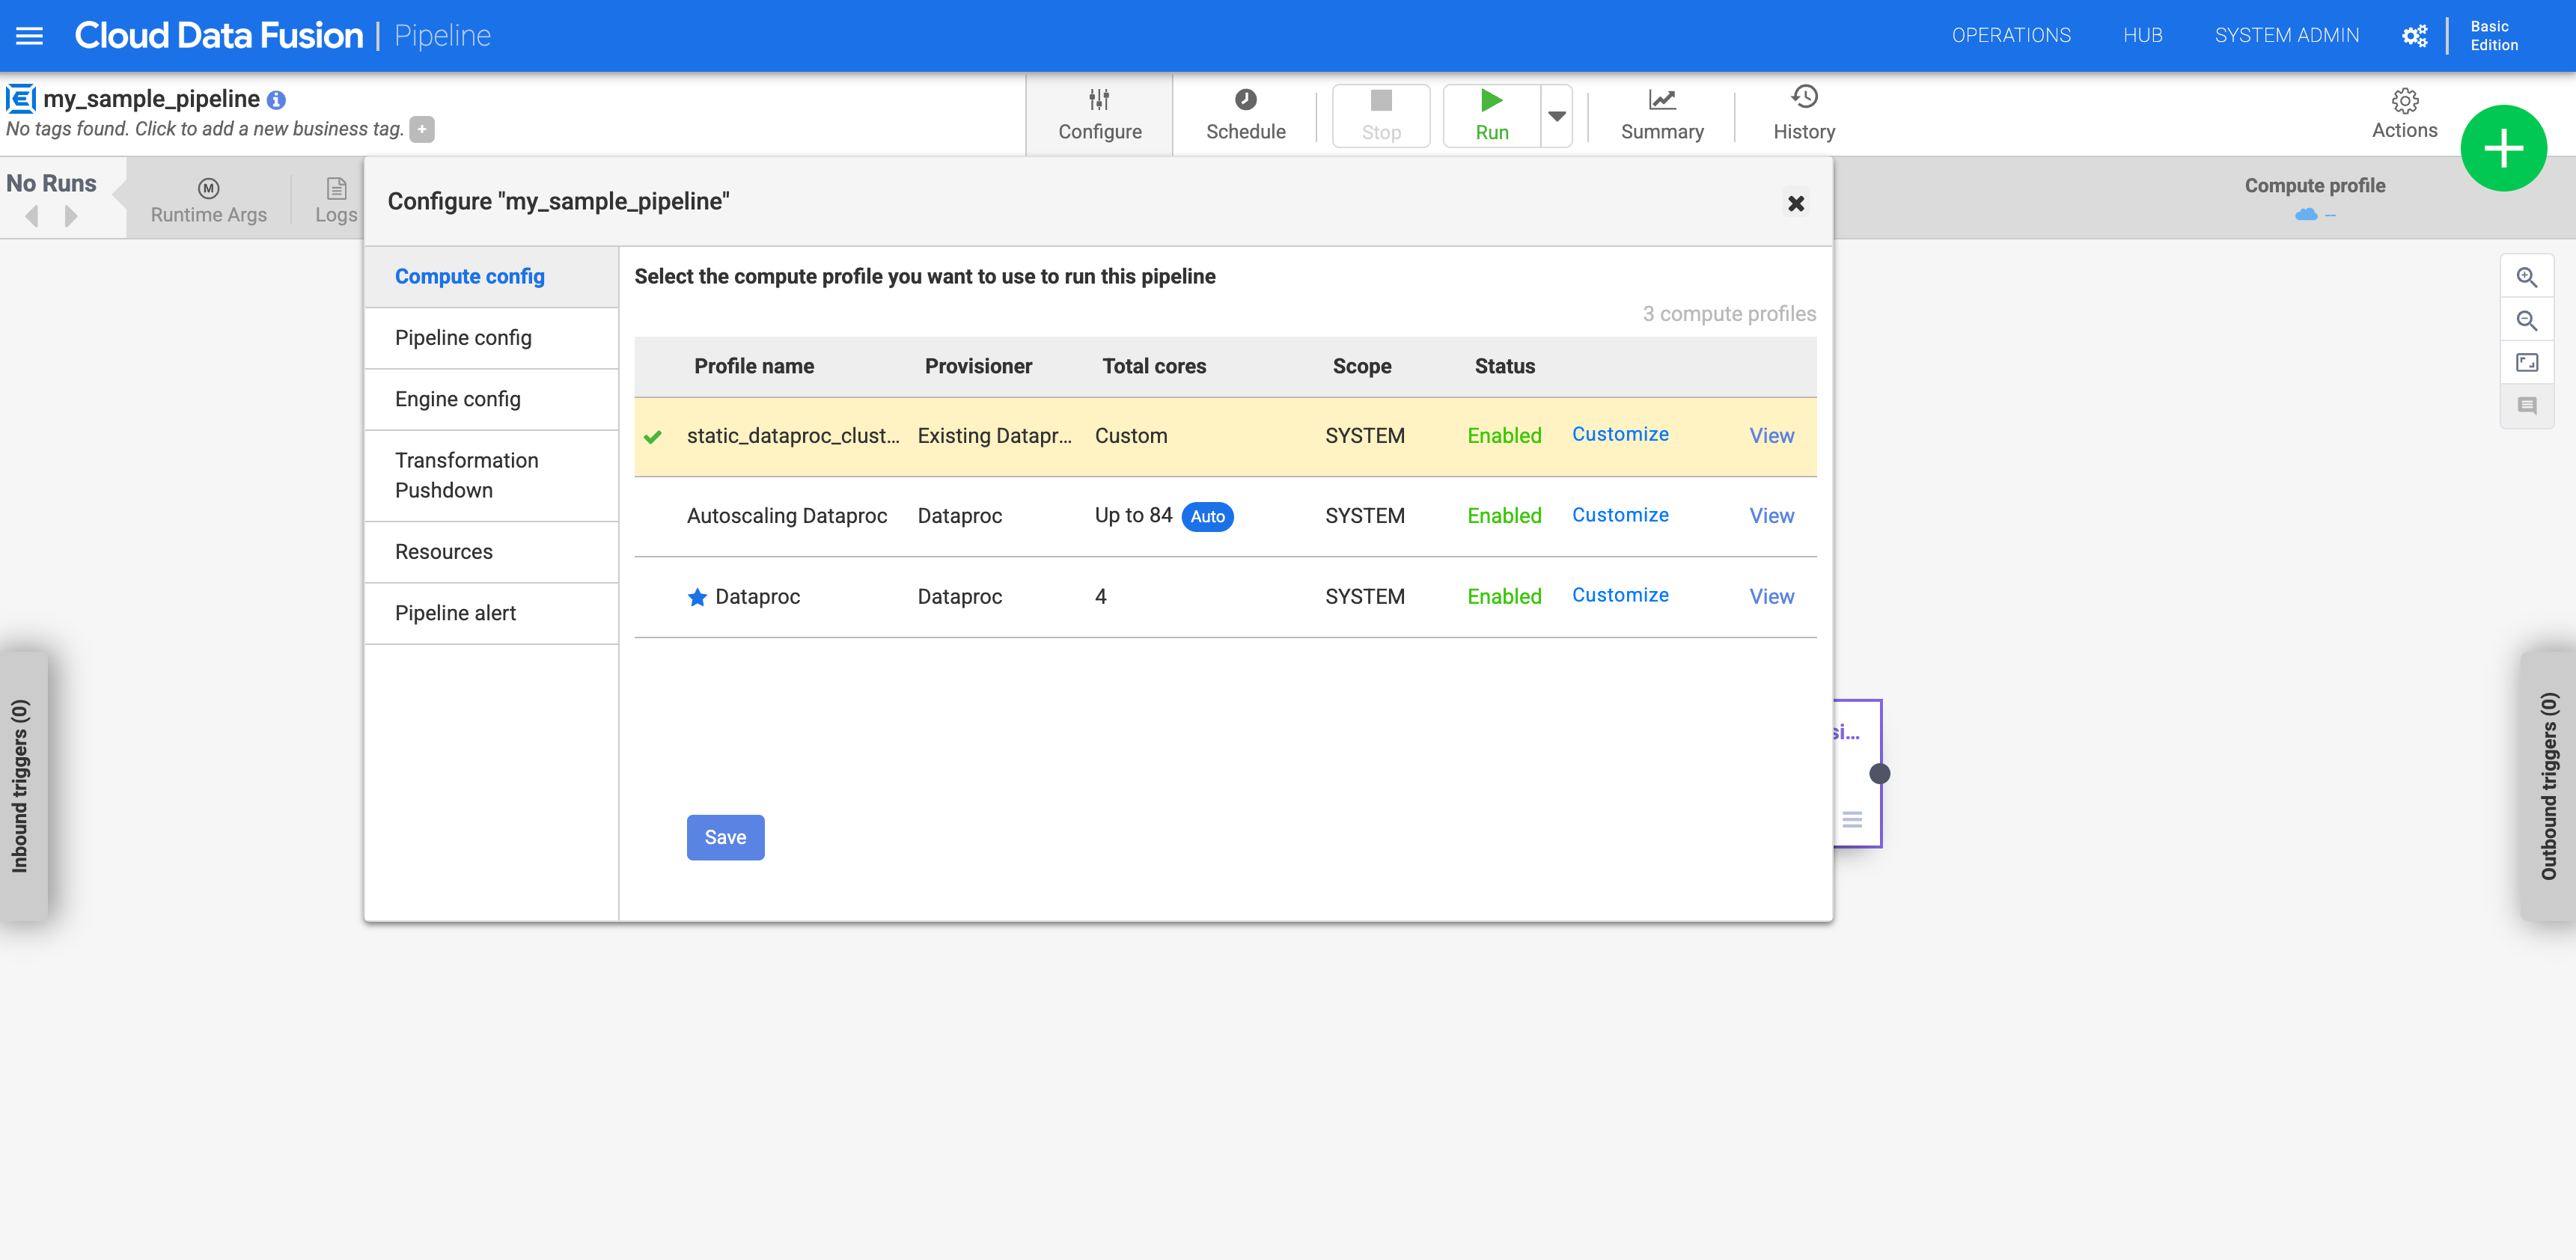
Figure 1: Click the custom profile Run the pipeline. It runs against the existing Dataproc cluster.
What's next
- Learn more about configuring clusters.
- Troubleshoot deleting clusters.