Run an Apache Airflow DAG in Cloud Composer 1
Cloud Composer 1 | Cloud Composer 2
This page shows you how to create a Cloud Composer environment and run an Apache Airflow DAG in Cloud Composer.
If you are new to Airflow, see this tutorial for more information about Airflow concepts, objects, and their usage.
Before you begin
- Sign in to your Google Cloud account. If you're new to Google Cloud, create an account to evaluate how our products perform in real-world scenarios. New customers also get $300 in free credits to run, test, and deploy workloads.
-
In the Google Cloud console, on the project selector page, select or create a Google Cloud project.
-
Make sure that billing is enabled for your Google Cloud project.
-
In the Google Cloud console, on the project selector page, select or create a Google Cloud project.
-
Make sure that billing is enabled for your Google Cloud project.
-
Enable the Cloud Composer API.
Create an environment
Console
In the Google Cloud console, go to the Create environment page.
In the Name field, enter
example-environment.In the Location drop-down list, select a region for the Cloud Composer environment. See Available regions for information about selecting a region.
For other environment configuration options, use the provided defaults.
To create the environment, click Create.
Wait until the environment is created. When done, a green check mark shows next to the environment name.
gcloud
Add Cloud Composer Service Agent account as a new principal
on your environment's service account and grant the Cloud Composer v2 API
Service Agent Extension (roles/composer.ServiceAgentV2Ext) role to it.
By default, your environment uses the default Compute Engine service account.
# Get current project's project number
PROJECT_NUMBER=$(gcloud projects list \
  --filter="$(gcloud config get-value project)" \
  --format="value(PROJECT_NUMBER)" \
  --limit=1)

# Add the Cloud Composer v2 API Service Agent Extension role
gcloud iam service-accounts add-iam-policy-binding \
    $PROJECT_NUMBER-compute@developer.gserviceaccount.com \
    --member serviceAccount:service-$PROJECT_NUMBER@cloudcomposer-accounts.iam.gserviceaccount.com \
    --role roles/composer.ServiceAgentV2Ext
Create a new environment:
gcloud composer environments create ENVIRONMENT_NAME \
  --location LOCATION \
  --image-version IMAGE_VERSION
Replace:
ENVIRONMENT_NAMEwith the name of the environment. This quickstart usesexample-environment.LOCATIONwith a region for the Cloud Composer environment. See Available regions for information about selecting a region.IMAGE_VERSIONwith the name of the Cloud Composer image. This guide usescomposer-1.20.12-airflow-1.10.15to create an environment with the latest Cloud Composer image.
Example:
gcloud composer environments create example-environment \
  --location us-central1 \
  --image-version composer-1.20.12-airflow-1.10.15
Terraform
To configure this environment using Terraform, add the following resource
block to your Terraform configuration and run terraform apply.
To utilize this resource block, the service account Terraform uses
must have a role with
the composer.environments.create permission enabled. For more information
about the service account for Terraform, see
Google Provider Configuration Reference.
For more information about using Terraform to create a Cloud Composer environment, refer to the Terraform documentation.
resource "google_composer_environment" "example" {
  name = "ENVIRONMENT_NAME"
  region = "LOCATION"

  config {
    software_config {
      image_version = "IMAGE_VERSION"
    }
  }
}
ENVIRONMENT_NAMEwith the name of the environment. This quickstart usesexample-environment.LOCATIONwith a region for the Cloud Composer environment. See Available regions for information about selecting a region.IMAGE_VERSIONwith the name of the Cloud Composer image. This guide usescomposer-1.20.12-airflow-1.10.15to create an environment with the latest Cloud Composer image.
Example:
resource "google_composer_environment" "example" {
  name = "example-environment"
  region = "us-central1"

  config {
    software_config {
      image_version = "composer-1.20.12-airflow-1.10.15"
    }
  }

}
View environment details
After the environment creation finishes, you can view your environment's information, such as the Cloud Composer version, the URL for the Airflow web interface, and the DAGs folder in Cloud Storage.
To view the environment information:
In the Google Cloud console, go to the Environments page.
To view the Environment details page, click the name of your environment,
example-environment.
Create a DAG
An Airflow DAG is a collection of organized tasks that you want to schedule and run. DAGs are defined in standard Python files.
The Python code in quickstart.py:
- Creates a DAG,
composer_sample_dag. The DAG runs once per day. - Executes one task,
print_dag_run_conf. The task prints the DAG run's configuration by using the bash operator.
To create a DAG, create a copy of the quickstart.py file on your local
machine.
Airflow 1
Airflow 2
Upload the DAG to Cloud Storage
Cloud Composer schedules only the DAGs that are located in
the /dags folder in the environment's Cloud Storage bucket.
To schedule your DAG, upload quickstart.py from your local machine to your
environment's /dags folder.
Console
In the Google Cloud console, go to the Environments page.
To open the
/dagsfolder, follow the DAGs folder link forexample-environment.On the Bucket details page, click Upload files and then select your local copy of
quickstart.py.To upload the file, click Open.
After you upload your DAG, Cloud Composer adds the DAG to Airflow and schedules a DAG run immediately. It might take a few minutes for the DAG to show up in the Airflow web interface.
gcloud
To upload quickstart.py with gcloud, run the following command:
gcloud composer environments storage dags import \
--environment example-environment  --location us-central1 \
--source quickstart.py
View the DAG in the Airflow UI
Each Cloud Composer environment has a web server that runs the Airflow web interface. You can manage DAGs from the Airflow web interface.
To view the DAG in the Airflow web interface:
Airflow 1
In the Google Cloud console, go to the Environments page.
To open the Airflow web interface, click the Airflow link for
example-environment. The Airflow UI opens in a new browser window.In the Airflow toolbar, go to the DAGs page.
To open the DAG details page, click
composer_sample_dag.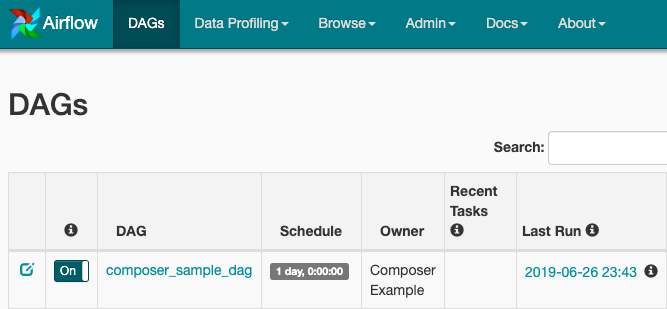
Figure 1. DAGs page in the Airflow UI (click to enlarge) The page for the DAG shows the Tree View, a graphical representation of the workflow's tasks and dependencies.
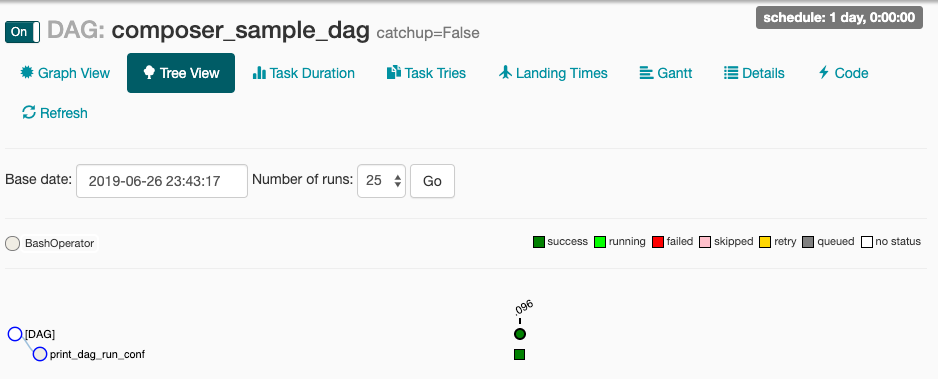
Figure 2. Tree view for the composer_sample_dags DAG
Airflow 2
In the Google Cloud console, go to the Environments page.
To open the Airflow web interface, click the Airflow link for
example-environment. The Airflow UI opens in a new browser window.In the Airflow toolbar, go to the DAGs page.
To open the DAG details page, click
composer_sample_dag.
Figure 1. DAGs page in the Airflow UI (click to enlarge) The page for the DAG shows the Tree View, a graphical representation of the workflow's tasks and dependencies.
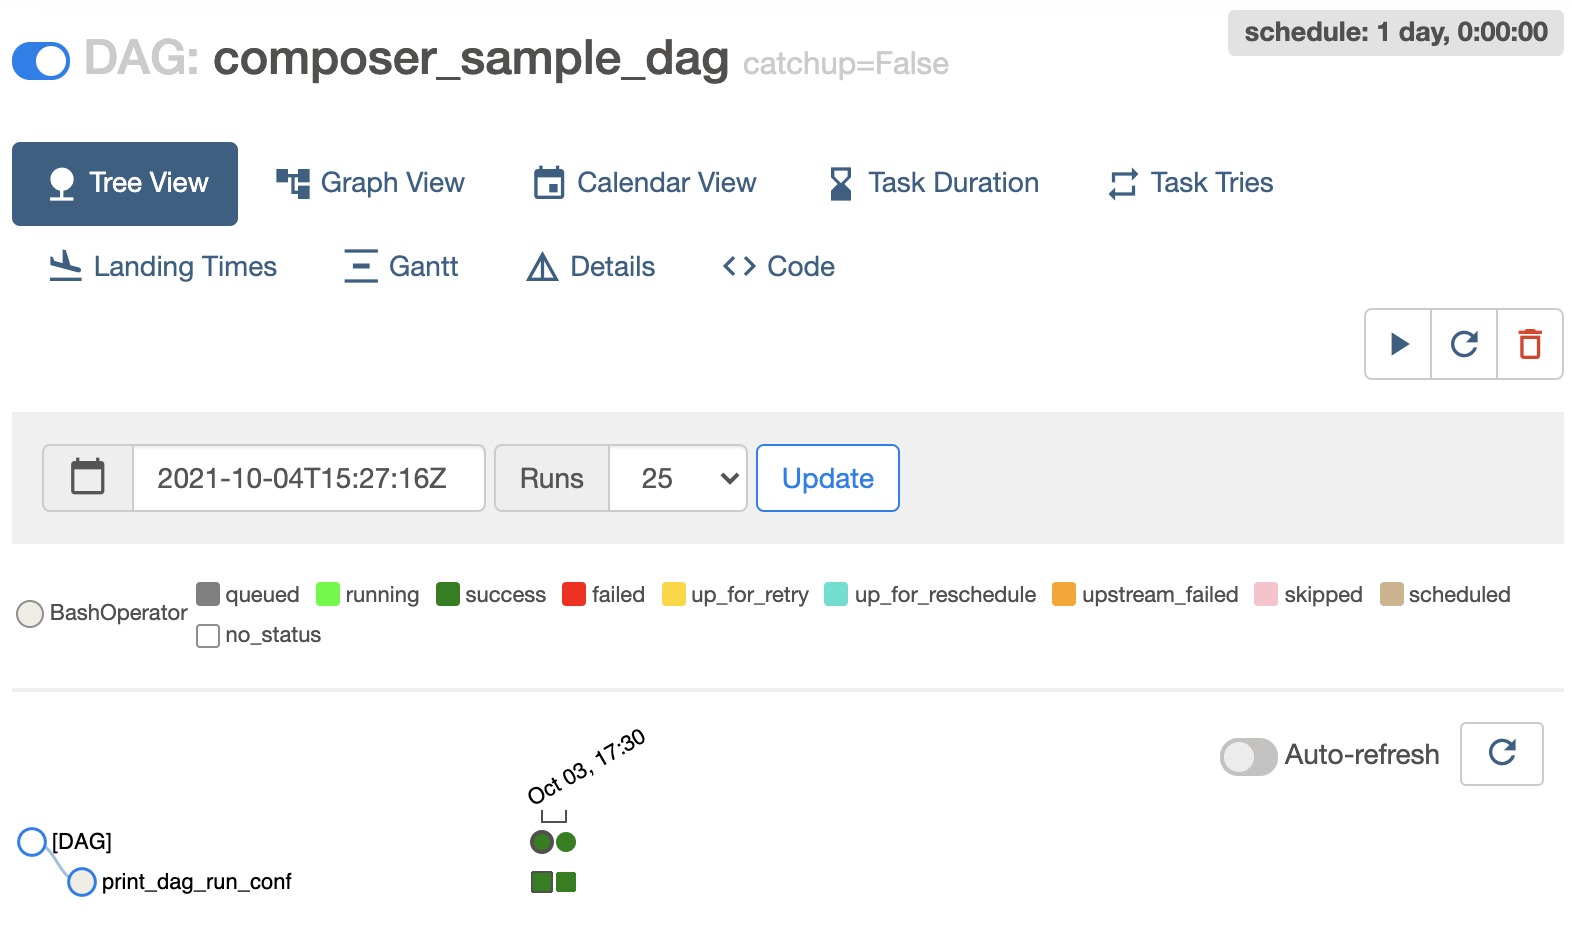
Figure 2. Tree view for the composer_sample_dags DAG
View task instance details in the Airflow logs
The DAG that you scheduled includes the print_dag_run_conf task. The task
prints the DAG run's configuration, which you can see in the Airflow logs for
the task instance.
To view the task instance details:
Airflow 1
In the DAG's Tree View in the Airflow web interface, click Graph View.
If you hold the pointer over the
print_dag_run_conftask, its status displays.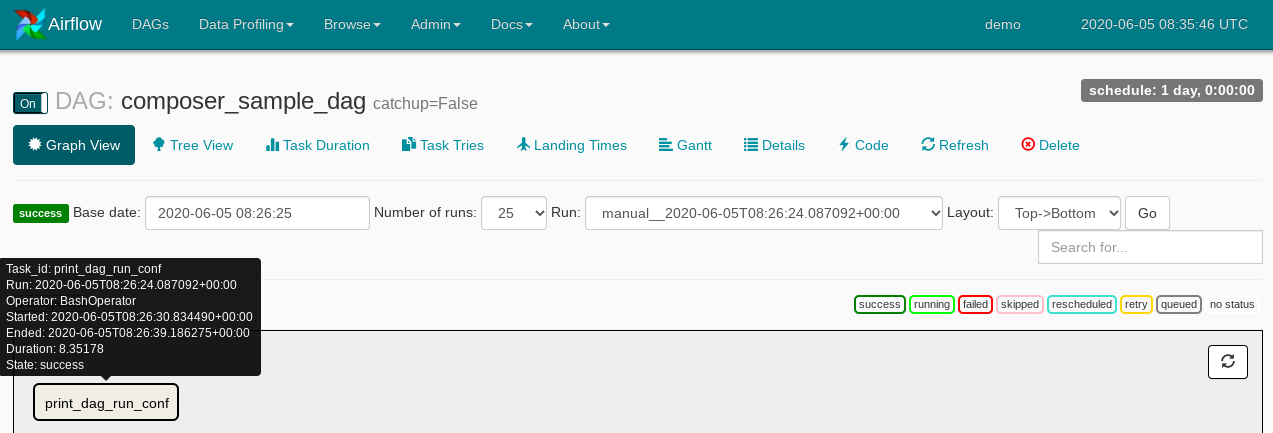
Figure 3. Status of the print_dag_run_conf task Click the
print_dag_run_conftask.In the Task Instance context menu, you can get metadata and perform some actions.
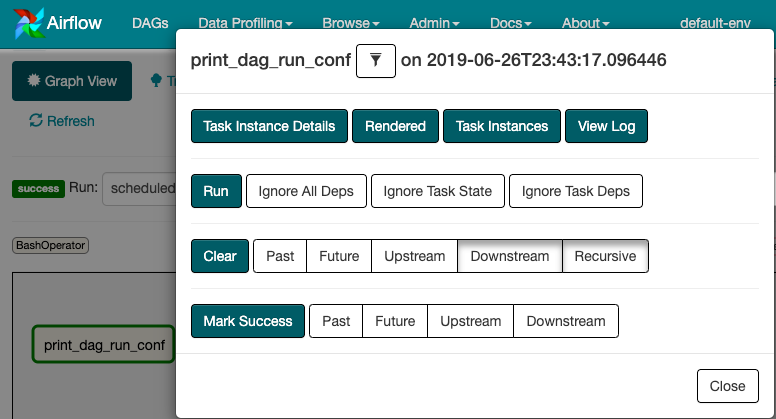
Figure 4. Task Instance context menu for the composer_sample_dags task In the Task Instance context menu, click View Log.
In the Log, look for
Running: ['bash'to see the output from the bash operator.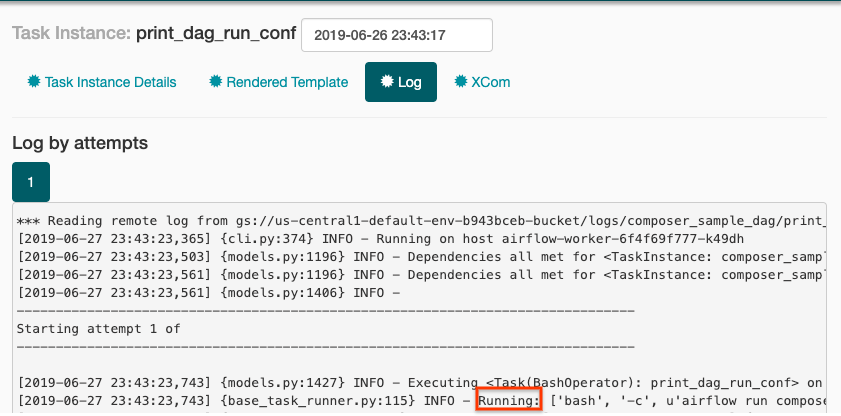
Figure 5. Bash operator log output
Airflow 2
In the DAG's Tree View in the Airflow web interface, click Graph View.
If you hold the pointer over the
print_dag_run_conftask, its status displays.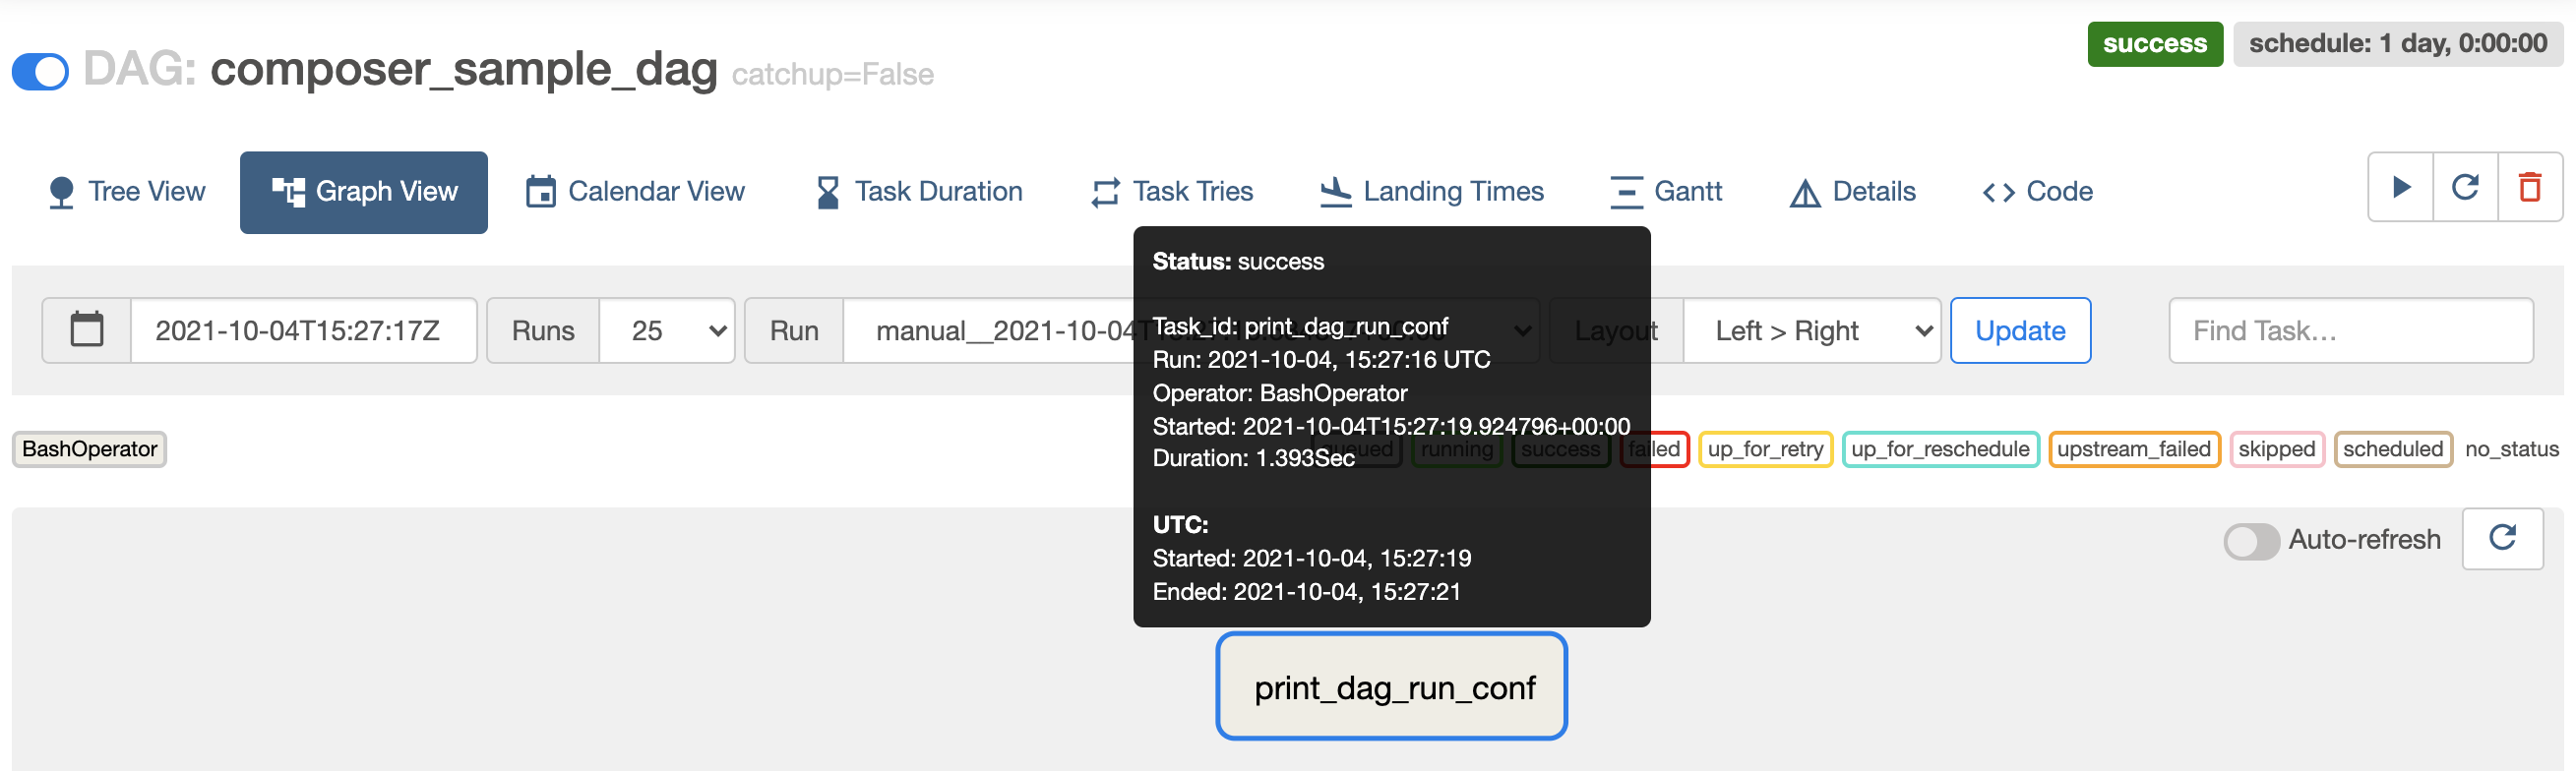
Figure 3. Status of the print_dag_run_conf task Click the
print_dag_run_conftask.In the Task Instance context menu, you can get metadata and perform some actions.
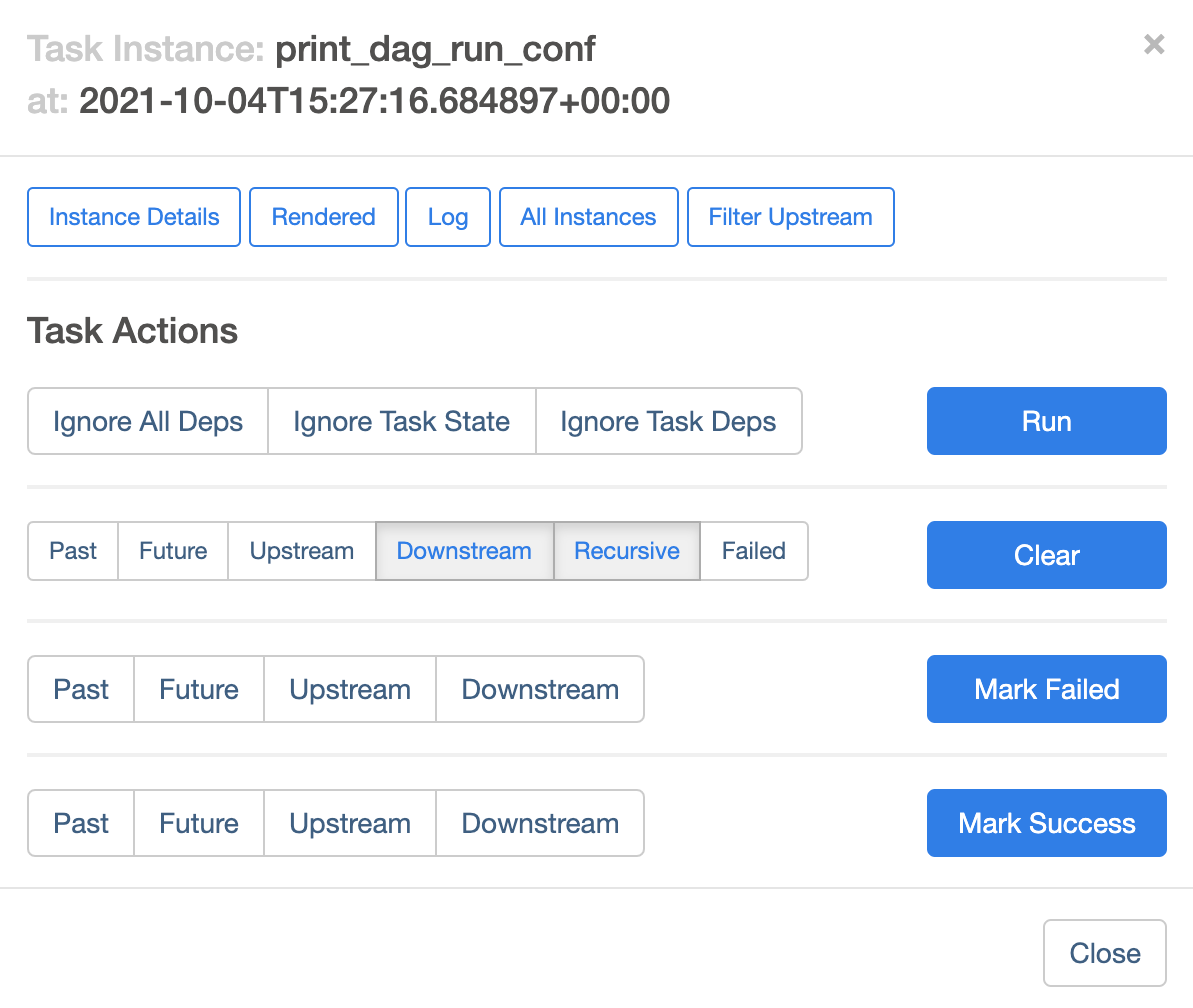
Figure 4. Task Instance context menu for the composer_sample_dags task In the Task Instance context menu, click Log.
In the log, look for
Running command: ['bash'to see the output from the bash operator.[2021-10-04 15:27:21,029] {subprocess.py:63} INFO - Running command: ['bash', '-c', 'echo 735'] [2021-10-04 15:27:21,167] {subprocess.py:74} INFO - Output: [2021-10-04 15:27:21,168] {subprocess.py:78} INFO - 735 [2021-10-04 15:27:21,168] {subprocess.py:82} INFO - Command exited with return code 0
Clean up
To avoid incurring charges to your Google Cloud account for the resources used on this page, follow these steps.
Delete the resources used in this tutorial:
Delete the Cloud Composer environment:
In the Google Cloud console, go to the Environments page.
Select
example-environmentand click Delete.Wait until the environment is deleted.
Delete your environment's bucket. Deleting the Cloud Composer environment does not delete its bucket.
In the Google Cloud console, go to the Storage > Browser page.
Select the environment's bucket and click Delete. For example, this bucket can be named
us-central1-example-environ-c1616fe8-bucket.
Delete the persistent disk of your environment's Redis queue. Deleting the Cloud Composer environment does not delete its persistent disk.
In the Google Cloud console, go to the Compute Engine > Disks.
Select the environment's Redis queue persistent disk and click Delete.
For example, this disk can be named
gke-us-central1-exampl-pvc-b12055b6-c92c-43ff-9de9-10f2cc6fc0ee. Disks for Cloud Composer 1 always have theStandard persistent disktype and the size of 2 GB.