Avant de commencer
Si ce n'est pas déjà fait, configurez un projet Google Cloud et deux (2) buckets Cloud Storage.
Configurer votre projet
- Sign in to your Google Cloud account. If you're new to Google Cloud, create an account to evaluate how our products perform in real-world scenarios. New customers also get $300 in free credits to run, test, and deploy workloads.
-
In the Google Cloud console, on the project selector page, select or create a Google Cloud project.
Roles required to select or create a project
- Select a project: Selecting a project doesn't require a specific IAM role—you can select any project that you've been granted a role on.
-
Create a project: To create a project, you need the Project Creator
(
roles/resourcemanager.projectCreator), which contains theresourcemanager.projects.createpermission. Learn how to grant roles.
-
Verify that billing is enabled for your Google Cloud project.
-
Enable the Dataproc, Compute Engine, Cloud Storage, and Cloud Run functions APIs.
Roles required to enable APIs
To enable APIs, you need the Service Usage Admin IAM role (
roles/serviceusage.serviceUsageAdmin), which contains theserviceusage.services.enablepermission. Learn how to grant roles. -
Install the Google Cloud CLI.
-
Si vous utilisez un fournisseur d'identité (IdP) externe, vous devez d'abord vous connecter à la gcloud CLI avec votre identité fédérée.
-
Pour initialiser la gcloud CLI, exécutez la commande suivante :
gcloud init -
In the Google Cloud console, on the project selector page, select or create a Google Cloud project.
Roles required to select or create a project
- Select a project: Selecting a project doesn't require a specific IAM role—you can select any project that you've been granted a role on.
-
Create a project: To create a project, you need the Project Creator
(
roles/resourcemanager.projectCreator), which contains theresourcemanager.projects.createpermission. Learn how to grant roles.
-
Verify that billing is enabled for your Google Cloud project.
-
Enable the Dataproc, Compute Engine, Cloud Storage, and Cloud Run functions APIs.
Roles required to enable APIs
To enable APIs, you need the Service Usage Admin IAM role (
roles/serviceusage.serviceUsageAdmin), which contains theserviceusage.services.enablepermission. Learn how to grant roles. -
Install the Google Cloud CLI.
-
Si vous utilisez un fournisseur d'identité (IdP) externe, vous devez d'abord vous connecter à la gcloud CLI avec votre identité fédérée.
-
Pour initialiser la gcloud CLI, exécutez la commande suivante :
gcloud init - In the Google Cloud console, go to the Cloud Storage Buckets page.
- Click Create.
- On the Create a bucket page, enter your bucket information. To go to the next
step, click Continue.
-
In the Get started section, do the following:
- Enter a globally unique name that meets the bucket naming requirements.
- To add a
bucket label,
expand the Labels section (),
click add_box
Add label, and specify a
keyand avaluefor your label.
-
In the Choose where to store your data section, do the following:
- Select a Location type.
- Choose a location where your bucket's data is permanently stored from the Location type drop-down menu.
- If you select the dual-region location type, you can also choose to enable turbo replication by using the relevant checkbox.
- To set up cross-bucket replication, select
Add cross-bucket replication via Storage Transfer Service and
follow these steps:
Set up cross-bucket replication
- In the Bucket menu, select a bucket.
In the Replication settings section, click Configure to configure settings for the replication job.
The Configure cross-bucket replication pane appears.
- To filter objects to replicate by object name prefix, enter a prefix that you want to include or exclude objects from, then click Add a prefix.
- To set a storage class for the replicated objects, select a storage class from the Storage class menu. If you skip this step, the replicated objects will use the destination bucket's storage class by default.
- Click Done.
-
In the Choose how to store your data section, do the following:
- Select a default storage class for the bucket or Autoclass for automatic storage class management of your bucket's data.
- To enable hierarchical namespace, in the Optimize storage for data-intensive workloads section, select Enable hierarchical namespace on this bucket.
- In the Choose how to control access to objects section, select whether or not your bucket enforces public access prevention, and select an access control method for your bucket's objects.
-
In the Choose how to protect object data section, do the
following:
- Select any of the options under Data protection that you
want to set for your bucket.
- To enable soft delete, click the Soft delete policy (For data recovery) checkbox, and specify the number of days you want to retain objects after deletion.
- To set Object Versioning, click the Object versioning (For version control) checkbox, and specify the maximum number of versions per object and the number of days after which the noncurrent versions expire.
- To enable the retention policy on objects and buckets, click the Retention (For compliance) checkbox, and then do the following:
- To enable Object Retention Lock, click the Enable object retention checkbox.
- To enable Bucket Lock, click the Set bucket retention policy checkbox, and choose a unit of time and a length of time for your retention period.
- To choose how your object data will be encrypted, expand the Data encryption section (), and select a Data encryption method.
- Select any of the options under Data protection that you
want to set for your bucket.
-
In the Get started section, do the following:
- Click Create.
- Créez le modèle de workflow.
  gcloud dataproc workflow-templates create wordcount-template \
      --region=us-central1
- Ajoutez la tâche WordCount au modèle de workflow.
-
Spécifiez le nom output-bucket-name avant d'exécuter la commande (votre fonction fournira le bucket d'entrée).
Une fois le nom du bucket de sortie inséré, l'argument de ce bucket doit se présenter comme suit :
gs://your-output-bucket/wordcount-output". -
L'ID de l'étape "count" est obligatoire et identifie la tâche Hadoop ajoutée.
          gcloud dataproc workflow-templates add-job hadoop \
              --workflow-template=wordcount-template \
              --step-id=count \
              --jar=file:///usr/lib/hadoop-mapreduce/hadoop-mapreduce-examples.jar \
              --region=us-central1 \
              -- wordcount gs://input-bucket gs://output-bucket-name/wordcount-output
-
Spécifiez le nom output-bucket-name avant d'exécuter la commande (votre fonction fournira le bucket d'entrée).
Une fois le nom du bucket de sortie inséré, l'argument de ce bucket doit se présenter comme suit :
- Utilisez un cluster géré à nœud unique pour exécuter le workflow. Dataproc crée le cluster, y exécute le workflow, puis le supprime une fois le workflow terminé.
gcloud dataproc workflow-templates set-managed-cluster wordcount-template \ --cluster-name=wordcount \ --single-node \ --region=us-central1 - Cliquez sur le nom
wordcount-templatesur la page Workflows Dataproc dans la console Google Cloud pour ouvrir la page Détails du modèle de workflow. Confirmez les attributs du modèle Wordcount.
- Exportez le modèle de workflow dans un fichier texte
wordcount.yamlpour le paramétrage.gcloud dataproc workflow-templates export wordcount-template \ --destination=wordcount.yaml \ --region=us-central1
- À l'aide d'un éditeur de texte, ouvrez le fichier
wordcount.yaml, puis ajoutez un blocparametersà la fin du fichier YAML pour que l'élément "INPUT_BUCKET_URI" Cloud Storage puisse être transmis en tant queargs[1]au fichier binaire WordCount lors du déclenchement du workflow.Vous trouverez ci-dessous un exemple de fichier YAML exporté. Vous pouvez adopter l'une des deux méthodes suivantes pour mettre à jour votre modèle :
- Copiez, puis collez l'intégralité du fichier pour remplacer le fichier
wordcount.yamlexporté après avoir remplacé your-output_bucket par le nom du bucket de sortie. OU - Copiez, puis collez uniquement la section
parametersà la fin du fichierwordcount.yamlexporté.
jobs: - hadoopJob: args: - wordcount - gs://input-bucket - gs://your-output-bucket/wordcount-output mainJarFileUri: file:///usr/lib/hadoop-mapreduce/hadoop-mapreduce-examples.jar stepId: count placement: managedCluster: clusterName: wordcount config: softwareConfig: properties: dataproc:dataproc.allow.zero.workers: 'true' parameters: - name: INPUT_BUCKET_URI description: wordcount input bucket URI fields: - jobs['count'].hadoopJob.args[1] - Copiez, puis collez l'intégralité du fichier pour remplacer le fichier
- Importez le fichier texte
wordcount.yamlparamétré. Saisissez "Y" (Oui) lorsque vous êtes invité à écraser le modèle.gcloud dataproc workflow-templates import wordcount-template \ --source=wordcount.yaml \ --region=us-central1
Ouvrez la page Cloud Run Functions dans la consoleGoogle Cloud , puis cliquez sur CRÉER UNE FONCTION.
Sur la page Créer une fonction, saisissez ou sélectionnez les informations suivantes :
- Nom : wordcount
- Mémoire allouée : conservez la valeur sélectionnée par défaut.
- Déclencheur :
- Cloud Storage
- Type d'événement : finaliser/créer
- Bucket : sélectionnez votre bucket d'entrée (consultez la section Créer un bucket Cloud Storage dans votre projet). Lorsqu'un fichier est ajouté à ce bucket, la fonction déclenche le workflow. Le workflow exécutera l'application WordCount, qui traitera tous les fichiers texte du bucket.
Code source :
- Éditeur intégré
- runtime : nodej.js 8
- Onglet
INDEX.JS: remplacez l'extrait de code par défaut par le code suivant, puis modifiez la ligneconst projectIdpour fournir -your-project-id- (sans ajouter "-" au début ou à la fin).
const dataproc = require('@google-cloud/dataproc').v1; exports.startWorkflow = (data) => { const projectId = '-your-project-id-' const region = 'us-central1' const workflowTemplate = 'wordcount-template' const client = new dataproc.WorkflowTemplateServiceClient({ apiEndpoint: `${region}-dataproc.googleapis.com`, }); const file = data; console.log("Event: ", file); const inputBucketUri = `gs://${file.bucket}/${file.name}`; const request = { name: client.projectRegionWorkflowTemplatePath(projectId, region, workflowTemplate), parameters: {"INPUT_BUCKET_URI": inputBucketUri} }; client.instantiateWorkflowTemplate(request) .then(responses => { console.log("Launched Dataproc Workflow:", responses[1]); }) .catch(err => { console.error(err); }); };- Onglet
PACKAGE.JSON: remplacez l'extrait de code par défaut par le code suivant.
{ "name": "dataproc-workflow", "version": "1.0.0", "dependencies":{ "@google-cloud/dataproc": ">=1.0.0"} }- Fonction à exécuter : insérer "startWorkflow".
Cliquez sur CREATE (Créer).
Copiez le fichier public
rose.txtdans votre bucket pour déclencher la fonction. Insérez your-input-bucket-name (le bucket utilisé pour déclencher votre fonction) dans la commande.gcloud storage cp gs://pub/shakespeare/rose.txt gs://your-input-bucket-name
Patientez 30 secondes, puis exécutez la commande suivante pour vérifier que la fonction s'est bien exécutée.
gcloud functions logs read wordcount
...
Function execution took 1348 ms, finished with status: 'ok'
Pour afficher les journaux de la fonction à partir de la page Fonctions de la console Google Cloud , cliquez sur le nom de la fonction
wordcount, puis sur "AFFICHER LES JOURNAUX" sur la page Détails de la fonction.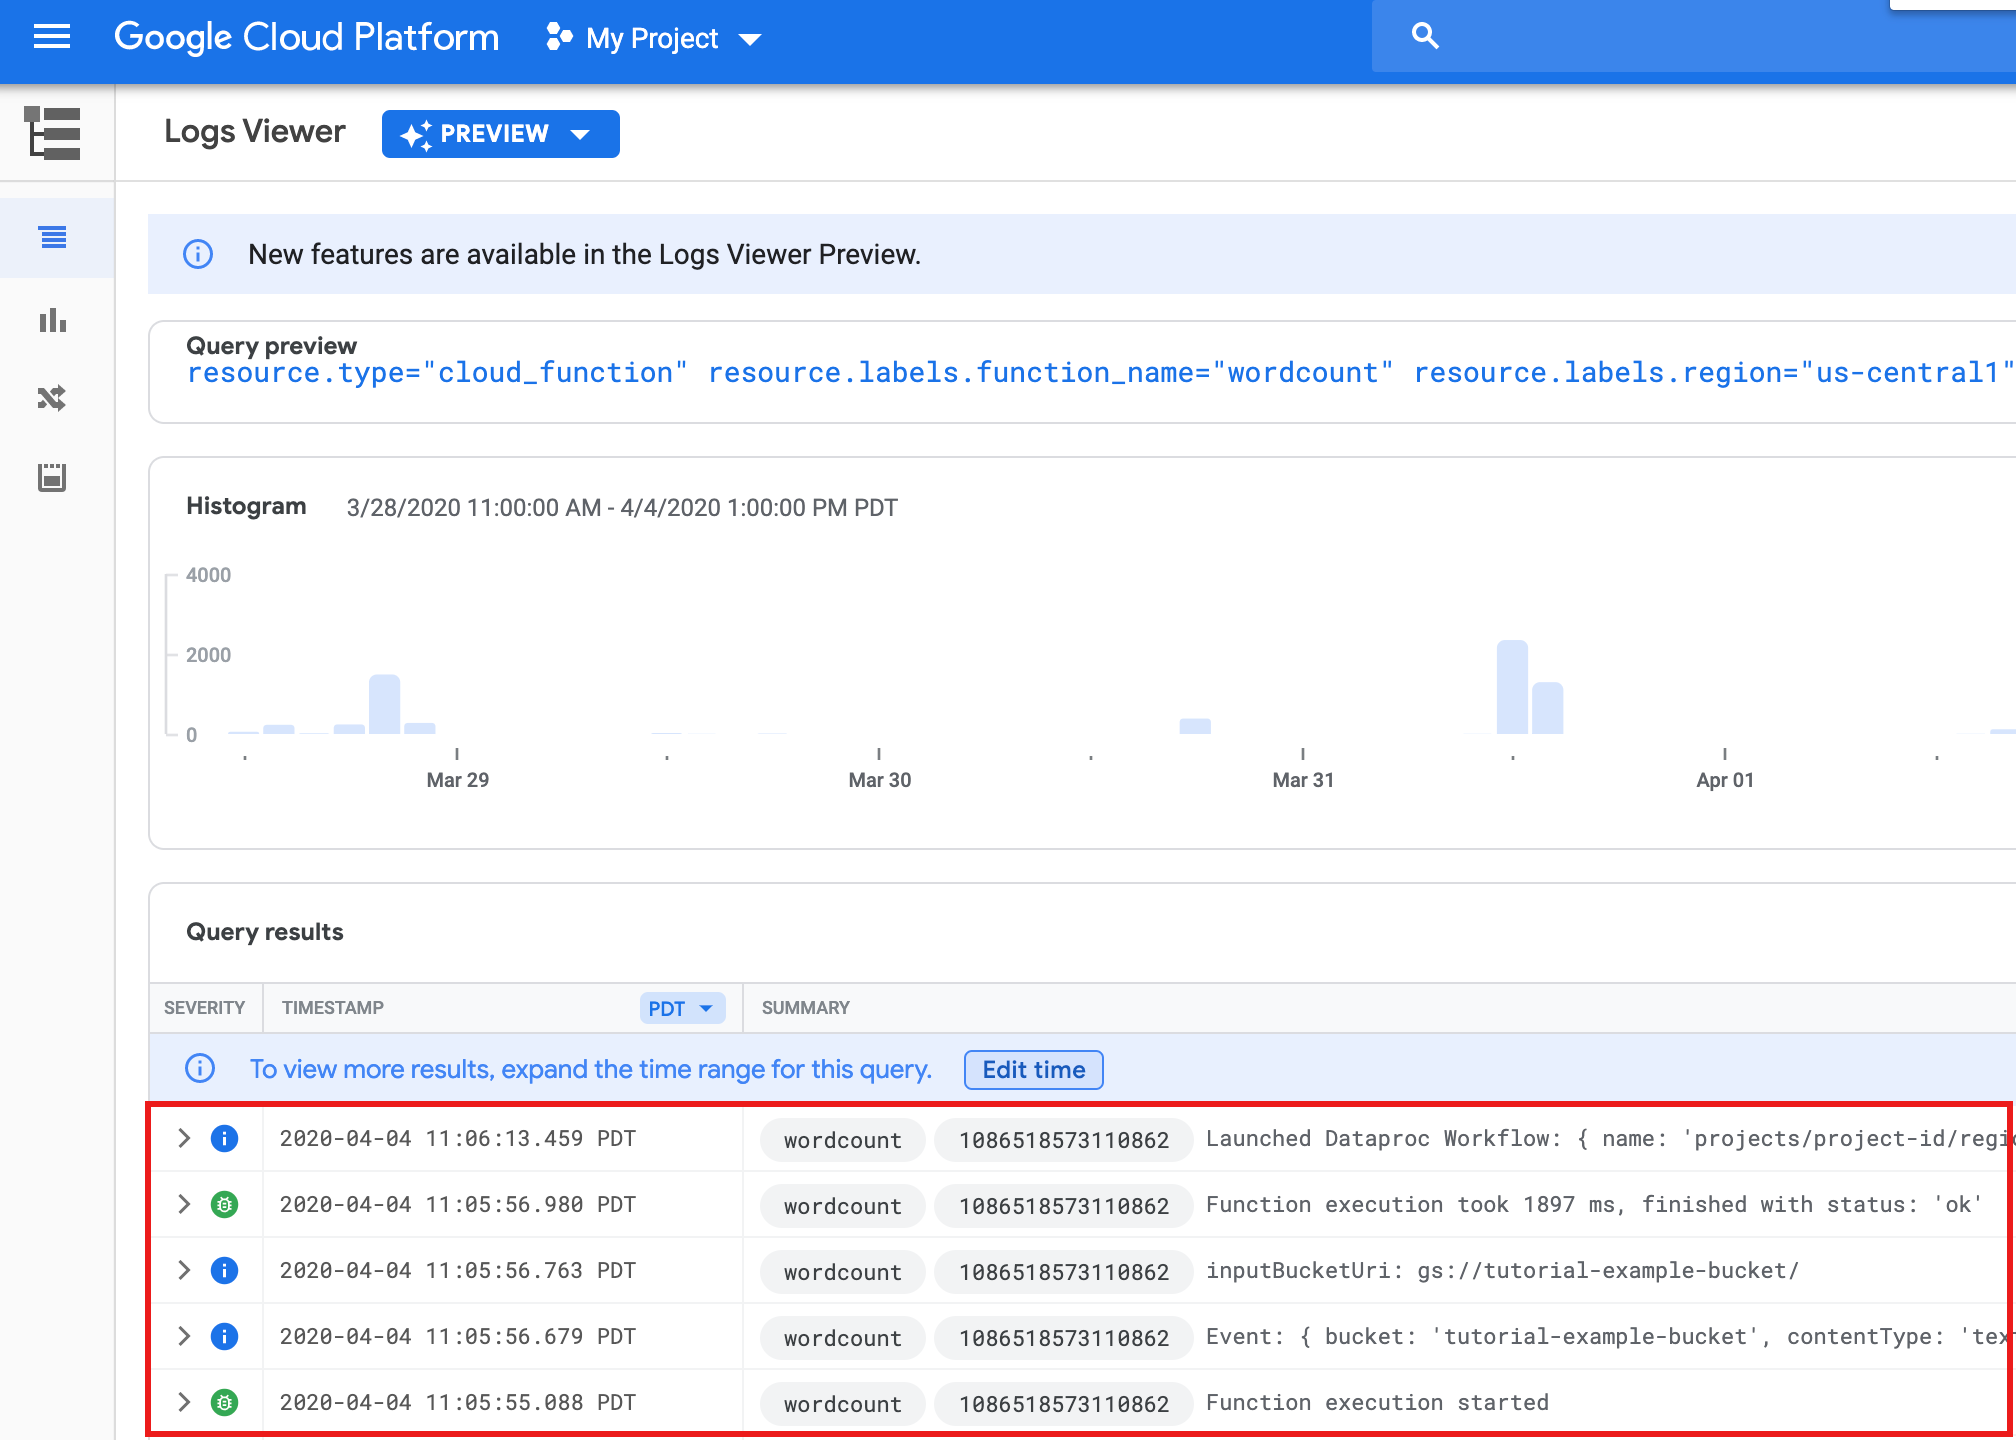
Vous pouvez afficher le dossier
wordcount-outputdans votre bucket de sortie à partir de la page Navigateur Storage de la consoleGoogle Cloud .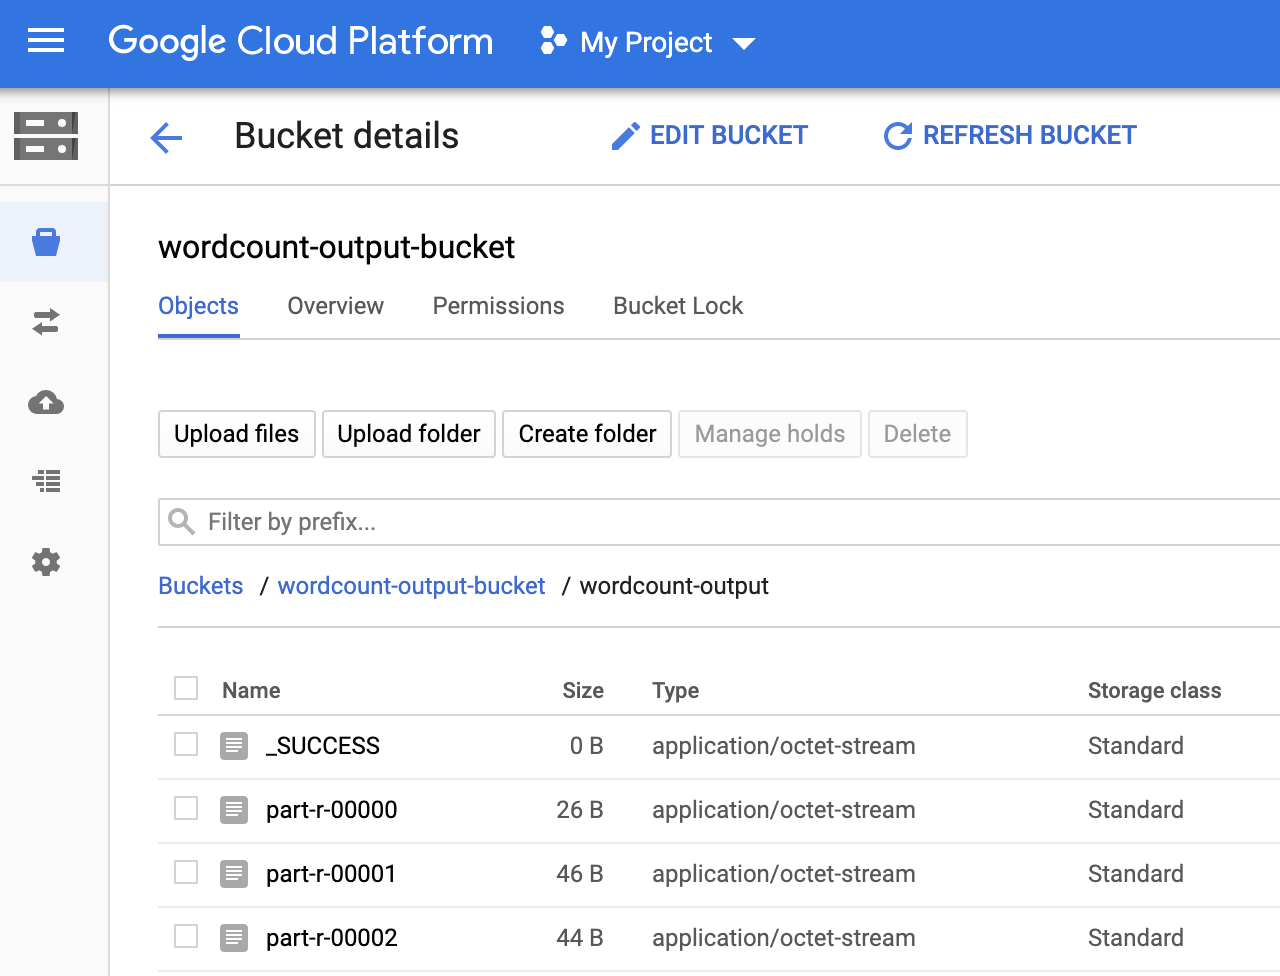
Une fois le workflow terminé, les détails de la tâche sont conservés dans la consoleGoogle Cloud . Cliquez sur le job
count...listé sur la page Jobs (Tâches) de Dataproc pour afficher les détails du job de workflow.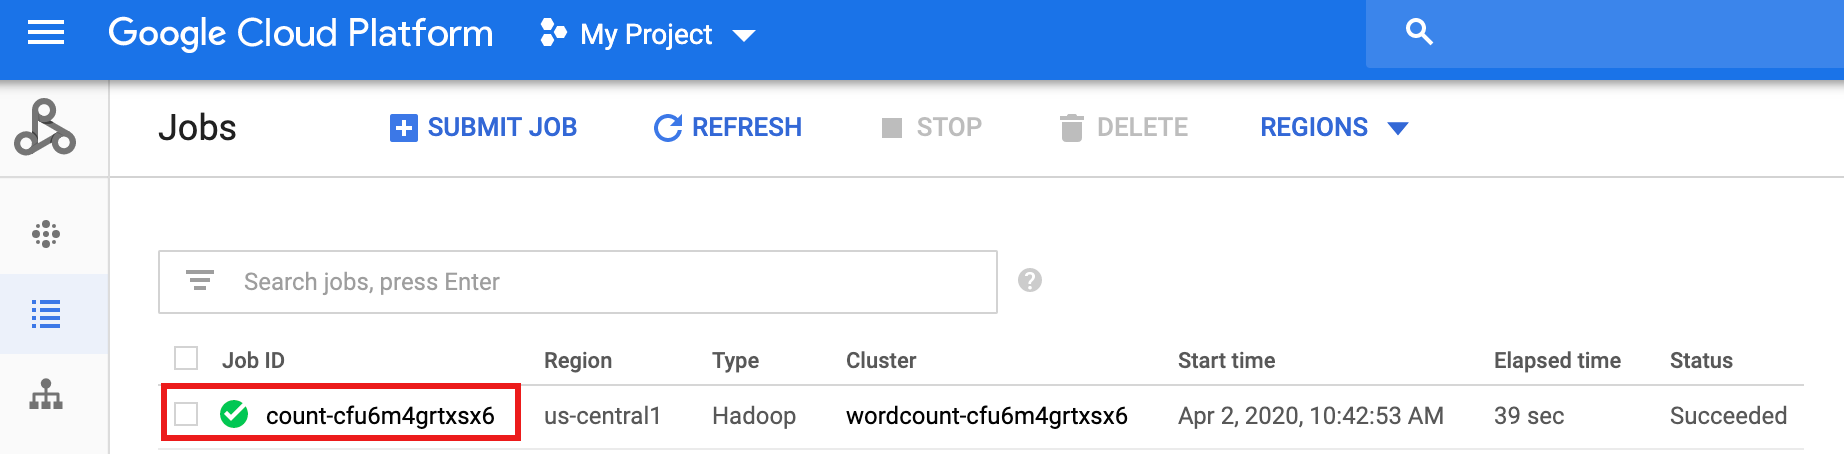
- In the Google Cloud console, go to the Manage resources page.
- In the project list, select the project that you want to delete, and then click Delete.
- In the dialog, type the project ID, and then click Shut down to delete the project.
- In the Google Cloud console, go to the Cloud Storage Buckets page.
- Click the checkbox for the bucket that you want to delete.
- To delete the bucket, click Delete, and then follow the instructions.
- Consultez la présentation des modèles de workflow Dataproc.
- Consultez Solutions de planification des workflows.
Créer ou utiliser deux buckets Cloud Storage dans votre projet
Vous aurez besoin de deux buckets Cloud Storage dans votre projet : un pour les fichiers d'entrée et un pour les fichiers de sortie.
Créer un modèle de flux de travail
Pour créer et définir un modèle de workflow, copiez et exécutez les commandes suivantes dans une fenêtre de terminal local ou dans Cloud Shell.
Paramétrer le modèle de workflow
Paramétrez la variable du bucket d'entrée à transmettre au modèle de workflow.
Créer une fonction Cloud
Tester votre fonction
Effectuer un nettoyage
Une fois terminé, le workflow de ce tutoriel supprime son cluster géré. Pour éviter les frais récurrents, vous pouvez supprimer d'autres ressources associées à ce tutoriel.
Supprimer un projet
Supprimer les buckets Cloud Storage
Supprimer votre modèle de workflow
gcloud dataproc workflow-templates delete wordcount-template \
    --region=us-central1
Supprimer votre fonction Cloud
Ouvrez la page Fonctions Cloud Run dans la console Google Cloud , cochez la case à gauche de la fonction wordcount, puis cliquez sur Supprimer.