このページでは、Microsoft SQL Server テーブルからデータを読み取るようにデータ パイプラインを設定する方法について説明します。
SQL Server のパスワードをセキュリティ キーとして保存する
Cloud Data Fusion インスタンスに、SQL Server のパスワードを安全な鍵として追加します。
Cloud Data Fusion で、[システム管理] をクリックします。
[構成] タブをクリックします。
[Make HTTP Calls] をクリックします。
![[Configuration] タブ。](https://cloud.google.com/static/data-fusion/docs/images/how-to/reading-from-sqlserver/config.png?hl=ja)
[PUT] を選択します。
[Path] フィールドに「
namespaces/NAMESPACE_ID/securekeys/password」と入力します。[Body] フィールドに「
{"data":"password"}」と入力します。 password は SQL Server のパスワードに置き換えます。[送信] をクリックします。
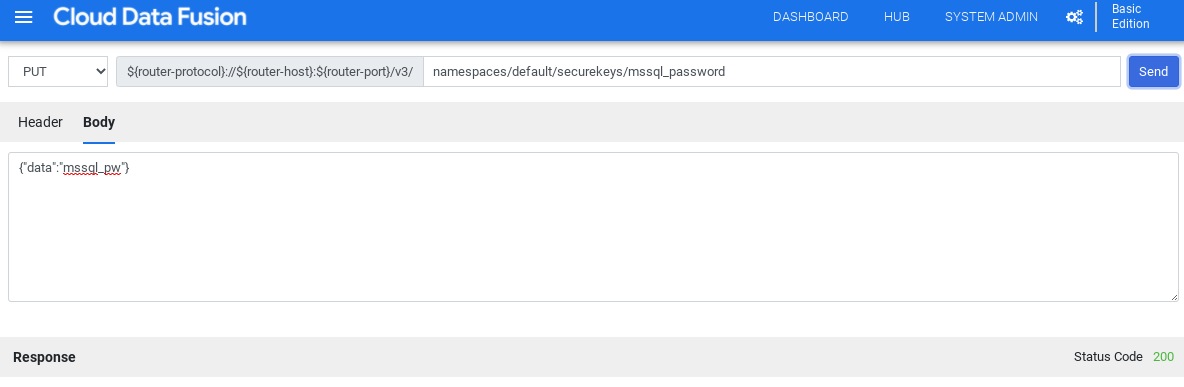
続行するには、[レスポンス] にステータス コード 200 が表示されている必要があります。
SQL Server の JDBC ドライバを取得する
ドライバは、ハブまたは Cloud Data Fusion の Pipeline Studio から入手できます。
ハブ
Cloud Data Fusion UI で、[Hub] をクリックします。
検索バーに「
SQL Server JDBC Driver」と入力して、ドライバを選択します。[ダウンロード] をクリックします。表示されたダウンロード手順に沿って操作します。
[Deploy] をクリックします。前の手順で作成した Jar ファイルをアップロードします。
[完了] をクリックします。
Pipeline Studio
Microsoft.com にアクセスします。
ダウンロードするファイルを選択して、[ダウンロード] をクリックします。
Cloud Data Fusion で、menu メニューをクリックし、[Pipeline Studio] ページに移動します。
[追加] をクリックします。
ドライバの場合は、[アップロード] をクリックします。
jre7フォルダにある JAR ファイルを選択します。[Next] をクリックします。
ドライバを構成するには、[名前] と [クラス名] に入力します。
[完了] をクリックします。
SQL Server プラグインをデプロイする
Cloud Data Fusion で [Hub] をクリックします。
検索バーに「
SQL Server Plugins」と入力します。[SQL Server プラグイン] をクリックします。
[デプロイ] をクリックします。
[完了] をクリックします。
[Create a pipeline] をクリックします。
SQL Server に接続する
Wrangler または Pipeline Studio の Cloud Data Fusion から SQL Server に接続できます。
Wrangler
Cloud Data Fusion で、menu [メニュー] をクリックし、[Wrangler] ページに移動します。
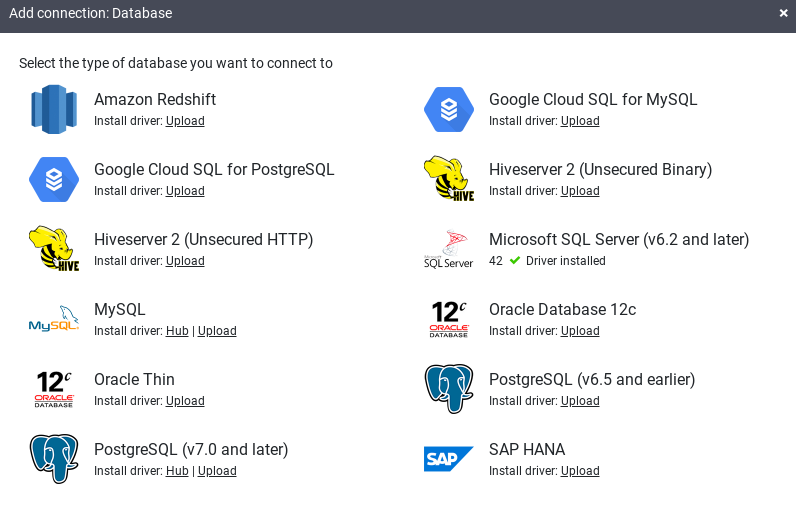
[Add connection] をクリックします。
[接続を追加] ウィンドウが開きます。
[SQL Server] をクリックして、ドライバがインストールされていることを確認します。
必要な接続フィールドに詳細情報を入力します。[Password] フィールドで、前に保存したセキュリティ キーを選択します。これにより、Cloud KMS を使用してパスワードが取得されるようになります。

データベースとの接続を確立できることを確認するには、[テスト接続] をクリックします。
[Add connection] をクリックします。
SQL Server データベースが接続され、SQL Server テーブルから読み取るパイプラインを作成したら、変換を適用して出力をシンクに書き込むことができます。
Pipeline Studio
Cloud Data Fusion インスタンスを開き、[Pipeline Studio] ページに移動します。
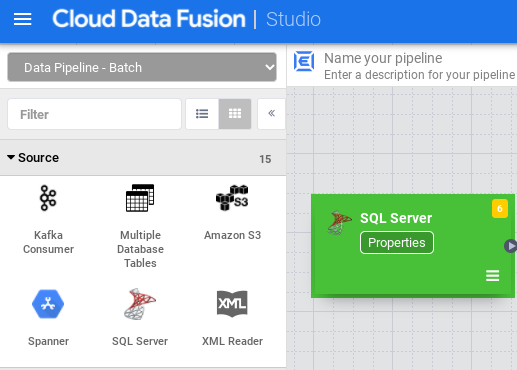
[ソース] メニューを展開し、[SQL Server] をクリックします。
[SQL Server] ノードで、[プロパティ] をクリックします。
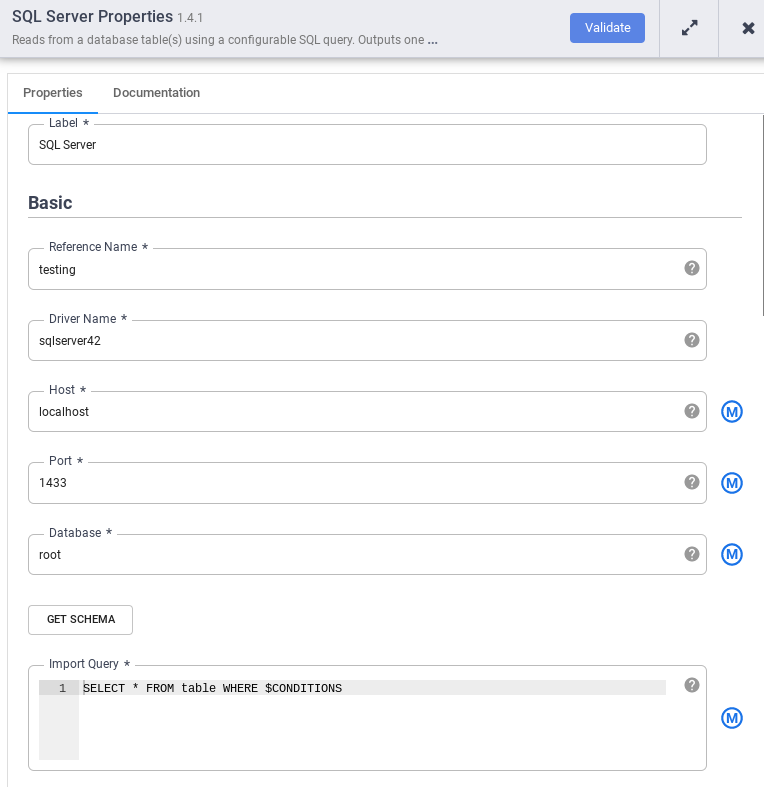
[参照名] フィールドに、SQL Server ソースを識別する名前を入力します。
[データベース] フィールドに、接続先のデータベースの名前を入力します。
[インポート クエリ] フィールドに、実行するクエリを入力します。例:
SELECT * FROM table WHERE $CONDITIONS。[検証] をクリックします。
[閉じる] をクリックします。
SQL Server データベースが接続され、SQL Server テーブルから読み取るパイプラインを作成したら、必要な変換を追加して、出力をシンクに書き込みます。