Ce rôle prédéfini contient les autorisations requises pour gérer les modèles. Pour connaître les autorisations exactes requises, développez la section Autorisations requises :
Autorisations requises
Les autorisations suivantes sont requises pour gérer les modèles :
Modifier des modèles :
integrations.templates.update
Supprimer des modèles :
integrations.templates.delete
La page Modèles s'affiche et liste tous les modèles (globaux, partagés et de projet) disponibles dans votre projet Google Cloud.
Pour modifier un modèle partagé, cliquez sur l'onglet Modèles partagés. Pour modifier un modèle de projet, cliquez sur l'onglet Modèles de projet.
Cliquez sur le modèle que vous souhaitez modifier dans l'onglet sélectionné.
Sur la page des détails du modèle, cliquez sur ModifierModifier.
Le volet Modifier le modèle s'affiche.
Saisissez le nom de la nouvelle version de l'intégration et, éventuellement, une description.
Cliquez sur Créer et modifier.
La page de l'éditeur d'intégration s'affiche avec le volet Variables de configuration ouvert.
Modifiez les variables de configuration de votre modèle (le cas échéant), puis cliquez sur OK. Cliquez sur Annuler pour ignorer cette étape.
Sur la page de l'éditeur d'intégration, ajoutez ou modifiez les composants requis : tâches, déclencheurs ou connecteurs. Une fois votre modèle d'intégration prêt, passez à l'étape suivante.
Dans la barre de navigation de l'éditeur d'intégration, cliquez sur Modèles > Modifier le modèle.
L'éditeur d'intégration passe en mode d'édition de modèle, ce qui bloque temporairement toute autre action sur l'intégration. Le volet Modifier le modèle s'affiche.
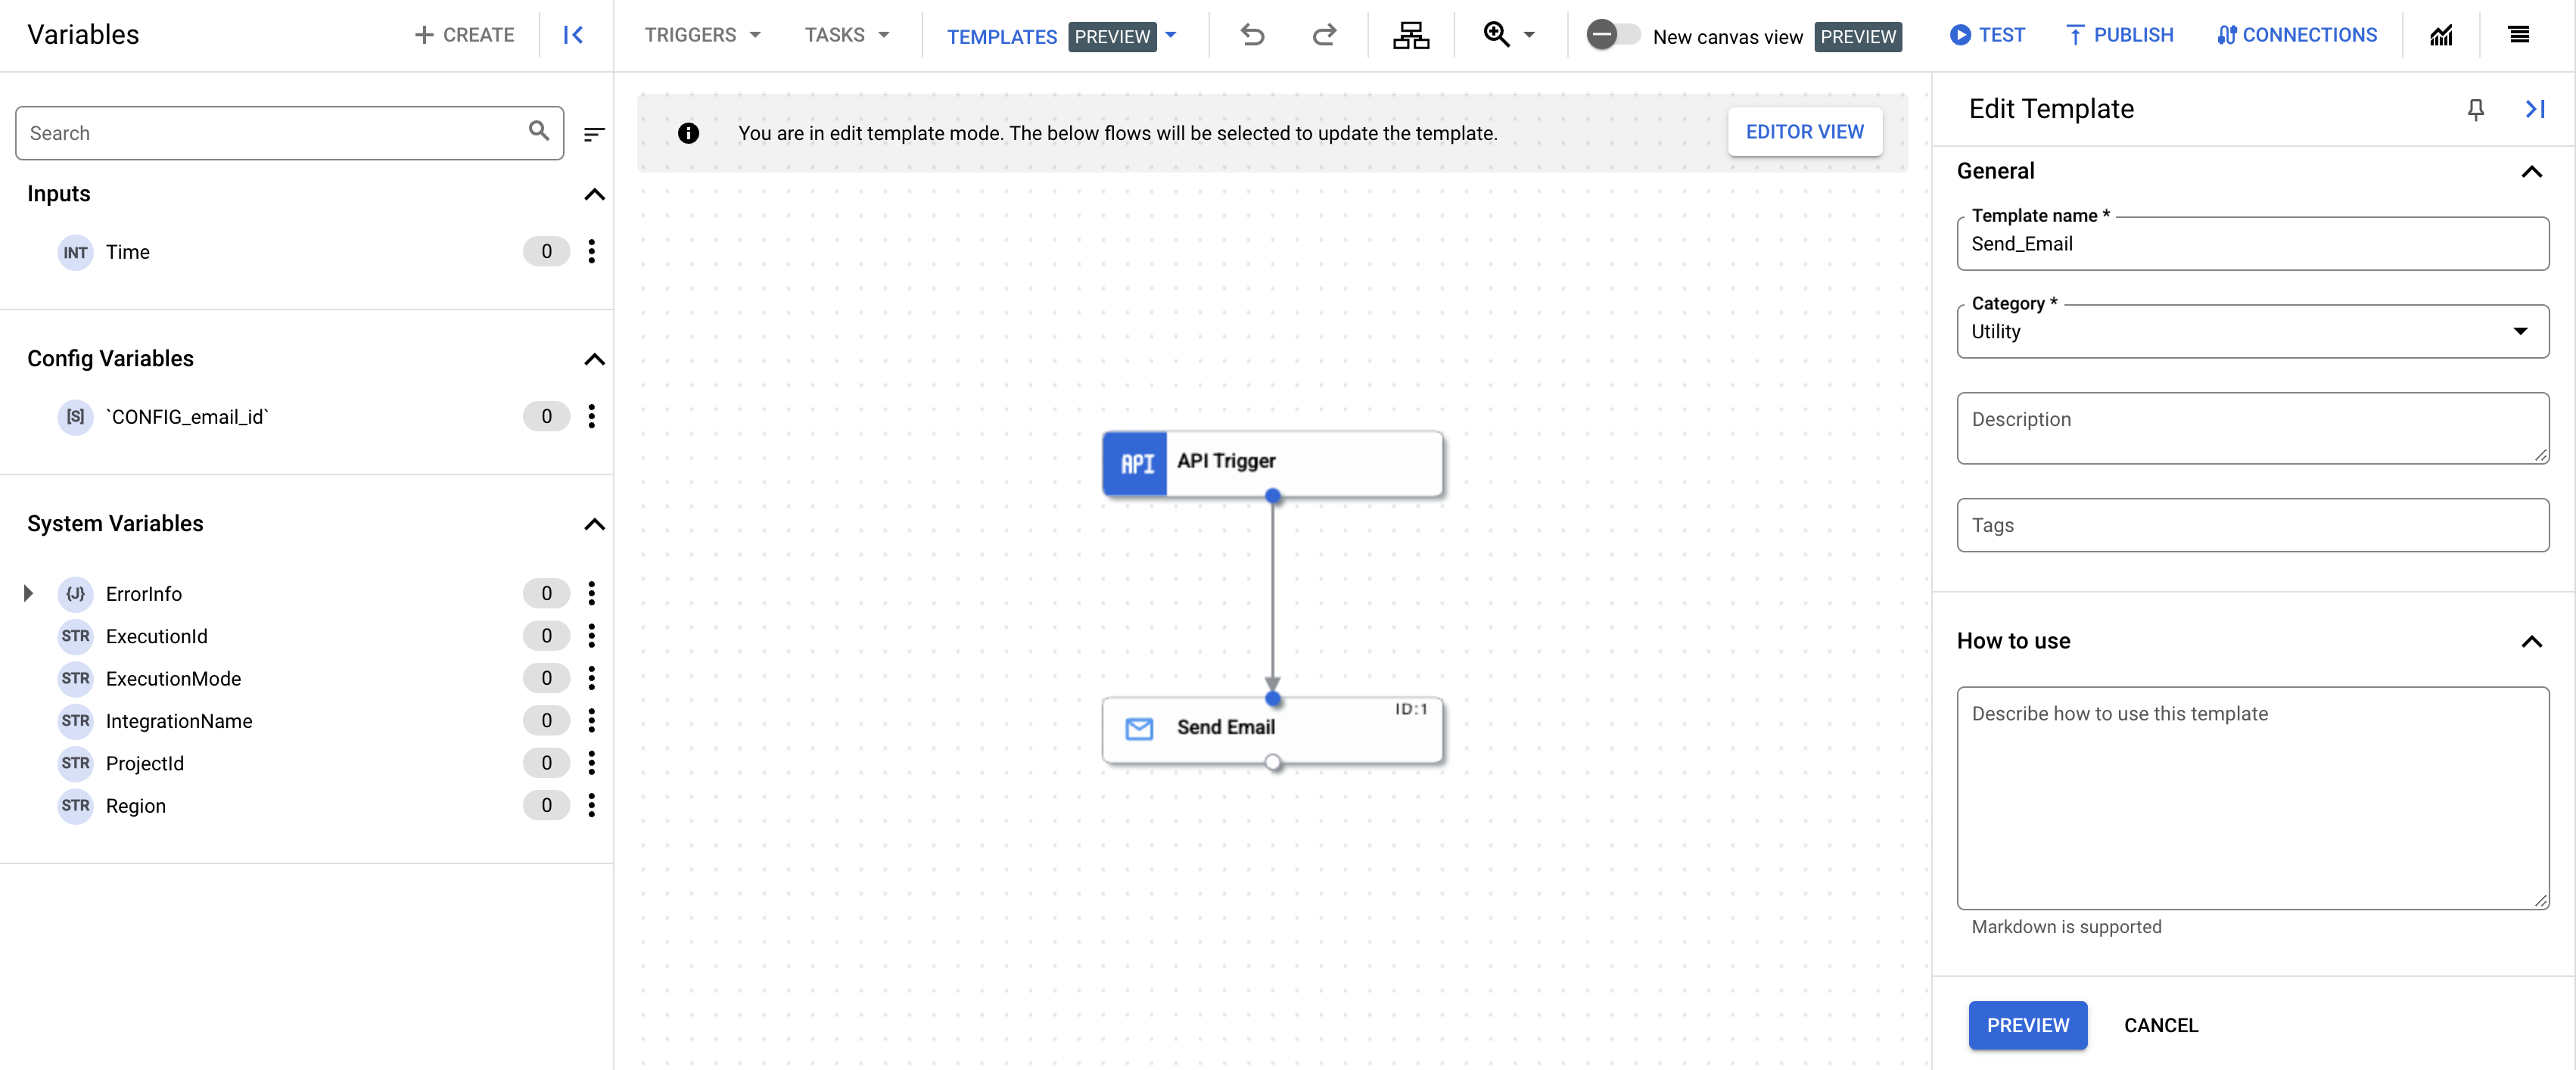
Apportez les modifications souhaitées aux détails du modèle, puis cliquez sur Aperçu.
Vérifiez toutes les modifications apportées au modèle, puis cliquez sur Mettre à jour le modèle.
Le modèle existant est mis à jour avec les modifications que vous avez apportées. Pour afficher le modèle mis à jour, accédez à la page Modèles et cliquez sur l'onglet Modèles de projet.
Supprimer des modèles
Pour supprimer un modèle :
Dans la console Google Cloud , accédez à la page Modèles.
Sauf indication contraire, le contenu de cette page est régi par une licence Creative Commons Attribution 4.0, et les échantillons de code sont régis par une licence Apache 2.0. Pour en savoir plus, consultez les Règles du site Google Developers. Java est une marque déposée d'Oracle et/ou de ses sociétés affiliées.
Dernière mise à jour le 2025/09/03 (UTC).
[[["Facile à comprendre","easyToUnderstand","thumb-up"],["J'ai pu résoudre mon problème","solvedMyProblem","thumb-up"],["Autre","otherUp","thumb-up"]],[["Difficile à comprendre","hardToUnderstand","thumb-down"],["Informations ou exemple de code incorrects","incorrectInformationOrSampleCode","thumb-down"],["Il n'y a pas l'information/les exemples dont j'ai besoin","missingTheInformationSamplesINeed","thumb-down"],["Problème de traduction","translationIssue","thumb-down"],["Autre","otherDown","thumb-down"]],["Dernière mise à jour le 2025/09/03 (UTC)."],[[["\u003cp\u003eThis page outlines how to manage project templates within Google Cloud's Application Integration, specifically how to edit and delete them.\u003c/p\u003e\n"],["\u003cp\u003eTo manage templates, users need the Application Integration Editor role, which grants permissions like \u003ccode\u003eintegrations.templates.update\u003c/code\u003e for editing and \u003ccode\u003eintegrations.templates.delete\u003c/code\u003e for deletion.\u003c/p\u003e\n"],["\u003cp\u003eEditing a template requires creating a new integration version from it, making the necessary modifications, and then updating the existing template with the new changes, which does not affect previously created integrations.\u003c/p\u003e\n"],["\u003cp\u003eDeleting a template is straightforward and achieved via the "Remove template" option on the template details page, but note that deleting a template won't delete integrations created from it.\u003c/p\u003e\n"],["\u003cp\u003eThe document refers the reader to use templates to create an integration, to import and download, to share and to learn how to create templates.\u003c/p\u003e\n"]]],[],null,["# Manage templates\n\nSee the [supported connectors](/integration-connectors/docs/connector-reference-overview) for Application Integration.\n\nManage templates\n================\n\n|\n| **Preview\n| --- templates**\n|\n|\n| This feature is subject to the \"Pre-GA Offerings Terms\" in the General Service Terms section\n| of the [Service Specific Terms](/terms/service-terms#1).\n|\n| Pre-GA features are available \"as is\" and might have limited support.\n|\n| For more information, see the\n| [launch stage descriptions](/products#product-launch-stages).\n\n\nThis page describes how to edit and delete project templates in your Google Cloud project.\n\nRequired role\n-------------\n\n\nTo get the permissions that\nyou need to manage templates,\n\nask your administrator to grant you the\n\n\n[Application Integration Editor](/iam/docs/roles-permissions/integrations#integrations.integrationEditor) (`roles/integrations.integrationEditor`)\nIAM role on the project.\n\n\nFor more information about granting roles, see [Manage access to projects, folders, and organizations](/iam/docs/granting-changing-revoking-access).\n\n\nThis predefined role contains\n\nthe permissions required to manage templates. To see the exact permissions that are\nrequired, expand the **Required permissions** section:\n\n\n#### Required permissions\n\nThe following permissions are required to manage templates:\n\n- Edit templates: ` integrations.templates.update `\n- Delete templates: ` integrations.templates.delete`\n\n\nYou might also be able to get\nthese permissions\nwith [custom roles](/iam/docs/creating-custom-roles) or\nother [predefined roles](/iam/docs/roles-overview#predefined).\n\nEdit templates\n--------------\n\nTo edit an existing project template, do the following:\n| **Note:** Editing a template does not update the existing integration versions created from the template.\n\n\u003cbr /\u003e\n\n1. In the Google Cloud console, go to the **Application Integration** page.\n\n [Go to Application Integration](https://console.cloud.google.com/integrations)\n2. In the navigation menu, click **Templates** .\n\n The **Templates** page appears listing all the templates (global, shared, and project) available in your Google Cloud project.\n3. To edit a shared template, click the **Shared templates** tab. To edit a project template, click the **Project templates** tab.\n4. Click the template that you want to edit from the respective tab selected.\n5. In the template details page, click edit **Edit** .\n\n The **Edit template** pane appears.\n | **Note:** Application Integration currently only supports editing templates through a new intgeration version. You must therefore create a new integration version from the template, modify the integration, and then create a new template from the integration version.\n - Enter the name of the new integration version and optionally, a description for the new integration version.\n - Click **Create and edit** .\n\n The integration editor page appears with the **Config variables** pane open.\n\n \u003cbr /\u003e\n\n6. Modify the config variables for your template (if any) and click **Done** . Click **Cancel** to skip this step.\n7. In the integration editor page, add or modify the required components: [tasks](/application-integration/docs/tasks), [triggers](/application-integration/docs/triggers), or [connectors](/application-integration/docs/configure-connectors-task). Once your integration template is ready, go to the next step. **Tip:** Use [Config variables](/application-integration/docs/variables#config_var) when configuring the input and output parameters of the components of your integration. This allows you to create a template that can be used in multiple environments.\n8. Click **Templates \\\u003e Edit template** from the integration editor navigation bar.\n\n The integration editor switches to edit template mode, temporaily locking any further actions on the integration, and the **Edit Template** pane appears.\n\n\n9. Make any changes to the template details and click **Preview**.\n10. Review all your changes made to the template and click **Update template** .\n\n The existing template is updated with the changes you made. To view the updated template, go to the **Templates** page and click the [Project Templates](https://console.cloud.google.com/integrations/templates) tab.\n\nDelete templates\n----------------\n\nTo delete a template, do the following:\n\n1. In the Google Cloud console, go to the **Templates** page.\n\n [Go to Templates](https://console.cloud.google.com/integrations/templates)\n2. To delete a shared template, click the **Shared templates** tab. To delete a project template, click the **Project templates** tab.\n3. Click the template that you want to delete from the respective tab selected.\n4. In the template details page, click delete **Remove template** .\n\n A confirmation dialog appears.\n5. Click **Delete** to permanently delete the template.\n| **Notes:**\n|\n| - Deleting a template does not delete the integrations created from the template.\n| - You can only delete the project templates and shared templates that you own or have edit access to. Global templates cannot be deleted.\n\nWhat's next\n-----------\n\n- Learn how to use templates to create an integration, see [Create integrations from templates](/application-integration/docs/create-integration-from-templates).\n- Learn how to import and download templates, see [import and download templates](/application-integration/docs/manage-templates).\n- Learn how to create templates, see [create templates](/application-integration/docs/create-templates).\n- Learn how to share templates, see [share templates](/application-integration/docs/share-templates)."]]