本教程演示了如何使用 Google Kubernetes Engine (GKE) 构建多层 Web 应用。
在本教程中,您将执行以下操作:
此示例介绍了以下 Kubernetes 概念:
- 使用 YAML 清单文件的声明式配置
- Deployment,这是 Kubernetes 资源,用于确定一组副本 Pod 的配置
- Service,用于为一组 Pod 创建内部和外部负载均衡器
目标
如需在 GKE 上部署和运行应用,请执行以下操作:- 设置 Redis Leader
- 设置两个 Redis 关注者
- 设置 Web 前端
- 访问网站
- 纵向扩容 Web 前端
下图展示了完成上述目标后创建的集群架构概览:

费用
在本文档中,您将使用 Google Cloud的以下收费组件:
如需根据您的预计使用量来估算费用,请使用价格计算器。
完成本文档中描述的任务后,您可以通过删除所创建的资源来避免继续计费。如需了解详情,请参阅清理。
准备工作
Cloud Shell 中预安装了本教程所需的软件,包括 kubectl 和 gcloud CLI。如果您不使用 Cloud Shell,则必须安装 gcloud CLI。
- Sign in to your Google Cloud account. If you're new to Google Cloud, create an account to evaluate how our products perform in real-world scenarios. New customers also get $300 in free credits to run, test, and deploy workloads.
-
Install the Google Cloud CLI.
-
如果您使用的是外部身份提供方 (IdP),则必须先使用联合身份登录 gcloud CLI。
-
如需初始化 gcloud CLI,请运行以下命令:
gcloud init -
Create or select a Google Cloud project.
Roles required to select or create a project
- Select a project: Selecting a project doesn't require a specific IAM role—you can select any project that you've been granted a role on.
-
Create a project: To create a project, you need the Project Creator
(
roles/resourcemanager.projectCreator), which contains theresourcemanager.projects.createpermission. Learn how to grant roles.
-
Create a Google Cloud project:
gcloud projects create PROJECT_ID
Replace
PROJECT_IDwith a name for the Google Cloud project you are creating. -
Select the Google Cloud project that you created:
gcloud config set project PROJECT_ID
Replace
PROJECT_IDwith your Google Cloud project name.
-
Verify that billing is enabled for your Google Cloud project.
-
Enable the GKE API:
Roles required to enable APIs
To enable APIs, you need the Service Usage Admin IAM role (
roles/serviceusage.serviceUsageAdmin), which contains theserviceusage.services.enablepermission. Learn how to grant roles.gcloud services enable container.googleapis.com
-
Install the Google Cloud CLI.
-
如果您使用的是外部身份提供方 (IdP),则必须先使用联合身份登录 gcloud CLI。
-
如需初始化 gcloud CLI,请运行以下命令:
gcloud init -
Create or select a Google Cloud project.
Roles required to select or create a project
- Select a project: Selecting a project doesn't require a specific IAM role—you can select any project that you've been granted a role on.
-
Create a project: To create a project, you need the Project Creator
(
roles/resourcemanager.projectCreator), which contains theresourcemanager.projects.createpermission. Learn how to grant roles.
-
Create a Google Cloud project:
gcloud projects create PROJECT_ID
Replace
PROJECT_IDwith a name for the Google Cloud project you are creating. -
Select the Google Cloud project that you created:
gcloud config set project PROJECT_ID
Replace
PROJECT_IDwith your Google Cloud project name.
-
Verify that billing is enabled for your Google Cloud project.
-
Enable the GKE API:
Roles required to enable APIs
To enable APIs, you need the Service Usage Admin IAM role (
roles/serviceusage.serviceUsageAdmin), which contains theserviceusage.services.enablepermission. Learn how to grant roles.gcloud services enable container.googleapis.com
设置环境变量:
export PROJECT_ID=PROJECT_ID
export COMPUTE_LOCATION=COMPUTE_LOCATION
替换以下内容:
PROJECT_ID:您的 Google Cloud项目 IDCOMPUTE_LOCATION:Compute Engine 位置,例如us-central1。
克隆 GitHub 代码库:
git clone https://github.com/GoogleCloudPlatform/kubernetes-engine-samples切换到工作目录:
cd kubernetes-engine-samples/quickstarts/guestbook/以下清单描述了一个运行单个副本 Redis Leader Pod 的 Kubernetes Deployment:
将清单应用到您的集群:
kubectl apply -f redis-leader-deployment.yaml验证 Redis Leader Pod 是否正在运行:
kubectl get pods输出类似于以下内容:
NAME READY STATUS RESTARTS AGE redis-leader-343230949-qfvrq 1/1 Running 0 43sSTATUS可能需要几分钟才能从Pending变为Running。以下清单描述了 Redis Leader 的 Service:
此清单包含一组标签选择器。这些标签与上一步中部署的标签集匹配。因此,该 Service 将网络流量路由到上一步中创建的 Redis Leader Pod。
清单的
ports部分声明了单个端口映射。此 Service 将port: 6379上的流量路由到匹配指定selector标签的容器的targetPort: 6379。Deployment 中使用的containerPort必须与targetPort匹配才能将流量路由到 Deployment。将清单应用到您的集群:
kubectl apply -f redis-leader-service.yaml验证 GKE 是否已创建 Service:
kubectl get service输出类似于以下内容:
NAME CLUSTER-IP EXTERNAL-IP PORT(S) AGE kubernetes 10.51.240.1 <none> 443/TCP 42s redis-leader 10.51.242.233 <none> 6379/TCP 12s以下清单描述了 Redis 关注者 Pod 的 Deployment:
将清单应用到您的集群:
kubectl apply -f redis-follower-deployment.yaml验证这两个 Redis 关注者副本是否正在运行:
kubectl get pods输出类似于以下内容:
NAME READY STATUS RESTARTS AGE redis-follower-76588f55b7-bnsq6 1/1 Running 0 27s redis-follower-76588f55b7-qvtws 1/1 Running 0 27s redis-leader-dd446dc55-kl7nl 1/1 Running 0 119sSTATUS可能需要几分钟才能从Pending变为Running。以下清单描述了 Redis 关注者的 Service:
此清单指定了 Service 在端口 6379 上运行。Service 的
selector字段与上一步中创建的 Redis 关注者 Pod 匹配。将清单应用到您的集群:
kubectl apply -f redis-follower-service.yaml验证 GKE 是否已创建 Service:
kubectl get service输出类似于以下内容:
NAME CLUSTER-IP EXTERNAL-IP PORT(S) AGE kubernetes 10.51.240.1 <none> 443/TCP 1m redis-leader 10.51.242.233 <none> 6379/TCP 49s redis-follower 10.51.247.238 <none> 6379/TCP 3s以下清单描述了 Web 服务器的 Deployment:
清单文件指定了环境变量
GET_HOSTS_FROM=dns。当您将配置提供给该 Web 前端应用时,前端应用会使用主机名redis-follower和redis-leader来执行 DNS 查找。DNS 查找将查找您在先前步骤中创建的 Service 的 IP 地址。此概念称为 DNS 服务发现。将清单应用到您的集群:
kubectl apply -f frontend-deployment.yaml验证副本是否正在运行:
kubectl get pods -l app=guestbook -l tier=frontend输出类似于以下内容:
NAME READY STATUS RESTARTS AGE frontend-7b78458576-8kp8s 1/1 Running 0 37s frontend-7b78458576-gg86q 1/1 Running 0 37s frontend-7b78458576-hz87g 1/1 Running 0 37s增加
frontendPod 的数量:kubectl scale deployment frontend --replicas=5输出类似于以下内容:
deployment.extensions/frontend scaled验证正在运行的副本数:
kubectl get pods输出类似于以下内容:
NAME READY STATUS RESTARTS AGE frontend-88237173-3s3sc 1/1 Running 0 1s frontend-88237173-twgvn 1/1 Running 0 1s frontend-88237173-5p257 1/1 Running 0 23m frontend-88237173-84036 1/1 Running 0 23m frontend-88237173-j3rvr 1/1 Running 0 23m redis-leader-343230949-qfvrq 1/1 Running 0 54m redis-follower-132015689-dp23k 1/1 Running 0 37m redis-follower-132015689-xq9v0 1/1 Running 0 37m您可以使用同一命令缩减
frontendPod 的数量,只需将5替换为1即可。删除
frontendService:kubectl delete service frontend删除 GKE 集群:
gcloud container clusters delete guestbook
准备环境
如需设置您的环境,请按以下步骤操作:
创建 GKE 集群
创建 Autopilot 或 Standard GKE 集群:
Autopilot
gcloud container clusters create-auto guestbook \
    --location=${COMPUTE_LOCATION} \
Standard
gcloud container clusters create guestbook \
    --location=${COMPUTE_LOCATION} \
    --num-nodes=4
连接到集群
配置 kubectl 以与集群通信:
gcloud container clusters get-credentials guestbook \
    --location=${COMPUTE_LOCATION}
设置 Redis Leader
该应用使用 Redis 来存储其数据。该应用将数据写入 Redis Leader 实例,并从多个 Redis 关注者实例中读取数据。
创建 Redis Leader 服务
该 Web 应用需要与 Redis Leader 通信才能写入其数据。您可以创建一个 Service 来代理传输到 Redis Leader Pod 的流量。
Service 是 Kubernetes 抽象,定义了一个逻辑 Pod 集及实现其访问权限的政策。创建 Service 时,您需要根据 Pod 标签来说明要代理哪些 Pod。
设置 Redis 关注者
虽然 Redis Leader 属于单个 Pod,但您可以通过添加一些 Redis 关注者副本来为其实现高可用性,并满足流量需求。
创建 Redis 关注者服务
该 Web 应用必须与 Redis 关注者通信才能读取数据。如需让 Redis 关注者更容易被发现,您必须设置一个 Service。
设置应用 Web 前端
现在,您已经为应用设置了 Redis 存储,接下来可以启动 Web 服务器。与 Redis 关注者一样,该前端将使用 Kubernetes Deployment 进行部署。
该 Web 应用使用 PHP 前端,该前端配置为根据请求属于读取请求还是写入请求,与 Redis 关注者 Service 或 Redis Leader Service 进行通信。该前端公开了一个 JSON 接口,并提供基于 jQuery Ajax 的界面。
在外部 IP 地址公开前端
在当前配置下,您在先前步骤中创建的 redis-follower 和 redis-leader Service 只能在 GKE 集群中访问,因为 Service 的默认类型是 ClusterIP。
ClusterIP Service 为自己指向的 Pod 集提供单个 IP 地址。此 IP 地址只能在集群内访问。
如需使该 Web 前端 Service 可从外部访问,您可以根据需求在 Service 配置中指定 type: LoadBalancer 或 type: NodePort。
以下清单描述了 LoadBalancer 类型的 Service:
ports 部分下方的端口声明指定了 port: 80,未指定 targetPort。如果忽略 targetPort 属性,则默认为 port 字段的值。在本例中,此 Service 将端口 80 上的外部流量路由到 frontend Deployment 中容器的端口 80。
将清单应用到您的集群:
kubectl apply -f frontend-service.yaml
创建 frontend Service 时,GKE 会创建一个负载均衡器和一个外部 IP 地址。这些资源需要付费。
访问应用网站
如需访问应用网站,请获取 frontend Service 的外部 IP 地址:
kubectl get service frontend
输出类似于以下内容:
NAME       CLUSTER-IP      EXTERNAL-IP        PORT(S)        AGE
frontend   10.51.242.136   109.197.92.229     80:32372/TCP   1m
创建负载均衡器时,EXTERNAL-IP 列可能会显示 <pending>。这可能需要几分钟。 如果您看到 Does not have minimum availability 等错误,请等待几分钟。此临时错误是因为 GKE 重新创建节点以进行更改而发生的。
复制该 IP 地址,然后在浏览器中打开相应网页:
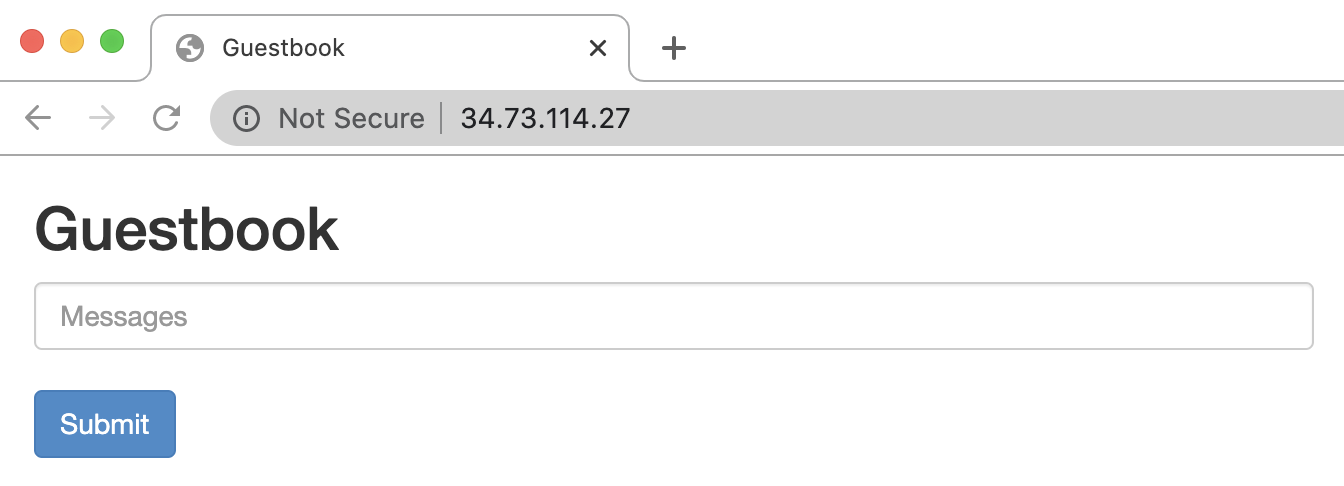
如需尝试添加一些条目,请尝试输入一则消息,然后点击提交。您输入的消息会显示在前端。此消息表示数据已通过您创建的 Service 成功添加到 Redis。
纵向扩容 Web 前端
假设您的应用已经运行了一段时间,公共宣传突然激增。您决定为前端添加更多 Web 服务器。您可以通过增加 Pod 数量来实现此目的。
清理
为避免因本教程中使用的资源导致您的 Google Cloud 账号产生费用,请删除包含这些资源的项目,或者保留项目但删除各个资源。
删除项目
Delete a Google Cloud project:
gcloud projects delete PROJECT_ID
逐个删除资源
如果您使用的是现有项目,并且不想将其删除,请逐个删除资源。