本教學課程示範如何使用 Google Kubernetes Engine (GKE) 建構多層級網頁應用程式。
在本教學課程中,執行下列操作:
這個範例說明下列 Kubernetes 概念:
- 陳述式設定 採用 YAML 資訊清單檔案
- Deployment,這是 Kubernetes 資源,用於決定一組 Pod 複本的設定
- 服務:為一組 Pod 建立內部和外部負載平衡器
準備環境
如要設定環境,請按照下列步驟操作:
設定環境變數:
export PROJECT_ID=PROJECT_ID
export COMPUTE_LOCATION=COMPUTE_LOCATION
更改下列內容:
PROJECT_ID:您的 Google Cloud 專案 IDCOMPUTE_LOCATION:Compute Engine 位置,例如us-central1。
複製 GitHub 存放區:
git clone https://github.com/GoogleCloudPlatform/kubernetes-engine-samples變更為工作目錄:
cd kubernetes-engine-samples/quickstarts/guestbook/
建立 GKE 叢集
建立 Autopilot 或 Standard GKE 叢集:
Autopilot
gcloud container clusters create-auto guestbook \
    --location=${COMPUTE_LOCATION} \
標準
gcloud container clusters create guestbook \
    --location=${COMPUTE_LOCATION} \
    --num-nodes=4
連線至叢集
設定 kubectl 與叢集通訊:
gcloud container clusters get-credentials guestbook \
    --location=${COMPUTE_LOCATION}
設定 Redis 領導者
應用程式使用 Redis 儲存資料,應用程式會將資料寫入 Redis 領導者執行個體,並從多個 Redis 追隨者執行個體讀取資料。
下列資訊清單說明 Kubernetes 部署作業,該作業會執行單一副本 Redis 領導者 Pod:
將資訊清單套用至叢集:
kubectl apply -f redis-leader-deployment.yaml確認 Redis 領導者 Pod 正在執行:
kubectl get pods輸出結果會與下列內容相似:
NAME                           READY     STATUS    RESTARTS   AGE
redis-leader-343230949-qfvrq   1/1       Running   0          43s
「
STATUS」可能需要幾分鐘的時間,才會從Pending變更為Running。
建立 Redis 領導者服務
Web 應用程式需要與 Redis 領導者通訊來寫入資料。您可以建立服務,將流量代理至 Redis 領導者 Pod。
Service 是 Kubernetes 抽象層,可定義邏輯上的一組 Pod 和存取這些 Pod 的政策。建立 Service 時,您可以根據 Pod 標籤說明要代理的 Pod。
下列資訊清單說明 Redis 領導者的 Service:
這個資訊清單包含一組標籤選取器。這些標籤與上一步中部署的標籤集相符。因此,這項服務會將網路流量轉送至上一步建立的 Redis 領導者 Pod。
資訊清單的
ports區段會宣告單一通訊埠對應。服務會針對與指定selector標籤相符的容器,將port: 6379的流量轉送至該容器的targetPort: 6379。部署中使用的containerPort必須與targetPort相符,才能將流量轉送至部署。將資訊清單套用至叢集:
kubectl apply -f redis-leader-service.yaml確認 GKE 是否已建立服務:
kubectl get service輸出結果會與下列內容相似:
NAME           CLUSTER-IP      EXTERNAL-IP   PORT(S)    AGE
kubernetes     10.51.240.1     <none>        443/TCP    42s
redis-leader   10.51.242.233   <none>        6379/TCP   12s
設定 Redis 追隨者
雖然 Redis 領導者是單一 Pod,但透過新增幾個 Redis 追隨者或副本,即可大幅提升 Redis 領導者的可用性並滿足流量需求。
下列資訊清單說明 Redis follower Pod 的部署:
將資訊清單套用至叢集:
kubectl apply -f redis-follower-deployment.yaml確認兩個 Redis follower 副本正在執行:
kubectl get pods輸出結果會與下列內容相似:
NAME                              READY   STATUS    RESTARTS   AGE
redis-follower-76588f55b7-bnsq6   1/1     Running   0          27s
redis-follower-76588f55b7-qvtws   1/1     Running   0          27s
redis-leader-dd446dc55-kl7nl      1/1     Running   0          119s
「
STATUS」可能需要幾分鐘的時間,才會從Pending變更為Running。
建立 Redis follower 服務
網路應用程式必須與 Redis 追隨者通訊來讀取資料。如要開放 Redis 追隨者以供偵測,則必須設定服務。
下列資訊清單說明 Redis follower 的 Service:
這個資訊清單指定 Service 在通訊埠 6379 上執行。Service 的
selector欄位與上一步驟中建立的 Redis follower Pod 相符。將資訊清單套用至叢集:
kubectl apply -f redis-follower-service.yaml確認 GKE 已建立 Service:
kubectl get service輸出結果會與下列內容相似:
NAME           CLUSTER-IP      EXTERNAL-IP   PORT(S)    AGE
kubernetes     10.51.240.1     <none>        443/TCP    1m
redis-leader   10.51.242.233   <none>        6379/TCP   49s
redis-follower 10.51.247.238   <none>        6379/TCP   3s
設定應用程式網頁前端
現在您已為應用程式準備好 Redis 儲存空間,請啟動網路伺服器。與 Redis 追隨者一樣,前端是使用 Kubernetes Deployment 部署。
這個網路應用程式使用 PHP 前端,可根據要求是讀取或寫入,設定成與 Redis 追隨者或領導者服務進行通訊。前端會公開 JSON 介面,並提供以 jQuery Ajax 為基礎的 UI。
下列資訊清單說明網路伺服器的 Deployment:
資訊清單檔案指定了環境變數
GET_HOSTS_FROM=dns。將設定提供給網路前端應用程式時,前端應用程式會使用主機名稱redis-follower和redis-leader執行 DNS 查詢。DNS 查詢會找出您在先前步驟中建立的服務 IP 位址。這個概念稱為 DNS 服務探索。將資訊清單套用至叢集:
kubectl apply -f frontend-deployment.yaml確認備用資源正在執行:
kubectl get pods -l app=guestbook -l tier=frontend輸出結果會與下列內容相似:
NAME                        READY   STATUS    RESTARTS   AGE
frontend-7b78458576-8kp8s   1/1     Running   0          37s
frontend-7b78458576-gg86q   1/1     Running   0          37s
frontend-7b78458576-hz87g   1/1     Running   0          37s
在外部 IP 位址公開前端
根據目前的設定,您在先前的步驟中建立的 redis-follower 和 redis-leader 服務只能在 GKE 叢集中存取,因為服務的預設類型為 ClusterIP。
ClusterIP Service 會為 Service 所指向的一組 Pod 提供單一 IP 位址。這個 IP 位址只能在叢集中存取。
如要讓外部存取網路前端服務,您可以根據需求在服務設定中指定 type: LoadBalancer 或 type: NodePort。
以下資訊清單說明 LoadBalancer 類型的 Service:
在 ports 區段底下的通訊埠宣告會指定 port: 80,並且不會指定 targetPort。如果省略 targetPort 屬性,該屬性會預設為 port 欄位的值。在這種情況下,這項服務會將通訊埠 80 的流量轉送至 frontend 部署中容器的通訊埠 80。
將資訊清單套用至叢集:
kubectl apply -f frontend-service.yaml
建立 frontend Service 後,GKE 會建立負載平衡器和外部 IP 位址。這些資源需要計費。
前往應用程式網站
如要存取應用程式網站,請取得 frontend 服務的外部 IP 位址:
kubectl get service frontend
輸出結果會與下列內容相似:
NAME       CLUSTER-IP      EXTERNAL-IP        PORT(S)        AGE
frontend   10.51.242.136   109.197.92.229     80:32372/TCP   1m
建立負載平衡器時,EXTERNAL-IP 欄可能會顯示 <pending>。這可能需要幾分鐘的時間。如果看到 Does not have minimum availability 等錯誤,請稍候幾分鐘。這是暫時性錯誤,因為 GKE 會重新建立節點來進行變更。
複製 IP 位址,並在瀏覽器中開啟該頁面:
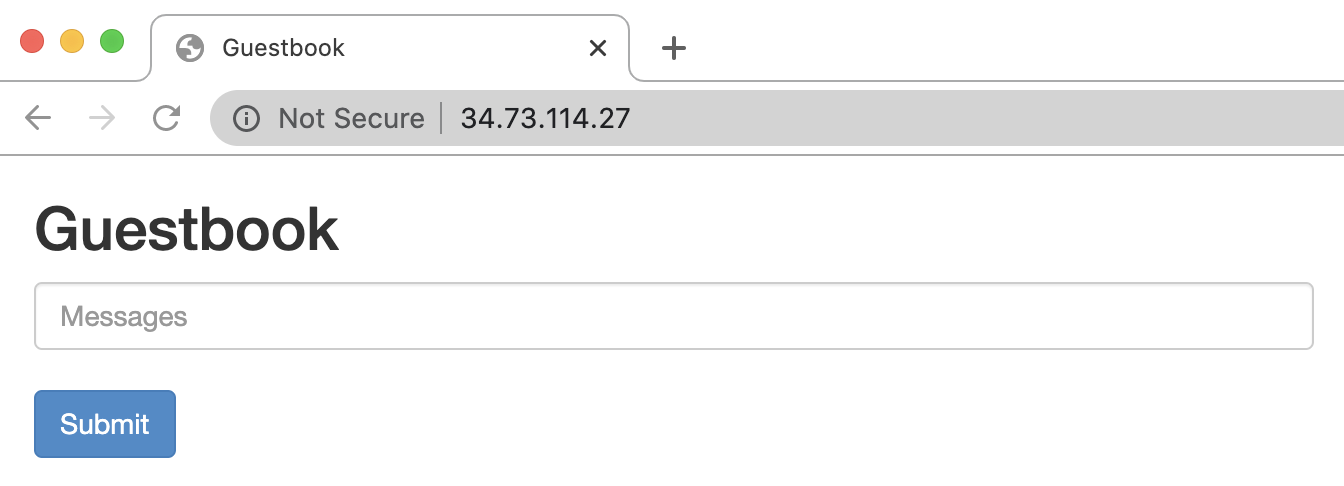
請嘗試輸入訊息,然後按一下「提交」,新增一些留言。您輸入的訊息會顯示在前端。這則訊息表示資料已透過您建立的服務成功新增至 Redis。
擴充網站前端
假設您的應用程式在運作一段時間後突然爆紅。您認為在前端新增更多網路伺服器會是個不錯的主意。您可以增加 Pod 數量來達成這個目標。
向上擴充
frontendPod 的數量:kubectl scale deployment frontend --replicas=5輸出結果會與下列內容相似:
deployment.extensions/frontend scaled確認正在執行的副本數量:
kubectl get pods輸出結果會與下列內容相似:
NAME                             READY     STATUS    RESTARTS   AGE
frontend-88237173-3s3sc          1/1       Running   0          1s
frontend-88237173-twgvn          1/1       Running   0          1s
frontend-88237173-5p257          1/1       Running   0          23m
frontend-88237173-84036          1/1       Running   0          23m
frontend-88237173-j3rvr          1/1       Running   0          23m
redis-leader-343230949-qfvrq     1/1       Running   0          54m
redis-follower-132015689-dp23k   1/1       Running   0          37m
redis-follower-132015689-xq9v0   1/1       Running   0          37m
您可以使用相同指令縮減
frontendPod 數量,只要將5換成1即可。