Dialogflow の Webhook フルフィルメントを使用すると、エージェントのフローをより詳細に制御できます。このチュートリアルでは、「Sequence」インテントで収集された英数字シーケンスを検証する Webhook が必要です。Webhook は、このループを繰り返し処理して、長いシーケンスを管理しやすい反復で収集します。
インライン エディタで Webhook を作成する
Dialogflow にはコンソール内にインライン エディタがあり、NodeJS コードを直接記述して、その後で Cloud Functions 上の Webhook として実行するようデプロイできます。
Dialogflow のインライン エディタを使用して Webhook を作成する方法は次のとおりです。
- ナビゲーション バーの [Fulfillment] タブをクリックして、フルフィルメントのページに移動します。
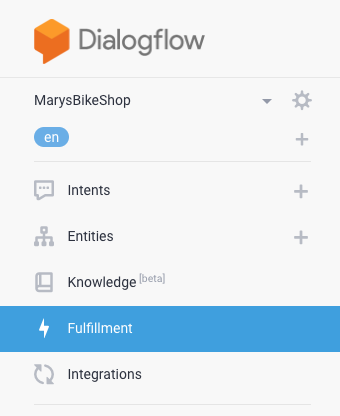
- インライン エディタのボタンを [ENABLED] に切り替えます。

- インライン エディタの [
package.json] タブ内の既存のコンテンツを削除します。
以下の JSON コンテンツをコピーして、インライン エディタの [
package.json] タブに貼り付けます。{ "name": "DialogflowFirebaseWebhook", "description": "Firebase Webhook dependencies for a Dialogflow agent.", "version": "0.0.1", "private": true, "license": "Apache Version 2.0", "author": "Google Inc.", "engines": { "node": "10" }, "scripts": { "lint": "semistandard --fix \"**/*.js\"", "start": "firebase deploy --only functions", "deploy": "firebase deploy --only functions" }, "dependencies": { "firebase-functions": "^2.0.2", "firebase-admin": "^5.13.1" } }インライン エディタの [
index.js] タブ内の既存のコードを削除します。
以下のコードをコピーして、インライン エディタの [
index.js] タブに貼り付けます。/** * Copyright 2020 Google Inc. All Rights Reserved. * * Licensed under the Apache License, Version 2.0 (the "License"); * you may not use this file except in compliance with the License. * You may obtain a copy of the License at * * http://www.apache.org/licenses/LICENSE-2.0 * * Unless required by applicable law or agreed to in writing, software * distributed under the License is distributed on an "AS IS" BASIS, * WITHOUT WARRANTIES OR CONDITIONS OF ANY KIND, either express or implied. * See the License for the specific language governing permissions and * limitations under the License. */ 'use strict'; const functions = require('firebase-functions'); // TODO: set this to the minimum valid length for your sequence. // There's no logic in here to enforce this length, but once the // user has said this many digits, the slot-filling prompt will // also instruct the user to say "that's all" to end the slot-filling. const MIN_SEQUENCE_LENGTH = 10; exports.dialogflowFirebaseFulfillment = functions.https.onRequest((request, response) => { let dfRequest = request.body; let action = dfRequest.queryResult.action; switch (action) { case 'handle-sequence': handleSequence(dfRequest, response); break; case 'validate-sequence': validateSequence(dfRequest, response); break; default: response.json({ fulfillmentText: `Webhook for action "${action}" not implemented.` }); } }); //// // Helper functions /* Send an SSML response. * @param request: Dialogflow WebhookRequest JSON with camelCase keys. * See https://cloud.google.com/dialogflow/es/docs/reference/common-types#webhookrequest * @param response: Express JS response object * @param ssml: SSML string. * @example: sendSSML(request, response, 'hello') * Will call response.json() with SSML payload '<speak>hello</speak>' */ function sendSSML(request, response, ssml) { ssml = `<speak>${ssml}</speak>`; if (request.originalDetectIntentRequest.source == 'GOOGLE_TELEPHONY') { // Dialogflow Phone Gateway Response // see https://cloud.google.com/dialogflow/es/docs/reference/rpc/google.cloud.dialogflow.v2beta1#google.cloud.dialogflow.v2beta1.Intent.Message.TelephonySynthesizeSpeech response.json({ fulfillmentMessages: [{ platform: 'TELEPHONY', telephonySynthesizeSpeech: {ssml: ssml} }] }); } else { // Some CCAI telephony partners accept SSML in a plain text response. // Check your specific integration and customize the payload here. response.json({ fulfillmentText: ssml }); } } /* Extract an output context from the incoming WebhookRequest. * @param request: Dialogflow WebhookRequest JSON with camelCase keys. * See https://cloud.google.com/dialogflow/es/docs/reference/common-types#webhookrequest * @param name: A string * @return: The context object if found, or undefined * @see: https://cloud.google.com/dialogflow/es/docs/reference/rpc/google.cloud.dialogflow.v2#google.cloud.dialogflow.v2.Context * and note this webhook uses JSON camelCase instead of RPC snake_case. * @example: * // Modify an existing output content * let context = getOutputContext(request, 'some-context'); * context.lifespanCount = 5; * context.parameters.some_parameter = 'new value'; * response.json({ * fulfillmentText: 'new value set', * outputContexts: [context] * }); */ function getOutputContext(request, name) { return request.queryResult.outputContexts.find( context => context.name.endsWith(`/contexts/${name}`) ); } //// // Action handler functions /* * Fulfillment function for: * actions: handle-sequence * intents: "Sequence", "Sequence - Edit" * @param request: Dialogflow WebhookRequest JSON with camelCase keys. * See https://cloud.google.com/dialogflow/es/docs/reference/common-types#webhookrequest * @param response: Express JS response object */ function handleSequence(request, response) { let parameters = request.queryResult.parameters; let isSlotFilling = !request.queryResult.allRequiredParamsPresent; let isEditing = getOutputContext(request, 'editing-sequence'); console.log(request.queryResult.action + ': ' + JSON.stringify(parameters)); if (isSlotFilling) { // Prompt the user for the sequence let verbatim = `<prosody rate="slow"><say-as interpret-as="verbatim">${parameters.existing_sequence}</say-as></prosody>`; if (!parameters.existing_sequence && !parameters.new_sequence) { // Initial prompt response.json({ fulfillmentText: "What is your sequence? Please pause after a few characters so I can confirm as we go." }); } else if (!isEditing) { // Confirm what the system heard with the user. We customize the response // according to how many sequences we've heard to make the prompts less // verbose. if (!parameters.previous_sequence) { // after the first input sendSSML(request, response, `Say "no" to correct me at any time. Otherwise, what comes after ${verbatim}`); } else if (parameters.existing_sequence.length < MIN_SEQUENCE_LENGTH) { // we know there are more characters to go sendSSML(request, response, `${verbatim} What's next?`); } else { // we might have all we need sendSSML(request, response, `${verbatim} What's next? Or say "that's all".`); } } else { // User just said "no" sendSSML(request, response, `Let's try again. What comes after ${verbatim}`); } } else { // Slot filling is complete. // Construct the full sequence. let sequence = (parameters.existing_sequence || '') + (parameters.new_sequence || ''); // Trigger the follow up event to get back into slot filling for the // next sequence. response.json({ followupEventInput: { name: 'continue-sequence', parameters: { existing_sequence: sequence, previous_sequence: parameters.existing_sequence || '' } } }); // TODO: CHALLENGE: consider validating the sequence here. // The user has already confirmed existing_sequence, so if you find a unique // record in your database with this existing_sequence prefix, you could send // a followUpEventInput like 'validated-sequence' to skip to the next part // of the flow. You could either create a new intent for this event, or // reuse the "Sequence - done" intent. If you reuse the "done" intent, you // could add another parameter "assumed_sequence" with value // "#validated-sequence.sequence", then modify the validateSequence function // below to customize the response for this case. } } /* * Fulfillment function for: * action: validate-sequence * intents: "Sequence - Done" * @param request: Dialogflow WebhookRequest JSON with camelCase keys. * See https://cloud.google.com/dialogflow/es/docs/reference/common-types#webhookrequest * @param response: Express JS response object */ function validateSequence(request, response) { let parameters = request.queryResult.parameters; // TODO: add logic to validate the sequence and customize your response let verbatim = `<say-as interpret-as="verbatim">${parameters.sequence}</say-as>`; sendSSML(request, response, `Thank you. Your sequence is ${verbatim}`); }[DEPLOY] をクリックします。
これで、エージェントを呼び出して統合をテストできます。Google のパートナーからワンクリックの電話統合の 1 つを設定するか、Dialogflow Phone Gateway をセットアップして、電話でエージェントをテストすることをお勧めします。
コードの説明
Webhook へのエントリポイントとして、ここでの dialogflowFirebaseFulfillment 関数は Webhook がトリガーされるたびに呼び出されます。リクエストごとに、Dialogflow はインテントに対して Dialogflow コンソールで指定した「アクション」名を送信します。コードは、このアクション名を使用して、どの Webhook 関数(handleSequence または validateSequence)を呼び出すかを決定します。
シーケンスの処理
handleSequence は、このチュートリアルのコア関数です。シーケンス スロット充填について、次のようなすべての側面を担当します。
- セッションが最初にインテントを開始したときに最初の指示を話します。
- 次のセットの入力を求める前に、シーケンスを繰り返します。
- エンドユーザーに対し、ボットを修正する方法を伝えます。
- 有効なシーケンスに十分な桁数があることを確認し、エンドユーザーに入力を完了させる方法を指示します(コード内の「MIN_SEQUENCE_LENGTH」を参照)。
- スロット充填用のループにより、複数の部分的なシーケンスを収集します。
- 部分的なシーケンスを 1 つの長いシーケンスに連結します。
シーケンスの検証
validateSequence にデータストアへの接続を追加して最終シーケンスを検証し、そのデータに基づいてカスタム メッセージをユーザーに返します。たとえば、注文検索エージェントを作成する場合、次のようにレスポンスをカスタマイズできます。
Thank you. Your order ${verbatim} will arrive on ${lookup.date} and will
${lookup.require_signature ? '' : 'not'} require a signature.
lookup は、この注文のデータストアで見つかったオブジェクトです。
ヘルパー関数
この例では、Dialogflow 固有の依存関係は使用しません。代わりに、request.body で予想される結果については WebhookRequest リファレンスを、response.json({...}) での応答内容については WebhookResponse リファレンスに従ってください。
このコードには、次の作業を容易にするため、以下の 2 つのヘルパー関数が含まれています。
- 文字列を
sendSSMLに渡して、現在のプラットフォームに適したレスポンス JSON を送信します。 - コンテキスト名を
getOutputContextに渡して、リクエストからアクティブな Dialogflow コンテキストを探します。
さらなる機能の強化
これで、高度なユースケースとして Webhook の使用を開始できます。エンドユーザーがシーケンスを話す間にシーケンス プロンプトをループできるエージェントを設計し、仮想エージェントが適切にリッスンすること保証しました。
操作性をさらに向上させるアイデアをいくつかご紹介します。
- ブランドに合わせて Webhook レスポンスの一部を変更してください。たとえば、一般的な「シーケンスは何ですか?」というプロンプトの代わりに、コードを編集して「注文番号は何ですか?... にあります」と発声させることができます。
- 「Sequence - Done」インテントに別の出力コンテキストを追加して、その入力コンテキストで新しいインテントを作成し、ユーザーが注文に関するフォローアップの質問をできるようにします。
- このユースケースについてさらに詳しく知りたい場合は、上のサンプルコードの
TODO: CHALLENGEを使用して、ユーザー エクスペリエンスをさらに改善する方法をご確認ください。