이 문서에서는 비용이 청구될 수 있는 Google Cloud구성요소( )를 사용합니다.
- Dataproc
- Compute Engine
- Cloud Composer
프로젝트 사용량을 기준으로 예상 비용을 산출하려면 가격 계산기를 사용합니다.
시작하기 전에
프로젝트 설정
- Sign in to your Google Cloud account. If you're new to Google Cloud, create an account to evaluate how our products perform in real-world scenarios. New customers also get $300 in free credits to run, test, and deploy workloads.
-
In the Google Cloud console, on the project selector page, select or create a Google Cloud project.
-
Verify that billing is enabled for your Google Cloud project.
-
Enable the Dataproc, Compute Engine, and Cloud Composer APIs.
-
Install the Google Cloud CLI.
-
외부 ID 공급업체(IdP)를 사용하는 경우 먼저 제휴 ID로 gcloud CLI에 로그인해야 합니다.
-
gcloud CLI를 초기화하려면 다음 명령어를 실행합니다.
gcloud init -
In the Google Cloud console, on the project selector page, select or create a Google Cloud project.
-
Verify that billing is enabled for your Google Cloud project.
-
Enable the Dataproc, Compute Engine, and Cloud Composer APIs.
-
Install the Google Cloud CLI.
-
외부 ID 공급업체(IdP)를 사용하는 경우 먼저 제휴 ID로 gcloud CLI에 로그인해야 합니다.
-
gcloud CLI를 초기화하려면 다음 명령어를 실행합니다.
gcloud init sparkpi워크플로 템플릿 만들기gcloud dataproc workflow-templates create sparkpi \ --region=us-central1sparkpi워크플로 템플릿에 spark 작업을 추가합니다. 'compute'step-id플래그는 SparkPi 작업을 식별합니다.gcloud dataproc workflow-templates add-job spark \ --workflow-template=sparkpi \ --step-id=compute \ --class=org.apache.spark.examples.SparkPi \ --jars=file:///usr/lib/spark/examples/jars/spark-examples.jar \ --region=us-central1 \ -- 1000- 관리형, 단일 노드 클러스터를 사용하여 워크플로를 실행합니다. Dataproc이 클러스터를 만들고 워크플로를 실행한 다음 워크플로가 완료되면 클러스터를 삭제합니다.
gcloud dataproc workflow-templates set-managed-cluster sparkpi \ --cluster-name=sparkpi \ --single-node \ --region=us-central1 - 워크플로 템플릿 만들기를 확인합니다.
Console
Google Cloud 콘솔의 Dataproc 워크플로 페이지에서
sparkpi이름을 클릭하여 워크플로 템플릿 세부정보 페이지를 엽니다. 워크플로 템플릿의 이름을 클릭하여sparkpi템플릿 속성을 확인합니다.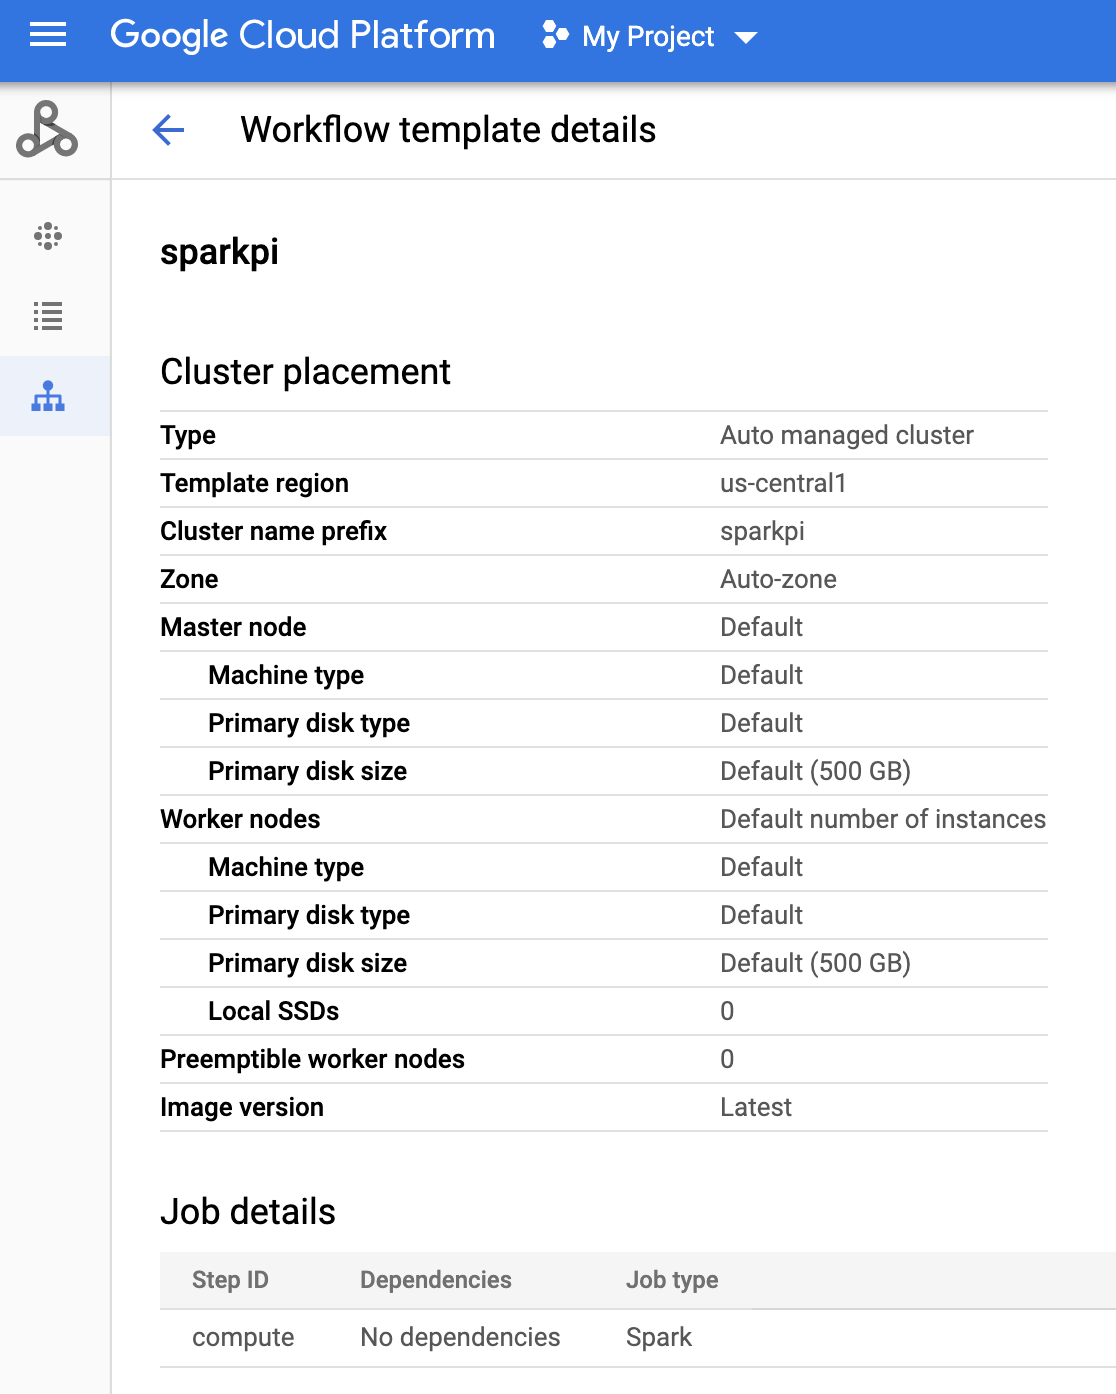
gcloud 명령어
다음 명령어를 실행합니다.
gcloud dataproc workflow-templates describe sparkpi --region=us-central1 - 기존 Cloud Composer 환경을 사용하거나 새로 만듭니다.
- 환경 변수를 설정합니다.
Airflow UI
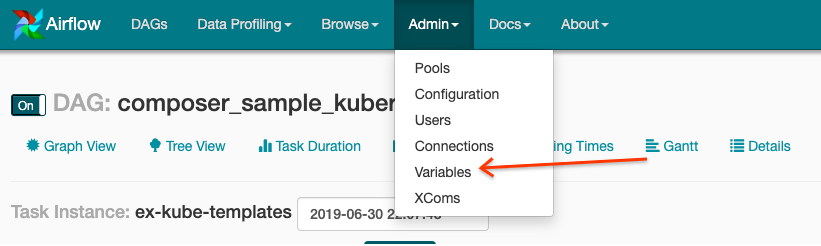
- 툴바에서 관리 > 변수를 클릭합니다.
- 만들기를 클릭합니다.

- 다음 정보를 입력합니다.
- 키:
project_id - 값: PROJECT_ID — Google Cloud 프로젝트 ID
- 키:
- 저장을 클릭합니다.
gcloud 명령어
다음 명령어를 입력합니다.
ENVIRONMENT는 Cloud Composer 환경의 이름입니다.LOCATION은 Cloud Composer 환경이 위치한 리전입니다.PROJECT_ID는 Cloud Composer 환경이 포함된 프로젝트의 프로젝트 ID입니다.
gcloud composer environments run ENVIRONMENT --location LOCATION variables set -- project_id PROJECT_ID - 툴바에서 관리 > 변수를 클릭합니다.
- 다음 DAG 코드를 DataprocInstantiateWorkflowTemplateOperator를 사용하는 'composer-dataproc-dag.py'라는 파일에 로컬로 복사합니다.
Airflow 2
Airflow 1
- Cloud Storage의 환경 폴더에 DAG를 업로드합니다. 업로드가 완료되면 Cloud Composer 환경 페이지에서 DAG 폴더 링크를 클릭합니다.

- Airflow 웹 인터페이스를 엽니다.
- DAG 페이지에서 DAG 이름(예:
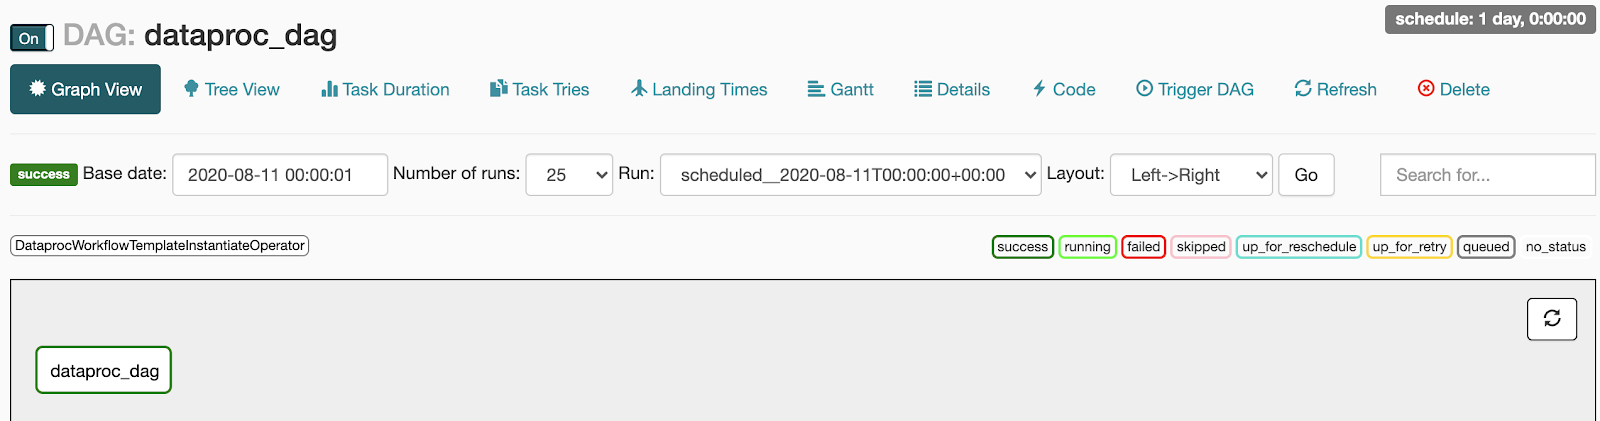
dataproc_workflow_dag)을 클릭합니다. - DAG 세부정보 페이지에서 그래프 보기를 클릭합니다.
- 상태를 확인합니다.
- 실패: 작업 주변에 빨간색 상자가 있습니다.
작업 위로 마우스 포인터를 올려놓고 상태: 실패를 찾을 수도 있습니다.

- 성공: 작업 주변에 녹색 상자가 있습니다.
작업 위로 마우스 포인터를 올려놓고 상태: 성공을 확인할 수도 있습니다.
- 실패: 작업 주변에 빨간색 상자가 있습니다.
작업 위로 마우스 포인터를 올려놓고 상태: 실패를 찾을 수도 있습니다.
- Dataproc 워크플로 템플릿 개요 참조하기
- 워크플로 예약 솔루션 참조하기
Dataproc 워크플로 템플릿 만들기
로컬 터미널 창 또는 Cloud Shell에서 다음 명령어를 복사하고 실행하여 워크플로 템플릿을 만들고 정의합니다.
DAG 만들기 및 Cloud Storage로 업로드
태스크 상태 보기
Airflow UI
콘솔
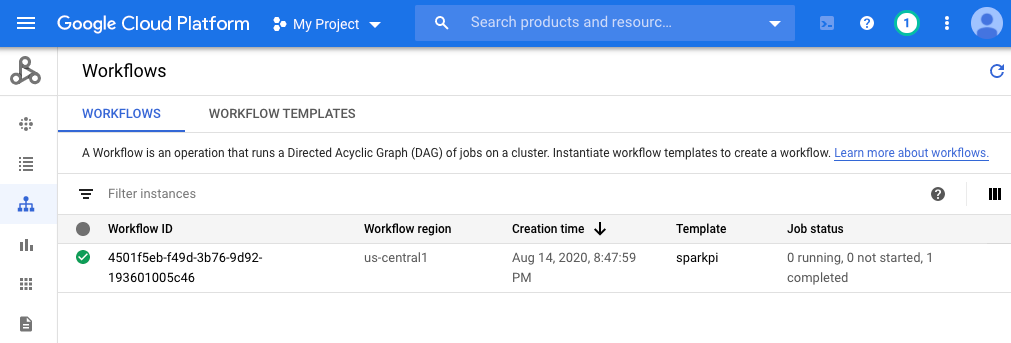
워크플로 탭을 클릭하여 워크플로 상태를 확인합니다.
gcloud 명령어
gcloud dataproc operations list \
    --region=us-central1 \
    --filter="labels.goog-dataproc-workflow-template-id=sparkpi"
삭제
Google Cloud 계정에 비용이 청구되지 않도록 하려면 이 튜토리얼에서 사용한 리소스를 삭제하면 됩니다.