Questo ruolo predefinito contiene
le autorizzazioni necessarie per gestire i modelli. Per vedere quali sono esattamente le autorizzazioni richieste, espandi la sezione Autorizzazioni obbligatorie:
Autorizzazioni obbligatorie
Per gestire i modelli sono necessarie le seguenti autorizzazioni:
Viene visualizzata la pagina Modelli, che elenca tutti i modelli (globali, condivisi e di progetto) disponibili nel tuo progetto Google Cloud.
Per modificare un modello condiviso, fai clic sulla scheda Modelli condivisi. Per modificare un modello di progetto, fai clic sulla scheda Modelli di progetto.
Fai clic sul modello da modificare nella scheda selezionata.
Nella pagina dei dettagli del modello, fai clic su ModificaModifica.
Viene visualizzato il riquadro Modifica modello.
Inserisci il nome della nuova versione dell'integrazione e, facoltativamente, una descrizione.
Fai clic su Crea e modifica.
Viene visualizzata la pagina dell'editor di integrazioni con il riquadro Variabili di configurazione aperto.
Modifica le variabili di configurazione per il modello (se presenti) e fai clic su Fine. Fai clic su Annulla per saltare questo passaggio.
Nella pagina dell'editor di integrazione, aggiungi o modifica i componenti richiesti: attività, trigger o connettori. Quando il modello di integrazione è pronto, vai al passaggio successivo.
Fai clic su Modelli > Modifica modello dalla barra di navigazione dell'editor di integrazioni.
L'editor integrazioni passa alla modalità di modifica del modello, bloccando temporaneamente qualsiasi altra azione sull'integrazione e viene visualizzato il riquadro Modifica modello.
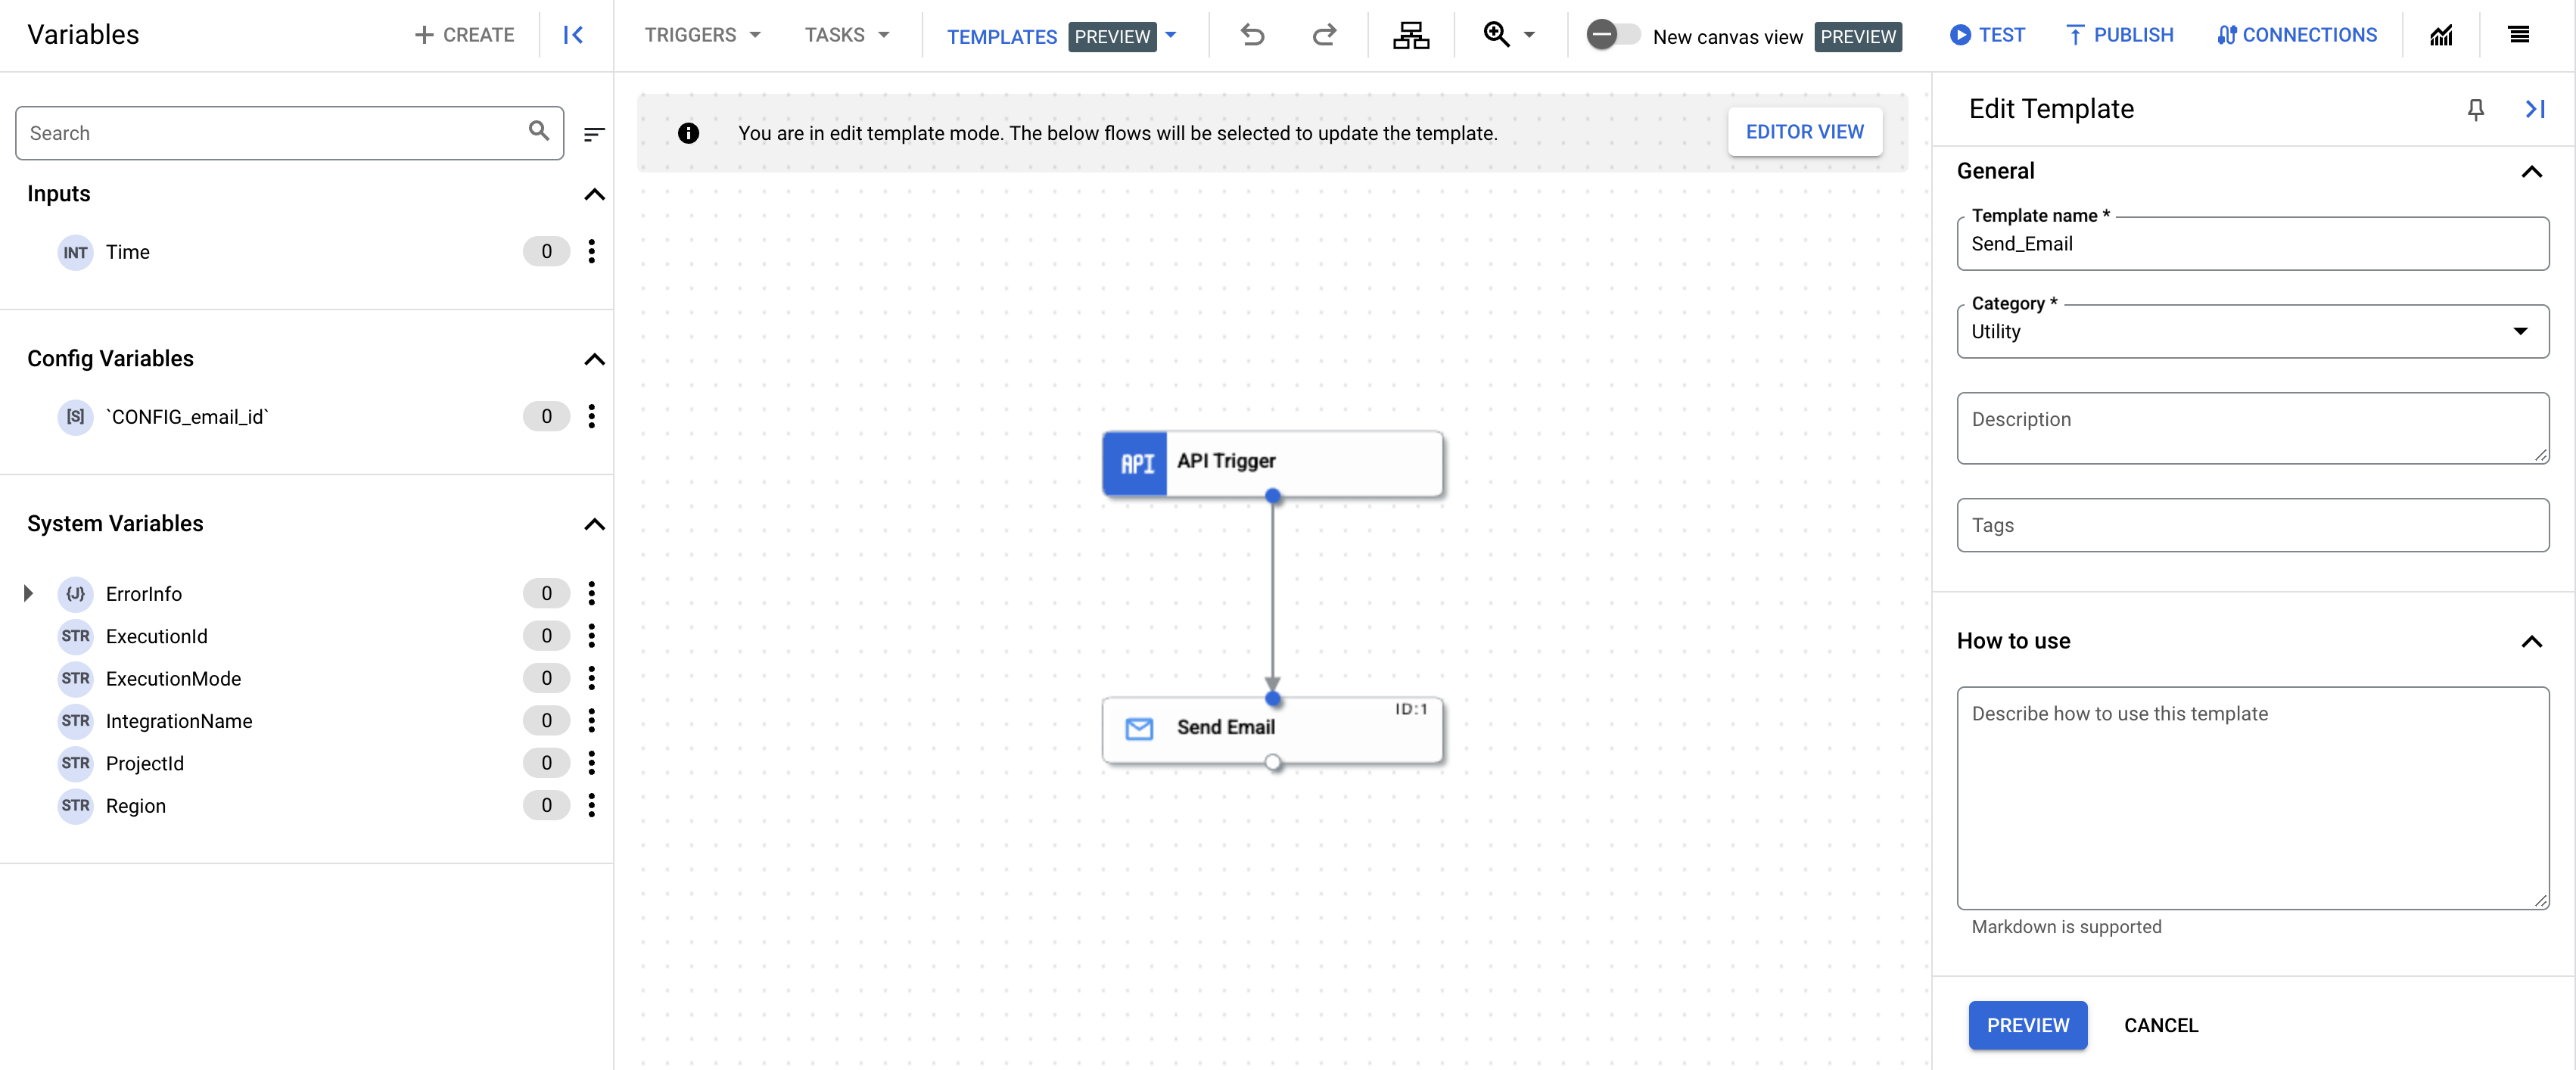
Apporta le modifiche ai dettagli del modello e fai clic su Anteprima.
Controlla tutte le modifiche apportate al modello e fai clic su Aggiorna modello.
Il modello esistente viene aggiornato con le modifiche apportate. Per visualizzare il modello aggiornato, vai alla pagina Modelli e fai clic sulla scheda Modelli di progetto.
Eliminare i modelli
Per eliminare un modello:
Nella console Google Cloud , vai alla pagina Modelli.
Per eliminare un modello condiviso, fai clic sulla scheda Modelli condivisi. Per eliminare un modello di progetto, fai clic sulla scheda Modelli di progetto.
Fai clic sul modello che vuoi eliminare dalla scheda selezionata.
Nella pagina dei dettagli del modello, fai clic su EliminaRimuovi modello.
Viene visualizzata una finestra di dialogo di conferma.
Fai clic su Elimina per eliminare definitivamente il modello.
[[["Facile da capire","easyToUnderstand","thumb-up"],["Il problema è stato risolto","solvedMyProblem","thumb-up"],["Altra","otherUp","thumb-up"]],[["Difficile da capire","hardToUnderstand","thumb-down"],["Informazioni o codice di esempio errati","incorrectInformationOrSampleCode","thumb-down"],["Mancano le informazioni o gli esempi di cui ho bisogno","missingTheInformationSamplesINeed","thumb-down"],["Problema di traduzione","translationIssue","thumb-down"],["Altra","otherDown","thumb-down"]],["Ultimo aggiornamento 2025-09-03 UTC."],[[["\u003cp\u003eThis page outlines how to manage project templates within Google Cloud's Application Integration, specifically how to edit and delete them.\u003c/p\u003e\n"],["\u003cp\u003eTo manage templates, users need the Application Integration Editor role, which grants permissions like \u003ccode\u003eintegrations.templates.update\u003c/code\u003e for editing and \u003ccode\u003eintegrations.templates.delete\u003c/code\u003e for deletion.\u003c/p\u003e\n"],["\u003cp\u003eEditing a template requires creating a new integration version from it, making the necessary modifications, and then updating the existing template with the new changes, which does not affect previously created integrations.\u003c/p\u003e\n"],["\u003cp\u003eDeleting a template is straightforward and achieved via the "Remove template" option on the template details page, but note that deleting a template won't delete integrations created from it.\u003c/p\u003e\n"],["\u003cp\u003eThe document refers the reader to use templates to create an integration, to import and download, to share and to learn how to create templates.\u003c/p\u003e\n"]]],[],null,["# Manage templates\n\nSee the [supported connectors](/integration-connectors/docs/connector-reference-overview) for Application Integration.\n\nManage templates\n================\n\n|\n| **Preview\n| --- templates**\n|\n|\n| This feature is subject to the \"Pre-GA Offerings Terms\" in the General Service Terms section\n| of the [Service Specific Terms](/terms/service-terms#1).\n|\n| Pre-GA features are available \"as is\" and might have limited support.\n|\n| For more information, see the\n| [launch stage descriptions](/products#product-launch-stages).\n\n\nThis page describes how to edit and delete project templates in your Google Cloud project.\n\nRequired role\n-------------\n\n\nTo get the permissions that\nyou need to manage templates,\n\nask your administrator to grant you the\n\n\n[Application Integration Editor](/iam/docs/roles-permissions/integrations#integrations.integrationEditor) (`roles/integrations.integrationEditor`)\nIAM role on the project.\n\n\nFor more information about granting roles, see [Manage access to projects, folders, and organizations](/iam/docs/granting-changing-revoking-access).\n\n\nThis predefined role contains\n\nthe permissions required to manage templates. To see the exact permissions that are\nrequired, expand the **Required permissions** section:\n\n\n#### Required permissions\n\nThe following permissions are required to manage templates:\n\n- Edit templates: ` integrations.templates.update `\n- Delete templates: ` integrations.templates.delete`\n\n\nYou might also be able to get\nthese permissions\nwith [custom roles](/iam/docs/creating-custom-roles) or\nother [predefined roles](/iam/docs/roles-overview#predefined).\n\nEdit templates\n--------------\n\nTo edit an existing project template, do the following:\n| **Note:** Editing a template does not update the existing integration versions created from the template.\n\n\u003cbr /\u003e\n\n1. In the Google Cloud console, go to the **Application Integration** page.\n\n [Go to Application Integration](https://console.cloud.google.com/integrations)\n2. In the navigation menu, click **Templates** .\n\n The **Templates** page appears listing all the templates (global, shared, and project) available in your Google Cloud project.\n3. To edit a shared template, click the **Shared templates** tab. To edit a project template, click the **Project templates** tab.\n4. Click the template that you want to edit from the respective tab selected.\n5. In the template details page, click edit **Edit** .\n\n The **Edit template** pane appears.\n | **Note:** Application Integration currently only supports editing templates through a new intgeration version. You must therefore create a new integration version from the template, modify the integration, and then create a new template from the integration version.\n - Enter the name of the new integration version and optionally, a description for the new integration version.\n - Click **Create and edit** .\n\n The integration editor page appears with the **Config variables** pane open.\n\n \u003cbr /\u003e\n\n6. Modify the config variables for your template (if any) and click **Done** . Click **Cancel** to skip this step.\n7. In the integration editor page, add or modify the required components: [tasks](/application-integration/docs/tasks), [triggers](/application-integration/docs/triggers), or [connectors](/application-integration/docs/configure-connectors-task). Once your integration template is ready, go to the next step. **Tip:** Use [Config variables](/application-integration/docs/variables#config_var) when configuring the input and output parameters of the components of your integration. This allows you to create a template that can be used in multiple environments.\n8. Click **Templates \\\u003e Edit template** from the integration editor navigation bar.\n\n The integration editor switches to edit template mode, temporaily locking any further actions on the integration, and the **Edit Template** pane appears.\n\n\n9. Make any changes to the template details and click **Preview**.\n10. Review all your changes made to the template and click **Update template** .\n\n The existing template is updated with the changes you made. To view the updated template, go to the **Templates** page and click the [Project Templates](https://console.cloud.google.com/integrations/templates) tab.\n\nDelete templates\n----------------\n\nTo delete a template, do the following:\n\n1. In the Google Cloud console, go to the **Templates** page.\n\n [Go to Templates](https://console.cloud.google.com/integrations/templates)\n2. To delete a shared template, click the **Shared templates** tab. To delete a project template, click the **Project templates** tab.\n3. Click the template that you want to delete from the respective tab selected.\n4. In the template details page, click delete **Remove template** .\n\n A confirmation dialog appears.\n5. Click **Delete** to permanently delete the template.\n| **Notes:**\n|\n| - Deleting a template does not delete the integrations created from the template.\n| - You can only delete the project templates and shared templates that you own or have edit access to. Global templates cannot be deleted.\n\nWhat's next\n-----------\n\n- Learn how to use templates to create an integration, see [Create integrations from templates](/application-integration/docs/create-integration-from-templates).\n- Learn how to import and download templates, see [import and download templates](/application-integration/docs/manage-templates).\n- Learn how to create templates, see [create templates](/application-integration/docs/create-templates).\n- Learn how to share templates, see [share templates](/application-integration/docs/share-templates)."]]