Este rol predefinido contiene los permisos necesarios para gestionar plantillas. Para ver los permisos exactos que se necesitan, despliega la sección Permisos necesarios:
Permisos obligatorios
Para gestionar plantillas, se necesitan los siguientes permisos:
En el menú de navegación, haga clic en Plantillas.
En la página Plantillas se muestran todas las plantillas (globales, compartidas y de proyecto) disponibles en tu proyecto de Google Cloud.
Para editar una plantilla compartida, haz clic en la pestaña Plantillas compartidas. Para editar una plantilla de proyecto, haz clic en la pestaña Plantillas de proyecto.
En la pestaña seleccionada, haz clic en la plantilla que quieras editar.
En la página de detalles de la plantilla, haz clic en EditarEditar.
Aparecerá el panel Editar plantilla.
Escribe el nombre de la nueva versión de la integración y, si quieres, una descripción.
Haz clic en Crear y editar.
Se abrirá la página del editor de integración con el panel Variables de configuración.
Modifica las variables de configuración de tu plantilla (si las hay) y haz clic en Hecho. Haz clic en Cancelar para saltarte este paso.
En la página del editor de integraciones, añade o modifica los componentes necesarios: tareas, activadores o conectores. Cuando la plantilla de integración esté lista, ve al siguiente paso.
En la barra de navegación del editor de integraciones, haga clic en Plantillas > Editar plantilla.
El editor de integraciones cambia al modo de edición de plantillas, lo que bloquea temporalmente cualquier otra acción en la integración, y aparece el panel Editar plantilla.
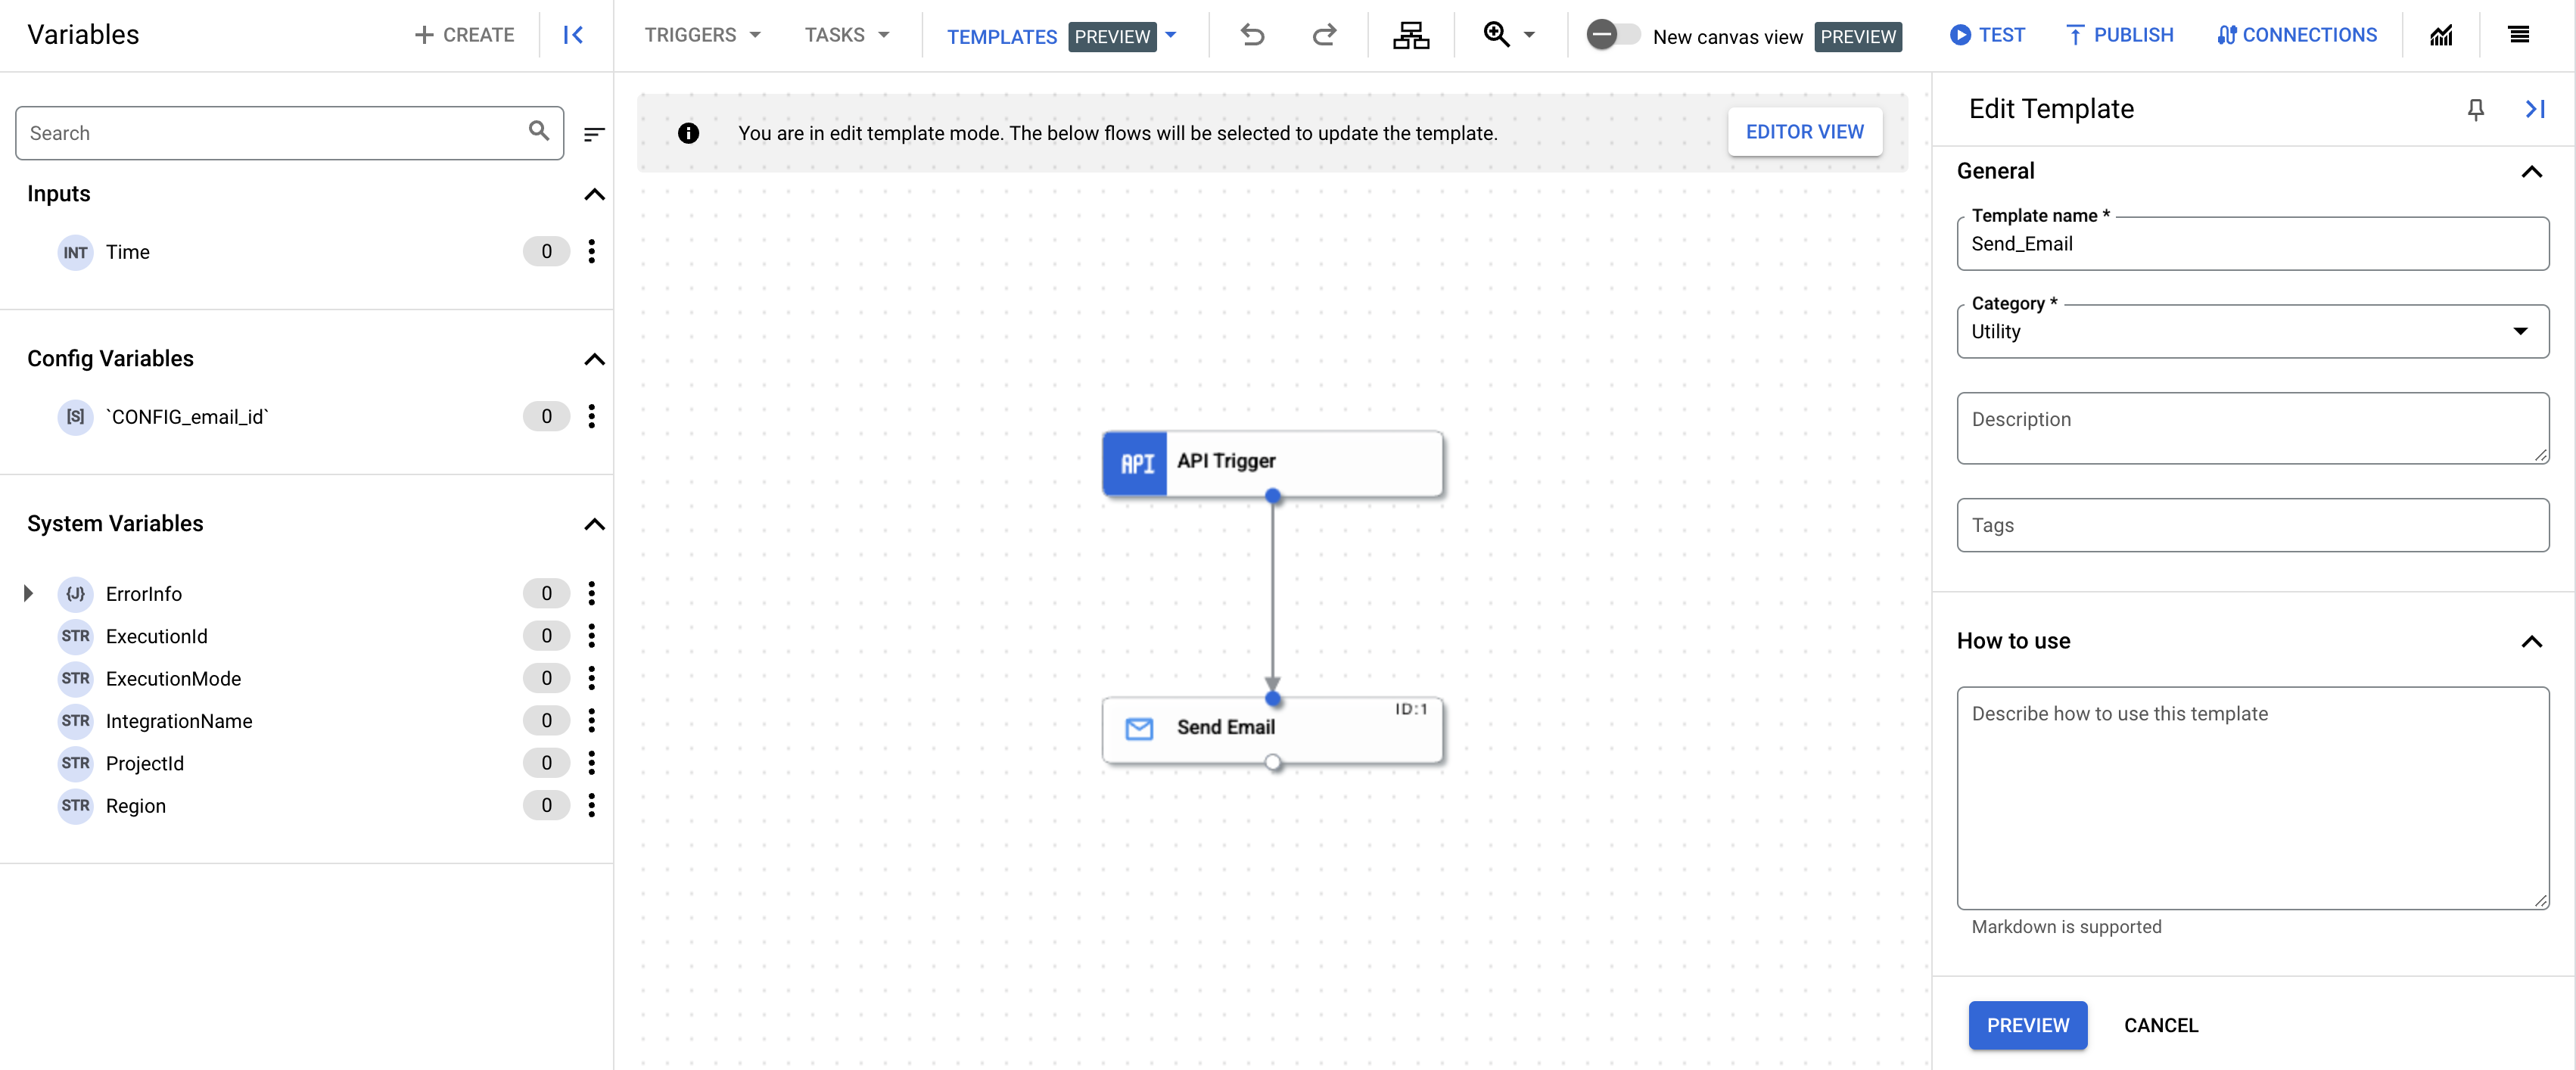
Haz los cambios que quieras en los detalles de la plantilla y haz clic en Vista previa.
Revisa todos los cambios que has hecho en la plantilla y haz clic en Actualizar plantilla.
La plantilla se actualiza con los cambios que has hecho. Para ver la plantilla actualizada, vaya a la página Plantillas y haga clic en la pestaña Plantillas de proyecto.
Eliminar plantillas
Para eliminar una plantilla, siga estos pasos:
En la Google Cloud consola, ve a la página Plantillas.
Para eliminar una plantilla compartida, haz clic en la pestaña Plantillas compartidas. Para eliminar una plantilla de proyecto, haz clic en la pestaña Plantillas de proyecto.
Haz clic en la plantilla que quieras eliminar en la pestaña correspondiente.
En la página de detalles de la plantilla, haga clic en EliminarQuitar plantilla.
Aparecerá un cuadro de diálogo de confirmación.
Haz clic en Eliminar para eliminar la plantilla de forma permanente.
[[["Es fácil de entender","easyToUnderstand","thumb-up"],["Me ofreció una solución al problema","solvedMyProblem","thumb-up"],["Otro","otherUp","thumb-up"]],[["Es difícil de entender","hardToUnderstand","thumb-down"],["La información o el código de muestra no son correctos","incorrectInformationOrSampleCode","thumb-down"],["Me faltan las muestras o la información que necesito","missingTheInformationSamplesINeed","thumb-down"],["Problema de traducción","translationIssue","thumb-down"],["Otro","otherDown","thumb-down"]],["Última actualización: 2025-09-11 (UTC)."],[[["\u003cp\u003eThis page outlines how to manage project templates within Google Cloud's Application Integration, specifically how to edit and delete them.\u003c/p\u003e\n"],["\u003cp\u003eTo manage templates, users need the Application Integration Editor role, which grants permissions like \u003ccode\u003eintegrations.templates.update\u003c/code\u003e for editing and \u003ccode\u003eintegrations.templates.delete\u003c/code\u003e for deletion.\u003c/p\u003e\n"],["\u003cp\u003eEditing a template requires creating a new integration version from it, making the necessary modifications, and then updating the existing template with the new changes, which does not affect previously created integrations.\u003c/p\u003e\n"],["\u003cp\u003eDeleting a template is straightforward and achieved via the "Remove template" option on the template details page, but note that deleting a template won't delete integrations created from it.\u003c/p\u003e\n"],["\u003cp\u003eThe document refers the reader to use templates to create an integration, to import and download, to share and to learn how to create templates.\u003c/p\u003e\n"]]],[],null,["# Manage templates\n\nSee the [supported connectors](/integration-connectors/docs/connector-reference-overview) for Application Integration.\n\nManage templates\n================\n\n|\n| **Preview\n| --- templates**\n|\n|\n| This feature is subject to the \"Pre-GA Offerings Terms\" in the General Service Terms section\n| of the [Service Specific Terms](/terms/service-terms#1).\n|\n| Pre-GA features are available \"as is\" and might have limited support.\n|\n| For more information, see the\n| [launch stage descriptions](/products#product-launch-stages).\n\n\nThis page describes how to edit and delete project templates in your Google Cloud project.\n\nRequired role\n-------------\n\n\nTo get the permissions that\nyou need to manage templates,\n\nask your administrator to grant you the\n\n\n[Application Integration Editor](/iam/docs/roles-permissions/integrations#integrations.integrationEditor) (`roles/integrations.integrationEditor`)\nIAM role on the project.\n\n\nFor more information about granting roles, see [Manage access to projects, folders, and organizations](/iam/docs/granting-changing-revoking-access).\n\n\nThis predefined role contains\n\nthe permissions required to manage templates. To see the exact permissions that are\nrequired, expand the **Required permissions** section:\n\n\n#### Required permissions\n\nThe following permissions are required to manage templates:\n\n- Edit templates: ` integrations.templates.update `\n- Delete templates: ` integrations.templates.delete`\n\n\nYou might also be able to get\nthese permissions\nwith [custom roles](/iam/docs/creating-custom-roles) or\nother [predefined roles](/iam/docs/roles-overview#predefined).\n\nEdit templates\n--------------\n\nTo edit an existing project template, do the following:\n| **Note:** Editing a template does not update the existing integration versions created from the template.\n\n\u003cbr /\u003e\n\n1. In the Google Cloud console, go to the **Application Integration** page.\n\n [Go to Application Integration](https://console.cloud.google.com/integrations)\n2. In the navigation menu, click **Templates** .\n\n The **Templates** page appears listing all the templates (global, shared, and project) available in your Google Cloud project.\n3. To edit a shared template, click the **Shared templates** tab. To edit a project template, click the **Project templates** tab.\n4. Click the template that you want to edit from the respective tab selected.\n5. In the template details page, click edit **Edit** .\n\n The **Edit template** pane appears.\n | **Note:** Application Integration currently only supports editing templates through a new intgeration version. You must therefore create a new integration version from the template, modify the integration, and then create a new template from the integration version.\n - Enter the name of the new integration version and optionally, a description for the new integration version.\n - Click **Create and edit** .\n\n The integration editor page appears with the **Config variables** pane open.\n\n \u003cbr /\u003e\n\n6. Modify the config variables for your template (if any) and click **Done** . Click **Cancel** to skip this step.\n7. In the integration editor page, add or modify the required components: [tasks](/application-integration/docs/tasks), [triggers](/application-integration/docs/triggers), or [connectors](/application-integration/docs/configure-connectors-task). Once your integration template is ready, go to the next step. **Tip:** Use [Config variables](/application-integration/docs/variables#config_var) when configuring the input and output parameters of the components of your integration. This allows you to create a template that can be used in multiple environments.\n8. Click **Templates \\\u003e Edit template** from the integration editor navigation bar.\n\n The integration editor switches to edit template mode, temporaily locking any further actions on the integration, and the **Edit Template** pane appears.\n\n\n9. Make any changes to the template details and click **Preview**.\n10. Review all your changes made to the template and click **Update template** .\n\n The existing template is updated with the changes you made. To view the updated template, go to the **Templates** page and click the [Project Templates](https://console.cloud.google.com/integrations/templates) tab.\n\nDelete templates\n----------------\n\nTo delete a template, do the following:\n\n1. In the Google Cloud console, go to the **Templates** page.\n\n [Go to Templates](https://console.cloud.google.com/integrations/templates)\n2. To delete a shared template, click the **Shared templates** tab. To delete a project template, click the **Project templates** tab.\n3. Click the template that you want to delete from the respective tab selected.\n4. In the template details page, click delete **Remove template** .\n\n A confirmation dialog appears.\n5. Click **Delete** to permanently delete the template.\n| **Notes:**\n|\n| - Deleting a template does not delete the integrations created from the template.\n| - You can only delete the project templates and shared templates that you own or have edit access to. Global templates cannot be deleted.\n\nWhat's next\n-----------\n\n- Learn how to use templates to create an integration, see [Create integrations from templates](/application-integration/docs/create-integration-from-templates).\n- Learn how to import and download templates, see [import and download templates](/application-integration/docs/manage-templates).\n- Learn how to create templates, see [create templates](/application-integration/docs/create-templates).\n- Learn how to share templates, see [share templates](/application-integration/docs/share-templates)."]]