本教程介绍如何开始使用 Compute Engine。 请按照本教程向 Compute Engine 部署一个 Hello World Node.js Web 应用。如需获取 App Engine 入门方面的帮助,请参阅 App Engine 标准环境。
目标
- 使用 Cloud Shell 下载并部署 Hello World 示例应用。
- 将 Hello World 示例应用部署到单个 Compute Engine 实例。
费用
在本文档中,您将使用 Google Cloud 的以下收费组件:
准备工作
- 登录您的 Google Cloud 账号。如果您是 Google Cloud 新手,请创建一个账号来评估我们的产品在实际场景中的表现。新客户还可获享 $300 赠金,用于运行、测试和部署工作负载。
-
In the Google Cloud console, on the project selector page, select or create a Google Cloud project.
-
启用 Compute Engine API。
-
In the Google Cloud console, on the project selector page, select or create a Google Cloud project.
-
启用 Compute Engine API。
-
在 Google Cloud 控制台中,在 Cloud Shell 中打开该应用。
借助 Cloud Shell,您可以直接在浏览器中通过命令行访问云端资源。
-
如果您同意克隆代码库,请点击确认以下载示例代码并切换到应用目录。
-
在 Cloud Shell 中,配置 gcloud CLI 以使用新的 Google Cloud 项目:
# Configure gcloud for your project
gcloud config set project YOUR_PROJECT_ID
在 Cloud Shell 中运行应用
如果您在上一部分中点击转到 Cloud Shell,则 Cloud Shell 会将 nodejs-getting-started 代码库克隆到您的实例。实例启动后,您的工作目录为 ~/cloudshell_open/nodejs-getting-started/gce。如果您不在此目录中,请参阅准备工作中的步骤。
安装依赖项:
npm install运行应用:
npm start在 Cloud Shell 中,点击 Web 预览,然后选择在端口 8080 上预览。此时浏览器会打开一个新窗口,显示出您运行中的应用。
要停止本地网络服务器,请按 Control+C。
设置 Cloud Source Repositories
启用 Cloud Source Repositories API。
在 Google Cloud 控制台中,转到 Cloud Source Repositories。
选择添加代码库。

选择创建新代码库,然后点击继续。
在代码库名称字段中,输入
new-repo。在项目字段中,输入您为本教程创建或选择的项目的 ID,然后点击继续。
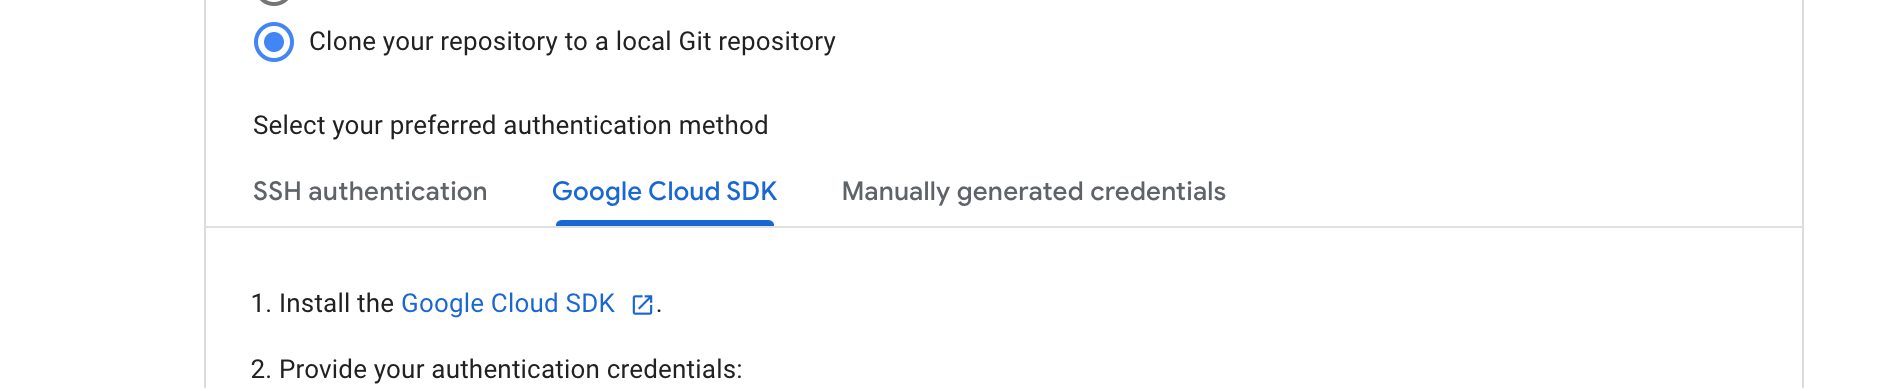
选择将您的代码库克隆到本地 Git 代码库。
在 Cloud Shell 中,按照 Google Cloud SDK 标签页中的说明返回根目录并克隆代码库,同时使此标签页保持打开状态。
在按照该说明完成最后一步之前,将您的应用复制到 Cloud Shell 中的新代码库:
cd new-repo
cp ../cloudshell_open/nodejs-getting-started/gce/app.js app.js
cp ../cloudshell_open/nodejs-getting-started/gce/package.json package.json
按照 Google Cloud SDK 标签页中的其余说明将您的更改提交到代码库。通过刷新浏览器并检查代码是否已添加到代码库
new-repo,确认您已将代码添加到代码库。
部署到单个实例
此部分逐步介绍了如何在 Compute Engine 上运行应用的单个实例。

您可以通过 Cloud Shell 将应用部署到单个 Compute Engine 实例虚拟机 (VM),以运行您的应用。
使用启动脚本初始化实例
您需要一种方法来指示实例下载并运行这些代码。 实例可能拥有对其执行启动或重启操作时会运行的启动脚本。
下面是 Hello World 示例应用中包含的启动脚本:
启动脚本会执行以下任务:
安装 Cloud Logging 代理。该代理会自动从系统日志收集日志。
安装 Supervisor 将应用作为守护进程运行。
从 Cloud Source Repositories 代码库克隆应用的源代码并安装依赖项。
配置 Supervisor 以运行该应用。如果应用意外退出或被管理员或其他进程终止,Supervisor 将确保应用重启。此外,它还会将应用的
stdout和stderr发送到 syslog,以便由 Logging 代理收集。
创建和配置 Compute Engine 实例
创建 Compute Engine 实例:
Linux/macOS
gcloud compute instances create my-app-instance \
    --image-family=debian-9 \
    --image-project=debian-cloud \
    --machine-type=g1-small \
    --scopes userinfo-email,cloud-platform \
    --metadata app-location=us-central1-f \
    --metadata-from-file startup-script=gce/startup-script.sh \
    --zone us-central1-f \
    --tags http-server
Windows
gcloud compute instances create my-app-instance ^
    --image-family=debian-9 ^
    --image-project=debian-cloud ^
    --machine-type=g1-small ^
    --scopes userinfo-email,cloud-platform ^
    --metadata-from-file startup-script=gce/startup-script.sh ^
    --zone us-central1-f ^
    --tags http-server
将地区替换为开发地区,例如
us-central1-a。如需详细了解区域和地区,请参阅地理位置和区域。这会创建一个新实例,允许其访问 Google Cloud 服务并运行您的启动脚本。实例名称为
my-app-instance。检查实例创建的进度:
gcloud compute instances get-serial-port-output my-app-instance --zone YOUR_ZONE
将
YOUR_ZONE替换为您将实例部署到的可用区。启动脚本完成后,您会看到以下消息:
startup-script: INFO Finished running startup scripts.
创建一条防火墙规则以允许流量进入您的实例:
gcloud compute firewall-rules create default-allow-http-8080 \
    --allow tcp:8080 \
    --source-ranges 0.0.0.0/0 \
    --target-tags http-server \
    --description "Allow port 8080 access to http-server"
获取您的实例的外部 IP 地址:
gcloud compute instances list要查看应用的运行情况,请在浏览器中输入以下网址:
http://YOUR_INSTANCE_IP:8080
将
YOUR_INSTANCE_IP替换为实例的外部 IP 地址。
管理和监控实例
您可以使用 GCP Console 来监控和管理您的实例。
- 在 Google Cloud 控制台中,转到虚拟机实例页面。
- 在虚拟机实例列表中,点击要连接的实例所在行中的 SSH。
- 如需查看 Compute Engine 资源生成的所有日志,请转到日志浏览器页面。转到日志浏览器
Cloud Logging 会自动配置为从各种常用服务(包括
syslog)收集日志。
清理
为避免因本教程中使用的资源导致您的 Google Cloud 帐号产生费用,请删除包含这些资源的项目,或者保留项目但删除各个资源。
删除项目
- 在 Google Cloud 控制台中,进入管理资源页面。
- 在项目列表中,选择要删除的项目,然后点击删除。
- 在对话框中输入项目 ID,然后点击关闭以删除项目。
逐个删除资源
gcloud compute instances delete my-app-instance --zone=YOUR_ZONE --delete-disks=all
gcloud compute firewall-rules delete default-allow-http-8080
后续步骤
探索有关 Google Cloud 的参考架构、图表和最佳实践。查看我们的 Cloud Architecture Center。
如需了解构建应用所需的其他 Node.js 资源,请参阅以下内容:
- 转到 Compute Engine > 实例组以管理和监控实例组部署。
- 转到网络服务 > 负载均衡以管理负载均衡配置,包括网址映射和后端服务。
- 使用 Firestore 处理会话
- 使用 Identity-Aware Proxy 对用户进行身份验证
- 向 Google Kubernetes Engine 部署应用
- 了解其他 Google Cloud 服务。