En este documento, se utilizan los siguientes componentes facturables de Google Cloud:
- Dataproc
- Compute Engine
- Cloud Composer
Para generar una estimación de costes basada en el uso previsto,
utiliza la calculadora de precios.
Antes de empezar
Configurar el proyecto
- Sign in to your Google Cloud account. If you're new to Google Cloud, create an account to evaluate how our products perform in real-world scenarios. New customers also get $300 in free credits to run, test, and deploy workloads.
-
In the Google Cloud console, on the project selector page, select or create a Google Cloud project.
Roles required to select or create a project
- Select a project: Selecting a project doesn't require a specific IAM role—you can select any project that you've been granted a role on.
-
Create a project: To create a project, you need the Project Creator
(
roles/resourcemanager.projectCreator), which contains theresourcemanager.projects.createpermission. Learn how to grant roles.
-
Verify that billing is enabled for your Google Cloud project.
-
Enable the Dataproc, Compute Engine, and Cloud Composer APIs.
Roles required to enable APIs
To enable APIs, you need the Service Usage Admin IAM role (
roles/serviceusage.serviceUsageAdmin), which contains theserviceusage.services.enablepermission. Learn how to grant roles. -
Install the Google Cloud CLI.
-
Si utilizas un proveedor de identidades (IdP) externo, primero debes iniciar sesión en la CLI de gcloud con tu identidad federada.
-
Para inicializar gcloud CLI, ejecuta el siguiente comando:
gcloud init -
In the Google Cloud console, on the project selector page, select or create a Google Cloud project.
Roles required to select or create a project
- Select a project: Selecting a project doesn't require a specific IAM role—you can select any project that you've been granted a role on.
-
Create a project: To create a project, you need the Project Creator
(
roles/resourcemanager.projectCreator), which contains theresourcemanager.projects.createpermission. Learn how to grant roles.
-
Verify that billing is enabled for your Google Cloud project.
-
Enable the Dataproc, Compute Engine, and Cloud Composer APIs.
Roles required to enable APIs
To enable APIs, you need the Service Usage Admin IAM role (
roles/serviceusage.serviceUsageAdmin), which contains theserviceusage.services.enablepermission. Learn how to grant roles. -
Install the Google Cloud CLI.
-
Si utilizas un proveedor de identidades (IdP) externo, primero debes iniciar sesión en la CLI de gcloud con tu identidad federada.
-
Para inicializar gcloud CLI, ejecuta el siguiente comando:
gcloud init - Crea la plantilla de flujo de trabajo
sparkpi.gcloud dataproc workflow-templates create sparkpi \ --region=us-central1 - Añade el trabajo de Spark a la
sparkpiplantilla de flujo de trabajo. La marca "compute"step-ididentifica la tarea SparkPi.gcloud dataproc workflow-templates add-job spark \ --workflow-template=sparkpi \ --step-id=compute \ --class=org.apache.spark.examples.SparkPi \ --jars=file:///usr/lib/spark/examples/jars/spark-examples.jar \ --region=us-central1 \ -- 1000 - Usa un clúster gestionado
de un solo nodo
para ejecutar el flujo de trabajo. Dataproc creará el clúster, ejecutará el flujo de trabajo en él y, a continuación, eliminará el clúster cuando se complete el flujo de trabajo.
gcloud dataproc workflow-templates set-managed-cluster sparkpi \ --cluster-name=sparkpi \ --single-node \ --region=us-central1 - Confirma la creación de la plantilla de flujo de trabajo.
Consola
Haz clic en el nombre de
sparkpien la página Flujos de trabajo de Dataproc en la consola de Google Cloud para abrir la página Detalles de la plantilla de flujo de trabajo. Haz clic en el nombre de la plantilla de flujo de trabajo para confirmar los atributos de la plantillasparkpi.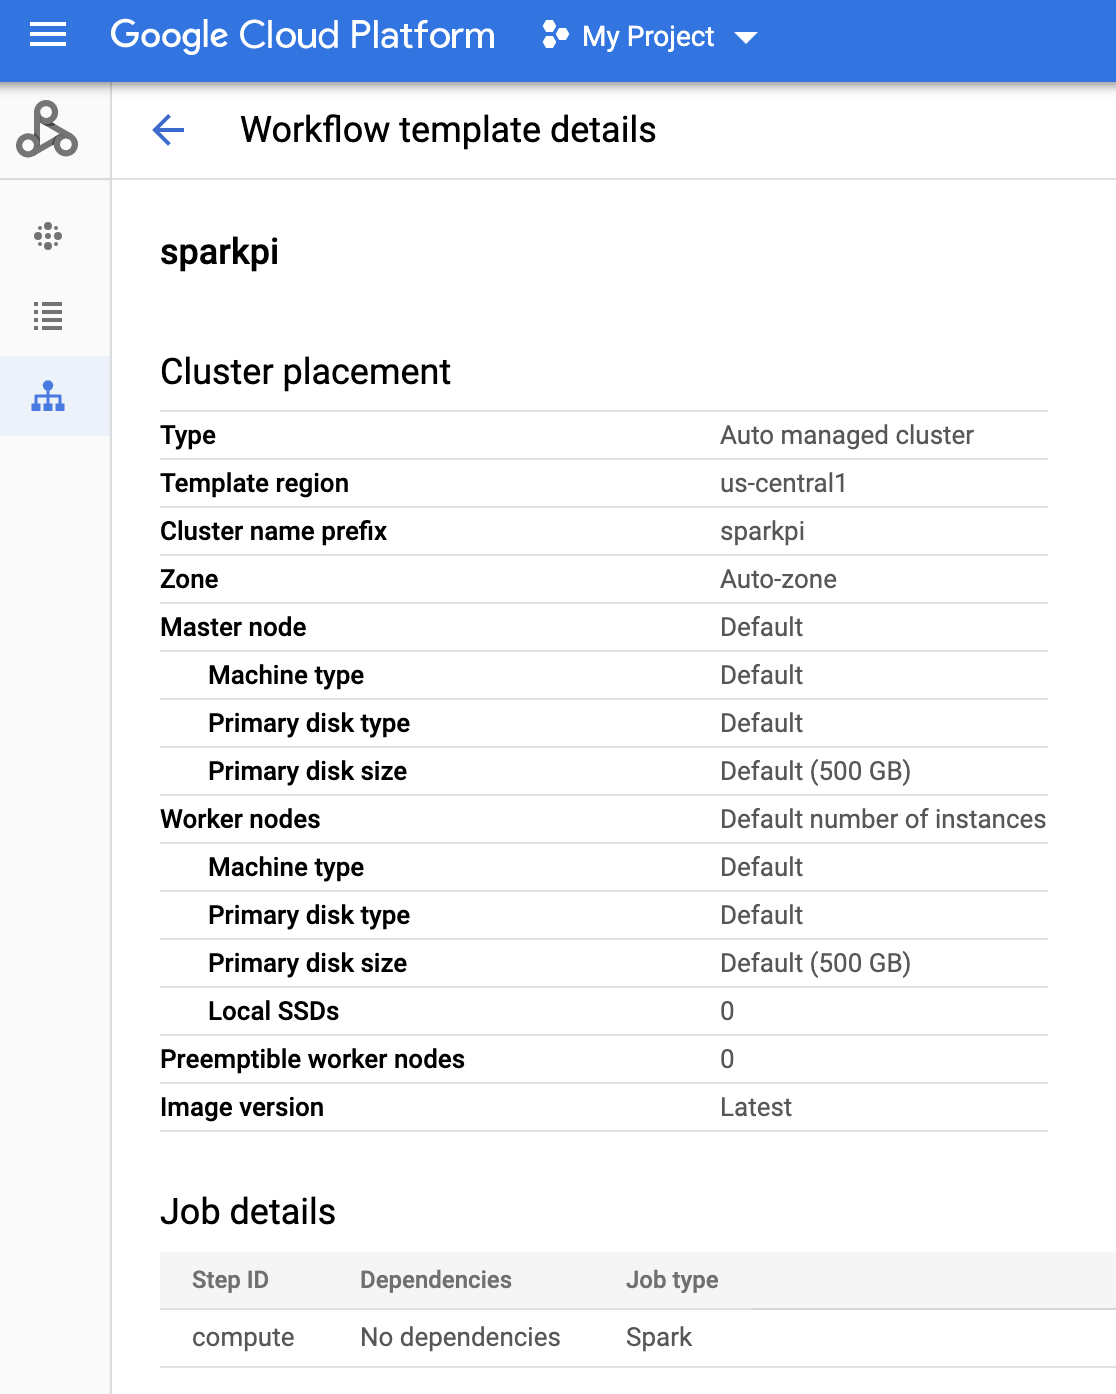
Comando gcloud
Ejecuta el siguiente comando:
gcloud dataproc workflow-templates describe sparkpi --region=us-central1 - Crea o usa un entorno de Cloud Composer.
- Define las variables de entorno.
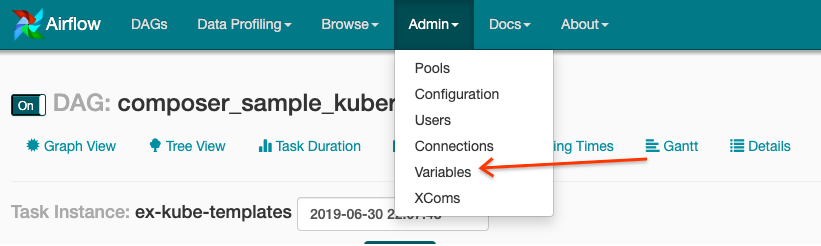
Interfaz de usuario de Airflow
- En la barra de herramientas, haga clic en Administrar > Variables.
- Haz clic en Crear.
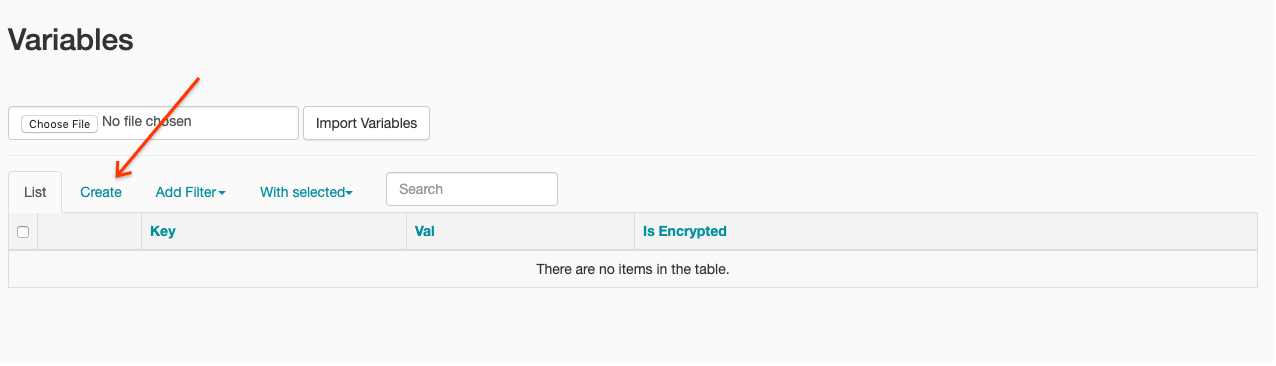
- Introduce la siguiente información:
- Tecla:
project_id - Valor: PROJECT_ID (tu ID de proyecto) Google Cloud
- Tecla:
- Haz clic en Guardar.
Comando gcloud
Introduce los comandos siguientes:
ENVIRONMENTes el nombre del entorno de Cloud Composer.LOCATIONes la región en la que se encuentra el entorno de Cloud Composer.PROJECT_IDes el ID del proyecto que contiene el entorno de Cloud Composer.
gcloud composer environments run ENVIRONMENT --location LOCATION variables set -- project_id PROJECT_ID - En la barra de herramientas, haga clic en Administrar > Variables.
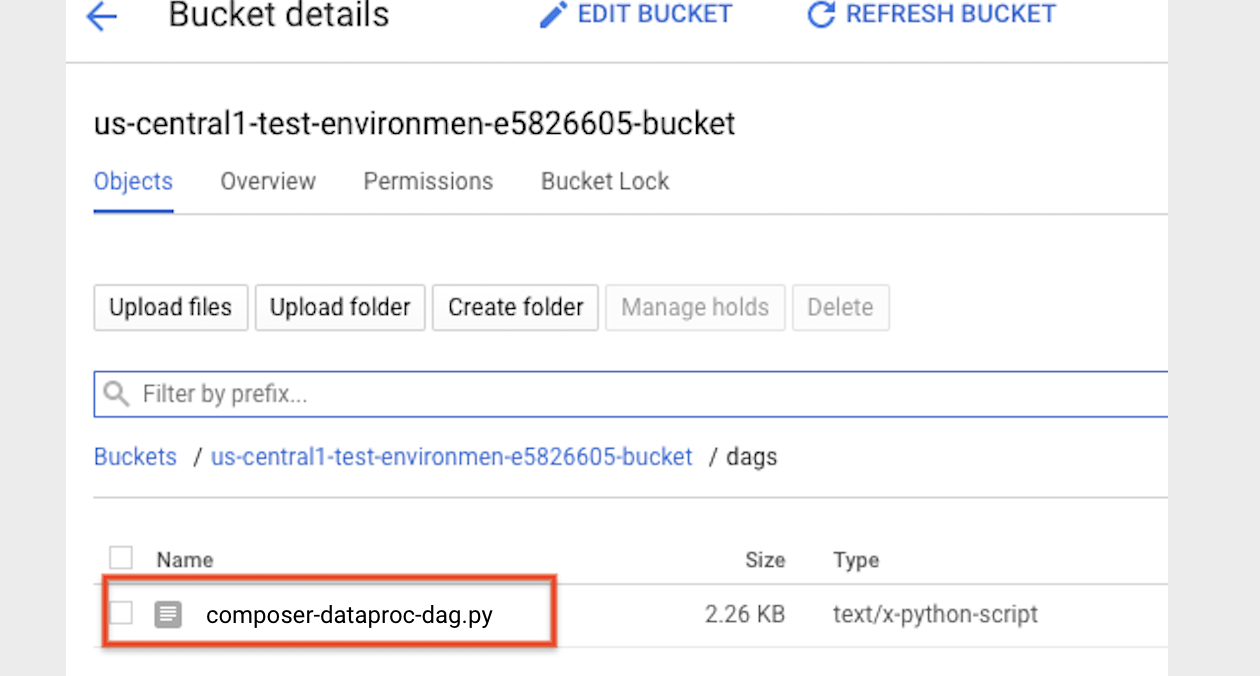
- Copia el siguiente código DAG de forma local en un archivo llamado "composer-dataproc-dag.py",
que usa el
DataprocInstantiateWorkflowTemplateOperator.
Airflow 2
Airflow 1
- Sube tu DAG a la carpeta de tu entorno en Cloud Storage. Una vez que se haya completado la subida correctamente, haga clic en el enlace Carpeta DAGs de la página Entorno de Cloud Composer.
- Abre la interfaz web de Airflow.
- En la página DAGs, haz clic en el nombre del DAG (por ejemplo,
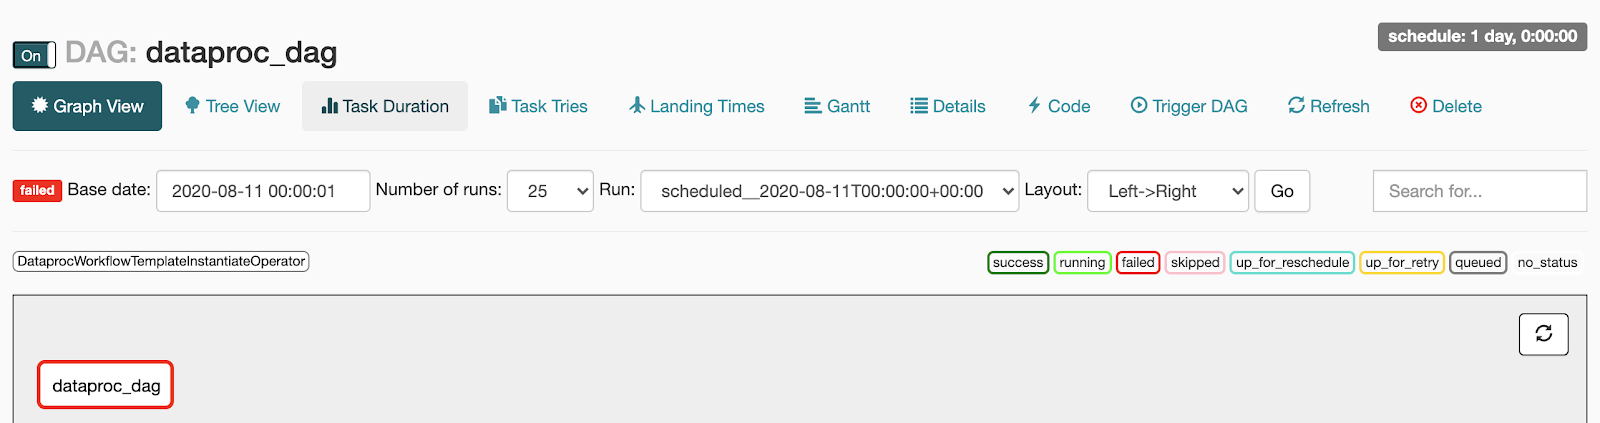
dataproc_workflow_dag). - En la página Detalles de los DAGs, haz clic en Vista de gráfico.
- Comprobar el estado:
- Error: la tarea tiene un cuadro rojo alrededor.
También puedes mantener el puntero sobre la tarea y buscar Estado: Fallido.
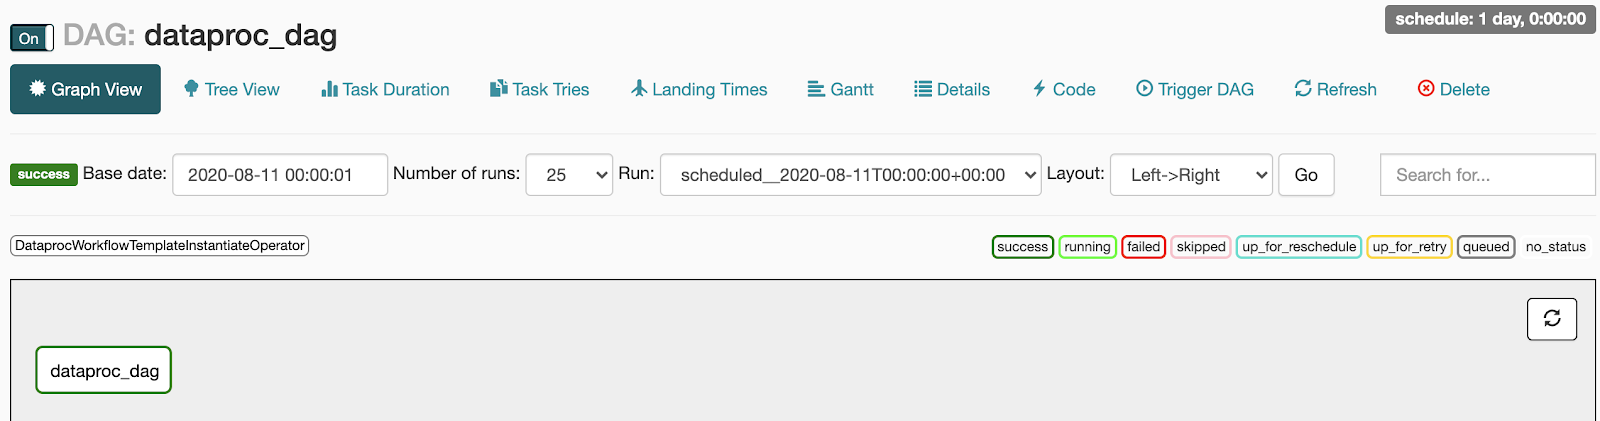
- Éxito: la tarea tiene un recuadro verde.
También puedes mantener el puntero sobre la tarea y comprobar si aparece el mensaje Estado: Éxito.
- Error: la tarea tiene un cuadro rojo alrededor.
También puedes mantener el puntero sobre la tarea y buscar Estado: Fallido.
- Consulta Introducción a las plantillas de flujo de trabajo de Dataproc.
- Consulta Soluciones de programación de flujos de trabajo.
Crear una plantilla de flujo de trabajo de Dataproc
Copia y ejecuta los siguientes comandos en una ventana de terminal local o en Cloud Shell para crear y definir una plantilla de flujo de trabajo.
Crear y subir un DAG a Cloud Storage
Ver el estado de una tarea
Interfaz de usuario de Airflow
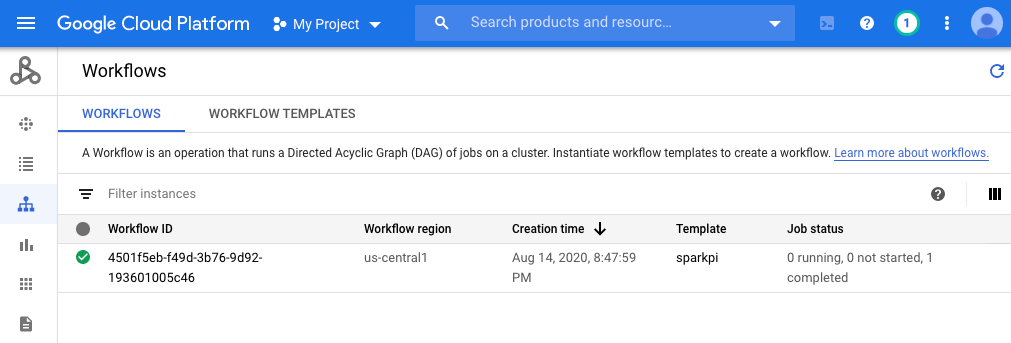
Consola
Haz clic en la pestaña Flujos de trabajo para ver el estado de los flujos de trabajo.
Comando gcloud
gcloud dataproc operations list \
    --region=us-central1 \
    --filter="labels.goog-dataproc-workflow-template-id=sparkpi"
Limpieza
Para evitar que se apliquen cargos en tu cuenta, puedes eliminar los recursos utilizados en este tutorial: Google Cloud