Questa pagina descrive come leggere più tabelle da un database Microsoft SQL Server utilizzando l'origine Multi Table. Utilizza l'origine Multi Table quando vuoi che la pipeline legga da più tabelle. Se vuoi che la pipeline legga da una singola tabella, consulta Lettura da una tabella SQL Server.
L'origine Multi Table restituisce dati con più schemi e include un campo del nome della tabella che indica la tabella da cui provengono i dati. Quando utilizzi l'origine Multi Table, utilizza uno dei sink multi-tabella, BigQuery Multi Table o GCS Multi File.
Archivia la password di SQL Server come chiave sicura
Aggiungi la password di SQL Server come chiave sicura per la crittografia nell'istanza Cloud Data Fusion. Più avanti in questa guida, ti assicurerai che la password venga recuperata utilizzando Cloud KMS.
Nell'angolo in alto a destra di qualsiasi pagina di Cloud Data Fusion, fai clic su Amministratore di sistema.
Fai clic sulla scheda Configuration (Configurazione).
Fai clic su Effettua chiamate HTTP.

Nel menu a discesa, scegli PUT.
Nel campo del percorso, inserisci
namespaces/NAMESPACE_ID/securekeys/PASSWORD.Nel campo Corpo, inserisci
{"data":"SQL_SERVER_PASSWORD"}.Fai clic su Invia.
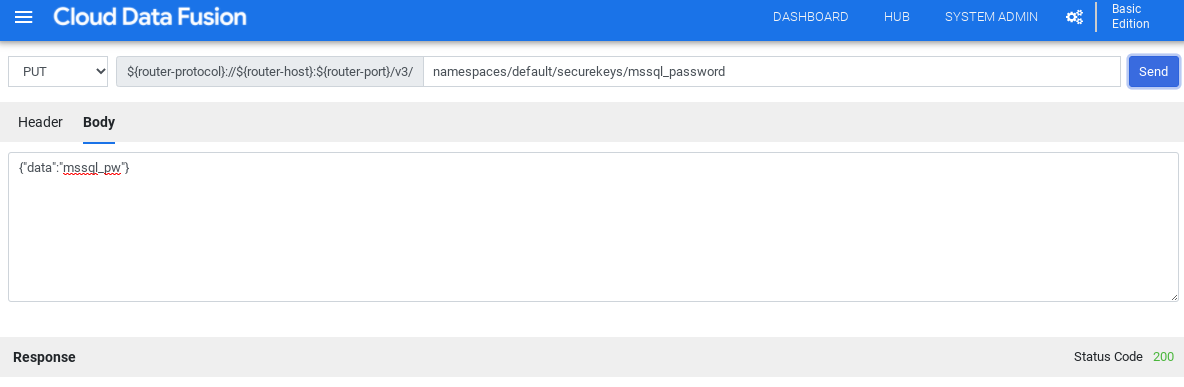
Assicurati che la Risposta che ricevi sia il codice di stato 200.
Ottieni il driver JDBC per SQL Server
Utilizzare l'hub
Nella UI di Cloud Data Fusion, fai clic su Hub.
Nella barra di ricerca, inserisci
Microsoft SQL Server JDBC Driver.Fai clic su Driver JDBC di Microsoft SQL Server.
Fai clic su Scarica. Segui i passaggi di download mostrati.
Fai clic su Esegui il deployment. Carica il file JAR del passaggio precedente.
Fai clic su Fine.
Utilizzo di Studio
Visita la pagina Microsoft.com.
Scegli il download e fai clic su Scarica.
Nella UI di Cloud Data Fusion, fai clic su Menu e vai alla pagina Studio.
Fai clic su Aggiungi.
Nella sezione Driver, fai clic su Carica.
Carica il file JAR scaricato nel passaggio 2.
Fai clic su Avanti.
Configura il driver inserendo un nome.
Nel campo Nome classe, inserisci
com.microsoft.sqlserver.jdbc.SQLServerDriver.Fai clic su Fine.
Esegui il deployment dei plug-in per più tabelle
Nella UI web di Cloud Data Fusion, fai clic su Hub.
Nella barra di ricerca, inserisci
Multiple table plugins.Fai clic su Multiple Table Plugins (Plug-in per più tabelle).
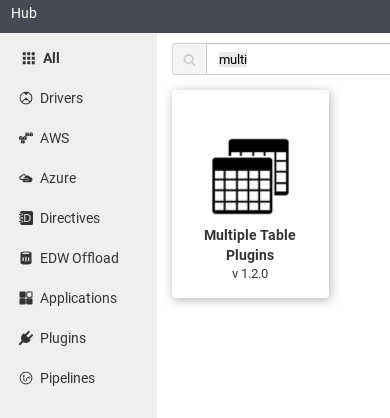
Fai clic su Esegui il deployment.
Fai clic su Fine.
Fai clic su Crea una pipeline.
Connettiti a SQL Server
Nella UI di Cloud Data Fusion, fai clic su Menu e vai alla pagina Studio.
In Studio, espandi il menu Origine.
Fai clic su Multiple Database Tables (Tabelle di più database).
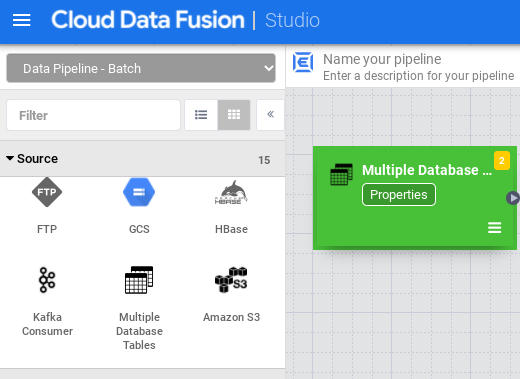
Tieni il puntatore sul nodo Multiple Database Tables (Più tabelle di database) e fai clic su Properties (Proprietà).
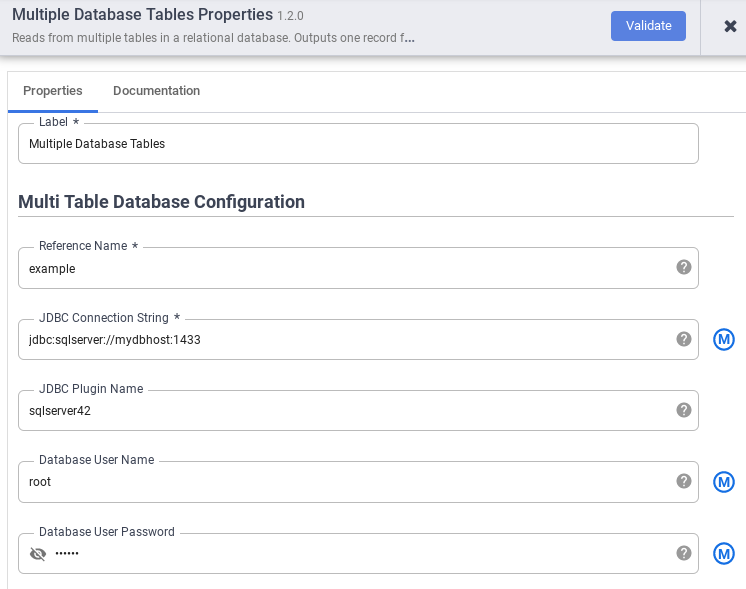
Nel campo Nome di riferimento, specifica un nome di riferimento che verrà utilizzato per identificare l'origine SQL Server.
Nel campo Stringa di connessione JDBC, inserisci la stringa di connessione JDBC. Ad esempio,
jdbc:sqlserver://mydbhost:1433. Per saperne di più, consulta la sezione Creazione dell'URL di connessione.Inserisci Nome plug-in JDBC, Nome utente database e Password utente database.
Fai clic su Validate (Convalida).
Fai clic su Close (Chiudi).
Connettersi a BigQuery o Cloud Storage
Nella UI di Cloud Data Fusion, fai clic su Menu e vai alla pagina Studio.
Espandi Sink.
Fai clic su BigQuery Multi Table o GCS Multi File.
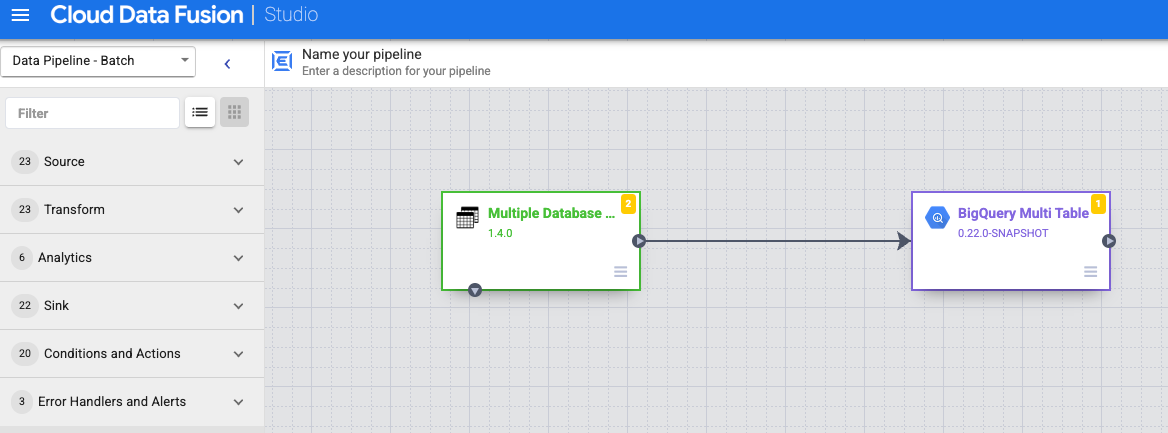
Collega il nodo Multiple Database Tables a BigQuery Multi Table o GCS Multi File.
Tieni il puntatore sul nodo BigQuery Multi Table o GCS Multi File, fai clic su Properties (Proprietà) e configura il sink.
Per saperne di più, consulta Google BigQuery Multi Table Sink e Google Cloud Storage Multi File Sink.
Fai clic su Validate (Convalida).
Fai clic su Close (Chiudi).
Esegui l'anteprima della pipeline
Nella UI di Cloud Data Fusion, fai clic su Menu e vai alla pagina Studio.
Fai clic su Anteprima.
Fai clic su Esegui. Attendi il completamento dell'anteprima.
Esegui il deployment della pipeline
Nella UI di Cloud Data Fusion, fai clic su Menu e vai alla pagina Studio.
Fai clic su Esegui il deployment.
esegui la pipeline.
Nella UI di Cloud Data Fusion, fai clic su Menu.
Fai clic su Elenco.
Fai clic sulla pipeline.
Nella pagina dei dettagli della pipeline, fai clic su Esegui.