La vista de lienzo proporciona una interfaz intuitiva y fácil de usar para administrar tus flujos de trabajo de integración.
Beneficios
La vista de lienzo ofrece los siguientes beneficios:
Mejor respuesta de la interacción del lienzo: Con la vista de lienzo, puedes mover tareas y activadores sin problemas, lo que facilita la creación de flujos de trabajo complejos.
Vista más clara de tu integración: El diseño visual actualizado proporciona una vista más clara de tu integración.
Vista de minimapa: Con la vista de minimapa, puedes ver el viewport en relación con el gráfico.
Integraciones más fáciles de compilar: La vista de lienzo proporciona un método intuitivo para agregar una nueva tarea secundaria con un borde de conexión o crear un borde nuevo para una tarea existente en tu integración.
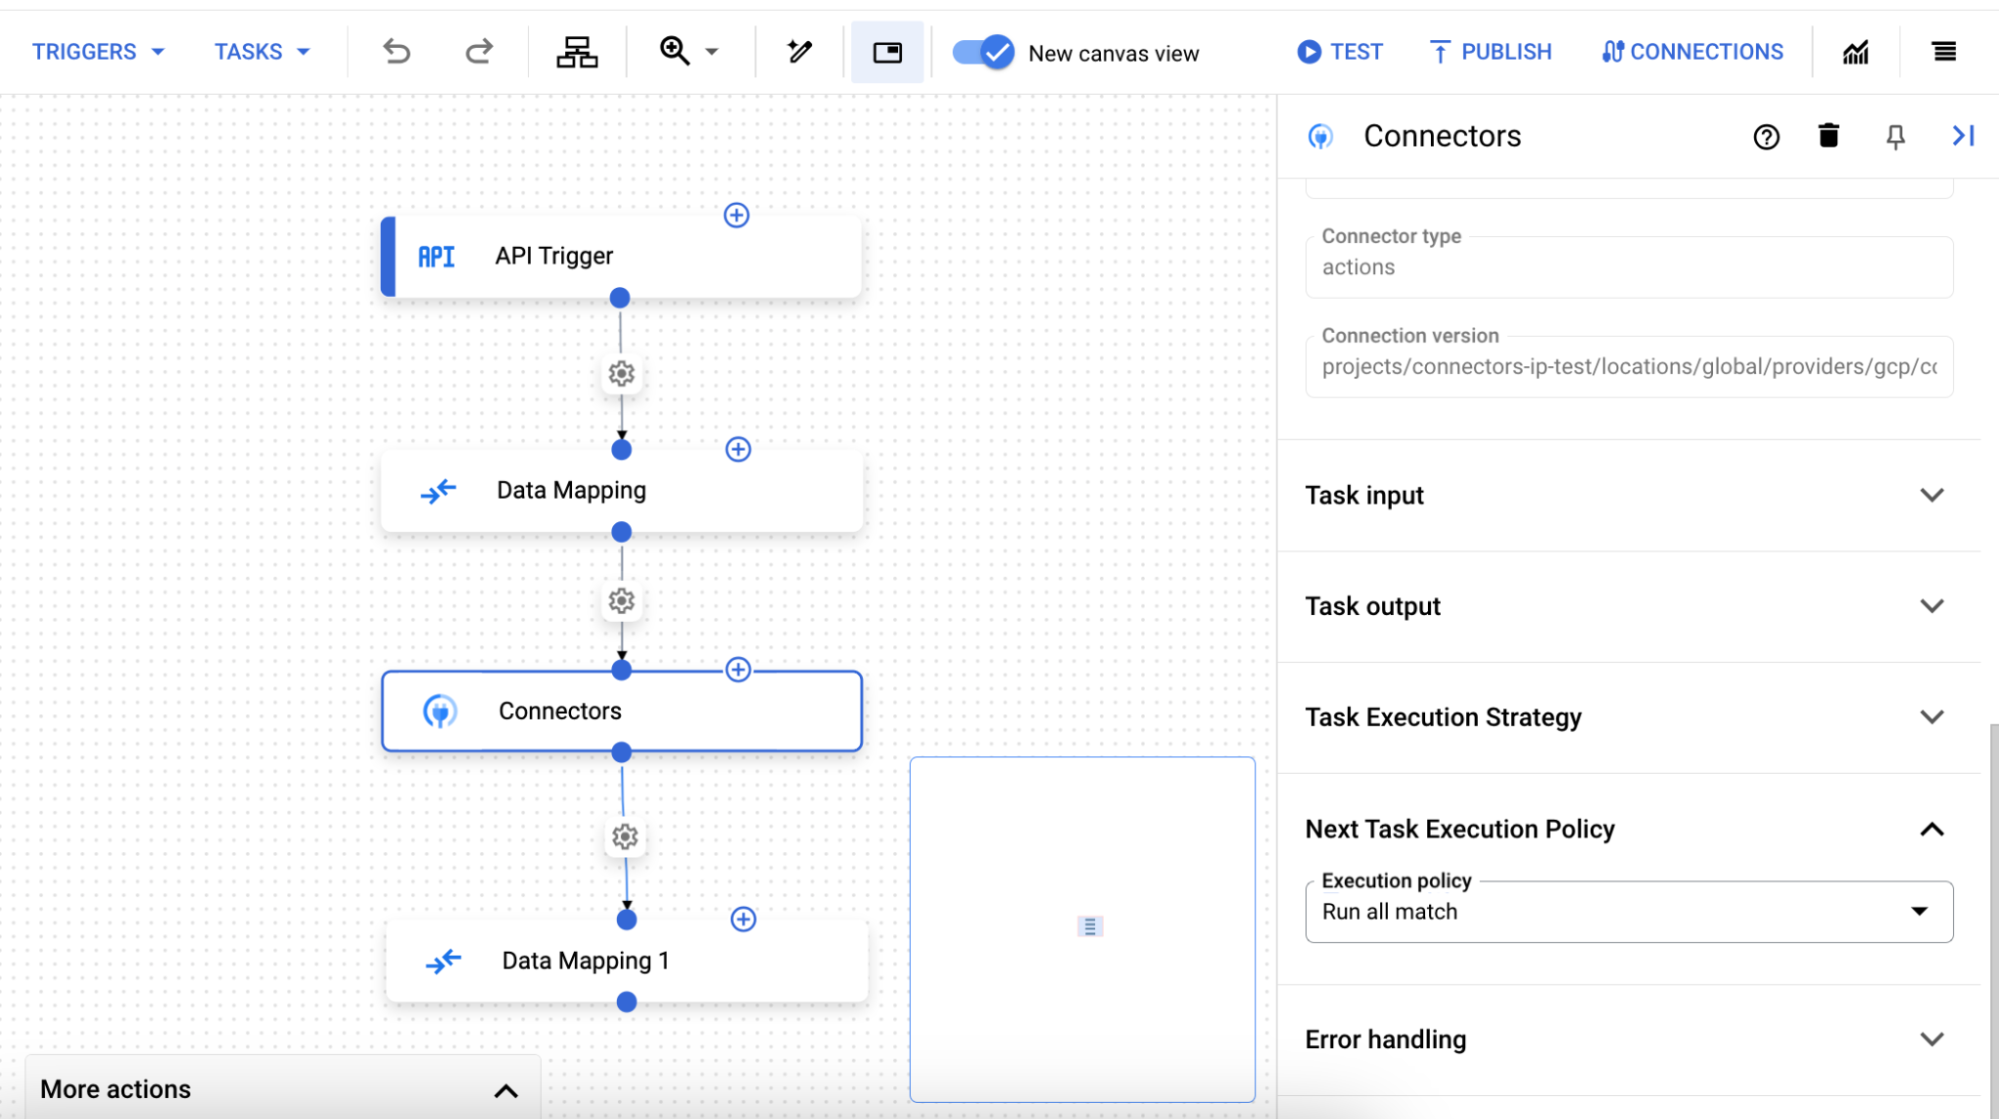
Mejora de la visibilidad: En el panel de configuración de tareas, puedes configurar la Estrategia de ejecución para esta tarea y la Política de ejecución para las siguientes tareas. Para obtener más información sobre estas políticas, consulta Bifurcaciones y uniones.
Cómo usar la vista de lienzo
Para usar la vista de lienzo, sigue estos pasos:
Abre el editor de integración.
En la barra de navegación, la vista de lienzo se activará automáticamente.
Usa el lienzo para crear tu flujo de trabajo de integración.
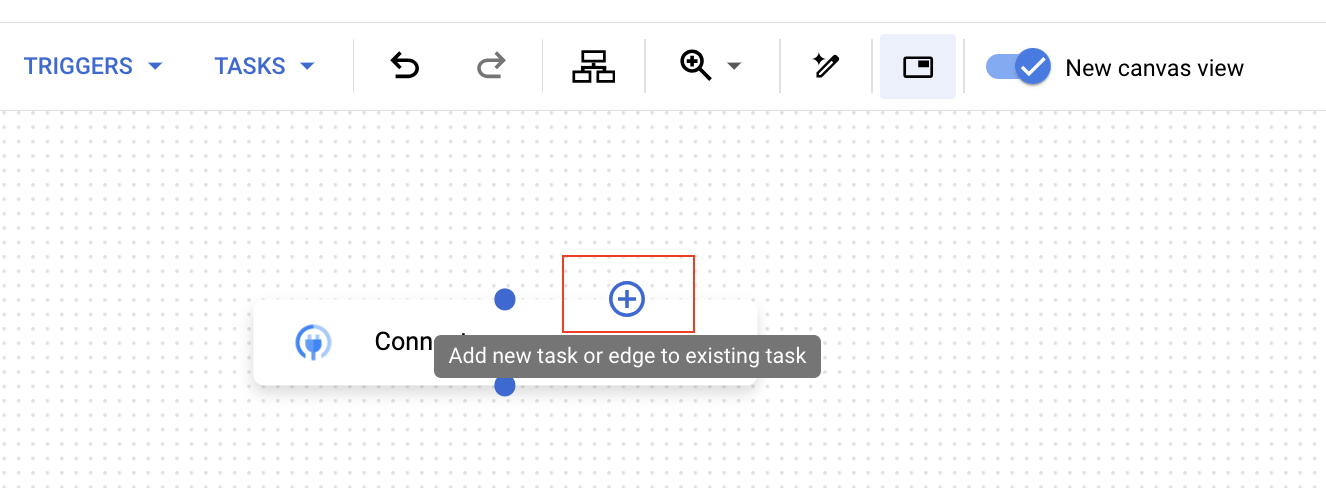
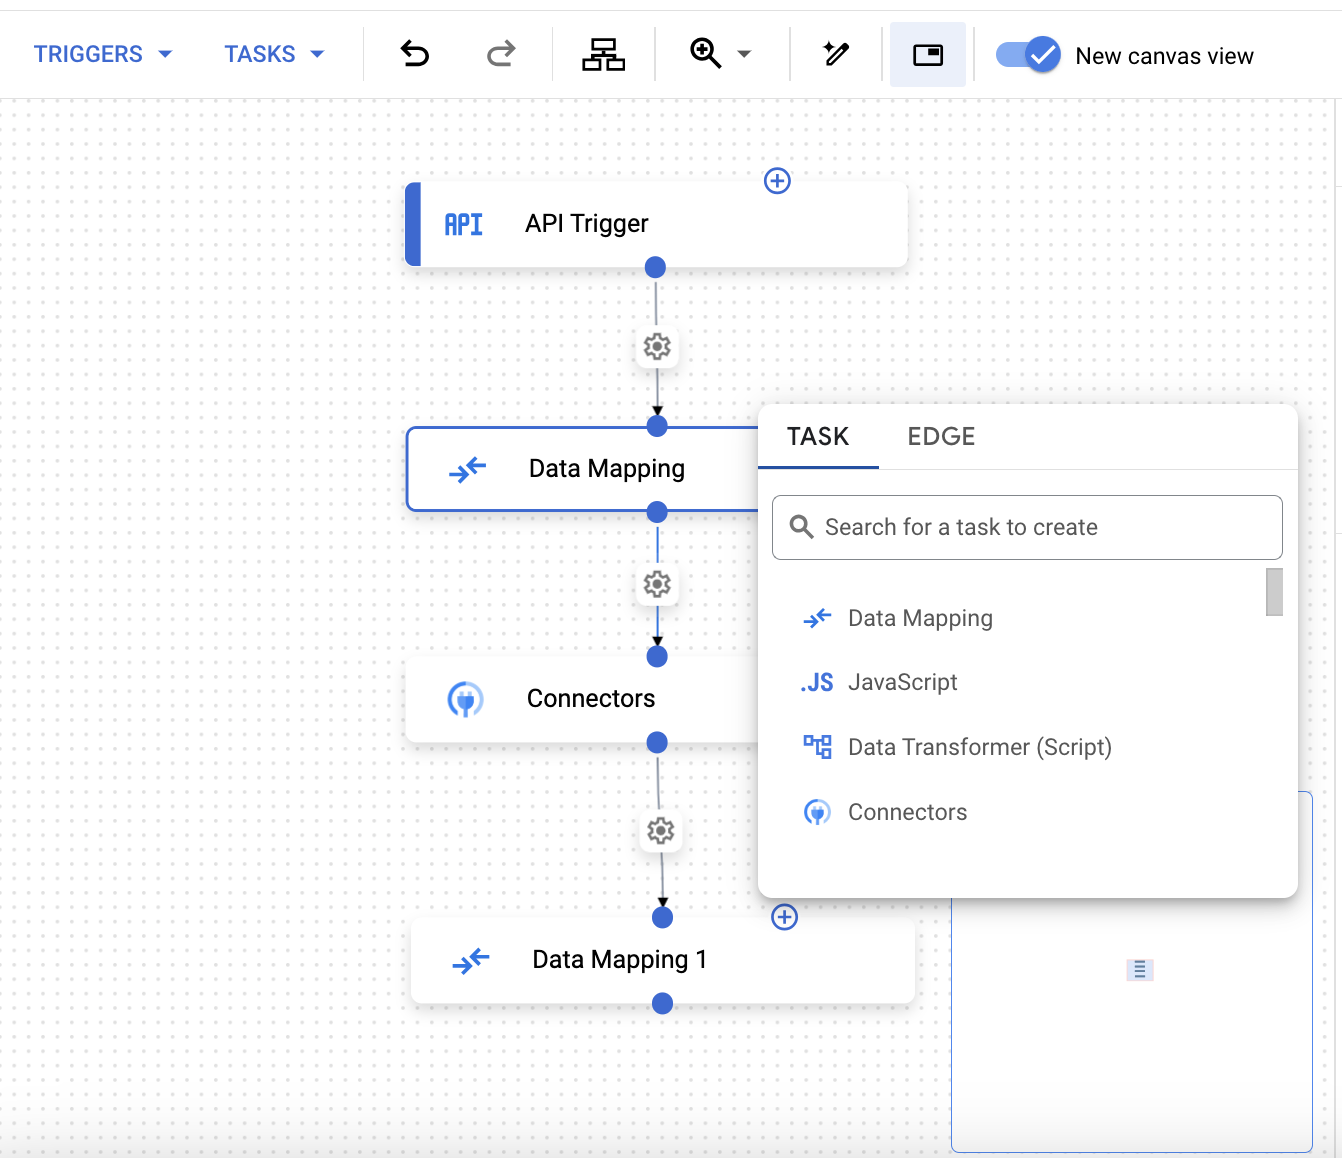
Para agregar una tarea o una arista, haz clic en add_circleAgregar una tarea o una arista nueva a la tarea existente.
Si tienes varios activadores en una integración, puedes usar la vista de minimapa para ver el viewport en relación con el gráfico.
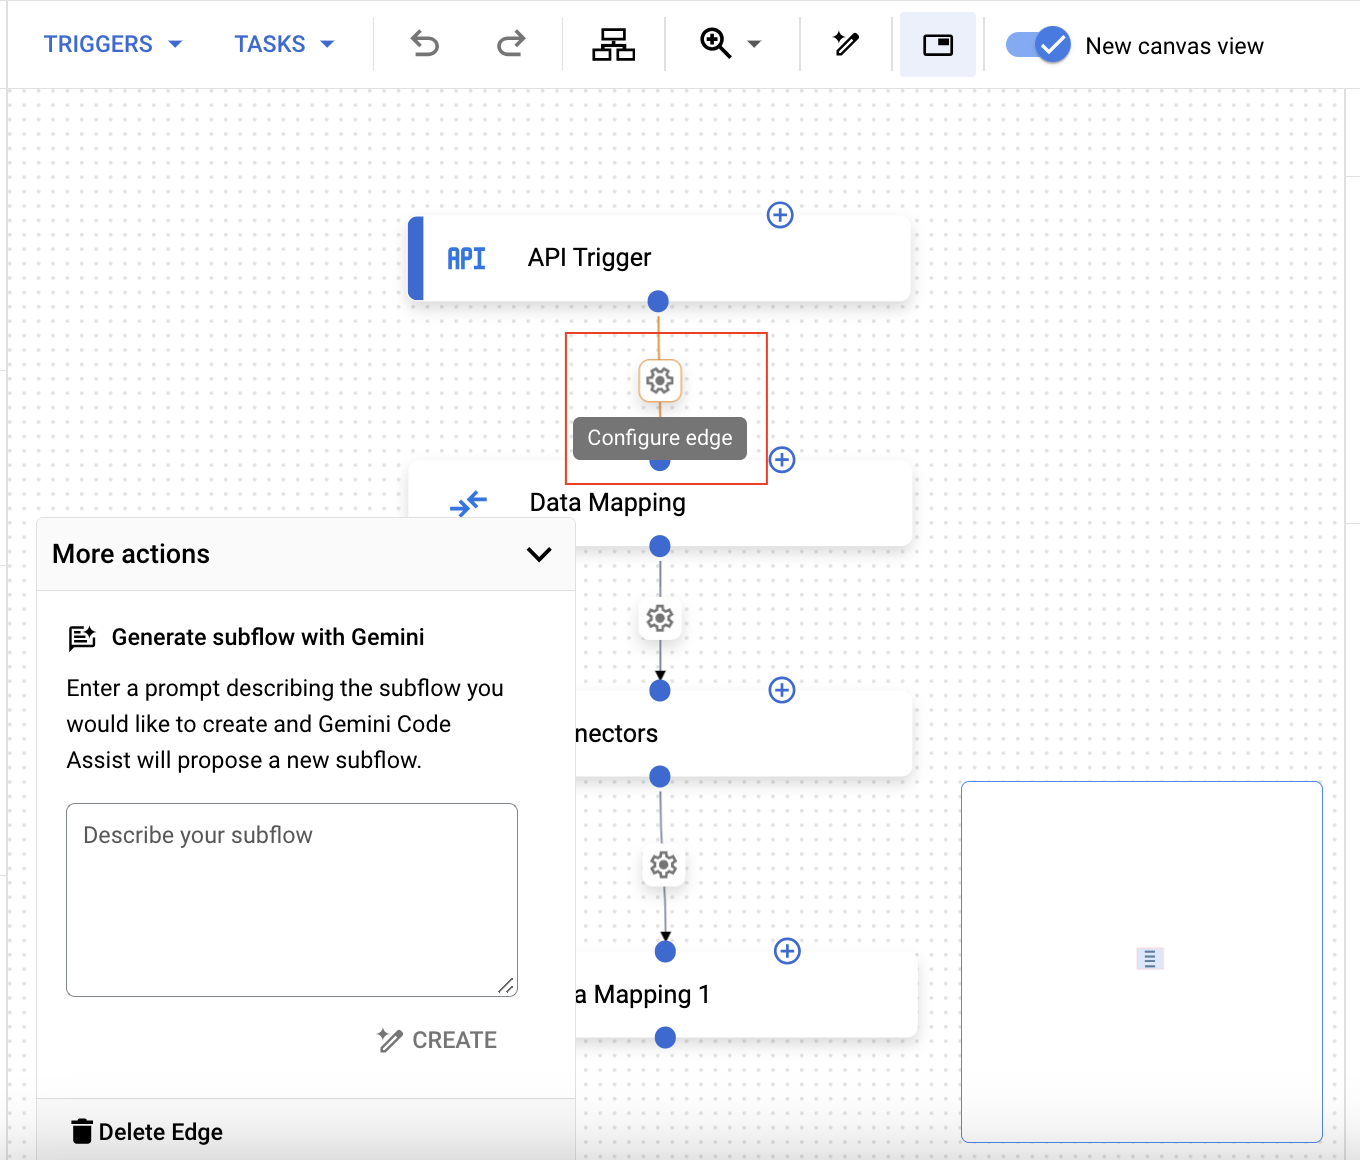
Para configurar un borde, haz clic en settingsConfigurar borde. Si habilitaste Gemini, aparecerá un menú emergente similar al de la siguiente imagen en el que se te pedirá que proporciones una entrada.
Para agregar una bifurcación, haz clic en la tarea y, luego, en el panel Configuración de la tarea, expande la Política de ejecución para las siguientes tareas.
De manera opcional, para usar teclas de acceso rápido, haz clic en una tarea o un activador en la vista de lienzo. Luego, usa teclas de acceso rápido para actualizar el flujo de trabajo de integración.
Teclas de acceso rápido
Las siguientes teclas de acceso rápido están disponibles en la vista del lienzo:
[[["Fácil de comprender","easyToUnderstand","thumb-up"],["Resolvió mi problema","solvedMyProblem","thumb-up"],["Otro","otherUp","thumb-up"]],[["Difícil de entender","hardToUnderstand","thumb-down"],["Información o código de muestra incorrectos","incorrectInformationOrSampleCode","thumb-down"],["Faltan la información o los ejemplos que necesito","missingTheInformationSamplesINeed","thumb-down"],["Problema de traducción","translationIssue","thumb-down"],["Otro","otherDown","thumb-down"]],["Última actualización: 2025-09-03 (UTC)"],[[["\u003cp\u003eThe new canvas view offers an intuitive interface for managing integration workflows, including improved responsiveness for moving tasks and triggers.\u003c/p\u003e\n"],["\u003cp\u003eUsers can easily add new tasks and edges, or create new edges to existing tasks, streamlining the integration building process.\u003c/p\u003e\n"],["\u003cp\u003eThe canvas view features a minimap view to help users navigate complex integrations with multiple triggers, providing a view of the viewport relative to the entire graph.\u003c/p\u003e\n"],["\u003cp\u003eConfiguration of task execution strategies and policies, along with fork additions are made easier from the task configuration pane.\u003c/p\u003e\n"],["\u003cp\u003eThe canvas view supports hotkeys such as copy, paste, undo, redo, and delete for efficient integration workflow management.\u003c/p\u003e\n"]]],[],null,["# Use the canvas view\n\nSee the [supported connectors](/integration-connectors/docs/connector-reference-overview) for Application Integration.\n\nUse the canvas view\n===================\n\nThe canvas view provides an intuitive and user-friendly interface for managing your\nintegration workflows.\n\nBenefits\n--------\n\nThe canvas view offers the following benefits:\n\n- **Improved responsiveness of the canvas interaction:** With the canvas view, you can smoothly move tasks and triggers, making it easier to create complex workflows.\n- **Clearer view of your integration:** The updated visual design provides a clearer view of your integration.\n- **Minimap view:** With the minimap view, you can see the viewport relative to the graph.\n- **Easier to build integrations:** The canvas view provides an intuitive method to add a new child task with a connecting edge or create a new edge to an existing task in your integration.\n\n\n- **Improved discoverability:** In the task configuration pane, you can configure the *Execution strategy for this task* and the *Execution policy for next tasks* . For more information about these policies, see [Forks and joins](/application-integration/docs/forks-joins).\n\nUse the canvas view\n-------------------\n\nTo use the canvas view, follow these steps:\n\n1. Open the integration editor.\n2. In the navigation bar, the canvas view will automatically be active. Use the canvas to create your integration workflow.\n3. To add a task or an edge, click the add_circle **Add new task or edge to the existing task** .\n\n\n4. If you have multiple triggers in an integration, you can use the *Minimap view* to see the viewport relative to the graph.\n\n\n5. To configure an [edge](/application-integration/docs/edge-and-edge-conditions), click the settings **Configure edge** . If you have [enabled Gemini](/application-integration/docs/build-integrations-gemini), then a pop-up menu, similar to the following image appears prompting you to provide an input.\n\n\n6. To add a [fork](/application-integration/docs/forks-joins), click the task and then in the **Task configuration** pane, expand the **Execution policy for next tasks** .\n\n\n7. Optionally, to use [hotkeys](#hotkeys), click a task or a trigger in the canvas view. Then, use hotkeys to update the integration workflow.\n\nHotkeys\n-------\n\nThe following hotkeys are available in the canvas view:\n\nWhat's next\n-----------\n\n- Learn about the [Integration editor layout](/application-integration/docs/integration-designer-layout).\n- Learn about [Application Integration concepts](/application-integration/docs/concepts)."]]