Set password policies
By default, Keycloak has no policy on passwords, but this identity provider provides different password policies available through the Keycloak Admin Console, such as password expiration, minimum length, or special characters.
To set password policies, complete the following steps in the Keycloak Admin Console:
- In the navigation menu, click Authentication.
- Click the Password Policy tab.
- In the Add policy list, select the policy that you want to apply.
- Enter a Policy value corresponding to the policy that you selected.
- Click Save.
After saving the policy, Keycloak enforces the policy for new users and sets an update password action for existing users to ensure that they change their password the next time they log in.
Configure two-factor authentication
Keycloak supports using Yubikeys as 2nd factor authentication (2FA) devices through the FIDO2/WebAuthn protocol.
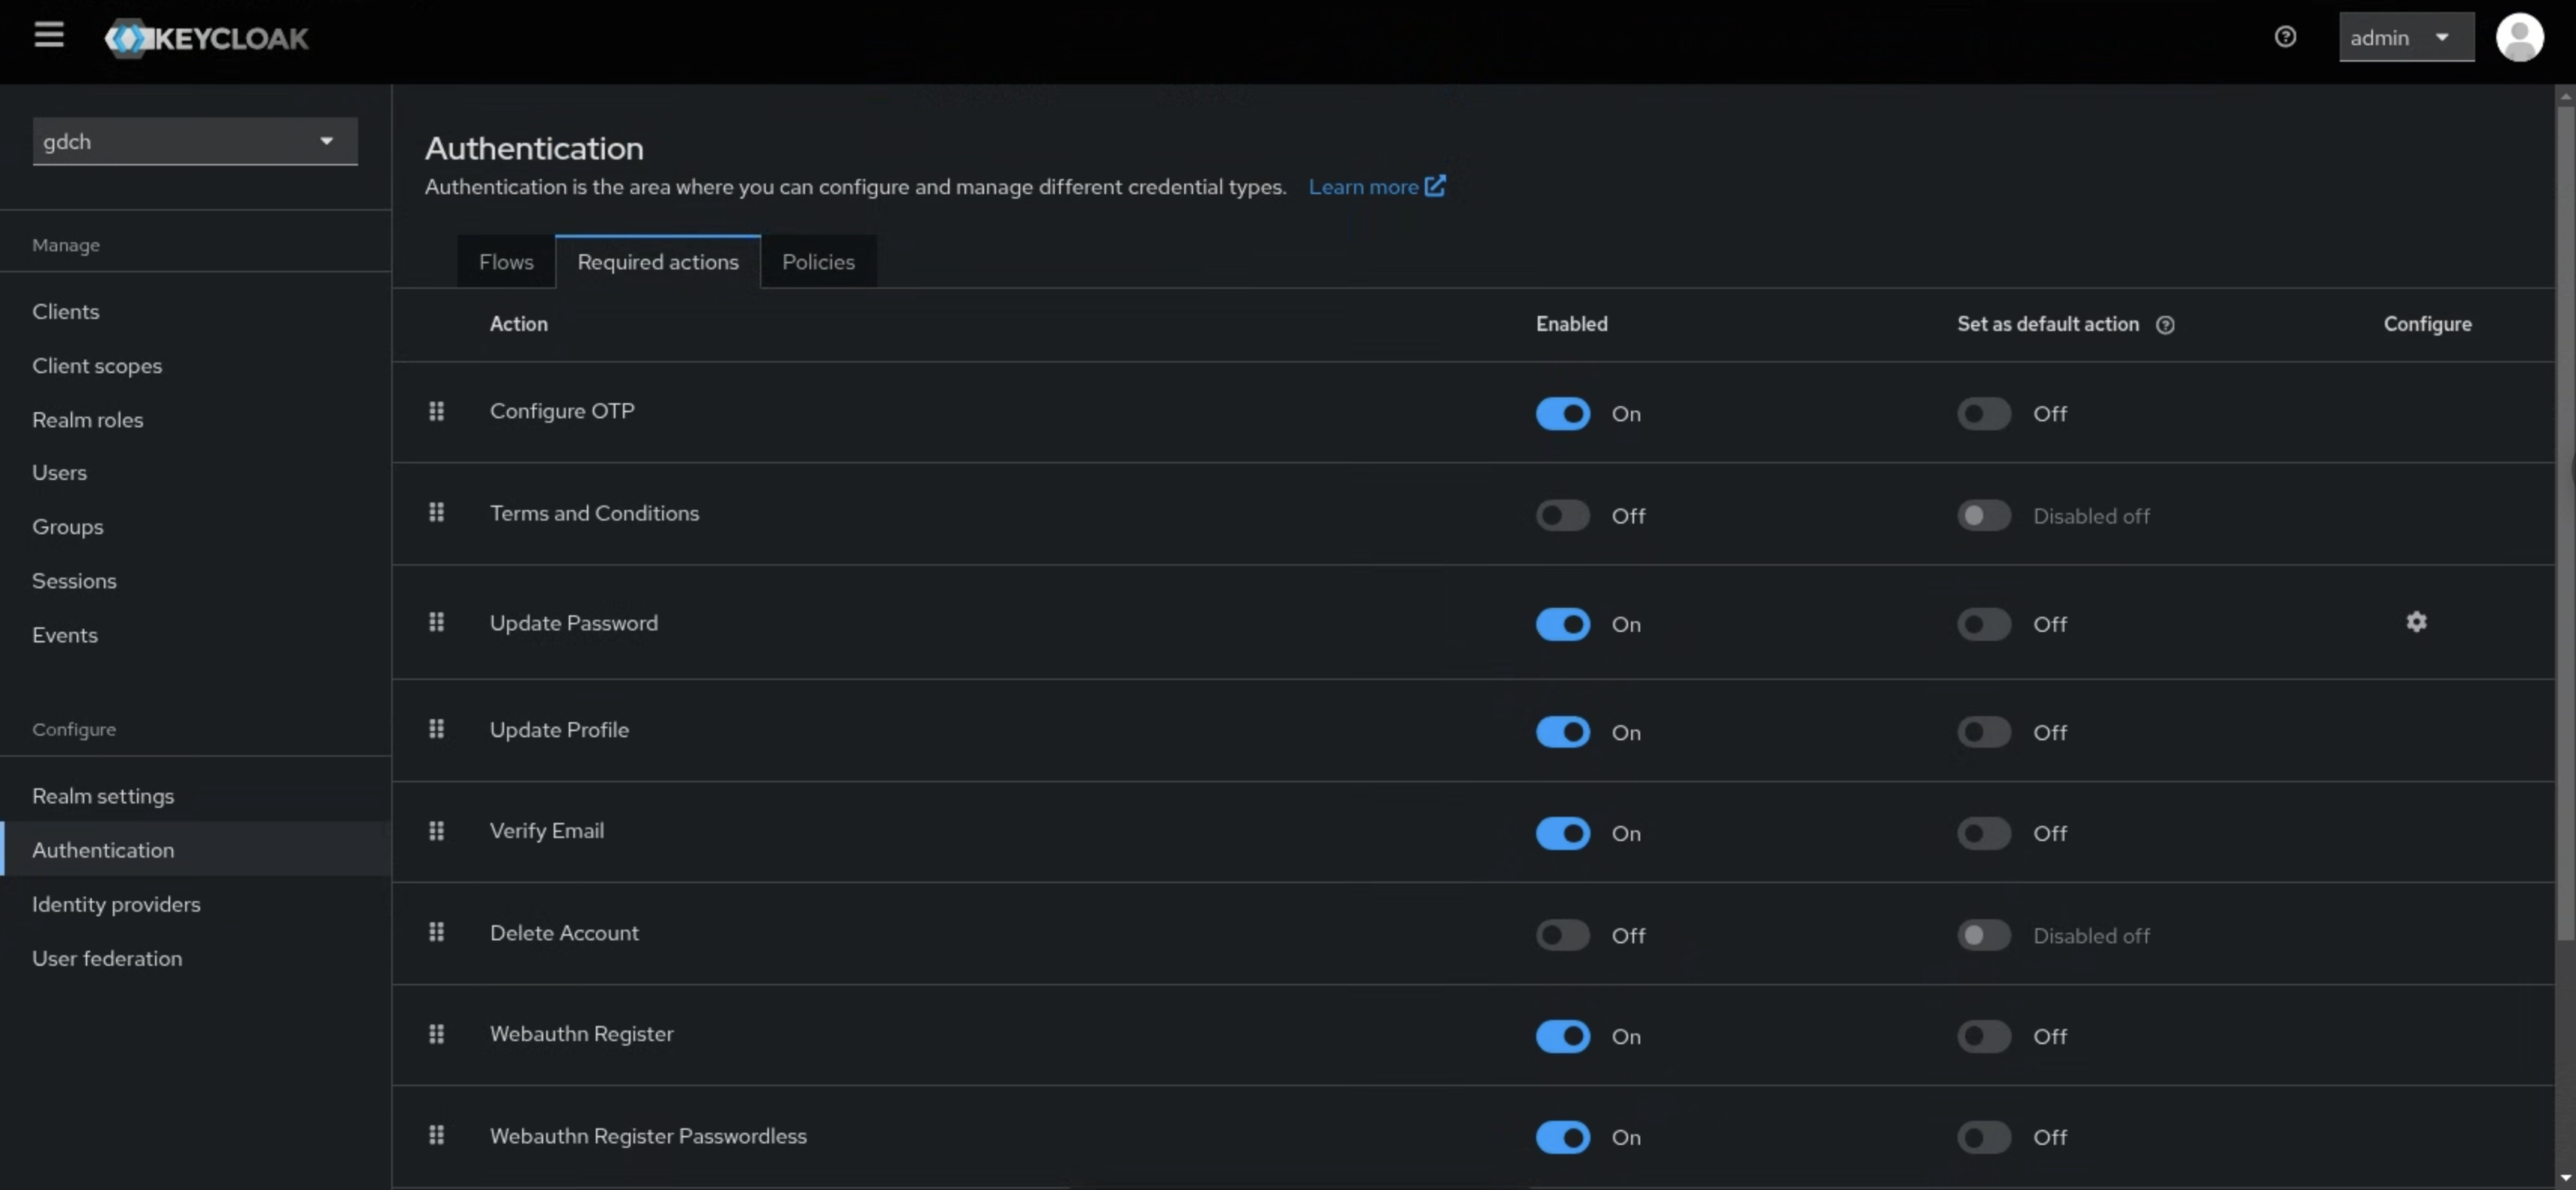
Enable two-factor authentication
Add Webauthn Register as a Required Action:
Open to the
gdchrealm admin page using the local administrator credential.Open the Authentication page from the navigation menu and then open the Required Actions tab.
Enable the Webauthn Register item:
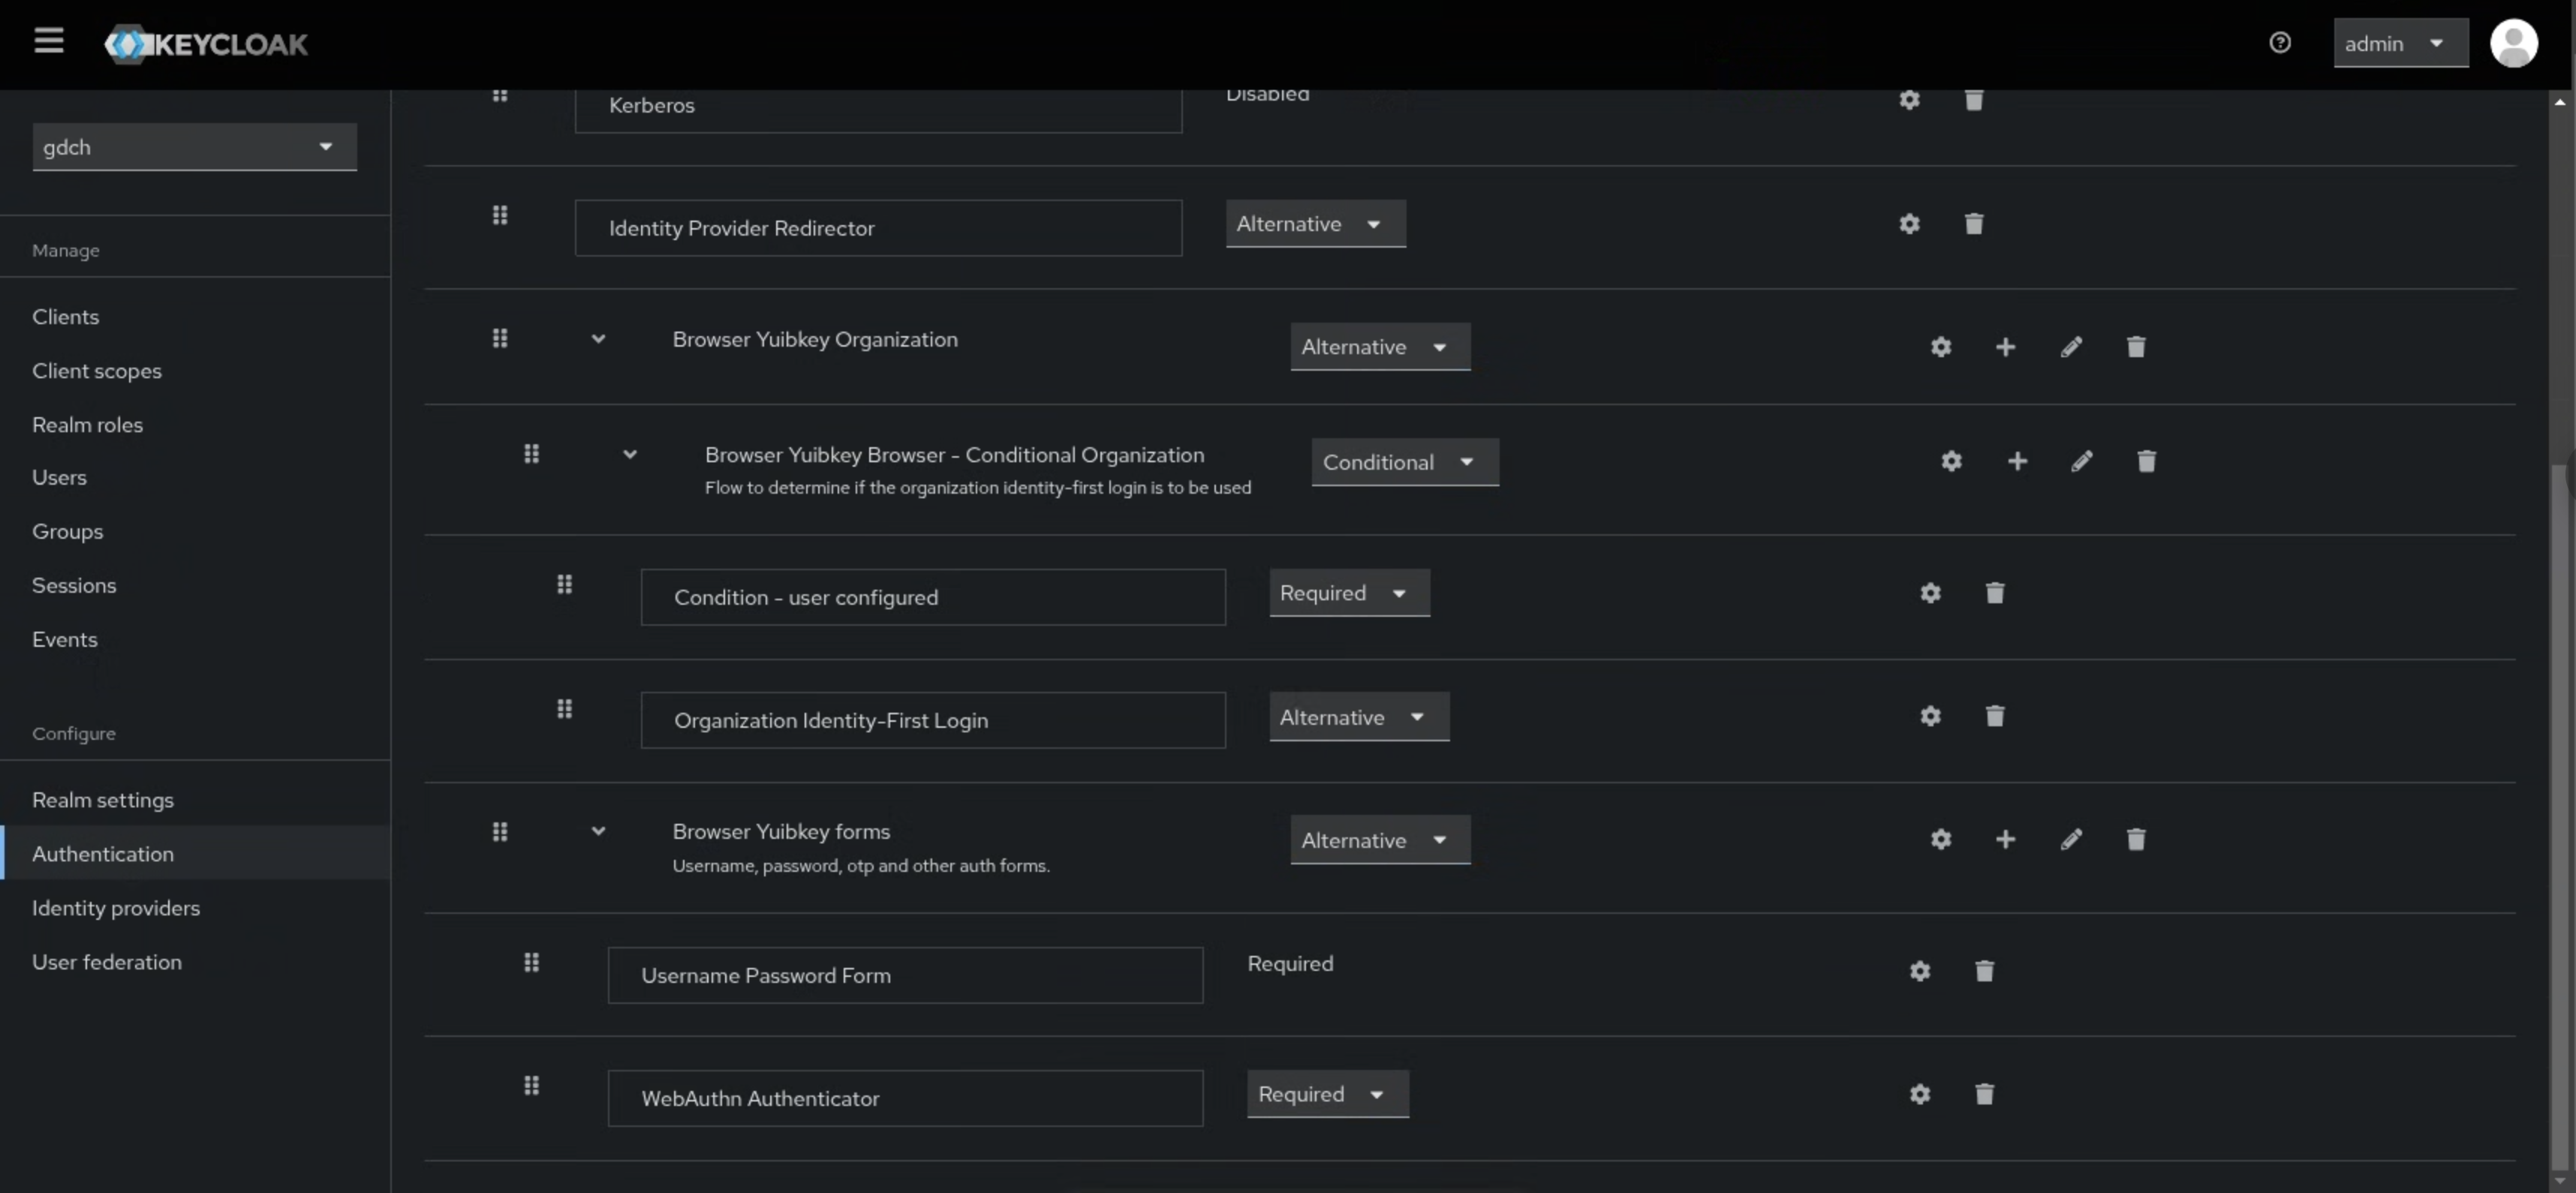
Add Webauthn Authentication to the browser flow:
Switch to the Flows tab and use the Duplicate button corresponding to browser flow name to copy the existing browser flow as a Browser Yubikey flow.
Switch to the Browser Yubikey flow.
Delete the Browser Yubikey Browser - Conditional OTP step.
Click the Add step button corresponding to Browser Yubikey forms step and add WebAuthn Authenticator.
Set the WebAuthn Authenticator item to Required:
Use the Bind flow button corresponding to Browser Yubikey flow and select Browser Flow:
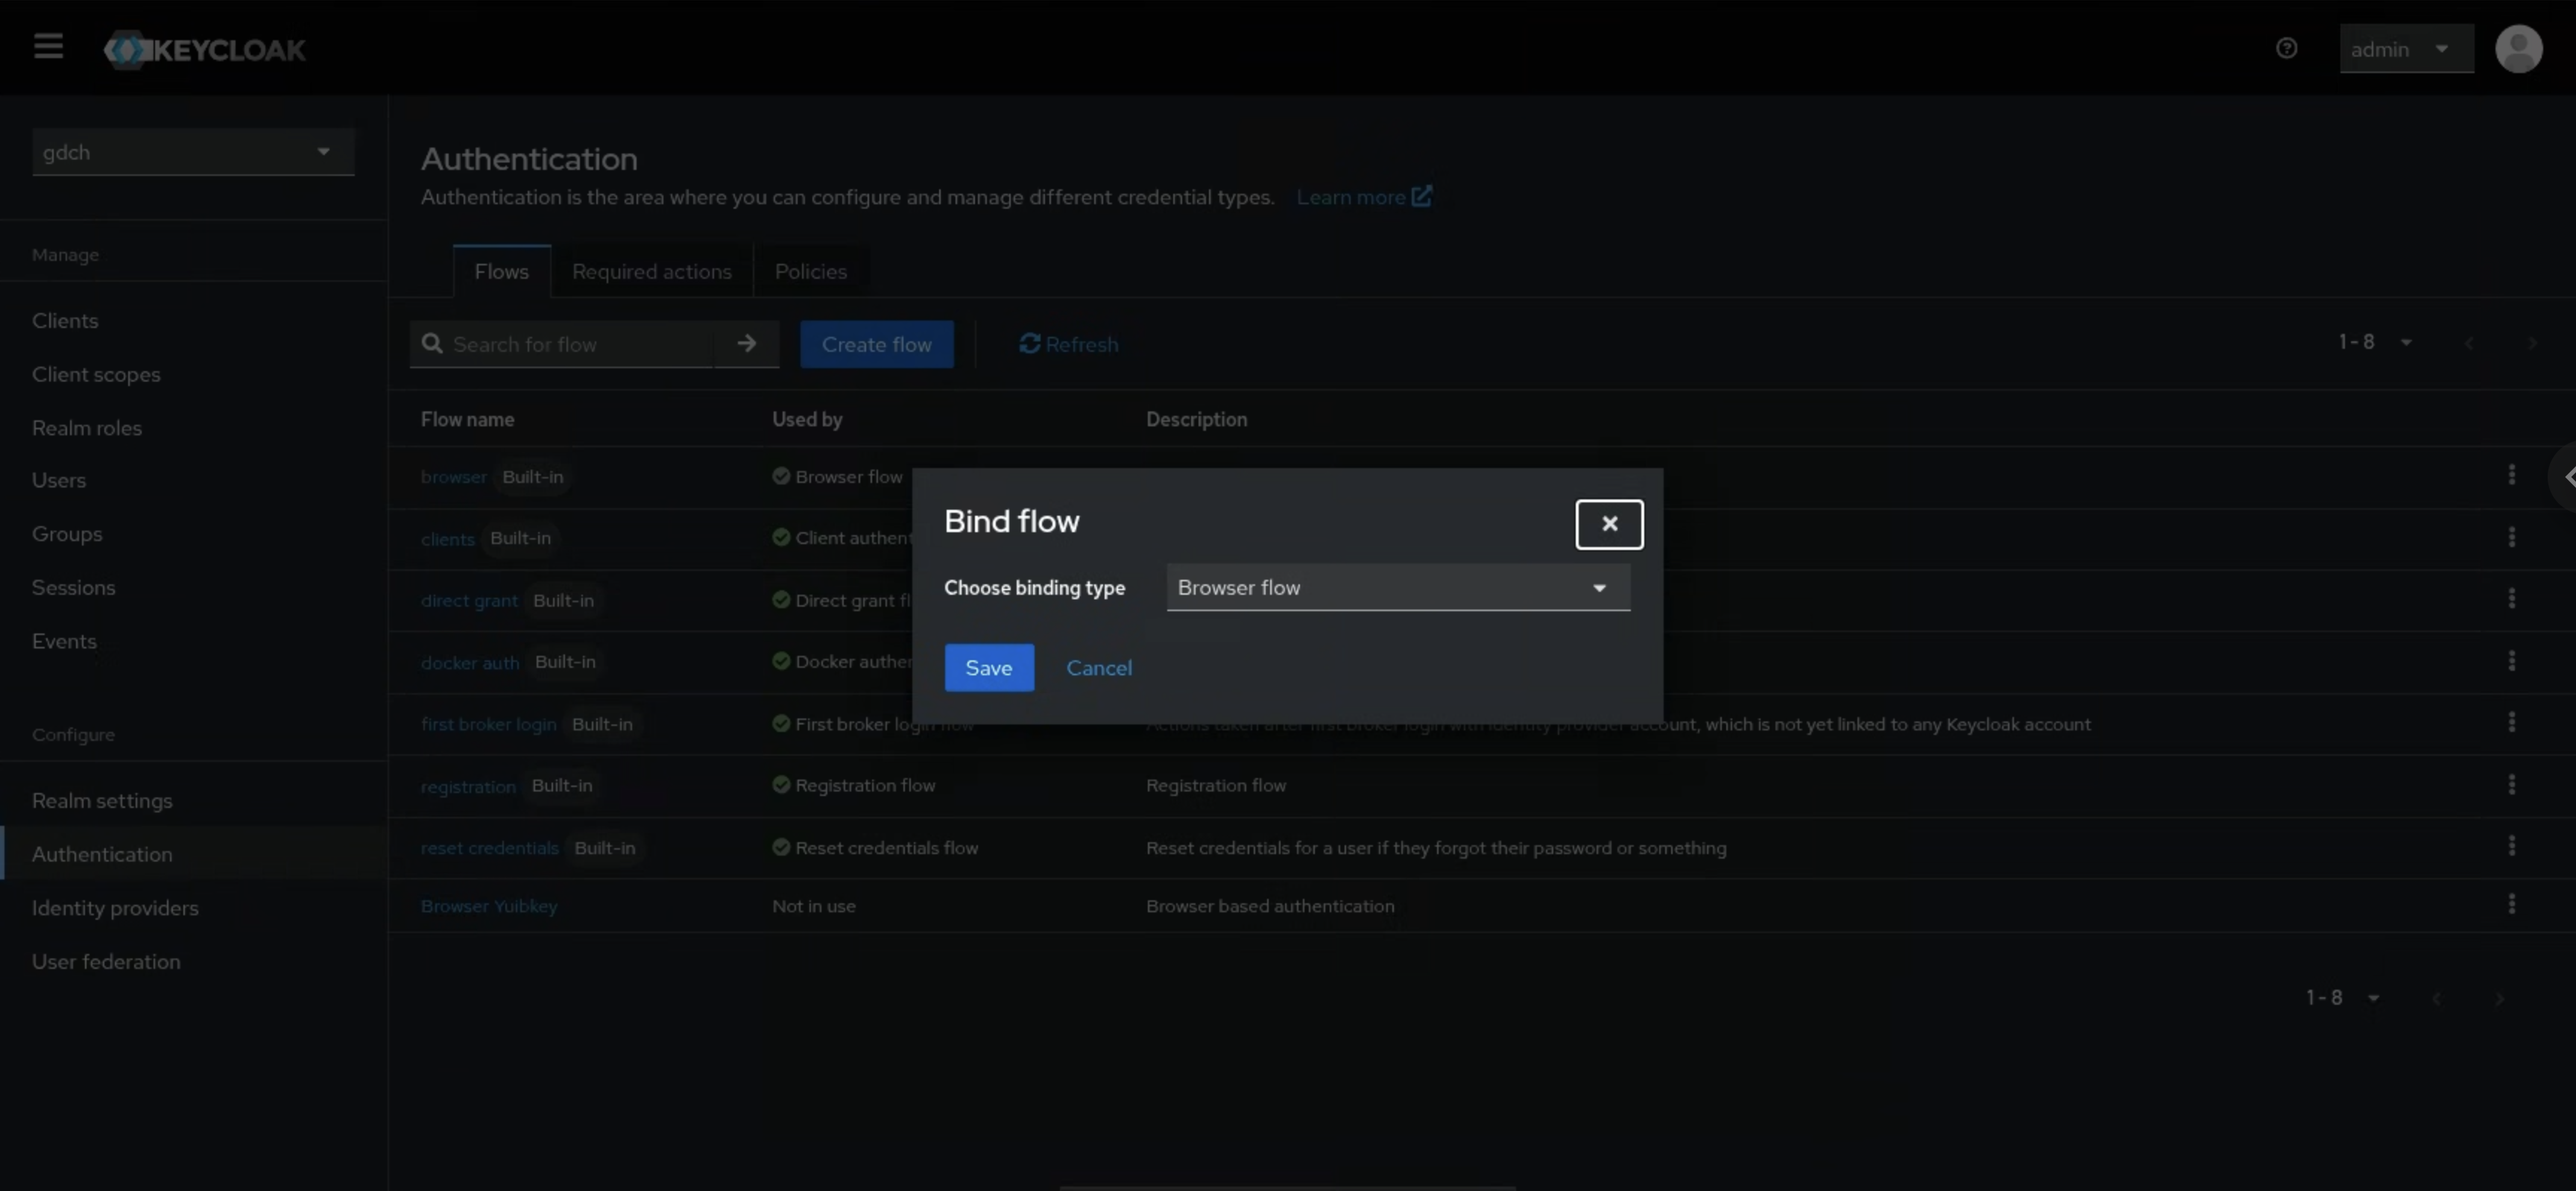
Click Save.
Register a Yubikey
Open the GDC console to sign in.
Use any user you created before in the
gdchrealm and enter the password.Click Register button:
Select the USB security key option:

Tap your inserted Yubikey:
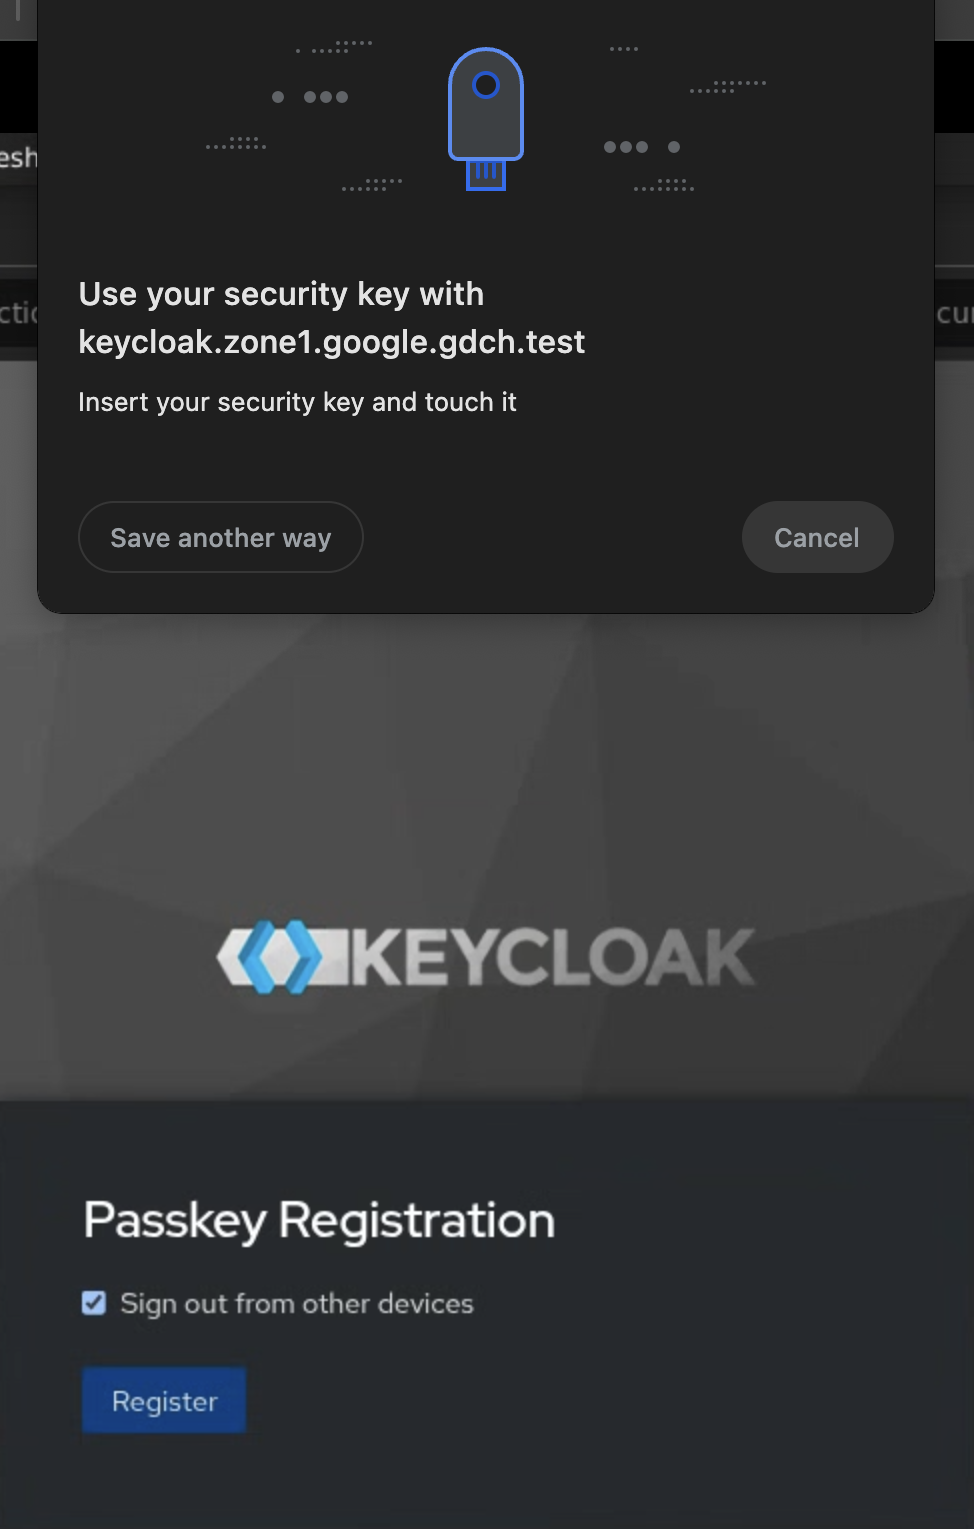
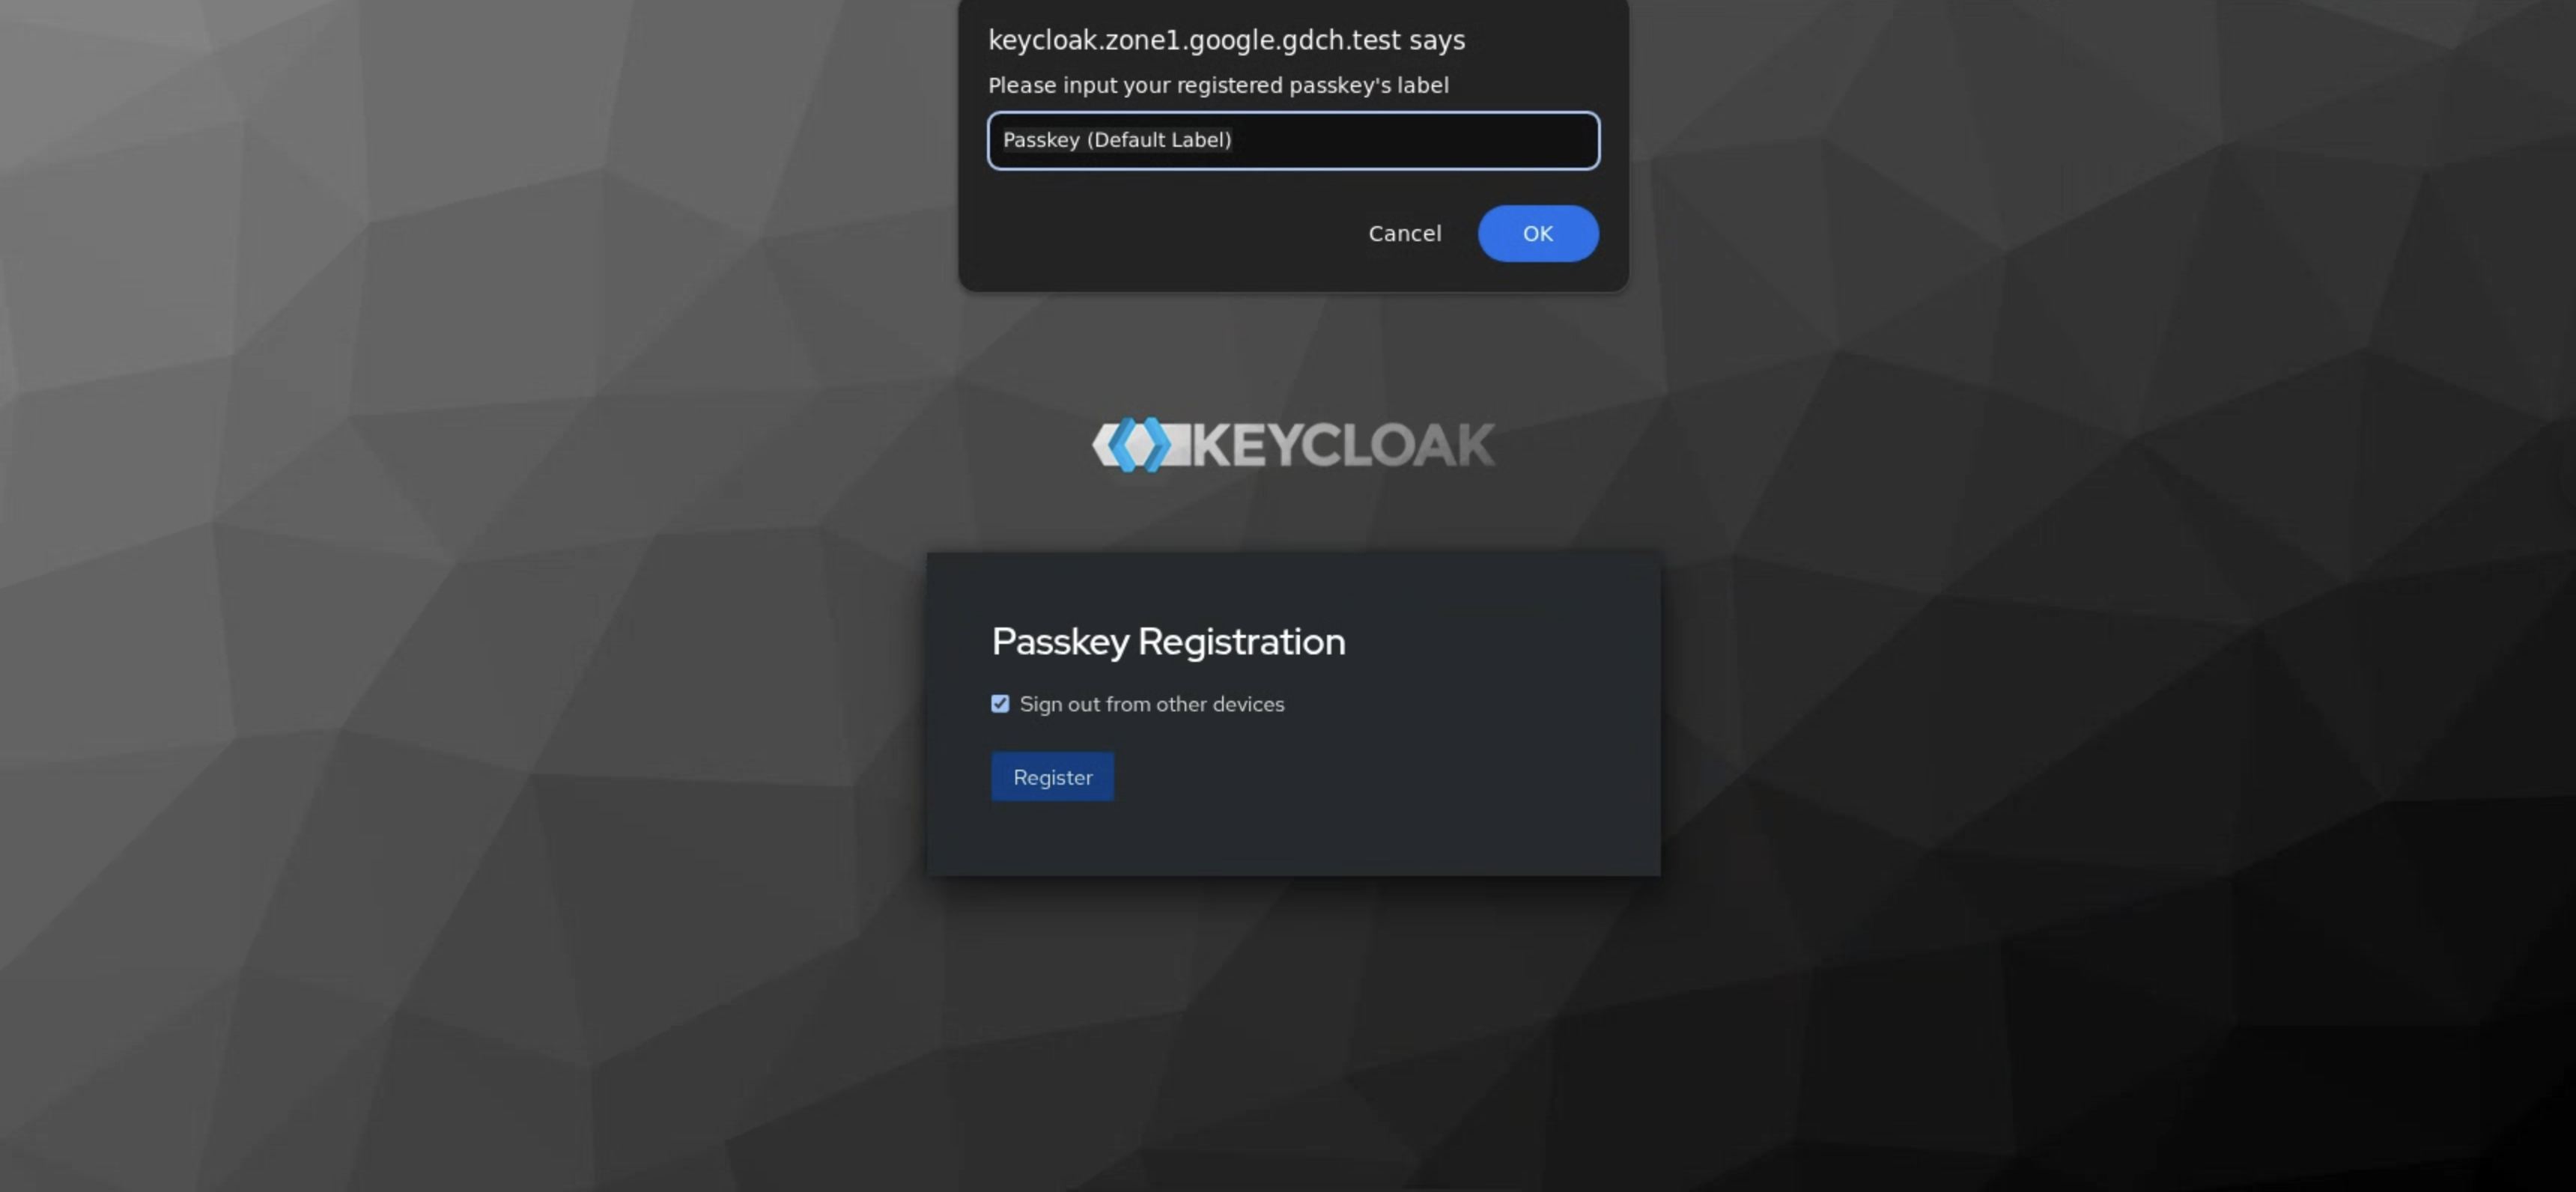
Type in any name for your new security key:
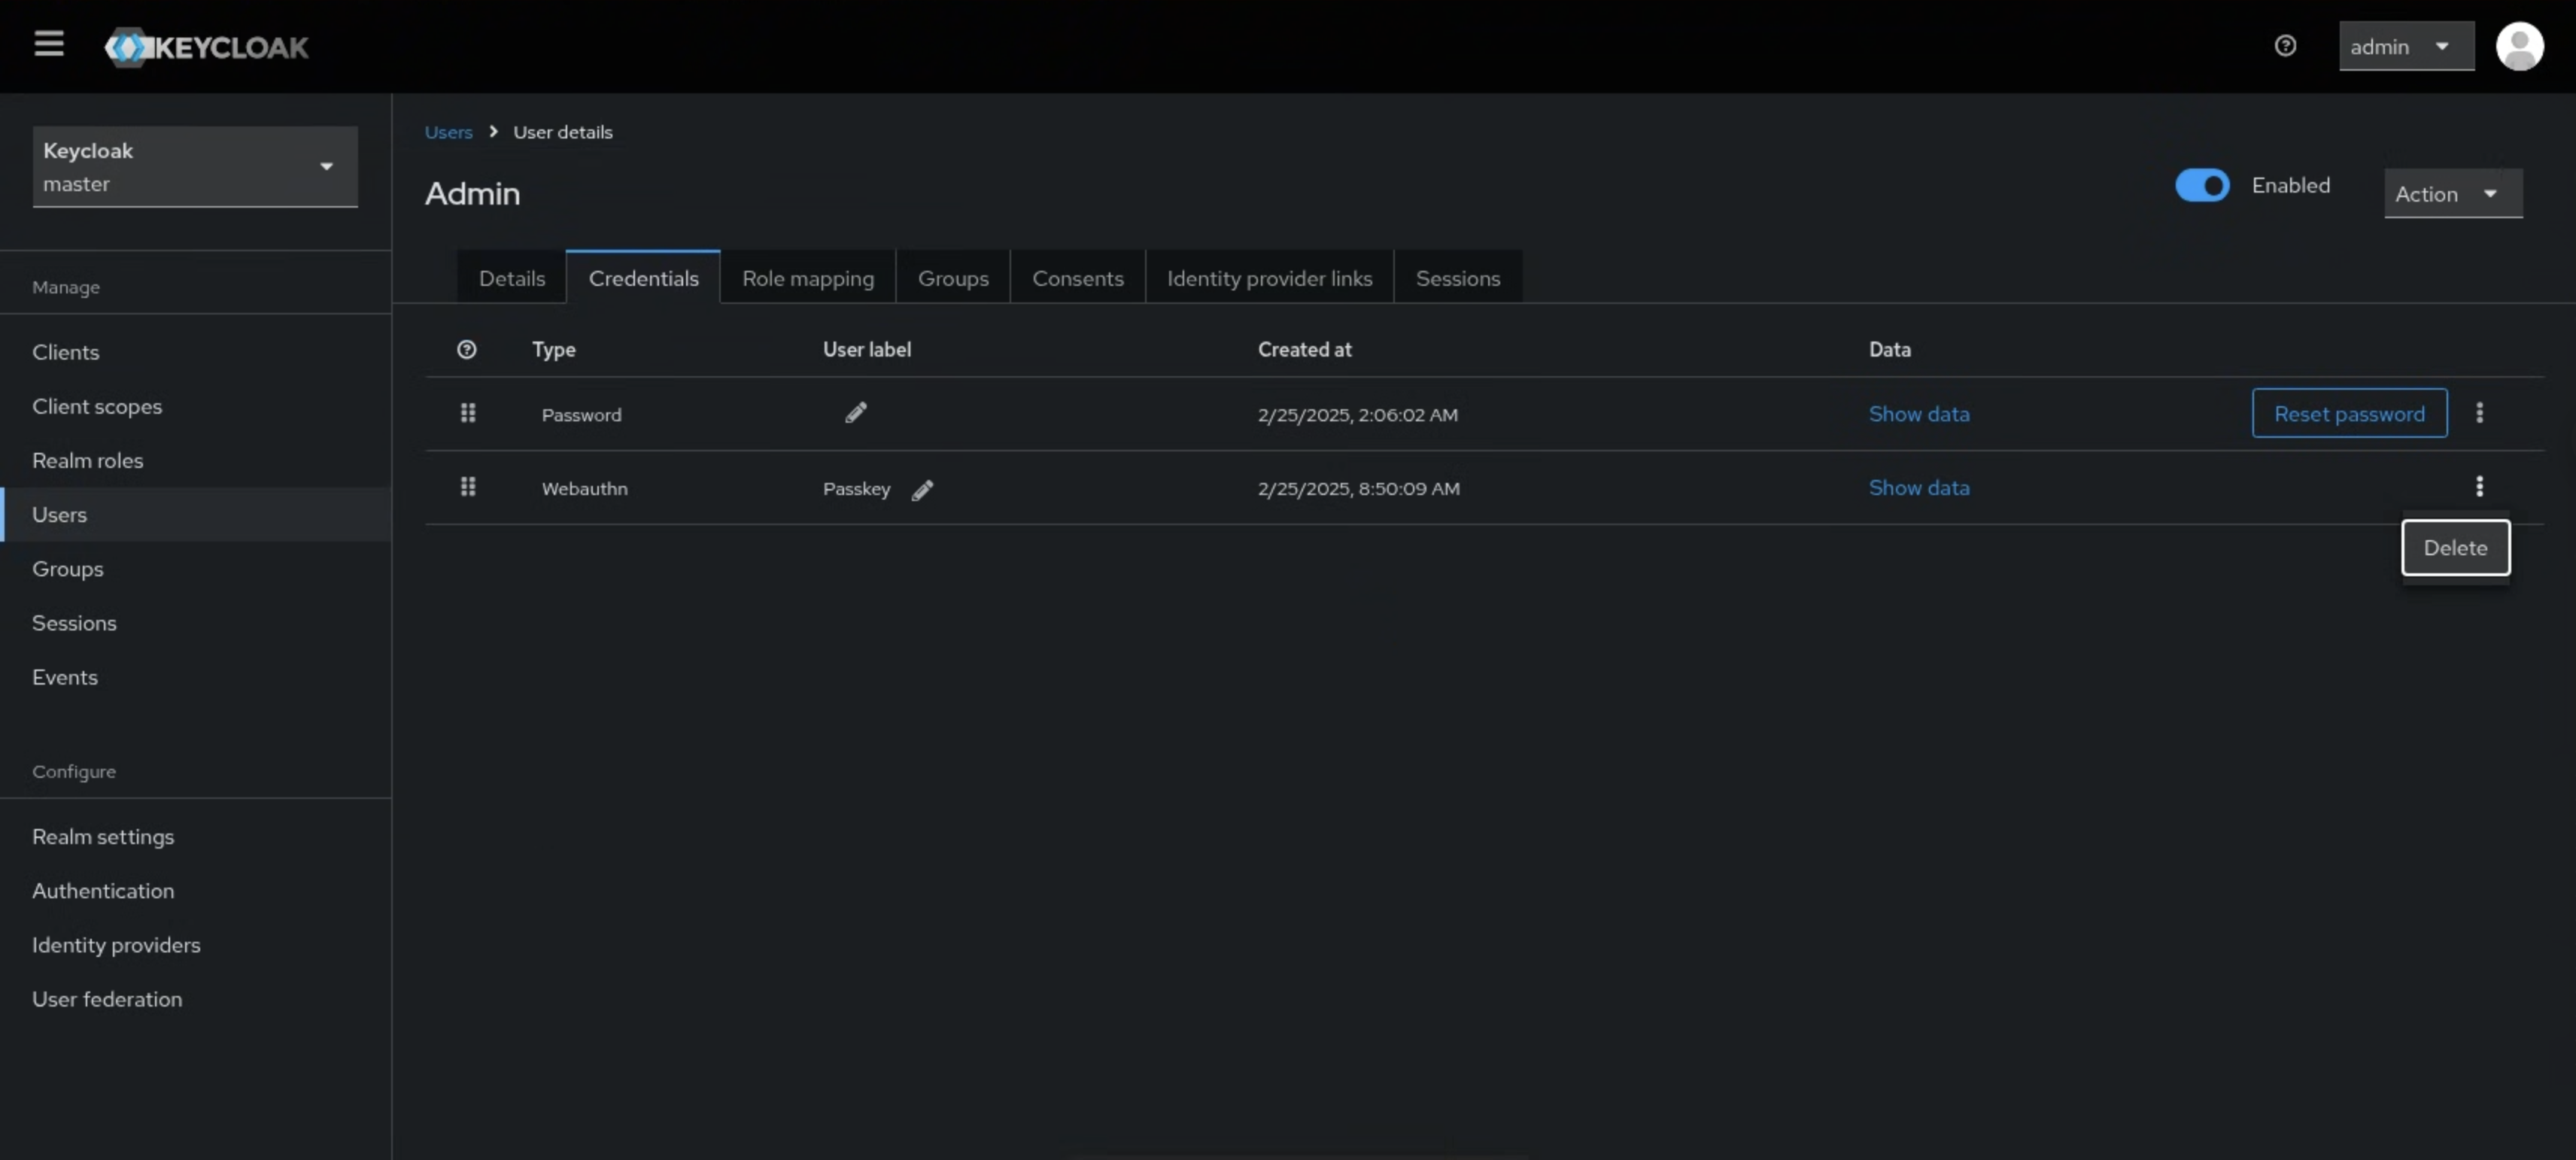
If you want to switch to another key or try this flow again, use the local administrator account to open the admin console and delete the Yubikey from the Credential tab of the user:
Sign in with a Yubikey
Sign out from the GDC console and open it again.
Use the user that you have registered a Yubikey.
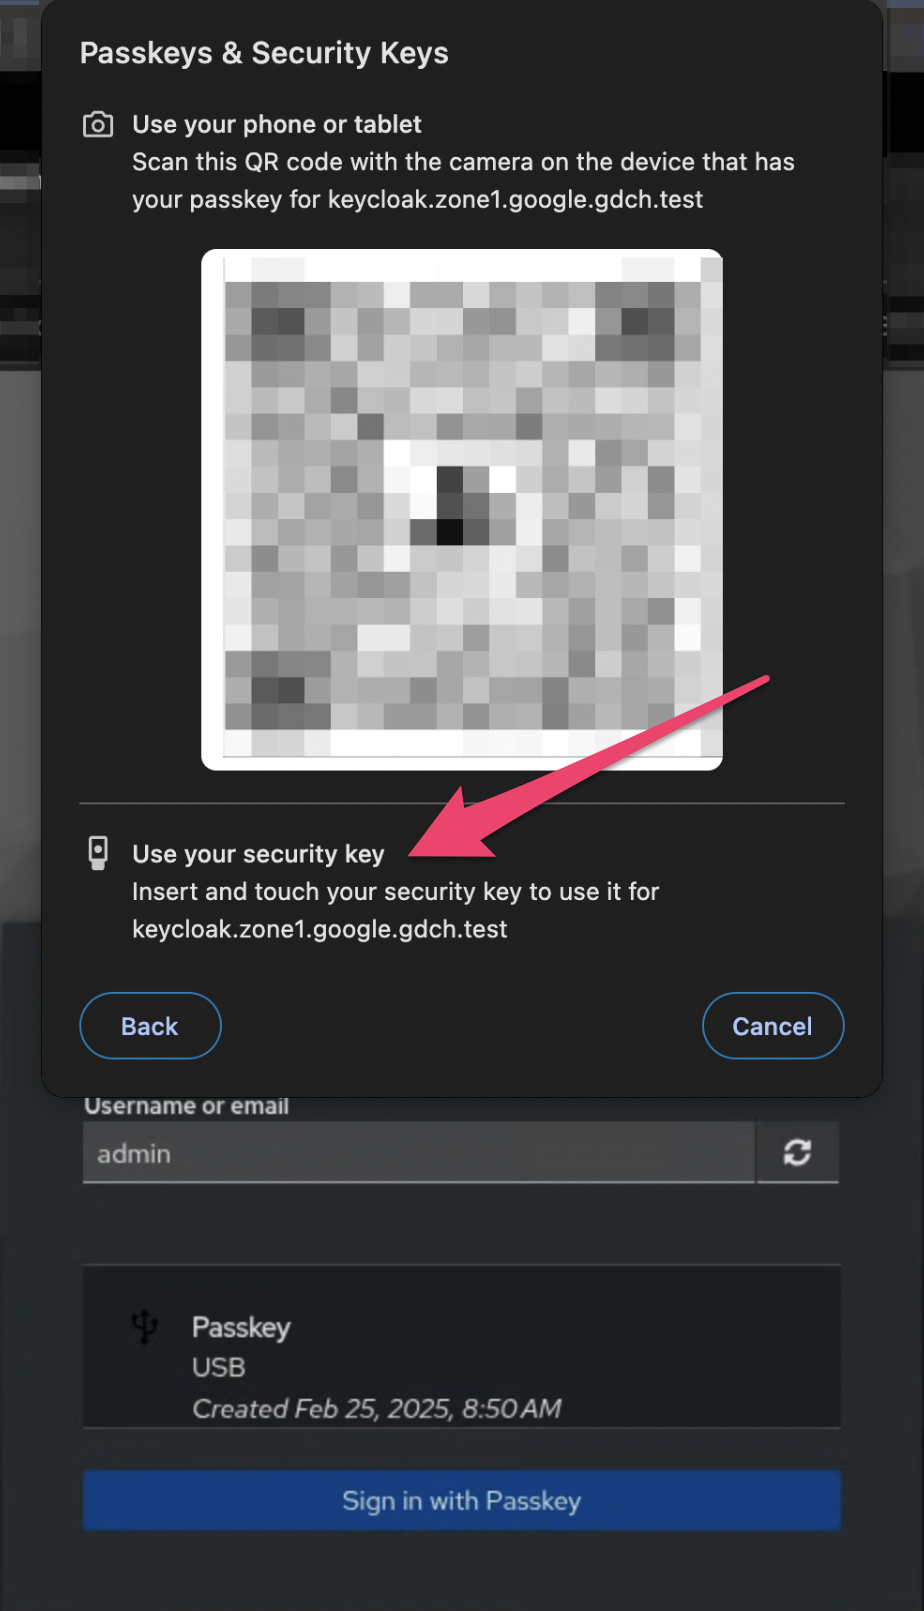
After typing the password, select the Yubikey device:

Tap your Yubikey device:
Set login attempt threshold
Keycloak has brute force detection capabilities and can temporarily disable a user account if the number of login failures exceeds a specified threshold. This threshold can be configured to block an account from login either temporarily or permanently.
To set up the brute force detection, complete the following steps in the Keycloak Admin Console:
- In the navigation menu, click Realm Settings.
- Click the Security Defenses tab.
- Click the Brute Force Detection tab.
- Turn Enabled to on.
Set values in the fields to match compliance requirements, such as the following:
- Max Login Failures
- Wait Increment
- Quick Login check
- Max Wait
- Failure Reset time

Connect to the GDC air-gapped appliance audit logging system
Enable audit logging in Keycloak
To enable audit logging, use the Keycloak Admin Console to complete the following steps:
- In the navigation menu, click Events.
- Click the Config tab.
- In the Login Events Settings and the Admin Events Settings sections, set the Save Events toggle to ON.
- In the Expiration field, specify how long you want to keep events stored.
- In the Saved Types field, specify the different actions that you consider important for auditing.
- Click Save.
- Click the Login Events tab to see audit logs about user account operations.
- Click the Admin Events tab to see audit logs about any action that an admin performs within the admin console.
Connect Keycloak audit logs to GDC air-gapped appliance
Keycloak provides built-in Service Provider Interfaces (SPIs) to enable audit logging. Audit logging export is configured in Keycloak to store a duplicate of the audit logs as files in the Pod. By default the logs are stored in the database). The GDC air-gapped appliance logging system uses the volume mount to pick up the log and parse the logs automatically.
Change the Keycloak theme
A theme provides one or more types to customize different aspects of Keycloak. The types available are:
- Account - Account management
- Admin - Admin Console
- Email - Emails
- Login - Login forms
- Welcome - Welcome page
To change the Keycloak theme, follow these steps:
- Log into the Keycloak Admin Console.
- Select your realm from the drop-down list.
- Click Realm Settings.
- Click the Themes tab.
- To set the theme for the master Admin Console, set the Admin Console theme for the master realm.
- To see the changes to the Admin Console, refresh the page.
Root admin account management
Keycloak is bootstrapped with an initial root admin account with a trivial
username and password of admin/admin. To ensure the protection and security
of this root account, complete the following manual steps as soon as the
bootstrapping is completed:
- Set up a strong password for the root admin account
- Set up 2FA for the root admin account
We recommend that you escrow the credential to the root admin account to a secure place.