Il completamento tramite webhook in Dialogflow ci offre un grande controllo sul flusso del nostro agente. In questo tutorial, hai bisogno di un webhook per convalidare le sequenze alfanumeriche raccolte nell'intent "Sequenza". L'webhook ripeterà l'intente più volte per raccogliere una sequenza lunga in iterazioni più gestibili.
Creare un webhook con l'editor in linea
Dialogflow dispone di un editor in linea nella console che ti consente di scrivere direttamente codice NodeJS, che può essere implementato per essere eseguito come webhook su Cloud Functions.
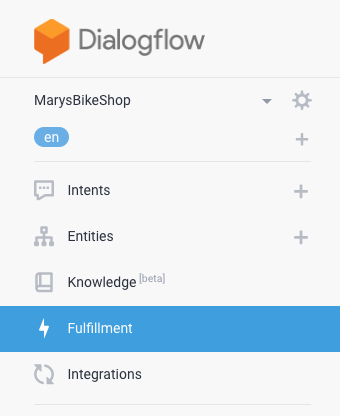
Per creare un webhook utilizzando l'editor in linea di Dialogflow:
- Fai clic sulla scheda Evasione nella barra di navigazione per accedere alla pagina di evasione.
- Imposta il pulsante dell'editor in linea su ATTIVATO.

- Elimina i contenuti esistenti nella scheda
package.jsondell'editor in linea.
Copia e incolla i contenuti JSON riportati di seguito nella scheda
package.jsondell'editor incorporato:{ "name": "DialogflowFirebaseWebhook", "description": "Firebase Webhook dependencies for a Dialogflow agent.", "version": "0.0.1", "private": true, "license": "Apache Version 2.0", "author": "Google Inc.", "engines": { "node": "10" }, "scripts": { "lint": "semistandard --fix \"**/*.js\"", "start": "firebase deploy --only functions", "deploy": "firebase deploy --only functions" }, "dependencies": { "firebase-functions": "^2.0.2", "firebase-admin": "^5.13.1" } }Elimina il codice esistente nella scheda
index.jsdell'editor in linea.
Copia e incolla il codice riportato di seguito nella scheda
index.jsdell'editor in linea:/** * Copyright 2020 Google Inc. All Rights Reserved. * * Licensed under the Apache License, Version 2.0 (the "License"); * you may not use this file except in compliance with the License. * You may obtain a copy of the License at * * http://www.apache.org/licenses/LICENSE-2.0 * * Unless required by applicable law or agreed to in writing, software * distributed under the License is distributed on an "AS IS" BASIS, * WITHOUT WARRANTIES OR CONDITIONS OF ANY KIND, either express or implied. * See the License for the specific language governing permissions and * limitations under the License. */ 'use strict'; const functions = require('firebase-functions'); // TODO: set this to the minimum valid length for your sequence. // There's no logic in here to enforce this length, but once the // user has said this many digits, the slot-filling prompt will // also instruct the user to say "that's all" to end the slot-filling. const MIN_SEQUENCE_LENGTH = 10; exports.dialogflowFirebaseFulfillment = functions.https.onRequest((request, response) => { let dfRequest = request.body; let action = dfRequest.queryResult.action; switch (action) { case 'handle-sequence': handleSequence(dfRequest, response); break; case 'validate-sequence': validateSequence(dfRequest, response); break; default: response.json({ fulfillmentText: `Webhook for action "${action}" not implemented.` }); } }); //// // Helper functions /* Send an SSML response. * @param request: Dialogflow WebhookRequest JSON with camelCase keys. * See https://cloud.google.com/dialogflow/es/docs/reference/common-types#webhookrequest * @param response: Express JS response object * @param ssml: SSML string. * @example: sendSSML(request, response, 'hello') * Will call response.json() with SSML payload '<speak>hello</speak>' */ function sendSSML(request, response, ssml) { ssml = `<speak>${ssml}</speak>`; if (request.originalDetectIntentRequest.source == 'GOOGLE_TELEPHONY') { // Dialogflow Phone Gateway Response // see https://cloud.google.com/dialogflow/es/docs/reference/rpc/google.cloud.dialogflow.v2beta1#google.cloud.dialogflow.v2beta1.Intent.Message.TelephonySynthesizeSpeech response.json({ fulfillmentMessages: [{ platform: 'TELEPHONY', telephonySynthesizeSpeech: {ssml: ssml} }] }); } else { // Some CCAI telephony partners accept SSML in a plain text response. // Check your specific integration and customize the payload here. response.json({ fulfillmentText: ssml }); } } /* Extract an output context from the incoming WebhookRequest. * @param request: Dialogflow WebhookRequest JSON with camelCase keys. * See https://cloud.google.com/dialogflow/es/docs/reference/common-types#webhookrequest * @param name: A string * @return: The context object if found, or undefined * @see: https://cloud.google.com/dialogflow/es/docs/reference/rpc/google.cloud.dialogflow.v2#google.cloud.dialogflow.v2.Context * and note this webhook uses JSON camelCase instead of RPC snake_case. * @example: * // Modify an existing output content * let context = getOutputContext(request, 'some-context'); * context.lifespanCount = 5; * context.parameters.some_parameter = 'new value'; * response.json({ * fulfillmentText: 'new value set', * outputContexts: [context] * }); */ function getOutputContext(request, name) { return request.queryResult.outputContexts.find( context => context.name.endsWith(`/contexts/${name}`) ); } //// // Action handler functions /* * Fulfillment function for: * actions: handle-sequence * intents: "Sequence", "Sequence - Edit" * @param request: Dialogflow WebhookRequest JSON with camelCase keys. * See https://cloud.google.com/dialogflow/es/docs/reference/common-types#webhookrequest * @param response: Express JS response object */ function handleSequence(request, response) { let parameters = request.queryResult.parameters; let isSlotFilling = !request.queryResult.allRequiredParamsPresent; let isEditing = getOutputContext(request, 'editing-sequence'); console.log(request.queryResult.action + ': ' + JSON.stringify(parameters)); if (isSlotFilling) { // Prompt the user for the sequence let verbatim = `<prosody rate="slow"><say-as interpret-as="verbatim">${parameters.existing_sequence}</say-as></prosody>`; if (!parameters.existing_sequence && !parameters.new_sequence) { // Initial prompt response.json({ fulfillmentText: "What is your sequence? Please pause after a few characters so I can confirm as we go." }); } else if (!isEditing) { // Confirm what the system heard with the user. We customize the response // according to how many sequences we've heard to make the prompts less // verbose. if (!parameters.previous_sequence) { // after the first input sendSSML(request, response, `Say "no" to correct me at any time. Otherwise, what comes after ${verbatim}`); } else if (parameters.existing_sequence.length < MIN_SEQUENCE_LENGTH) { // we know there are more characters to go sendSSML(request, response, `${verbatim} What's next?`); } else { // we might have all we need sendSSML(request, response, `${verbatim} What's next? Or say "that's all".`); } } else { // User just said "no" sendSSML(request, response, `Let's try again. What comes after ${verbatim}`); } } else { // Slot filling is complete. // Construct the full sequence. let sequence = (parameters.existing_sequence || '') + (parameters.new_sequence || ''); // Trigger the follow up event to get back into slot filling for the // next sequence. response.json({ followupEventInput: { name: 'continue-sequence', parameters: { existing_sequence: sequence, previous_sequence: parameters.existing_sequence || '' } } }); // TODO: CHALLENGE: consider validating the sequence here. // The user has already confirmed existing_sequence, so if you find a unique // record in your database with this existing_sequence prefix, you could send // a followUpEventInput like 'validated-sequence' to skip to the next part // of the flow. You could either create a new intent for this event, or // reuse the "Sequence - done" intent. If you reuse the "done" intent, you // could add another parameter "assumed_sequence" with value // "#validated-sequence.sequence", then modify the validateSequence function // below to customize the response for this case. } } /* * Fulfillment function for: * action: validate-sequence * intents: "Sequence - Done" * @param request: Dialogflow WebhookRequest JSON with camelCase keys. * See https://cloud.google.com/dialogflow/es/docs/reference/common-types#webhookrequest * @param response: Express JS response object */ function validateSequence(request, response) { let parameters = request.queryResult.parameters; // TODO: add logic to validate the sequence and customize your response let verbatim = `<say-as interpret-as="verbatim">${parameters.sequence}</say-as>`; sendSSML(request, response, `Thank you. Your sequence is ${verbatim}`); }Fai clic su ESEGUI IL ROLLOUT.
Ora dovresti essere in grado di testare l'integrazione chiamando l'agente. Se non lo hai ancora fatto, è il momento giusto per configurare una delle integrazioni di telefonia con un solo clic dei nostri partner o configurare il gateway di telefonia Dialogflow per testare l'agente per telefono.
Nozioni di base sul codice
In quanto punto di contatto del webhook, la funzione dialogflowFirebaseFulfillment viene richiamata ogni volta che viene attivato il webhook. Con ogni richiesta, Dialogflow invia il nome "action" specificato nella console Dialogflow per un intent. Il codice
utilizza questo nome dell'azione per determinare quale funzione webhook chiamare,
handleSequence o validateSequence.
Gestisci sequenza
handleSequence è la funzione di base di questo tutorial. È responsabile di tutti gli aspetti
dell'inserimento degli slot della sequenza, tra cui:
- Pronuncia delle istruzioni iniziali quando una sessione accede per la prima volta all'intent.
- Ripeti la sequenza prima di richiedere l'impostazione successiva.
- Indicare agli utenti finali come correggere il bot.
- Riconoscere quando ci sono cifre sufficienti per una sequenza valida e indicare all'utente finale come finalizzare l'input (vedi "MIN_SEQUENCE_LENGTH" nel codice).
- Eseguire il looping del riempimento delle caselle per raccogliere più sequenze parziali.
- Concatenare le sequenze parziali in un'unica sequenza lunga.
Convalida sequenza
In validateSequence devi aggiungere una connessione al tuo datastore per convalidare la sequenza finale e restituire un messaggio personalizzato all'utente in base a questi dati. Ad esempio, se stai creando un agente di ricerca degli ordini, potresti personalizzare la risposta in questo modo:
Thank you. Your order ${verbatim} will arrive on ${lookup.date} and will
${lookup.require_signature ? '' : 'not'} require a signature.
dove lookup è un oggetto che hai trovato nel tuo datastore per questo ordine.
Funzioni di supporto
Questo esempio non utilizza dipendenze specifiche di Dialogflow. Segui invece la documentazione di riferimento di WebhookRequest per sapere cosa aspettarti in request.body e la documentazione di riferimento di WebhookResponse per sapere cosa rispondere con response.json({...}).
Il codice include due funzioni di supporto per semplificare:
- Invia la risposta JSON corretta per la piattaforma corrente passando una stringa a
sendSSML. - Cerca un contesto Dialogflow attivo dalla richiesta passando il nome del contesto a
getOutputContext.
Ulteriore miglioramento
In questo modo puoi iniziare a utilizzare webhook per casi d'uso avanzati. Hai progettato un agente che può ripetere un prompt di sequenza mentre un utente finale pronuncia la sequenza, tranquillizzandolo nel frattempo sul fatto che l'agente virtuale lo sta ascoltando correttamente.
Ecco alcune idee per migliorare ulteriormente l'esperienza:
- Modifica alcune delle risposte webhook in modo che corrispondano al tuo brand. Ad esempio, anziché il prompt generico "Qual è la tua sequenza?", puoi modificare il codice in modo che dica "Qual è il numero dell'ordine? Puoi trovarlo su …".
- Valuta la possibilità di aggiungere un altro contesto di output all'intent "Sequenza - Fine", quindi crea alcuni nuovi intent in questo contesto di input per consentire agli utenti di porre domande di follow-up sul loro ordine.
- Se vuoi approfondire questo caso d'uso, consulta
TODO: CHALLENGEnel codice campione riportato sopra per scoprire come migliorare ulteriormente questa esperienza per i tuoi utenti.