Create a pipeline and release in the Google Cloud console
This page shows you how to use the Google Cloud console to create a Cloud Deploy delivery pipeline, and then create a release for that pipeline.
In this quickstart, you'll do the following:
Create two GKE clusters or configure two Cloud Run services.
Create a delivery pipeline and two targets using the Google Cloud console.
Instantiate your delivery pipeline by creating a release using the Google Cloud console.
After you create this release, the application is automatically deployed to the target.
See the results in Google Cloud console.
Before you begin
- Sign in to your Google Cloud account. If you're new to Google Cloud, create an account to evaluate how our products perform in real-world scenarios. New customers also get $300 in free credits to run, test, and deploy workloads.
-
In the Google Cloud console, on the project selector page, select or create a Google Cloud project.
Roles required to select or create a project
- Select a project: Selecting a project doesn't require a specific IAM role—you can select any project that you've been granted a role on.
-
Create a project: To create a project, you need the Project Creator
(
roles/resourcemanager.projectCreator), which contains theresourcemanager.projects.createpermission. Learn how to grant roles.
-
Verify that billing is enabled for your Google Cloud project.
-
Enable the Cloud Deploy, Cloud Build, GKE, Artifact Registry, Cloud Run, and Cloud Storage APIs.
Roles required to enable APIs
To enable APIs, you need the Service Usage Admin IAM role (
roles/serviceusage.serviceUsageAdmin), which contains theserviceusage.services.enablepermission. Learn how to grant roles. -
Install the Google Cloud CLI.
-
If you're using an external identity provider (IdP), you must first sign in to the gcloud CLI with your federated identity.
-
To initialize the gcloud CLI, run the following command:
gcloud init -
In the Google Cloud console, on the project selector page, select or create a Google Cloud project.
Roles required to select or create a project
- Select a project: Selecting a project doesn't require a specific IAM role—you can select any project that you've been granted a role on.
-
Create a project: To create a project, you need the Project Creator
(
roles/resourcemanager.projectCreator), which contains theresourcemanager.projects.createpermission. Learn how to grant roles.
-
Verify that billing is enabled for your Google Cloud project.
-
Enable the Cloud Deploy, Cloud Build, GKE, Artifact Registry, Cloud Run, and Cloud Storage APIs.
Roles required to enable APIs
To enable APIs, you need the Service Usage Admin IAM role (
roles/serviceusage.serviceUsageAdmin), which contains theserviceusage.services.enablepermission. Learn how to grant roles. -
Install the Google Cloud CLI.
-
If you're using an external identity provider (IdP), you must first sign in to the gcloud CLI with your federated identity.
-
To initialize the gcloud CLI, run the following command:
gcloud init
If you already have the CLI installed, make sure you're running the latest version:
gcloud components update
Create your runtime environment
If you're deploying to Cloud Run, you can skip this command.
For GKE, create two clusters:
quickstart-cluster-for-console-staging and quickstart-cluster-for-console-prod,
with default settings. The clusters' Kubernetes API endpoints must be
network-reachable from the public internet. GKE clusters
are externally accessible by default.
gcloud container clusters create-auto quickstart-cluster-for-console-staging \
                 --project=PROJECT_ID \
                 --region=us-central1 && \
gcloud container clusters create-auto quickstart-cluster-for-console-prod \
                 --project=PROJECT_ID \
                 --region=us-central1
Create a delivery pipeline and two targets
You can use Cloud Deploy to create a delivery pipeline and targets based on configuration specified in one or more YAML files. But you can also create a delivery pipeline using the Google Cloud console.
In this section, you use Google Cloud console to create a delivery pipeline and two targets. When you use Google Cloud console, you don't need to create any YAML files; Cloud Deploy creates your skaffold.yaml and manifest for you.
In the Google Cloud console, navigate to the Cloud Deploy main page.
Click Create
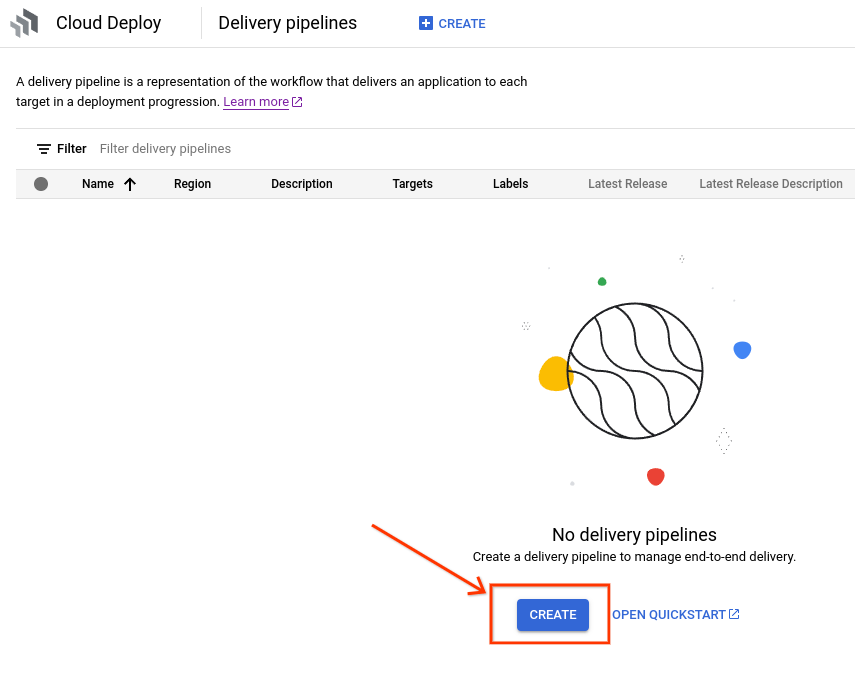
The Create a delivery pipeline form is displayed.
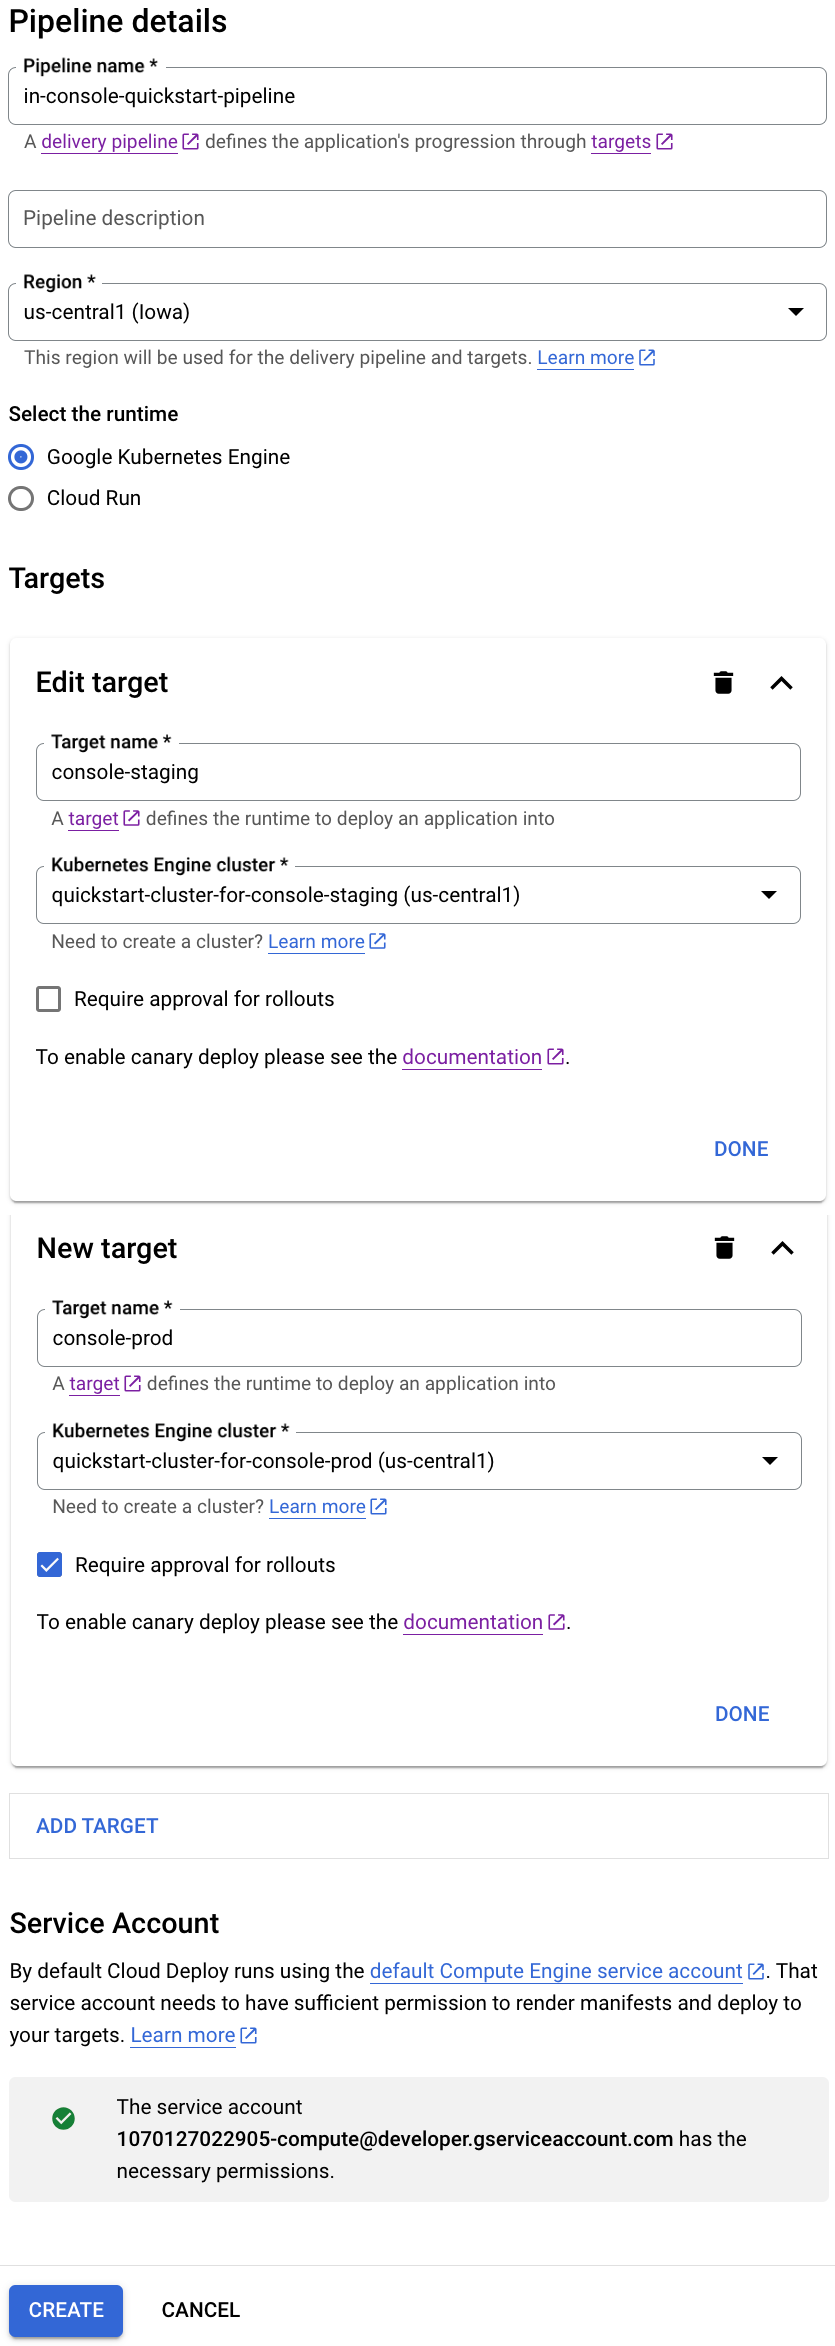
In the Pipeline name field, replace the default text with
in-console-quickstart-pipeline.Optionally, enter a description for this delivery pipeline.
In the Region drop-down, select
us-central1.Select your runtime.
If you're deploying to GKE, select Google Kubernetes Engine. Otherwise, select Cloud Run.
Create your targets:
GKE
Under New target, in the Target name field, replace the default text with
console-staging.From the Kubernetes Engine cluster drop-down, select
quickstart-cluster-for-console-staging.Click Done.
Click Add target.
Replace the default text for Target name with
console-prod.Select
quickstart-cluster-for-console-prodfrom the Kubernetes Engine cluster drop-down.Select Require approval for rollouts.
For this quickstart, we're requiring approval on the second target but not on the first target.
Click Create to create this delivery pipeline.
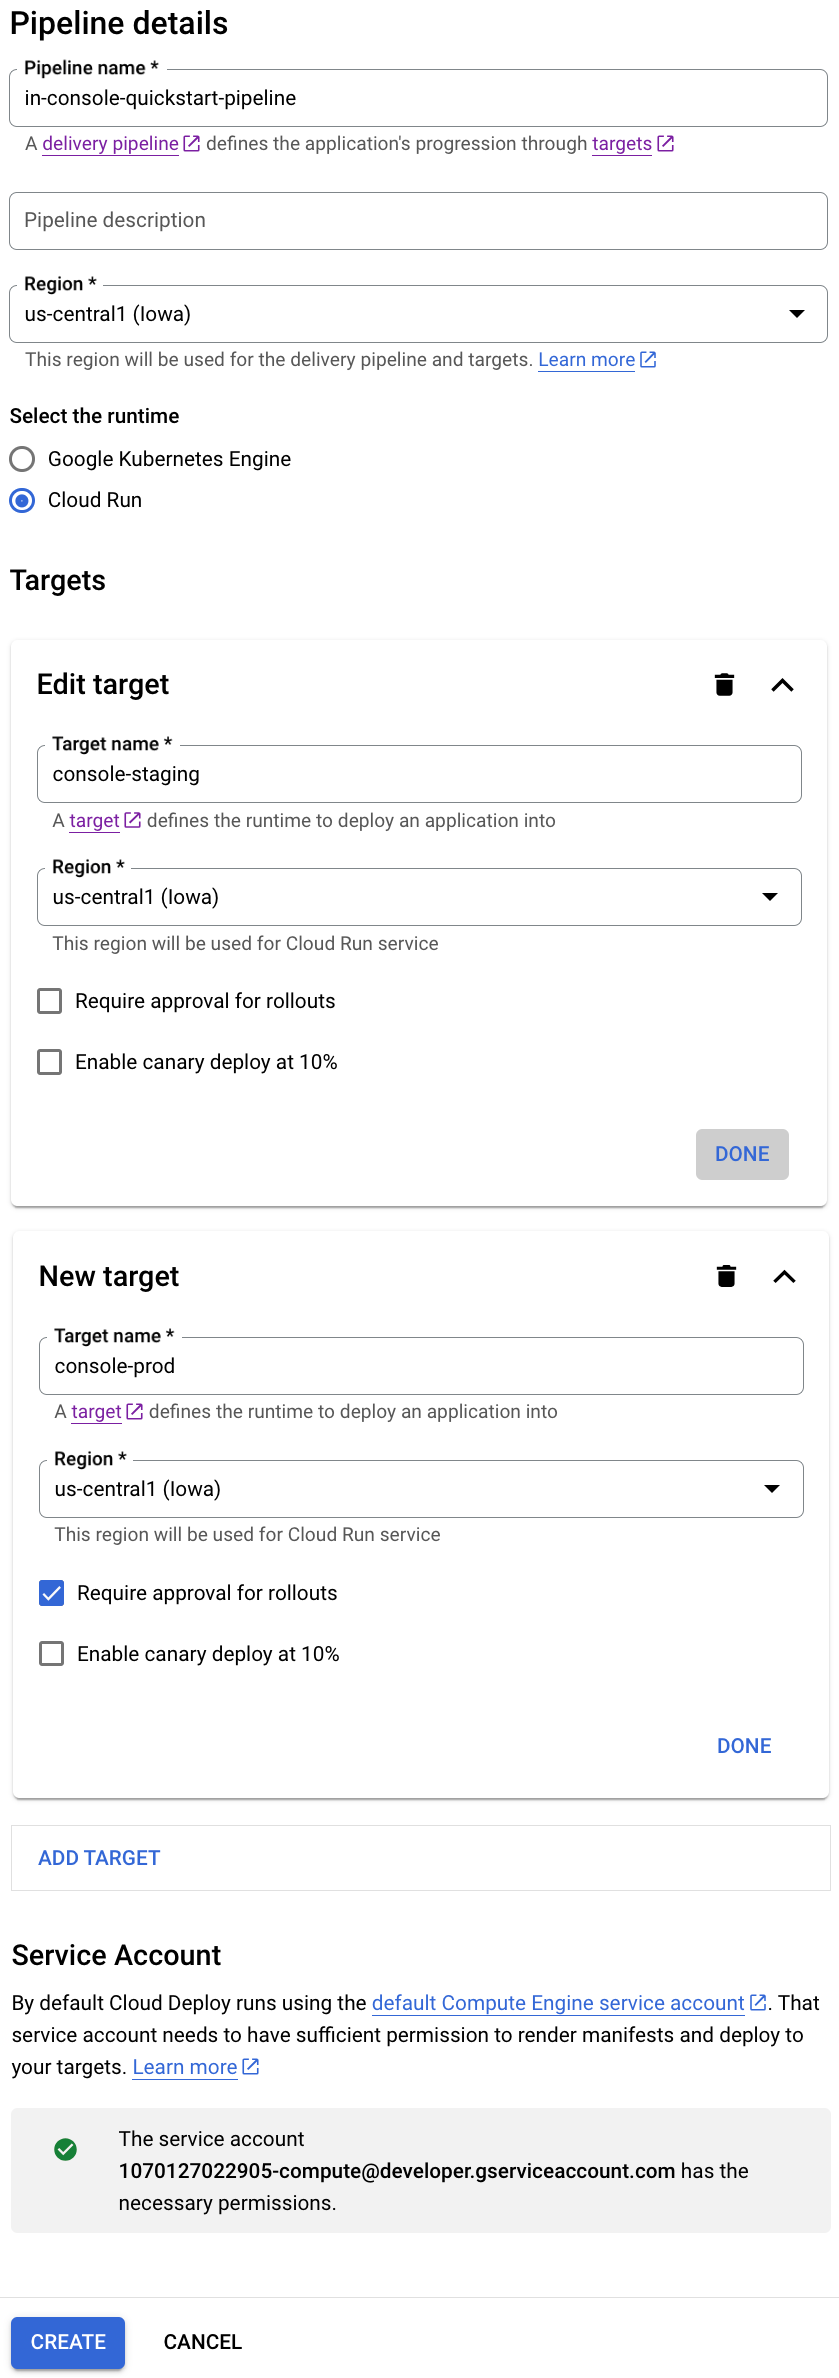
Cloud Run
Under New target, in the Target name field, replace the default text with
console-staging.From the Region drop-down, select
us-central1.Click Done.
Click Add target.
Replace the default text for Target name with
console-prod.Activate the Require approval for rollouts checkbox for this target.
For this quickstart, we're requiring approval on the second target but not on the first target.
Click Create to create this delivery pipeline.
You now have a delivery pipeline with two targets, ready to create a release.
The pipeline's page is displayed, showing both targets, with no rollouts.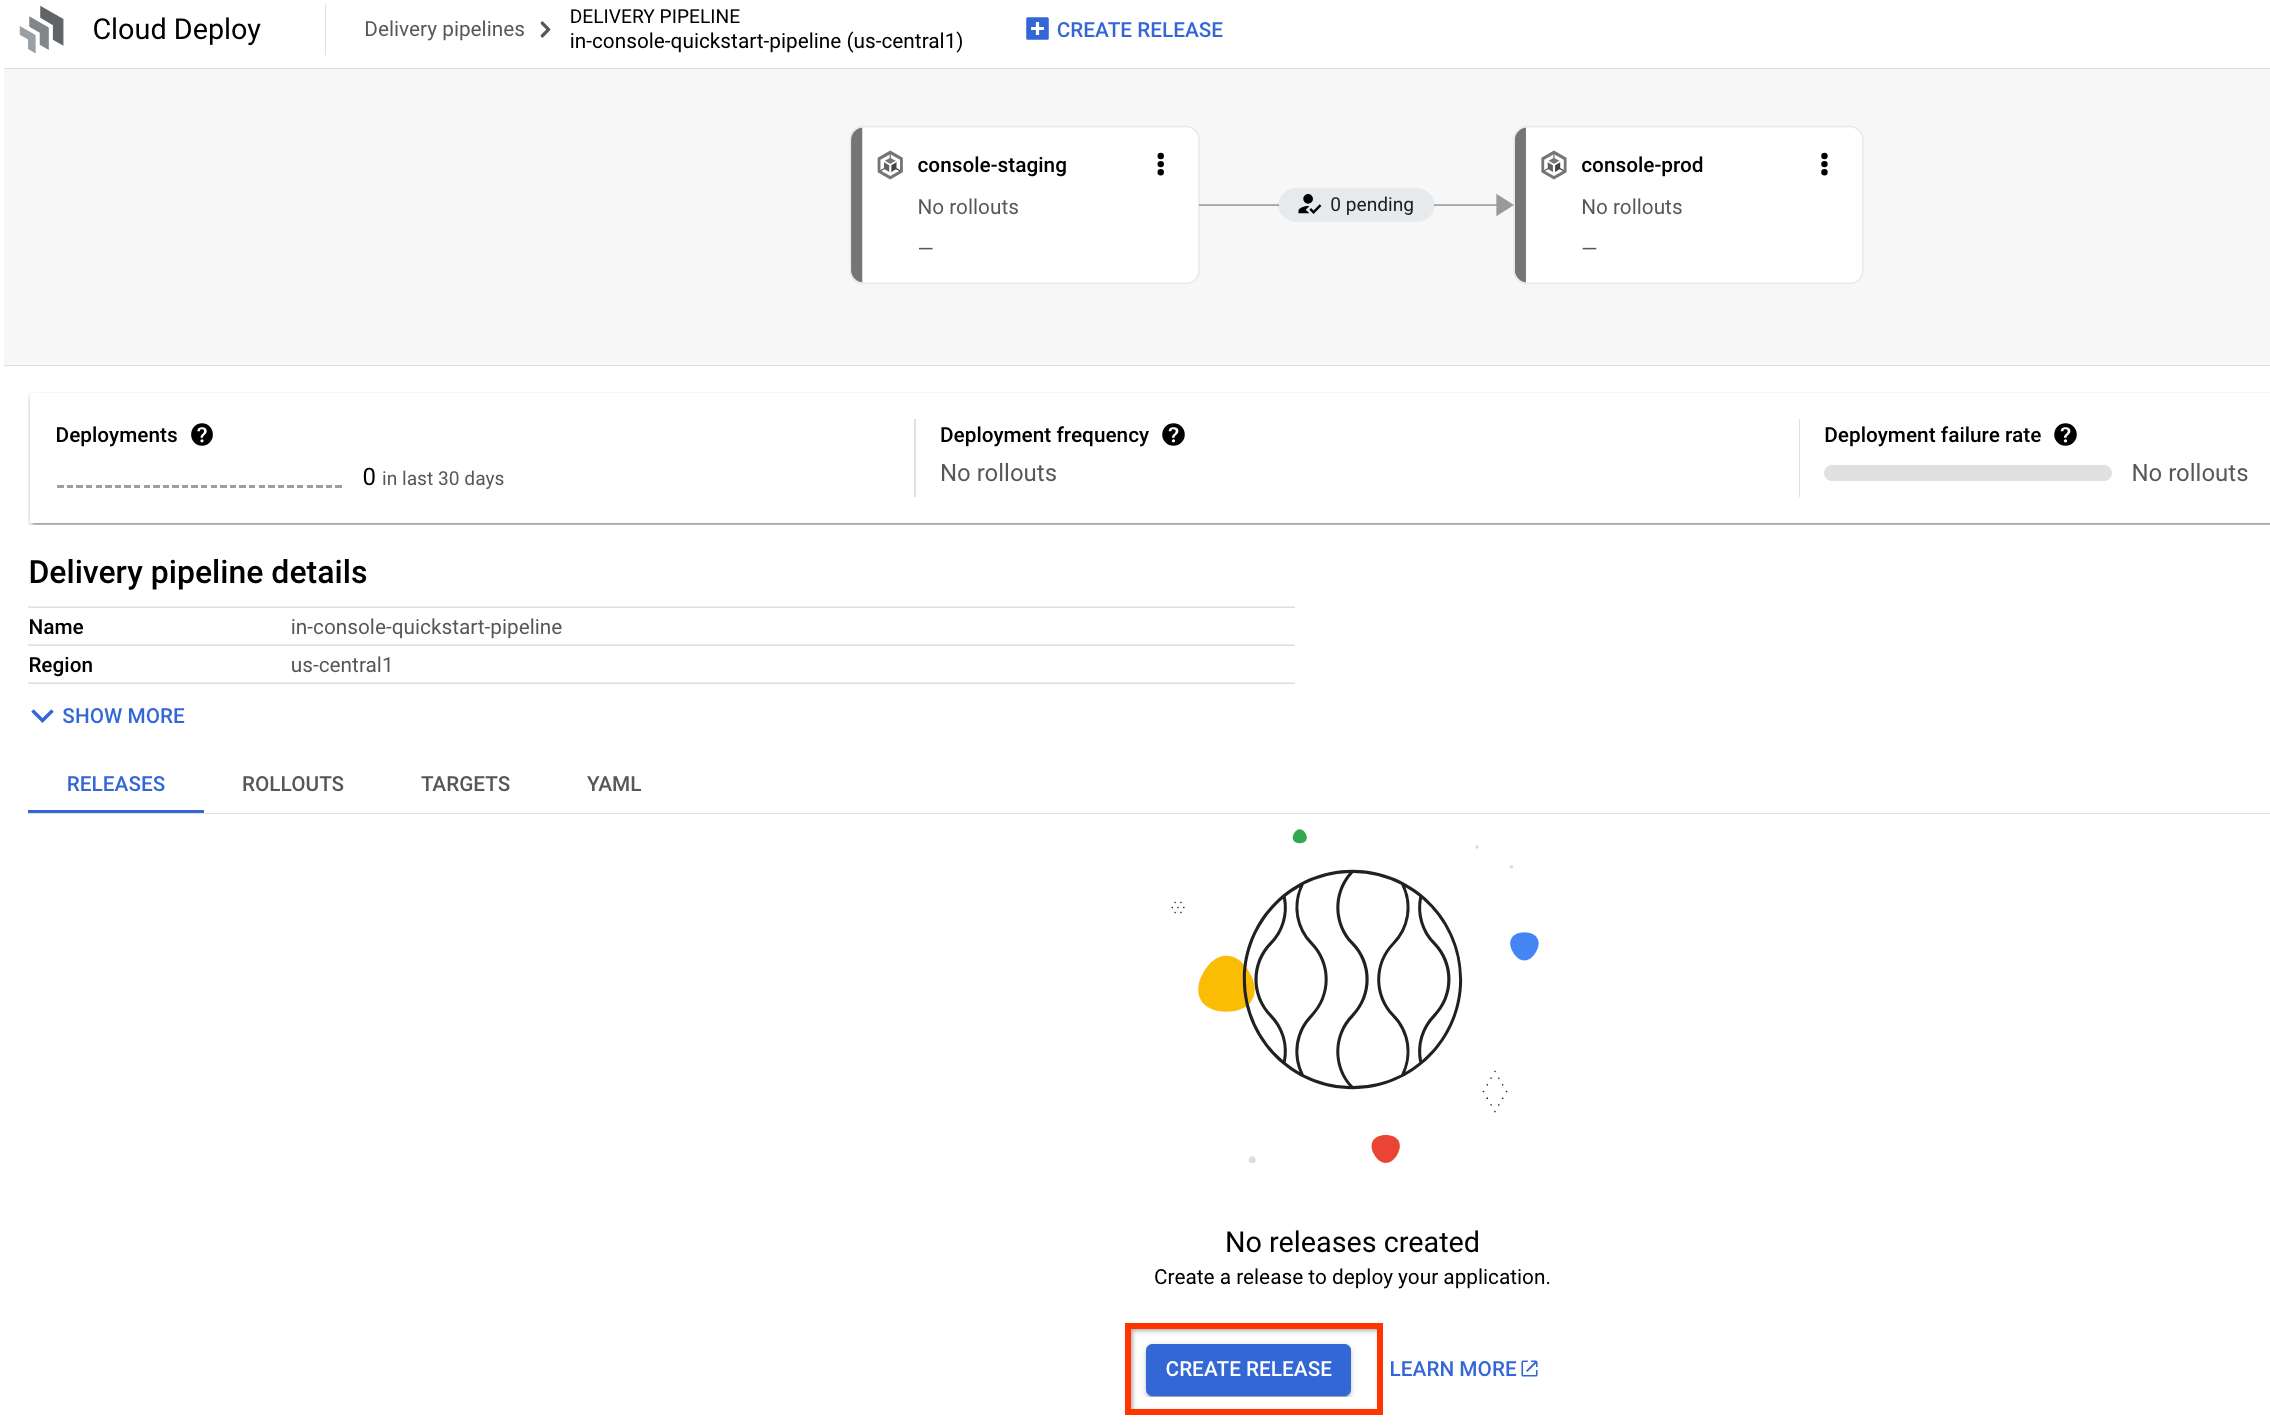
Create a release
Now that you have a delivery pipeline, with two targets, pointing to two GKE clusters or two Cloud Run services, you can create a release to deploy your application to the first target.
If you're not already on the delivery pipeline page, showing the new delivery pipeline
in-console-quickstart-pipeline, navigate there now.The pipeline visualization is shown, with no rollouts.
Click the Create release button.
The Create a release dialog is shown. Most of the fields are pre-populated. Keep these default values.
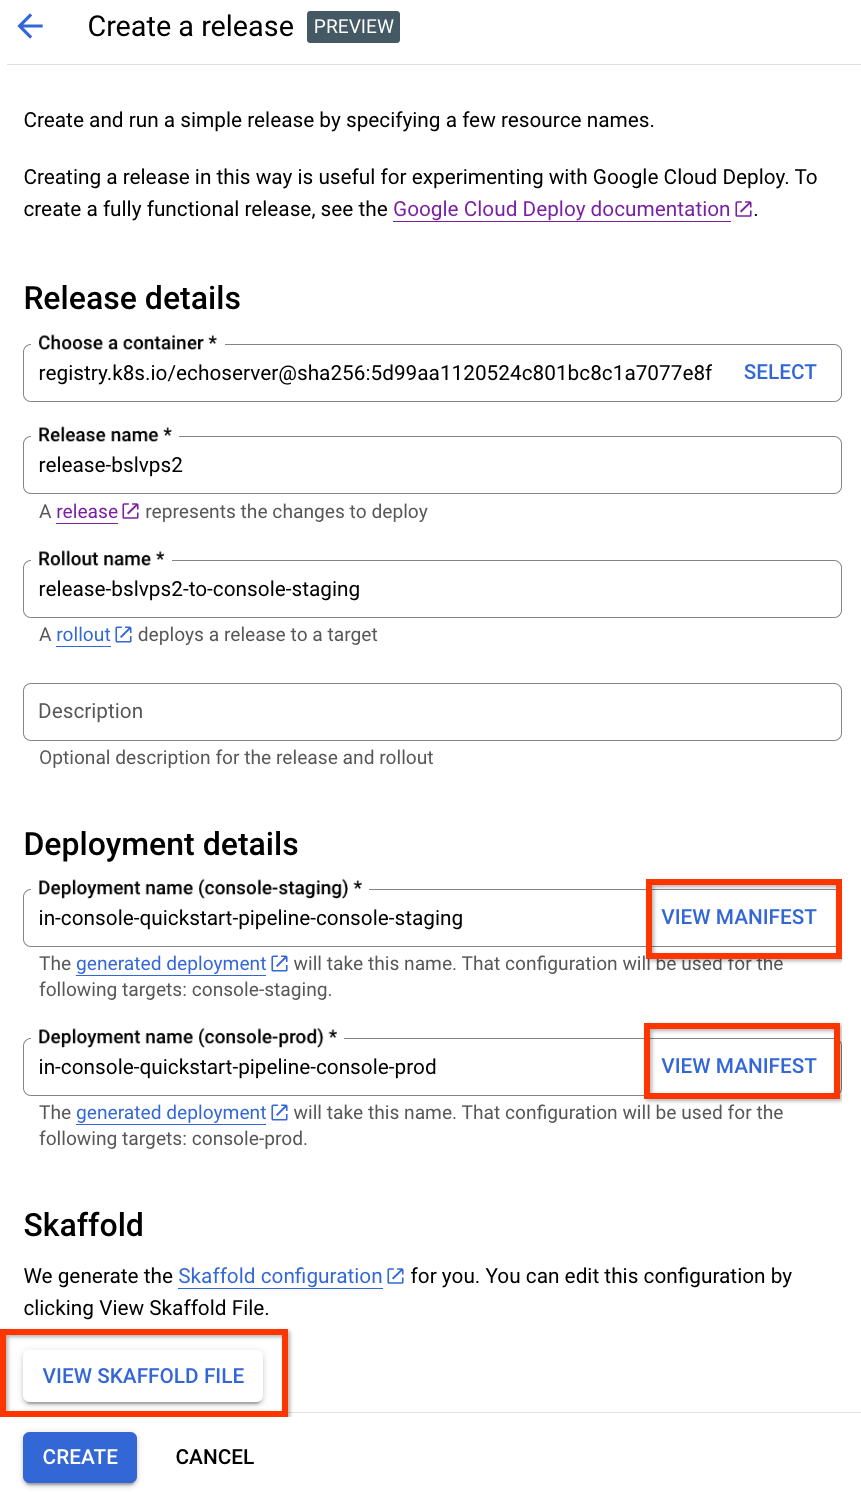
You can click the View manifest button to view the manifest the automatically generated manifest, for either target, and you can click View Skaffold file to view the generated
skaffold.yaml. You can also edit them, but for this quickstart leave them as they are.Optionally, add a description for this release, in the Description field.
Click Create to start the release.
The rollout details page is shown, for the rollout to the first target, and you can watch the progress of this rollout. It will take a few minutes to complete. It may take a few seconds for the rollout to start.
After the first rollout finishes, click the delivery pipeline name to go to the delivery pipeline page.

The pipeline visualization is shown, with the rollout complete to the first target.
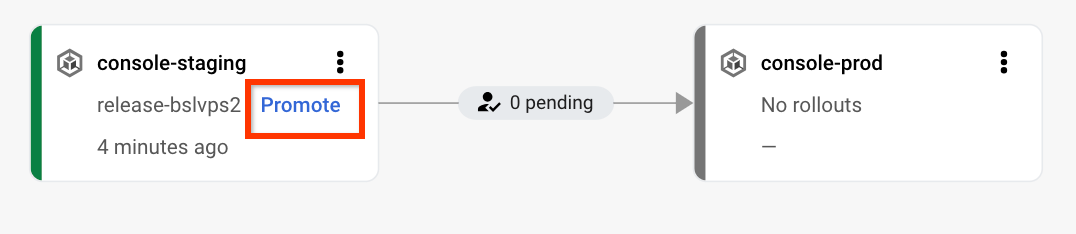
Click Promote to start the rollout to the next target.
The Promote dialog is shown.
Keep the default values, add a Rollout description if you want, then click Promote.
Because we selected Require approval for rollouts when we created the second target, this promotion is waiting for approval.
Click Review, in the delivery pipeline visualization.
The approval page is shown.

Click Review again, and in the approval dialog, click Approve.
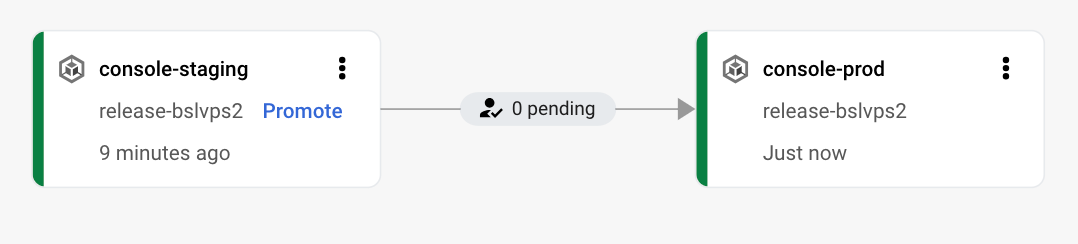
The rollout is started for the second target. You can click the delivery pipeline name again to watch the progress in the pipeline visualization.
When the second rollout is finished, the application is deployed in the second target, and your delivery pipeline has completed.
Clean up
To avoid incurring charges to your Google Cloud account for the resources used on this page, follow these steps.
Delete the GKE clusters or Cloud Run services:
GKE
gcloud container clusters delete quickstart-cluster-for-console-staging --region=us-central1 --project=PROJECT_ID \
&& gcloud container clusters delete quickstart-cluster-for-console-prod --region=us-central1 --project=PROJECT_ID
Cloud Run
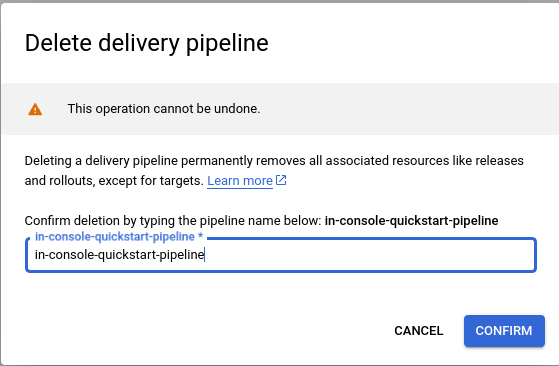
gcloud run services delete in-console-quickstart-pipeline-target-1 --region=us-central1 --project=PROJECT_ID \
&& gcloud run services delete in-console-quickstart-pipeline-target-2 --region=us-central1 --project=PROJECT_ID
From the delivery pipeline page, click Delete to delete the delivery pipeline, the release, and rollouts.
Type the pipeline name in the field provided, and click Confirm to finish deleting the resources.
Delete both targets:
gcloud deploy targets delete console-staging --region=us-central1  && \
gcloud deploy targets delete console-prod --region=us-central1
Delete the Cloud Storage buckets that Cloud Deploy created.
One ends with
_clouddeploy, and the other is[region].deploy-artifacts.[project].appspot.com.
That's it, you completed this quickstart!