This page describes how to use Cloud Deploy to get your application into your intended target runtime environments. Before you do this, you need to create your delivery pipeline and targets.
Before you begin
This section describes the things you need to have in place before you can deploy your application using Cloud Deploy.
Make sure your execution service account has the necessary IAM roles and permissions.
Create your delivery pipeline and targets.
Cloud Deploy can deploy to Google Kubernetes Engine, Cloud Run, and GKE Enterprise clusters. Target configuration differs depending on which of these you're deploying to.
Have your container images and manifests.
You need one or more container images to deploy and one or more Kubernetes manifests (to deploy to GKE) or service YAML files (to deploy to Cloud Run).
You need a continuous integration pipeline, or some other process, to build and place your images. Your CI tool can be Cloud Build, Jenkins, or anything that results in container images that you can provide to your Cloud Deploy delivery pipeline.
Have a
skaffold.yamlconfiguration file.Cloud Deploy calls
skaffold renderto render the Kubernetes manifests using this file andskaffold applyto deploy them into your target. To do this, Skaffold requires at least a minimalskaffold.yaml. You can get one in either of two ways:Create your own.
Note that the
skaffold.yamlfile must reference the namespace corresponding to a supported Skaffold version in the first line, as in this example:`apiVersion: skaffold/v4beta7`Have it generated for you.
If you don't already have a
skaffold.yamlfile, you can have Cloud Deploy create one for you. This file is suitable for onboarding, learning, or demonstrating Cloud Deploy, and should not be used for production workloads.
See Using Skaffold with Cloud Deploy for more details. Also, Managing manifests in Cloud Deploy has more details on using Skaffold and Cloud Deploy with manifest-management tools, such as Helm, Kustomize, and kpt.
Set up Cloud Deploy for the runtime environment of your choice
Cloud Deploy can deploy your application to any of the following runtime environments:
Invoke your delivery pipeline to create a release
After you've configured Cloud Deploy to deploy to your runtime, you can now submit your application to be deployed according to the delivery pipeline you created.
Run your regular continuous-integration (CI) process, creating the deployable artifact or artifacts.
Initiate the delivery pipeline by calling Cloud Deploy to create a release.
Run the following command from the directory containing your Skaffold config:
gcloud deploy releases create RELEASE_NAME --delivery-pipeline=PIPELINE_NAME --region=REGIONBecause this command creates a tar file of the entire contents of the directory, and any subdirectories, you might not want to run this command from your home or root directory. Either run the command from the directory containing your Skaffold config, or include the
--source=option, described later.In this command...
RELEASE_NAMEis a name to give to this release. The name must be unique among all releases for this delivery pipeline.You can specify dynamic release names by including
'$DATE'or'$TIME'or both. For example, if you invoke this command at 3:07pm UTC,'rel-$TIME'resolves torel-1507.'$DATE'and'$TIME'must be in single-quotes, and the time is UTC time on the machine where you invoke the command.PIPELINE_NAMEis the name of the delivery pipeline that will manage deployment of this release through the progression of targets. This name must match thenamefield in the pipeline definition.REGIONis the name of the region in which you're creating the release, for exampleus-central1. This is required.
This command uploads a tar file containing your configs to a Cloud Storage bucket and creates the release. Cloud Deploy also automatically creates a rollout and deploys your image to the first target defined in the delivery pipeline.
In addition to the parameters shown with this command, you can include either of the following options:
--images=<name=path/name:$IMAGE_SHA>,<name=path/name:$IMAGE_SHA>A collection of image name to image full-path replacements.
--build-artifacts=<path/file>A reference to a Skaffold build artifacts output file, which can be passed in to represent the image full path replacements.
These two options are mutually exclusive.
You can also include one of the following flags to have Cloud Deploy
generate a skaffold.yaml file for you:
--from-k8s-manifest=K8S_MANIFESTThe generated Skaffold config is based on the Kubernetes manifest you pass this flag. Using this flag with either the
--skaffold-fileflag or the--sourceflag, generates an error. See Generating yourskaffold.yamlfor more details.--from-run-manifest=RUN_MANIFESTThe generated Skaffold config is based on the Cloud Run service YAML you pass this flag. Using this flag with either the
--skaffold-fileflag or the--sourceflag, generates an error. See Generating yourskaffold.yamlfor more details.
These two options are mutually exclusive.
You can also include a .gcloudignore file if there are any files in the
directory which you don't want included in the tar file.
Create a release from the Google Cloud console
You can use the Google Cloud console to create a release for a delivery pipeline. This is useful for trying out Cloud Deploy, but is not suitable for production workloads.
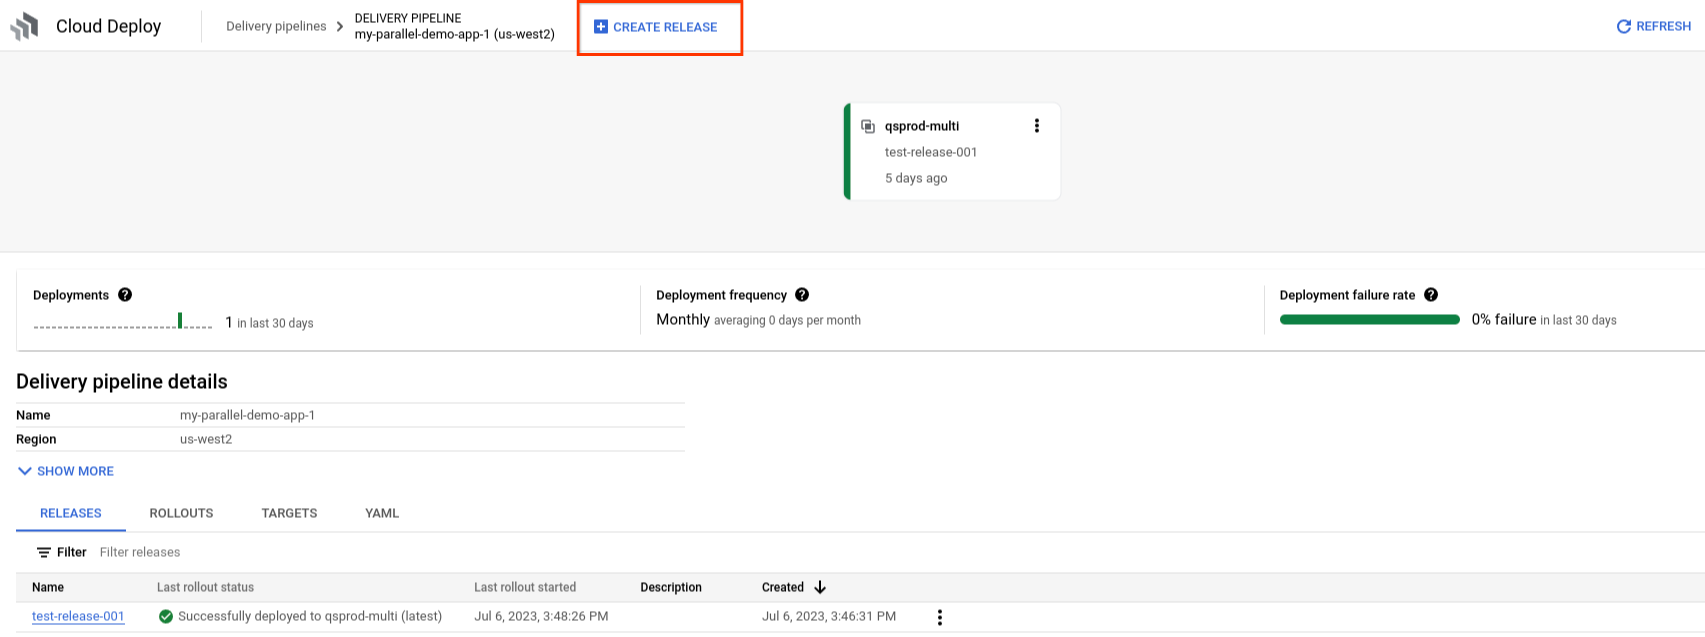
The following procedure assumes you have already created a delivery pipeline and one or more targets. (You can also use the Google Cloud console) to create your delivery pipeline.)
From the Delivery pipeline details page, for a specific delivery pipeline, click Create release.
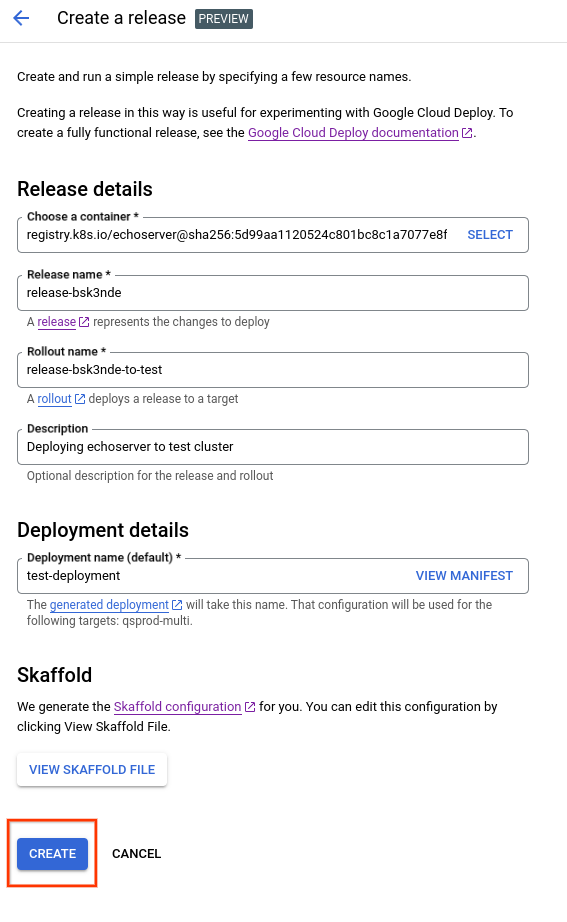
In the Choose a container field, paste or type the path to the container image you want to deploy. You can also use the default container pre-populated in this field, for evaluation.
You can also click Select to choose a container image from Artifact Registry.
Provide a unique name for this release, in the Release name field, or use the default name provided.
Provide a name for the rollout, in the Rollout name field, or use the default name provided.
This name is used for the rollout to the first target, for this release. For subsequent targets, you can name the rollout in the Promote dialog or on the
gcloud deploy releases promotecommand.Optionally, include a description for this release, in the Description field.
Under Deployment details, enter a name for your GKE deployment or Cloud Run service, or use the default name provided.
For GKE, Cloud Deploy generates the manifest for you. For Cloud Run, Cloud Deploy generates the service definition, which is used to create the service.
Click Create.
Cloud Deploy uses the generated manifest or
Cloud Run service definition, and the generated skaffold.yaml,
to create the release.
Change the deployment timeout
For deployments to GKE and GKE Enterprise target clusters, there are three separate timeouts that affect how long the system waits for Kubernetes to report a stable deployment:
Cloud Build has a timeout of 1 hour on operations that Cloud Build performs for Cloud Deploy.
You can change this timeout in the configuration for your execution environment.
Skaffold has a health-check timeout (
deploy.statusCheckDeadlineSeconds), which is the amount of time, in seconds, to wait for deployments to stabilize.The default is 600 seconds (10 minutes). To use this timeout,
deploy.statusCheckmust be set totrue. By default, it is. IfstatusCheckisfalse, there is no status check, the rollout is marked successful afterkubectl applyfinishes successfully.For Kubernetes resources of
kind: Deployment, there'sDeployment.spec.progressDeadlineSeconds, which is the amount of time Kubernetes waits for the Deployment to report as stable.This timeout is applicable to
Deploymentresources only. Here's how these first two timeouts work together:If
Deployment.spec.progressDeadlineSeconds, in Kubernetes, is unset, then the Skaffold health-check timeout is the effective timeout, whether it's the default or is explicitly set.If
Deployment.spec.progressDeadlineSeconds, in Kubernetes, is set, then Skaffold ignores its own health-check timeout, and the Kubernetes progress deadline is the effective timeout. However, if the Kubernetes timeout is explicitly set to600(10 minutes), then Skaffold assumes that it's the default (unset) and ignores it, and the Skaffold timeout is used (if set).If neither timeout is set, then the effective timeout is the Skaffold default of
600(10 minutes).
Besides
Deployments, other Kubernetes resources can have timeouts, which do not influence the stability timeout. If any of these are present, review them to ensure they are not in conflict with the stability timeout.If Skaffold (or Cloud Build) times out, the GKE deployment continues to run. Cloud Deploy shows a failure, but it can still succeed or fail on the GKE cluster.
To change your deployment stability timeout:
Ensure that
deploy.statusCheckis set totrueinskaffold.yaml.trueis the default. Whentrue, Skaffold waits for health checks to report a stable deployment, subject to the timeout value in the next step.In
skaffold.yaml, setstatusCheckDeadlineSecondsto the number of seconds you want to wait.deploy: ... statusCheck: true statusCheckDeadlineSeconds: 600 ...The default is
600(10 minutes). Skaffold waits this amount of time for a stable deployment. If this time is exceeded before the deployment is stable, the deployment fails.Optionally, you can add
tolerateFailuresUntilDeadline: trueafterstatusCheckDeadlineSeconds.This setting tells Skaffold not to exit if a single deployment fails, but to tolerate failures until
statusCheckDeadlineSecondsexpires. This setting can help in situations where you have resources that might need more time (up to the status-check deadline) to reach a stable state.For example, if you're using Istio or Cloud Service Mesh, you might have a failed deployment with a message similar to this one:
error iptables validation failed; workload is not ready for Istio.
When using Istio CNI, this can occur if a pod is scheduled before the node is ready.
In your Kubernetes manifest, for resources of
kind: Deployment, setDeployment.spec.progressDeadlineSecondsto the same value as you set forstatusCheckDeadlineSeconds.
What's next
Find out about deploying to GKE
Find out about deploying to Cloud Run
Find out about deploying to GKE Enterprise
Learn how to create your delivery pipeline and targets
Learn how to promote a release