查看 Application Integration 支持的连接器。
设置 Application Integration
本页面介绍了在 Google Cloud 项目中成功设置或预配 Application Integration 所需的不同方法和步骤。
准备和规划
在设置 Application Integration 之前,请执行以下步骤:
-
In the Google Cloud console, go to the project selector page.
-
Select or create a Google Cloud project.
Roles required to select or create a project
- Select a project: Selecting a project doesn't require a specific IAM role—you can select any project that you've been granted a role on.
-
Create a project: To create a project, you need the Project Creator
(
roles/resourcemanager.projectCreator), which contains theresourcemanager.projects.createpermission. Learn how to grant roles.
-
Verify that billing is enabled for your Google Cloud project.
所需的角色
如需获得设置 Application Integration 所需的权限,请让管理员向您授予项目的以下 IAM 角色:
-
Google Cloud Project Editor (
roles/editor) -
Cloud KMS Admin (
roles/cloudkms.admin) -
Application Integration Admin (
roles/integrations.integrationAdmin) -
Connector Admin (
roles/connectors.admin)
如需详细了解如何授予角色,请参阅管理对项目、文件夹和组织的访问权限。
设置 Application Integration 的方法
您可以使用以下方式在 Google Cloud 项目中设置 Application Integration:
- 快速设置
快速设置是一键式自动化流程,可为您预配 Application Integration,而无需担心任何设置配置。请参阅开始快速设置。
- 高级设置
高级设置是一个手动流程,您可以在其中选择要用于在 Google Cloud 项目中设置 Application Integration 的加密方法。请参阅开始高级设置。
开始快速设置
快速设置是一项一键式操作,可自动为 Application Integration 默认设置,以便您开始使用该产品。默认配置包括启用 API(Application Integration API、Secret Manager API 和 Connectors API)、创建默认服务账号,以及使用 Google-owned and Google-managed encryption keys 作为所选区域的加密方法。
如需开始快速设置,请执行以下操作:
- 打开 Google Cloud 控制台,然后使用您的 Google Cloud 账号登录。
- 前往 Application Integration 页面。
- 选择要在其中设置 Application Integration 的 Google Cloud 项目。
- 在概览页面中,选择要部署 Application Integration 的区域,然后点击快速设置。
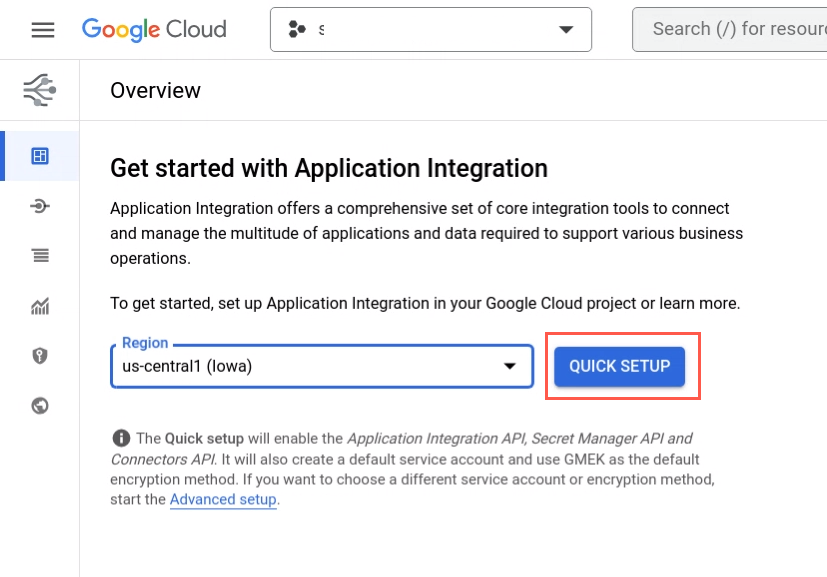
系统会显示一个指示设置进度的进度条。成功完成后,您会被重定向到集成列表页面。
开始高级设置
使用高级设置手动选择要在项目中预配 Application Integration 时使用的加密方法。
如需开始高级设置,请执行以下操作:
- 打开 Google Cloud 控制台,然后使用您的 Google Cloud 账号登录。
- 前往 Application Integration 页面。
- 选择要在其中设置 Application Integration 的 Google Cloud 项目。
系统会显示概览页面。
- 点击高级设置。
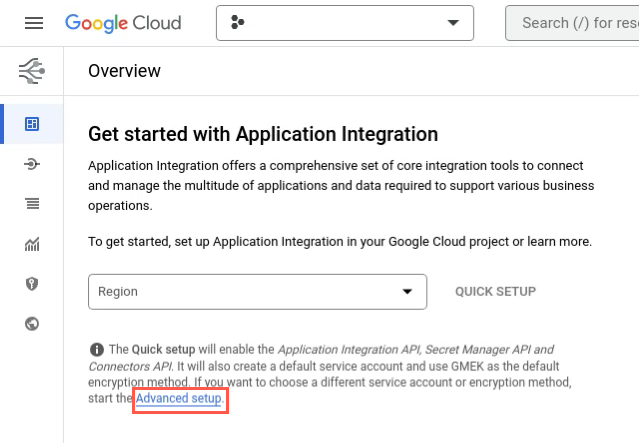
系统会显示设置 Application Integration 页面。
如需成功设置 Application Integration,请在设置应用集成页面中完成以下步骤:
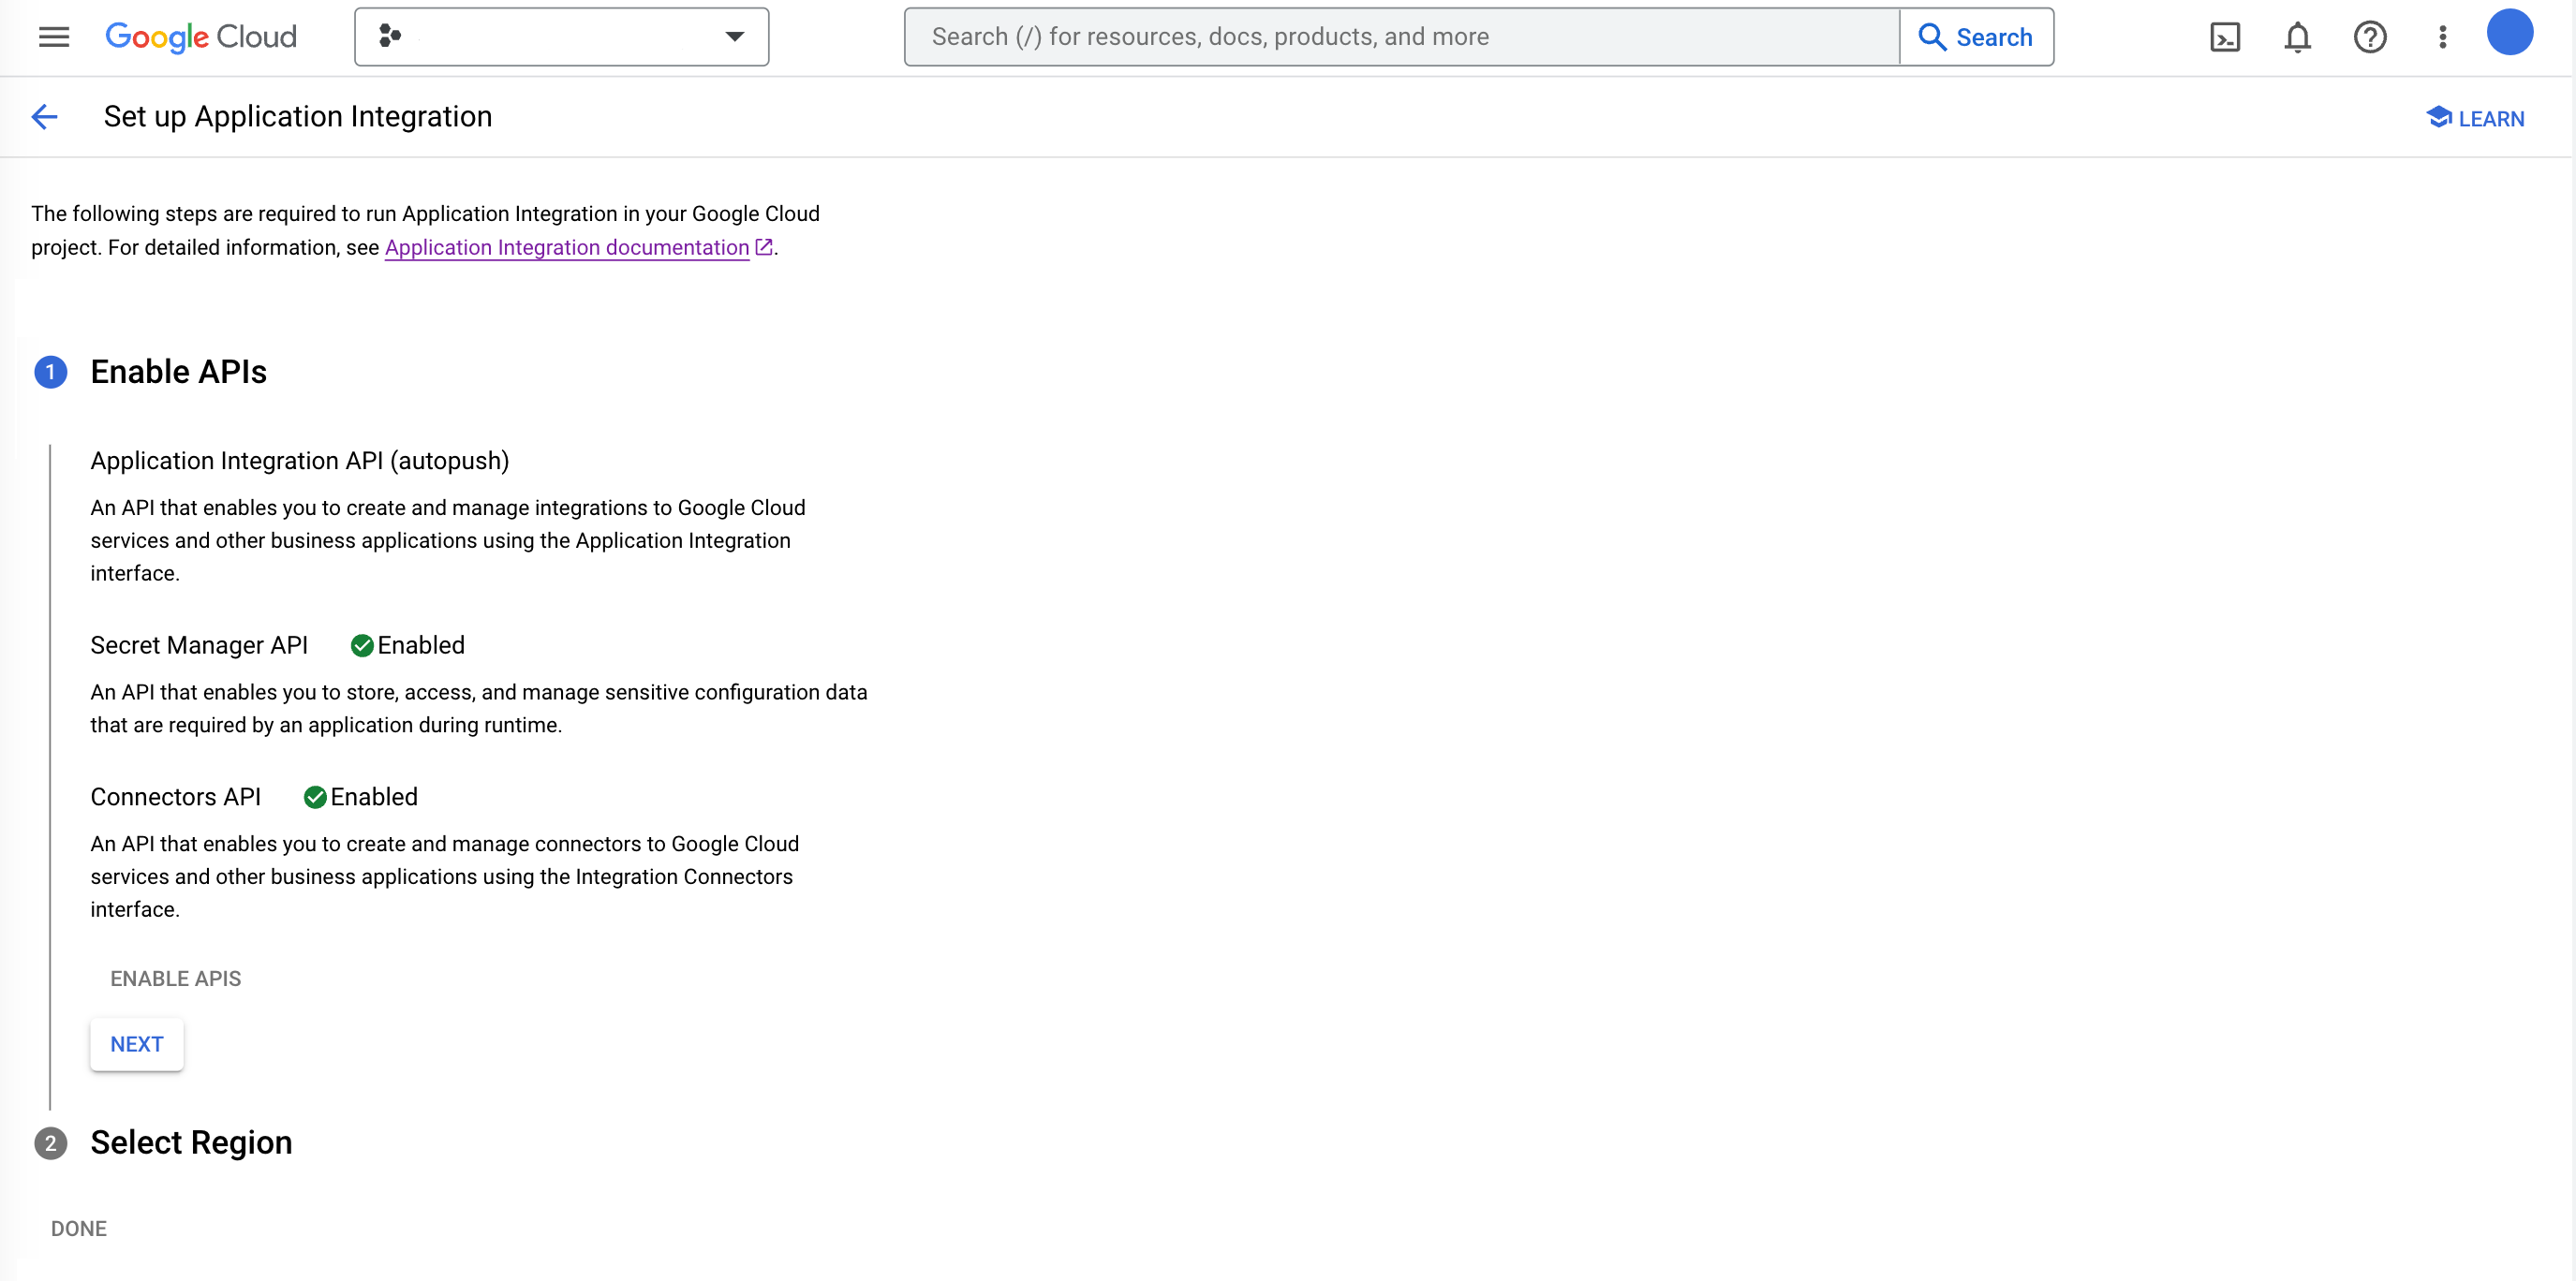
启用 API
启用 API 部分会显示在设置过程中将为 Application Integration 启用的一组 API。只有在所有 API 都已启用后,您才能继续执行下一步。
只需点击一下,即可顺畅地启用所有必需的 API:
- 点击启用 API,并等待几分钟,系统会自动启用所需的 API。
在此步骤中,系统会启用以下 API:
API 名称 位置信息 说明 应用集成 API integrations.googleapis.com 使用户能够通过 Application Integration 界面创建和管理与 Google Cloud 服务和其他业务应用的集成。 Secret Manager API secretmanager.googleapis.com 存储 API 密钥、密码和证书等敏感数据。在提供便捷性的同时还能提高安全性。 Connectors API connectors.googleapis.com 允许用户使用 Integration Connectors 界面创建和管理与 Google Cloud 服务和其他业务应用的连接。 Cloud KMS API cloudkms.googleapis.com 启用客户管理的加密密钥 (CMEK) 以进行数据加密。这样一来,集成数据就可以使用您自己的密钥进行加密,而不是使用 Google-owned and Google-managed encryption keys。
如需详细了解 CMEK,请参阅客户管理的加密密钥。 - 当设置应用集成页面指示所有 API 均已成功启用时,点击下一步,如下图所示。
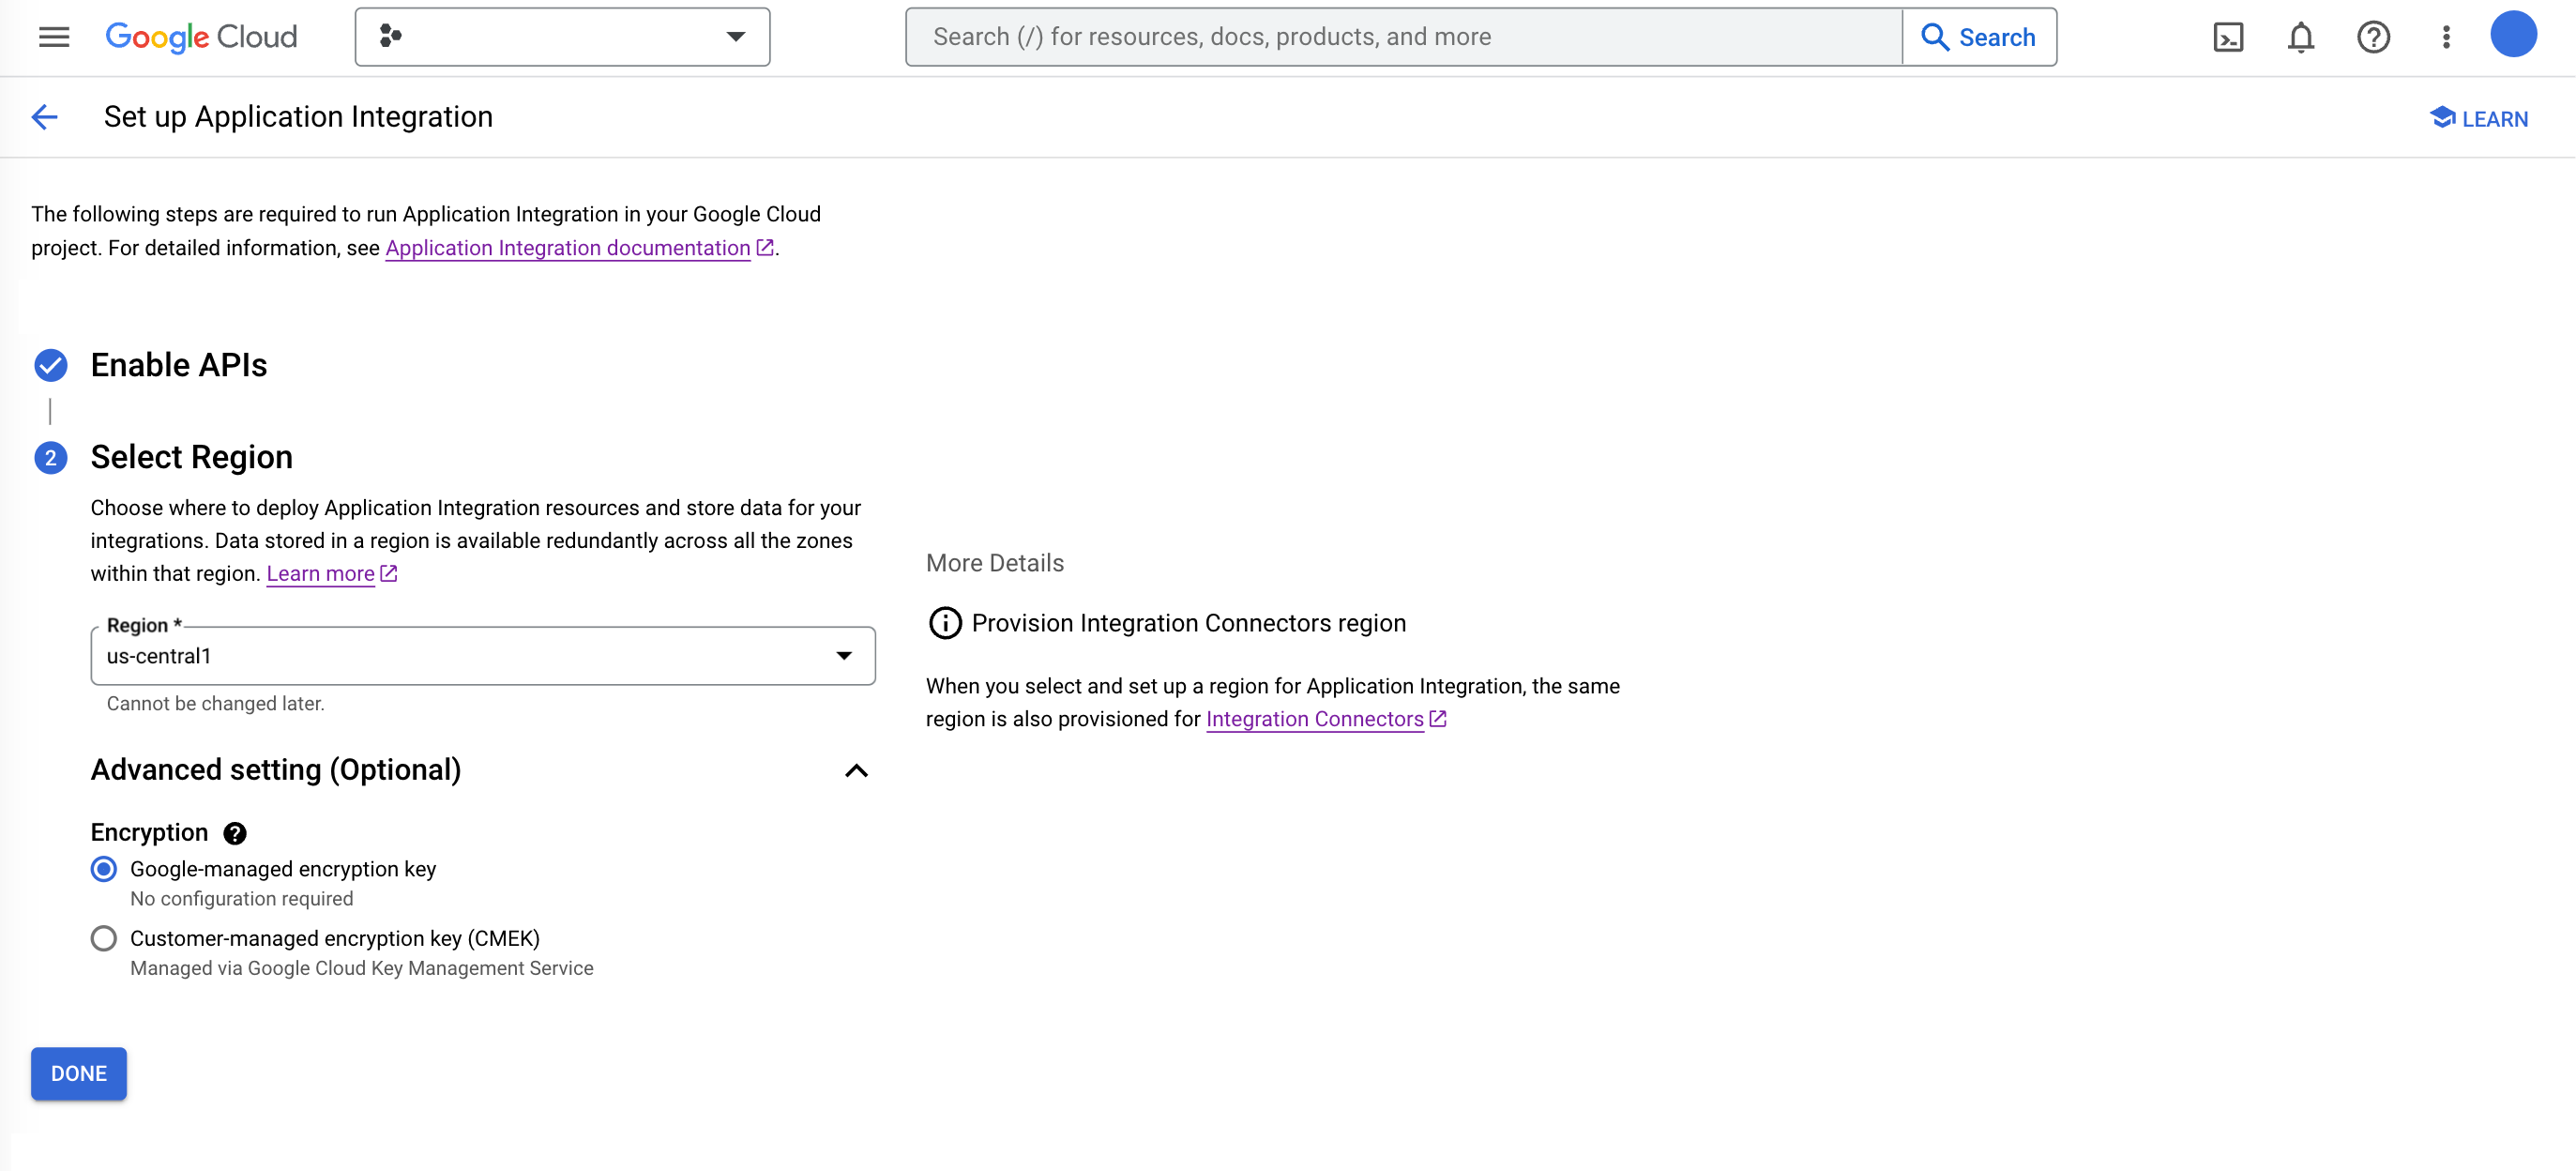
选择区域和加密方法
在此步骤中,您将选择要部署 Application Integration 的区域,并为所选区域选择 加密方法。
在选择区域部分下,执行以下步骤:
-
区域:选择您要部署 Application Integration 资源并存储集成数据的区域位置。
存储在某个区域中的数据以冗余方式分布在该区域内的所有可用区中。
如需了解支持的 Application Integration 区域,请参阅 Application Integration 位置。
-
高级设置:您可以选择展开并选择要在所选区域中使用的加密方法。您可以选择以下方法之一:
- Google-managed encryption key:这是默认的加密方法。如果您希望 Google 管理用于保护所选区域中的数据的加密密钥,请使用此方法。
- 客户管理的加密密钥 (CMEK):如果您想控制和管理用于保护所选区域中的数据的加密密钥,请使用此方法。
- 点击选择客户管理的密钥,然后选择所选区域中现有的 CMEK 密钥。您还可以创建新密钥或使用现有密钥的密钥资源 ID。
- 点击验证,检查您的默认服务账号是否具有对所选 CMEK 密钥的 cryptokey 访问权限。
- 如果所选 CMEK 密钥的验证失败,请点击授予,将 CryptoKey Encrypter/Decrypter IAM 角色分配给默认服务账号。
- 点击完成以完成 Application Integration 设置。
后续步骤
- 试用预配置的示例集成。
- 开始学习快速入门。
- 深入了解基本的 Application Integration 概念。
- 请参阅 Application Integration 配额和限制。