Consulta los conectores compatibles con Application Integration.
Ver el diseño del editor de integraciones
El editor de integración es una interfaz de arrastrar y soltar que te permite diseñar y desarrollar todo el flujo de integración con poco o ningún código. Puedes crear, modificar y ejecutar todas tus integraciones en el editor de integraciones. En general, el editor de integración es un espacio de trabajo unificado para gestionar tu integración.
Integración de aplicaciones proporciona activadores y tareas listos para usar que te ayudarán a desarrollar rápidamente tu integración. Cada tarea o elemento de activación se conecta mediante un borde junto con su bifurcación y unión respectivos. Los bordes también indican el flujo de control de una tarea o un activador a otro. Para obtener información sobre cómo especificar las condiciones de los bordes y las tareas, consulta Condiciones de los bordes.
Abrir el editor de integración
Para abrir tu integración en el editor de integraciones, haz lo siguiente:
- En la consola de Google Cloud, ve a la página Application Integration (Integración de aplicaciones).
- En el menú de navegación de la izquierda, haga clic en Integraciones para abrir la página Integraciones.
- Seleccione una integración o cree una haciendo clic en Crear integración.
Si vas a crear una integración:
- Escribe un nombre y una descripción en el cuadro de diálogo Crear integración.
- Selecciona una región para la integración.
- Haz clic en Crear. La integración que acabas de crear se abre en el editor de integraciones.
Ver el diseño del editor de integraciones
En la siguiente imagen se muestra un diseño de ejemplo del editor de integración.
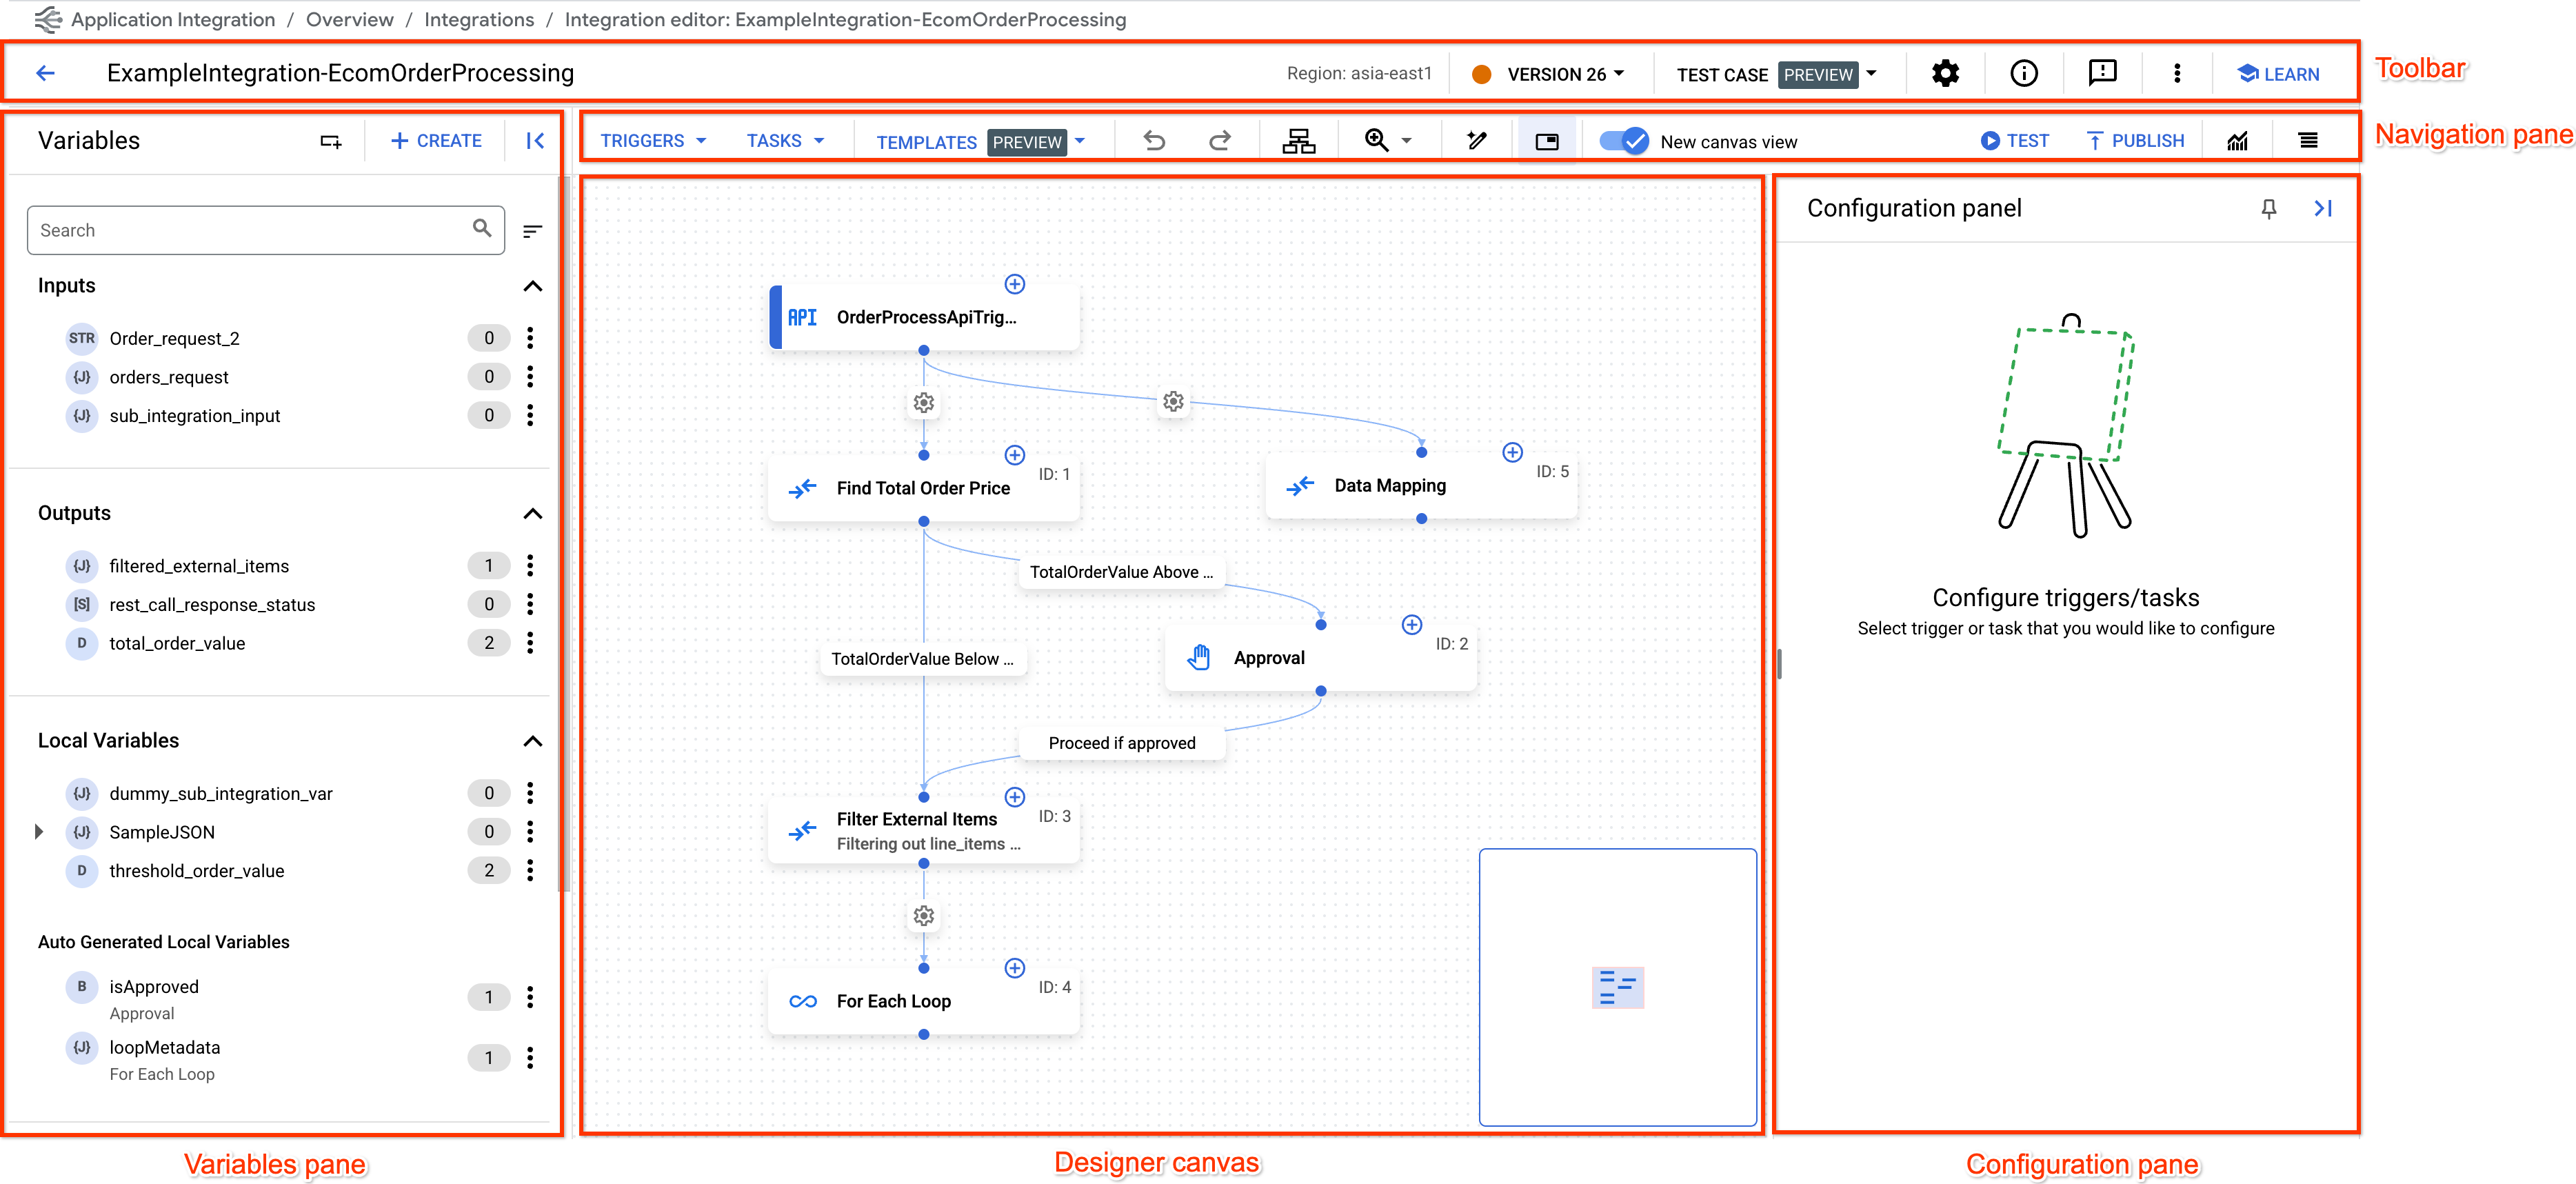
En la siguiente tabla se describen las diferentes secciones que componen el editor de integración:
| Sección | Descripción |
|---|---|
Barra de herramientas 
|
La barra de herramientas de diseño muestra la siguiente información sobre tu integración:
Para ver un resumen de toda la integración en un mismo lugar, haz clic en . Para realizar acciones como eliminar, clonar, descargar y subir una integración, y ver la especificación de OpenAPI de una integración, haz clic en (menú Acciones) en la barra de herramientas. |
Barra de navegación 
|
La barra de navegación del diseñador te permite realizar las siguientes acciones:
|
Panel Variables 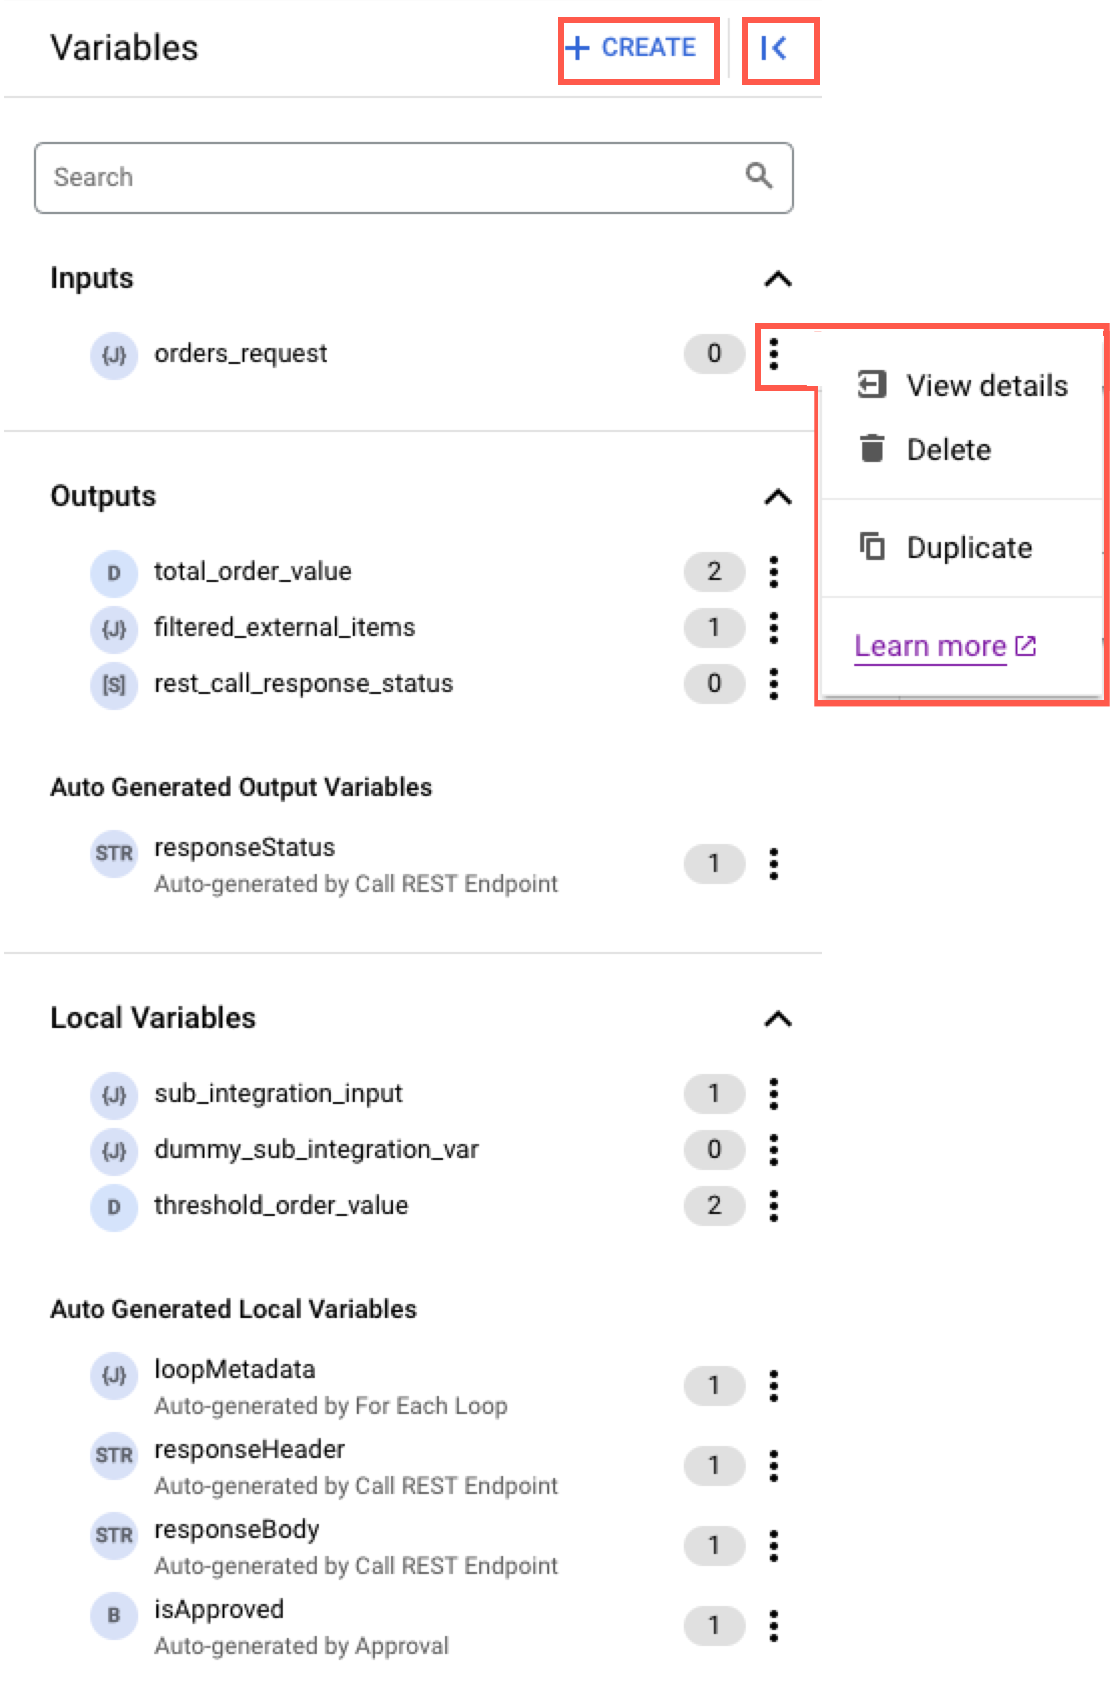
|
En el panel Variables se muestran todas las variables de integración y de tarea disponibles en la integración. También muestra el número total de referencias de variables en la integración. Para realizar acciones como eliminar o duplicar una variable, haz clic en (menú Acciones) junto a la variable correspondiente. Para obtener más información sobre las variables, consulta Variables. |
Lienzo de diseño 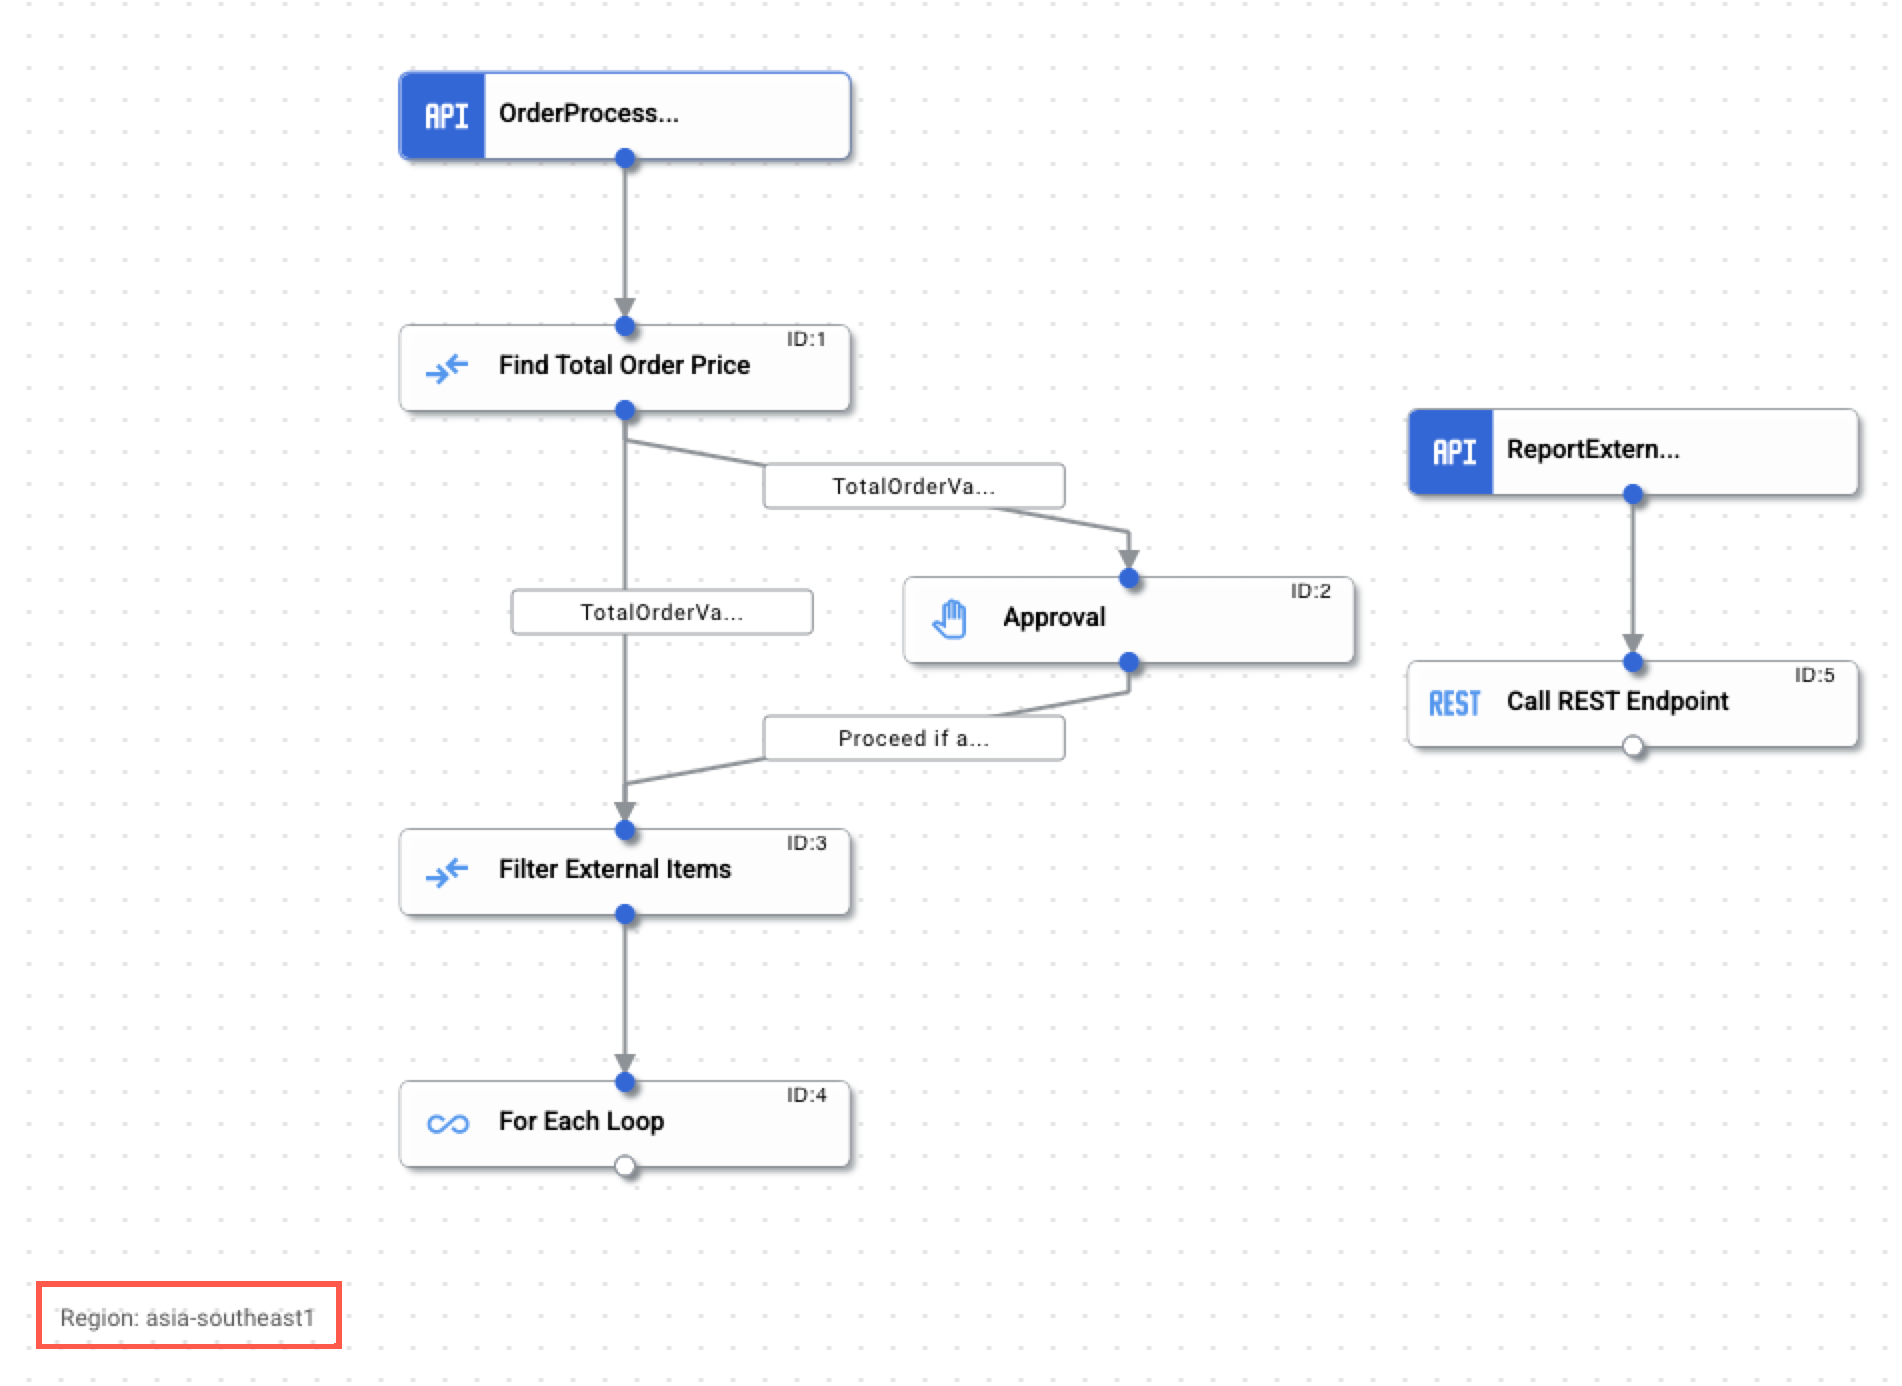
|
El lienzo de diseño es el fondo sobre el que puedes diseñar y desarrollar tu flujo de integración. |
Panel de configuración 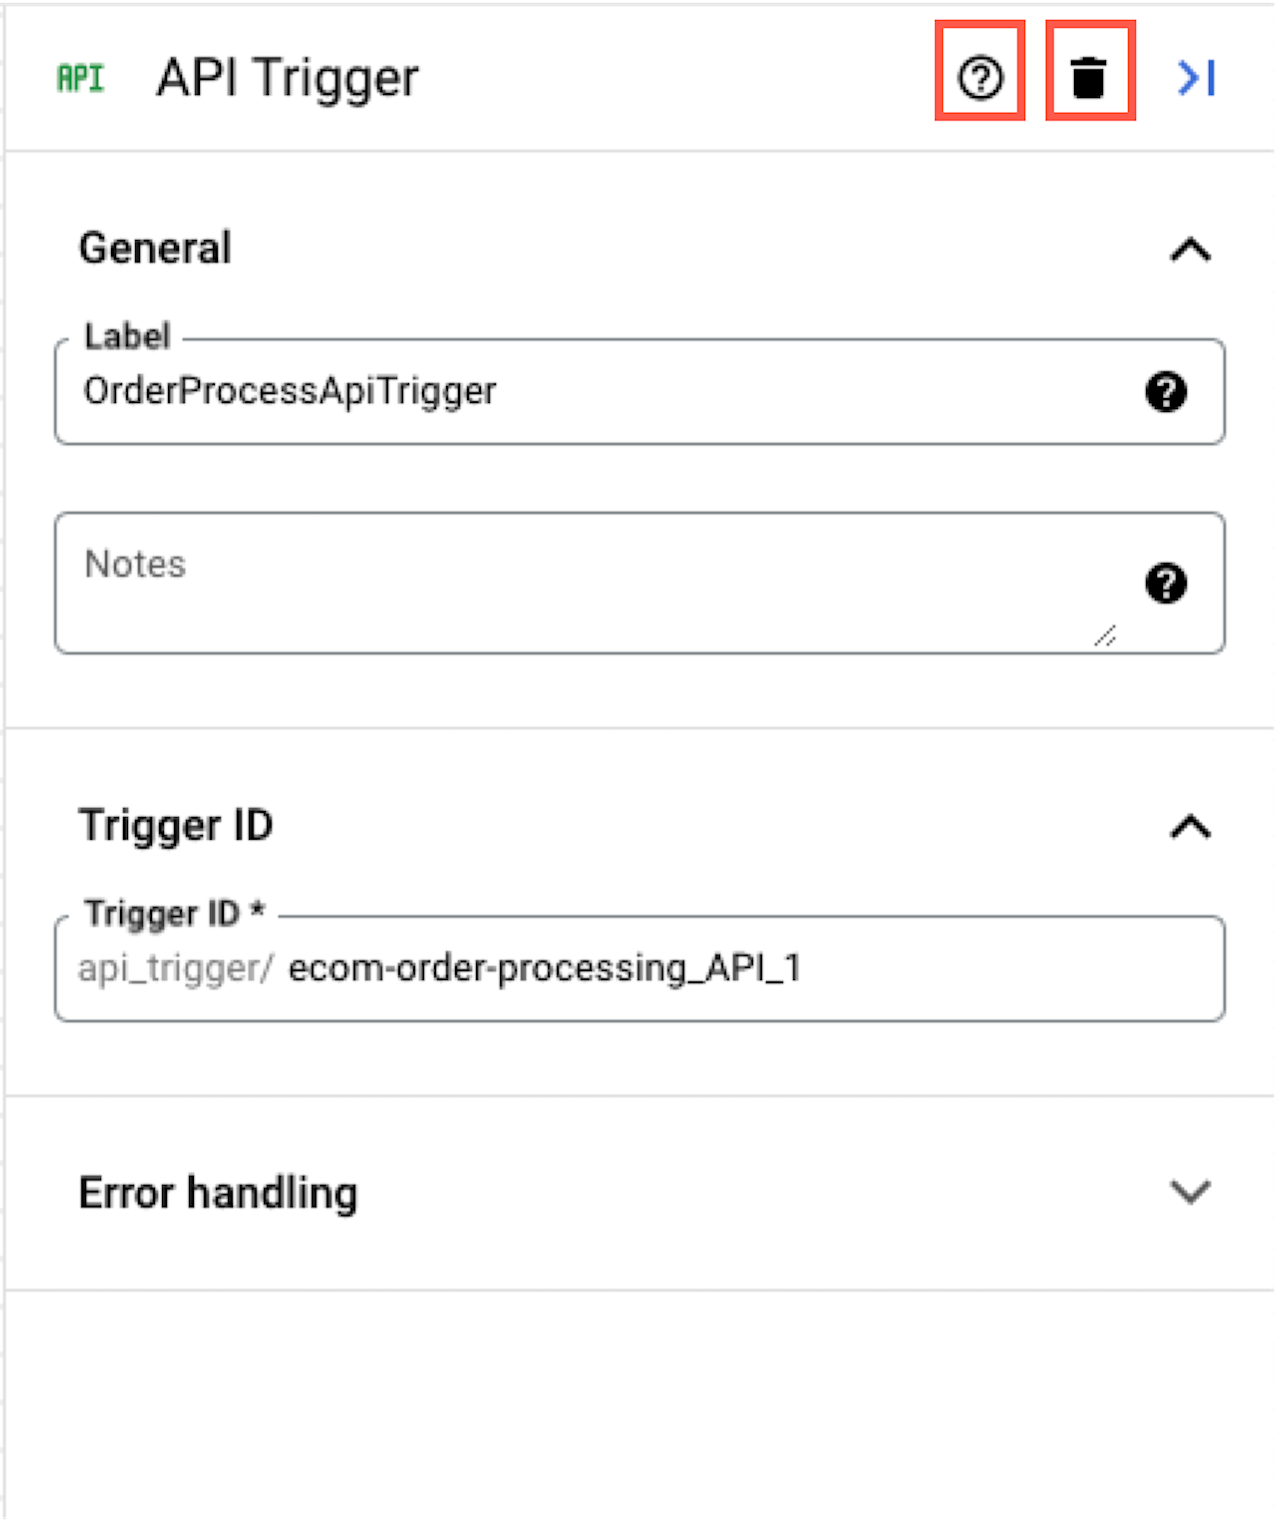
|
En el panel de configuración se muestran los ajustes de configuración de cada uno de los activadores y las tareas que se añaden al lienzo de diseño. Para obtener información sobre cómo configurar un activador o una tarea, consulta Activadores y tareas. |
Siguientes pasos
- Empieza con una guía de inicio rápido.
- Consulta información sobre la vista de lienzo.
- Profundizar en los conceptos fundamentales de Application Integration.
- Consulta cómo añadir y configurar los activadores y las tareas disponibles.