Tampilan kanvas menyediakan antarmuka yang intuitif dan mudah digunakan untuk mengelola alur kerja integrasi Anda.
Manfaat
Tampilan kanvas menawarkan manfaat berikut:
Peningkatan responsivitas interaksi kanvas: Dengan tampilan kanvas, Anda dapat
memindahkan tugas dan pemicu dengan lancar, sehingga memudahkan pembuatan alur kerja yang kompleks.
Tampilan integrasi yang lebih jelas: Desain visual yang diperbarui memberikan tampilan integrasi yang lebih jelas.
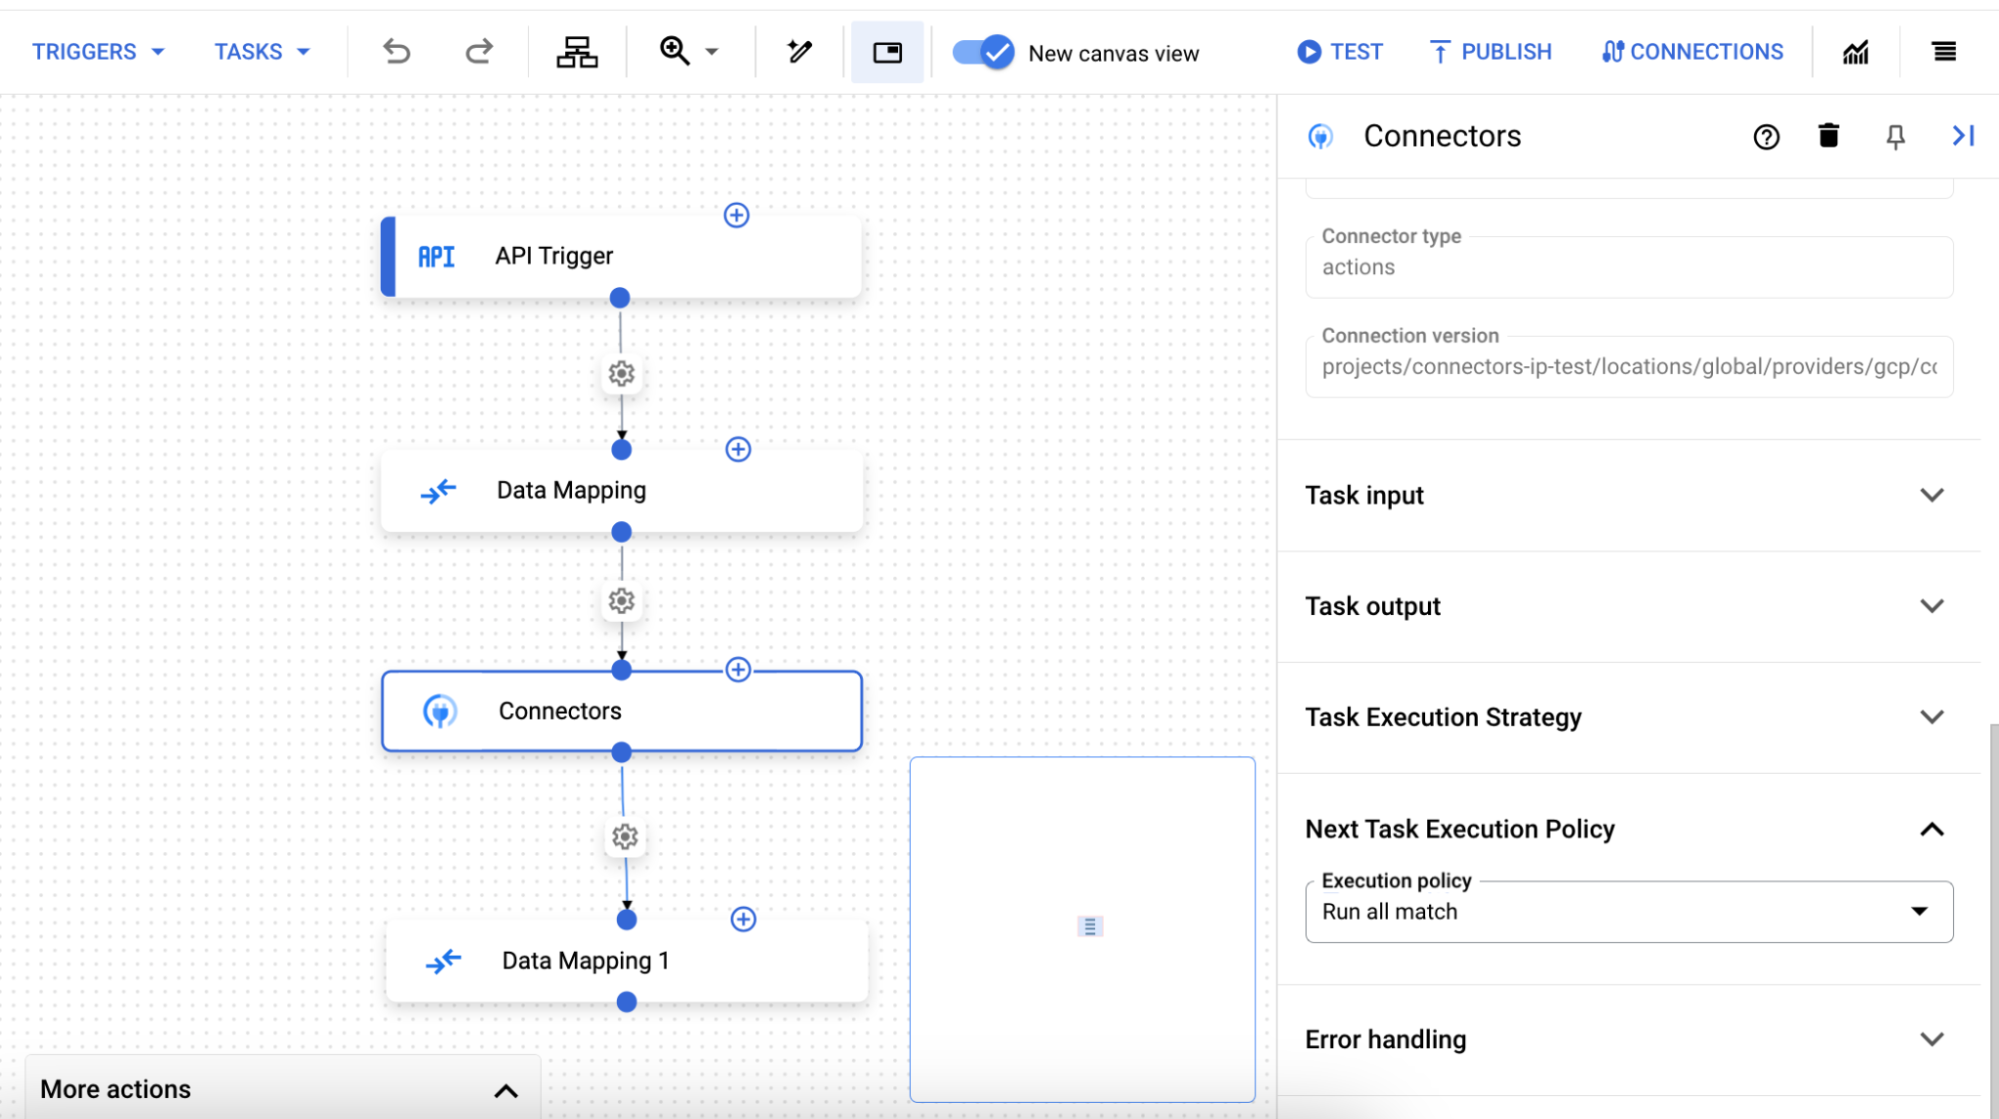
Tampilan peta mini: Dengan tampilan peta mini, Anda dapat melihat area tampilan relatif terhadap grafik.
Lebih mudah membangun integrasi: Tampilan kanvas menyediakan metode intuitif untuk menambahkan tugas turunan baru dengan tepi penghubung atau membuat tepi baru ke tugas yang ada dalam integrasi Anda.
Peningkatan kemampuan penemuan: Di panel konfigurasi tugas, Anda dapat mengonfigurasi Strategi eksekusi untuk tugas ini dan Kebijakan eksekusi untuk tugas berikutnya. Untuk mengetahui informasi selengkapnya tentang kebijakan ini, lihat Percabangan dan penggabungan.
Menggunakan tampilan kanvas
Untuk menggunakan tampilan kanvas, ikuti langkah-langkah berikut:
Buka editor integrasi.
Di panel navigasi, tampilan kanvas akan otomatis aktif.
Gunakan kanvas untuk membuat alur kerja integrasi Anda.
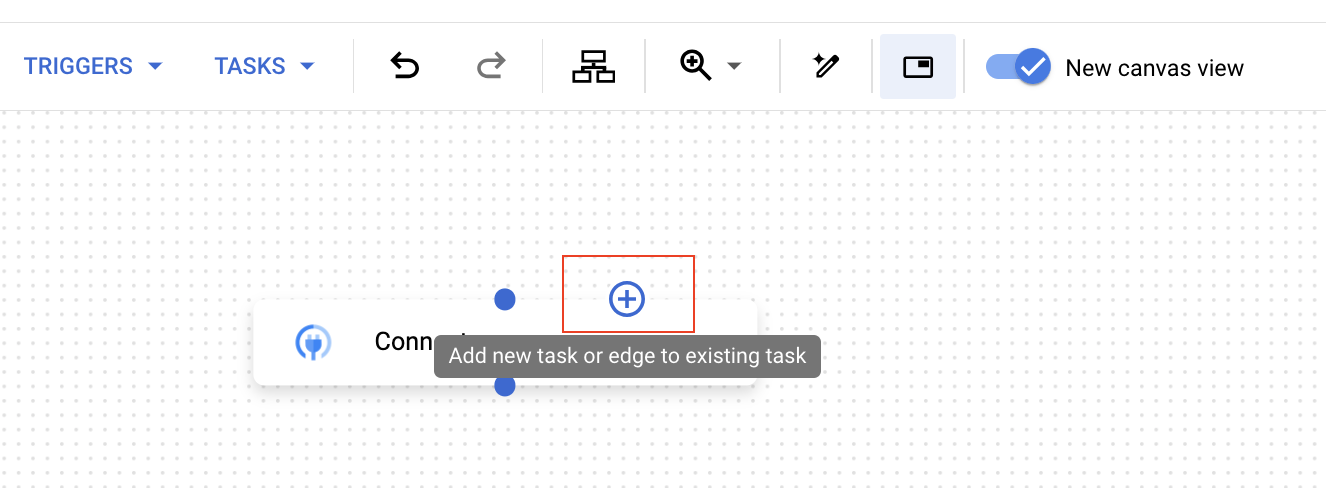
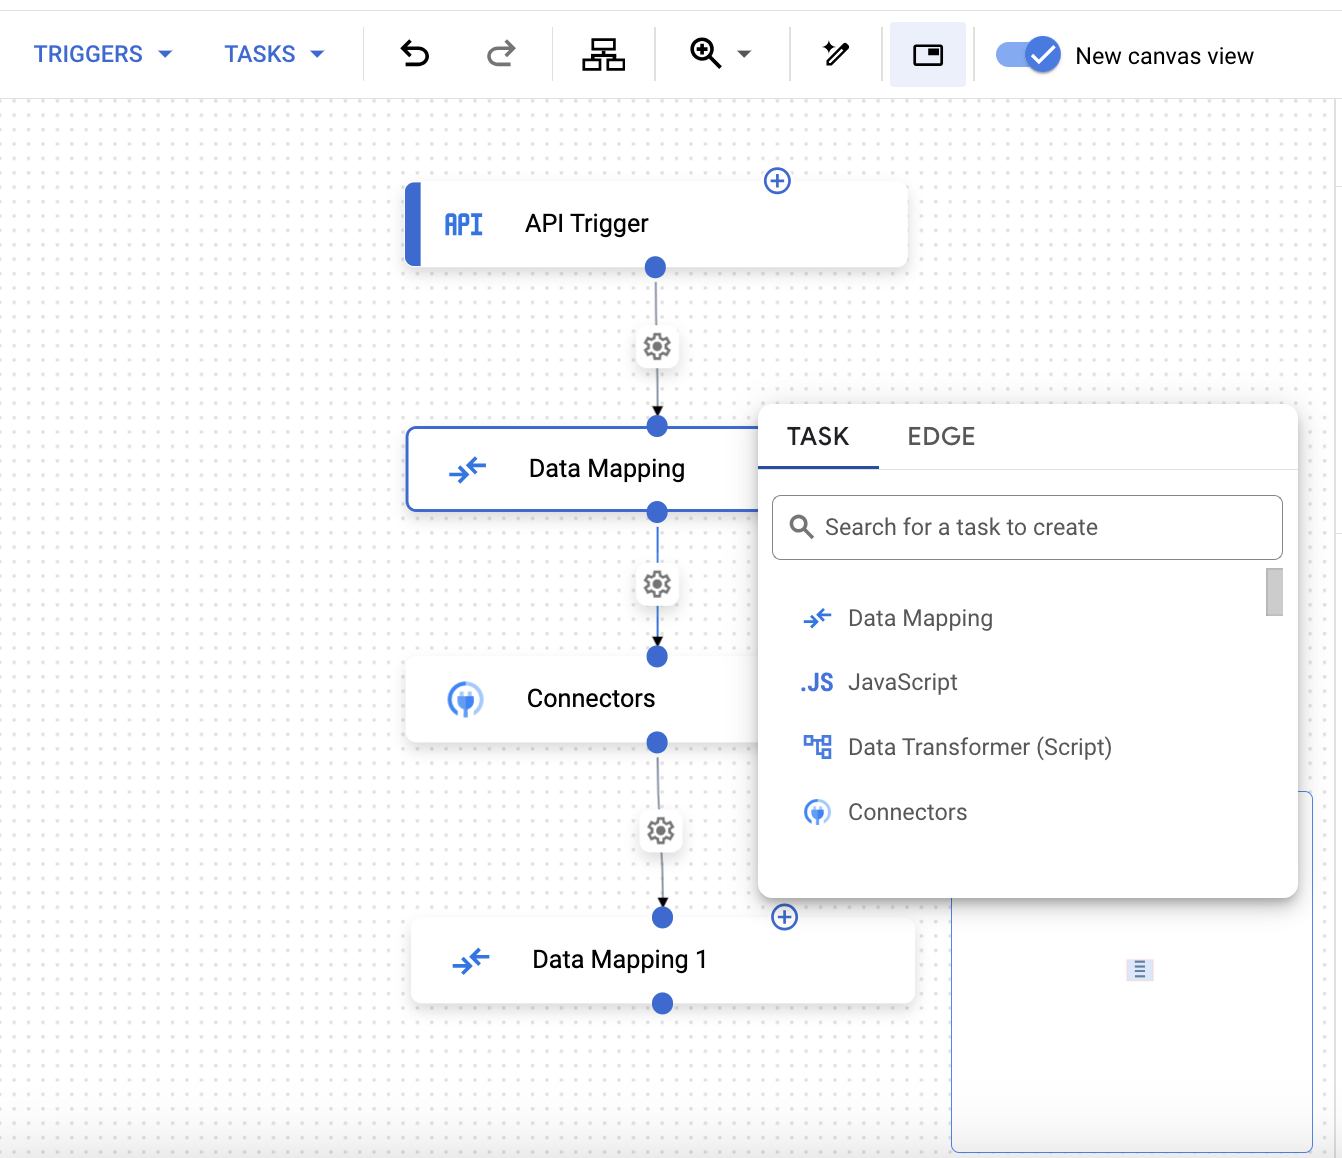
Untuk menambahkan tugas atau tepi, klik add_circleTambahkan tugas atau tepi baru ke tugas yang ada.
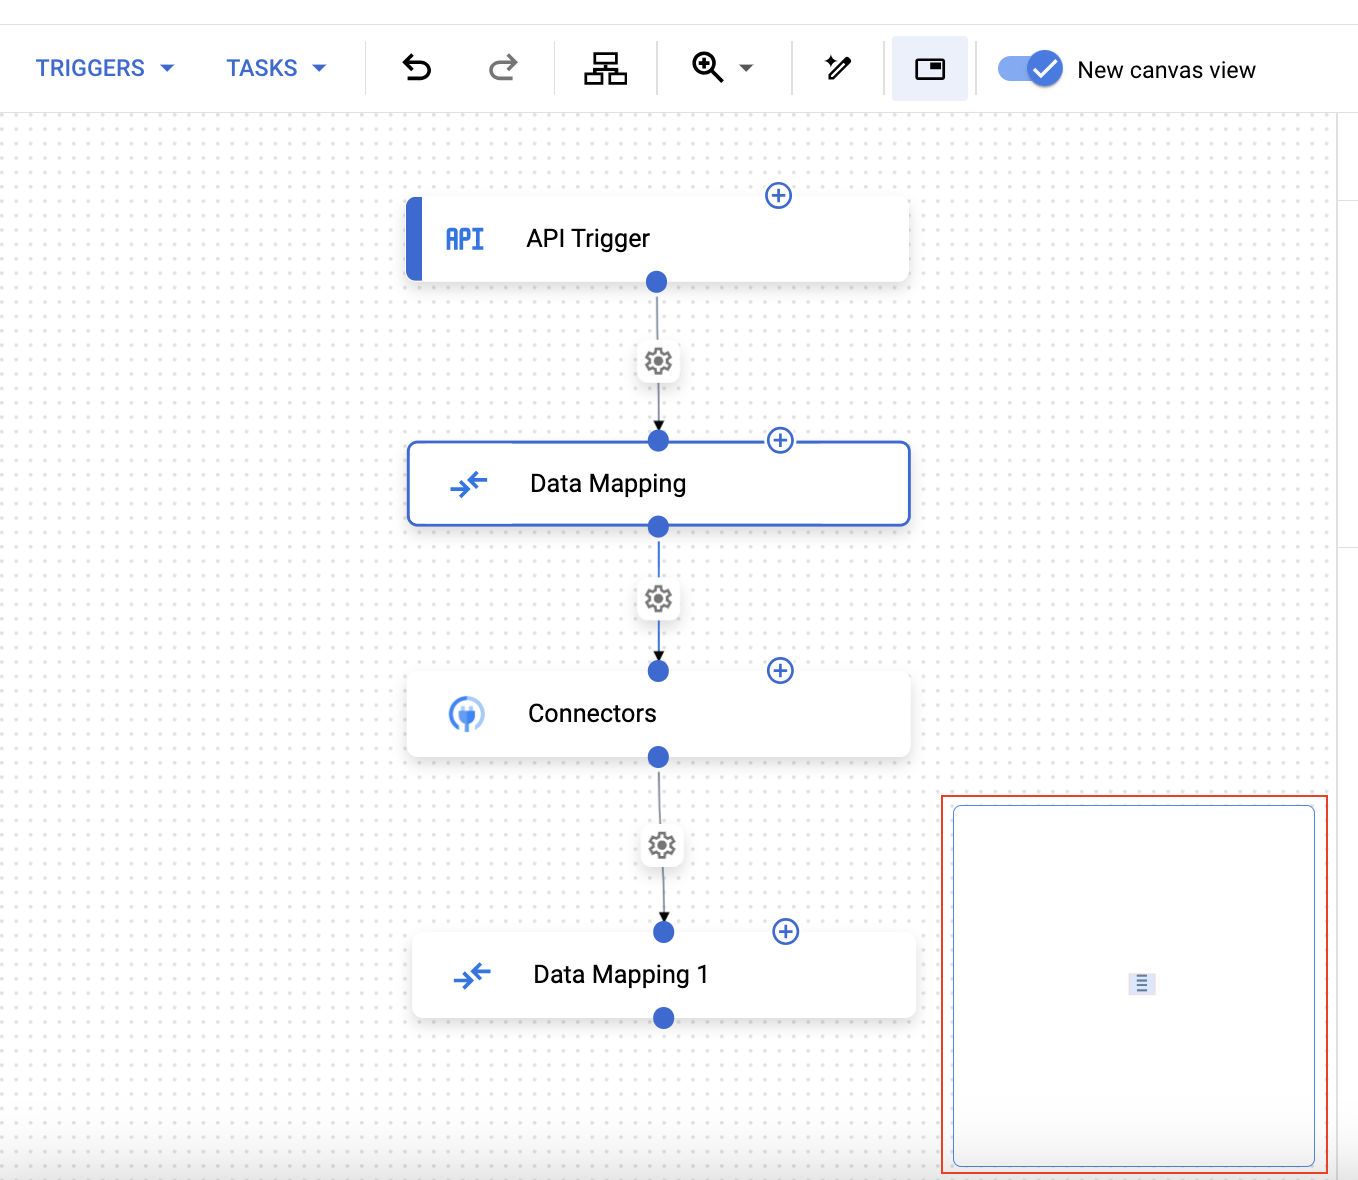
Jika memiliki beberapa pemicu dalam integrasi, Anda dapat menggunakan tampilan Minimap untuk melihat area tampilan relatif terhadap grafik.
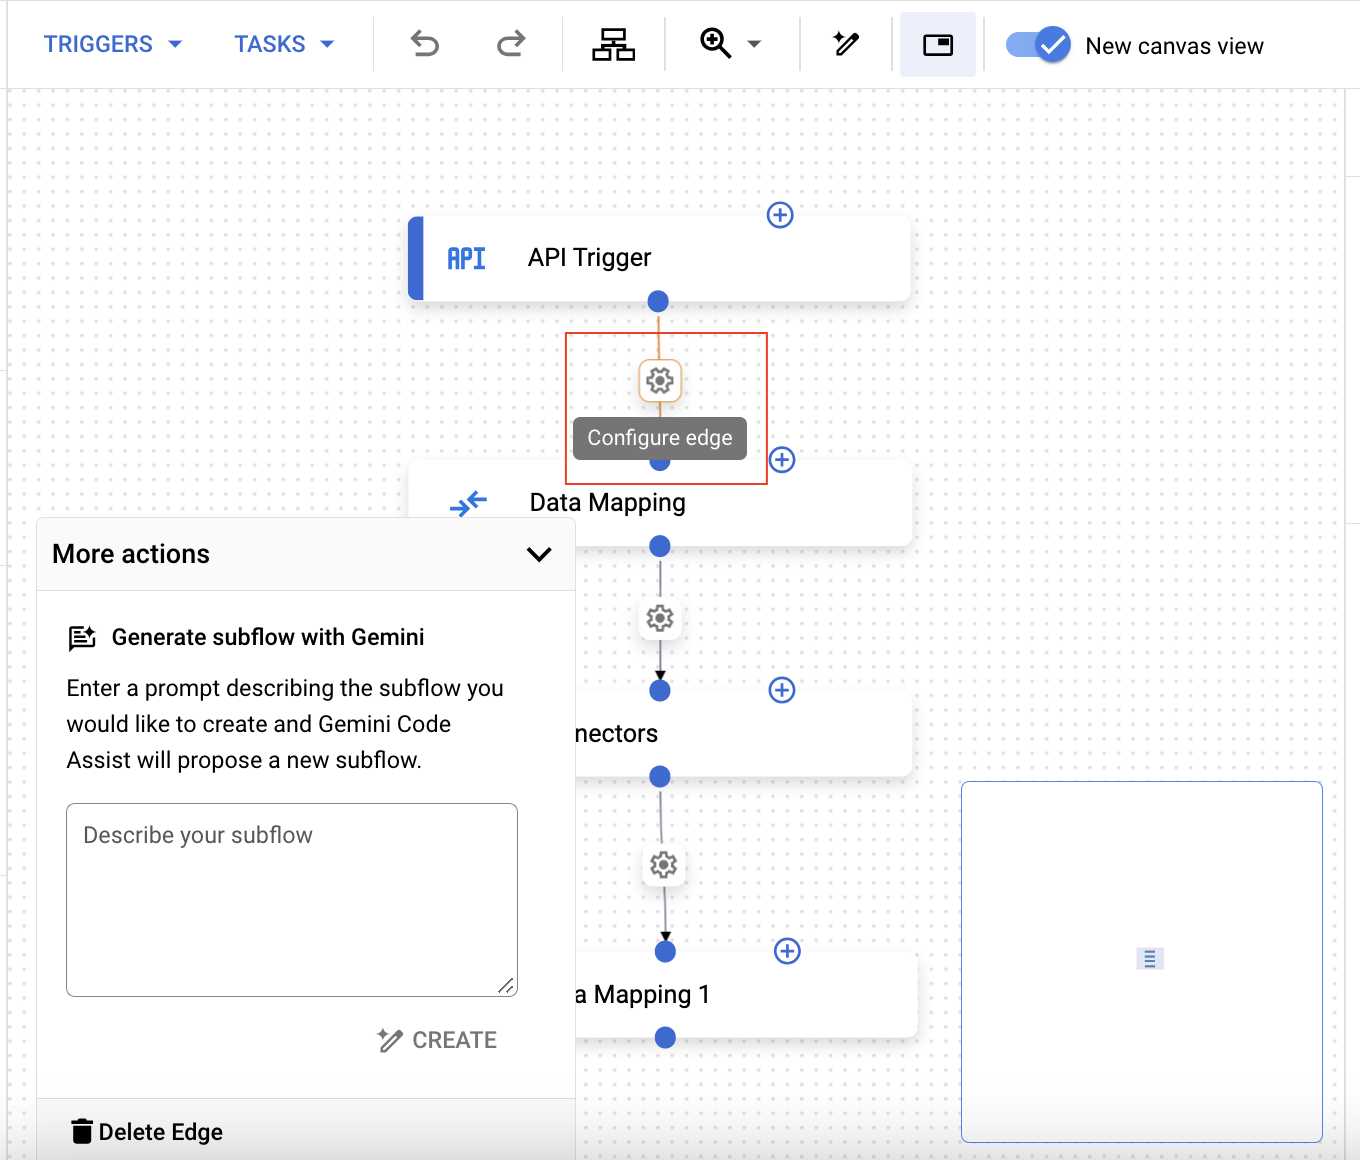
Untuk mengonfigurasi edge, klik settingsKonfigurasi edge. Jika Anda telah mengaktifkan Gemini, menu pop-up yang mirip dengan gambar berikut akan muncul dan meminta Anda memberikan input.
Untuk menambahkan fork, klik tugas, lalu di panel Konfigurasi tugas, luaskan Kebijakan eksekusi untuk tugas berikutnya.
Jika perlu, untuk menggunakan tombol pintas, klik tugas atau pemicu dalam tampilan kanvas. Kemudian, gunakan tombol pintas untuk memperbarui alur kerja integrasi.
Tombol pintas
Tombol pintas berikut tersedia di tampilan kanvas:
[[["Mudah dipahami","easyToUnderstand","thumb-up"],["Memecahkan masalah saya","solvedMyProblem","thumb-up"],["Lainnya","otherUp","thumb-up"]],[["Sulit dipahami","hardToUnderstand","thumb-down"],["Informasi atau kode contoh salah","incorrectInformationOrSampleCode","thumb-down"],["Informasi/contoh yang saya butuhkan tidak ada","missingTheInformationSamplesINeed","thumb-down"],["Masalah terjemahan","translationIssue","thumb-down"],["Lainnya","otherDown","thumb-down"]],["Terakhir diperbarui pada 2025-09-03 UTC."],[[["\u003cp\u003eThe new canvas view offers an intuitive interface for managing integration workflows, including improved responsiveness for moving tasks and triggers.\u003c/p\u003e\n"],["\u003cp\u003eUsers can easily add new tasks and edges, or create new edges to existing tasks, streamlining the integration building process.\u003c/p\u003e\n"],["\u003cp\u003eThe canvas view features a minimap view to help users navigate complex integrations with multiple triggers, providing a view of the viewport relative to the entire graph.\u003c/p\u003e\n"],["\u003cp\u003eConfiguration of task execution strategies and policies, along with fork additions are made easier from the task configuration pane.\u003c/p\u003e\n"],["\u003cp\u003eThe canvas view supports hotkeys such as copy, paste, undo, redo, and delete for efficient integration workflow management.\u003c/p\u003e\n"]]],[],null,["# Use the canvas view\n\nSee the [supported connectors](/integration-connectors/docs/connector-reference-overview) for Application Integration.\n\nUse the canvas view\n===================\n\nThe canvas view provides an intuitive and user-friendly interface for managing your\nintegration workflows.\n\nBenefits\n--------\n\nThe canvas view offers the following benefits:\n\n- **Improved responsiveness of the canvas interaction:** With the canvas view, you can smoothly move tasks and triggers, making it easier to create complex workflows.\n- **Clearer view of your integration:** The updated visual design provides a clearer view of your integration.\n- **Minimap view:** With the minimap view, you can see the viewport relative to the graph.\n- **Easier to build integrations:** The canvas view provides an intuitive method to add a new child task with a connecting edge or create a new edge to an existing task in your integration.\n\n\n- **Improved discoverability:** In the task configuration pane, you can configure the *Execution strategy for this task* and the *Execution policy for next tasks* . For more information about these policies, see [Forks and joins](/application-integration/docs/forks-joins).\n\nUse the canvas view\n-------------------\n\nTo use the canvas view, follow these steps:\n\n1. Open the integration editor.\n2. In the navigation bar, the canvas view will automatically be active. Use the canvas to create your integration workflow.\n3. To add a task or an edge, click the add_circle **Add new task or edge to the existing task** .\n\n\n4. If you have multiple triggers in an integration, you can use the *Minimap view* to see the viewport relative to the graph.\n\n\n5. To configure an [edge](/application-integration/docs/edge-and-edge-conditions), click the settings **Configure edge** . If you have [enabled Gemini](/application-integration/docs/build-integrations-gemini), then a pop-up menu, similar to the following image appears prompting you to provide an input.\n\n\n6. To add a [fork](/application-integration/docs/forks-joins), click the task and then in the **Task configuration** pane, expand the **Execution policy for next tasks** .\n\n\n7. Optionally, to use [hotkeys](#hotkeys), click a task or a trigger in the canvas view. Then, use hotkeys to update the integration workflow.\n\nHotkeys\n-------\n\nThe following hotkeys are available in the canvas view:\n\nWhat's next\n-----------\n\n- Learn about the [Integration editor layout](/application-integration/docs/integration-designer-layout).\n- Learn about [Application Integration concepts](/application-integration/docs/concepts)."]]