Die Canvas-Ansicht bietet eine intuitive und nutzerfreundliche Oberfläche zum Verwalten Ihrer Integrations-Workflows.
Vorteile
Die Canvas-Ansicht bietet folgende Vorteile:
Verbesserte Reaktionsfähigkeit der Canvas-Interaktion:In der Canvas-Ansicht können Sie Aufgaben und Trigger reibungslos verschieben, was die Erstellung komplexer Workflows erleichtert.
Bessere Übersicht über Ihre Integration:Das aktualisierte visuelle Design bietet eine bessere Übersicht über Ihre Integration.
Minimap-Ansicht:In der Minimap-Ansicht sehen Sie den Darstellungsbereich im Verhältnis zum Diagramm.
Einfachere Entwicklung von Integrationen:In der Canvas-Ansicht können Sie auf intuitive Weise eine neue untergeordnete Aufgabe mit einer Verbindungskante hinzufügen oder eine neue Kante zu einer vorhandenen Aufgabe in Ihrer Integration erstellen.
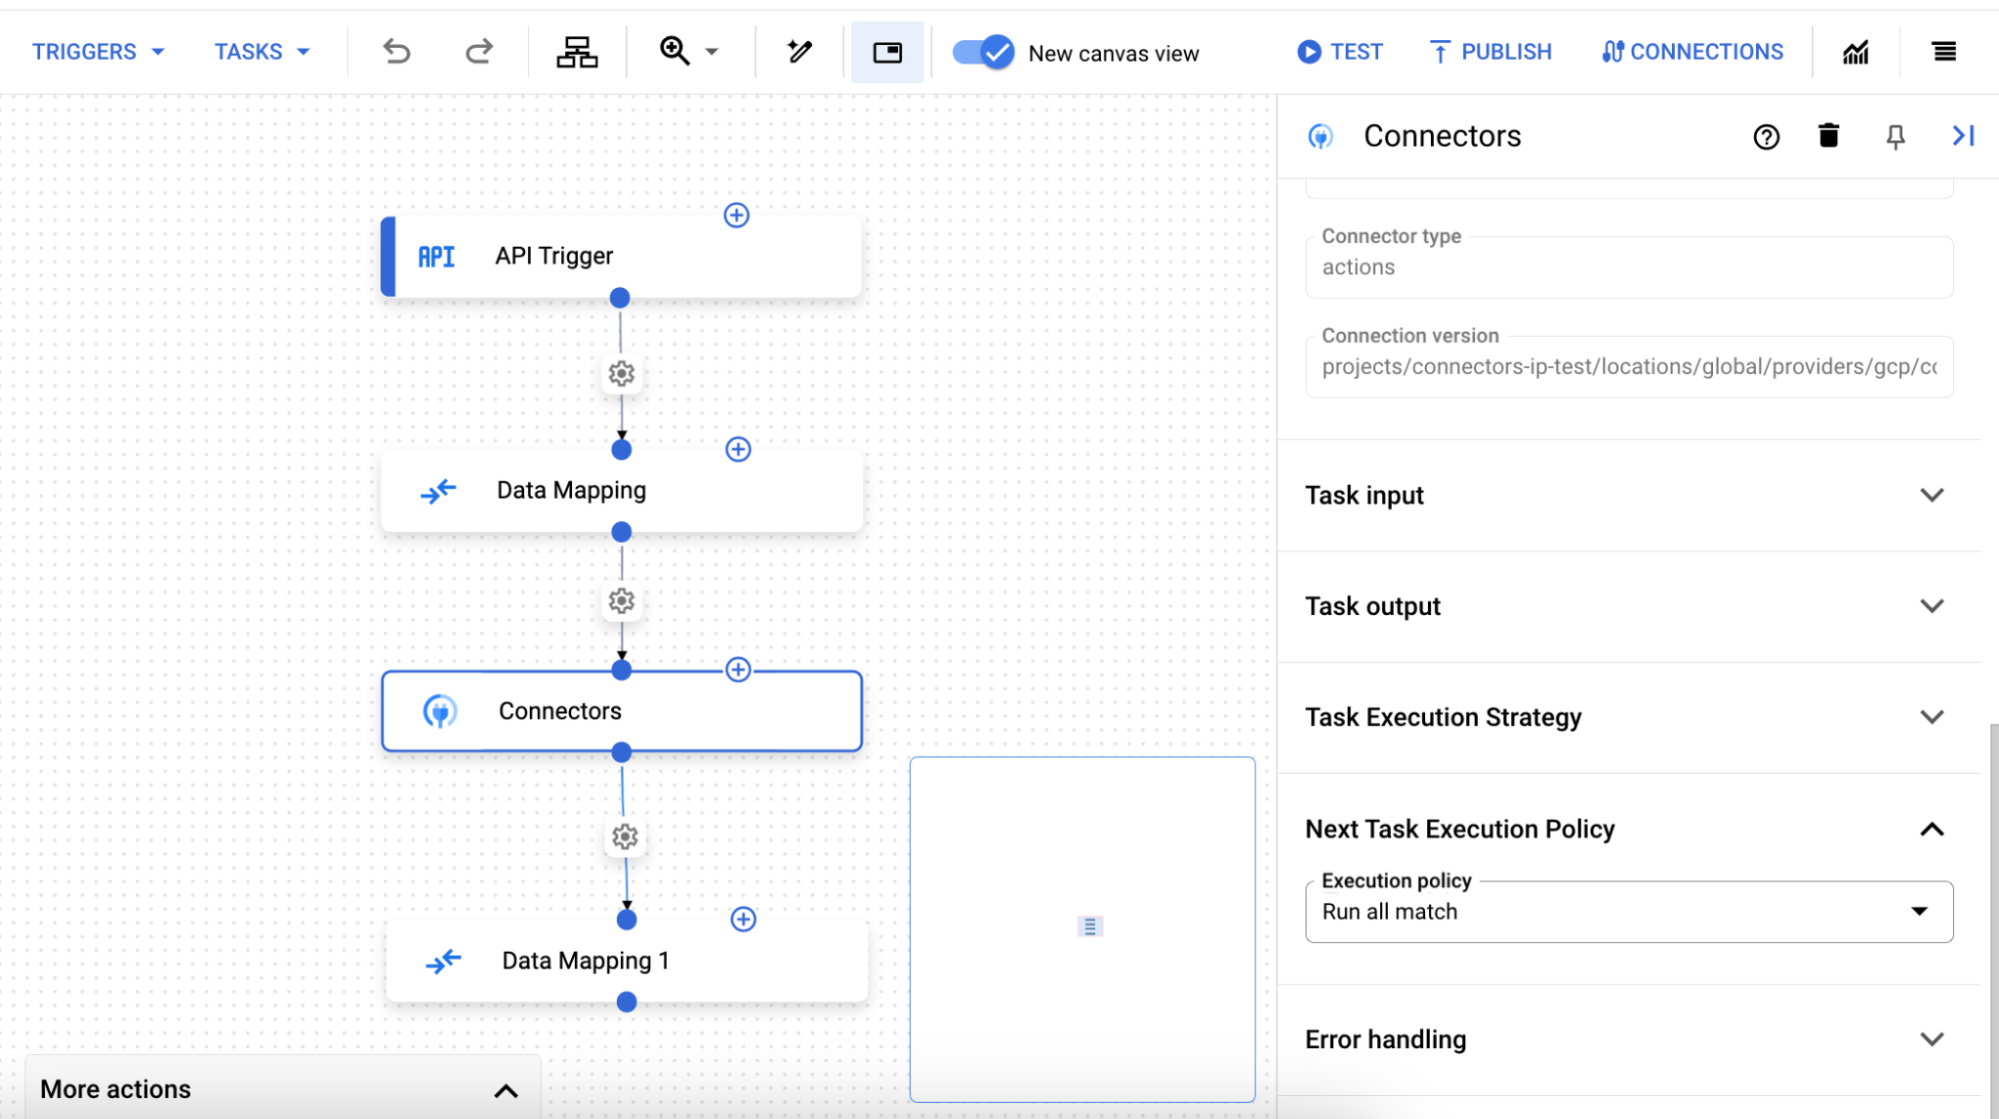
Bessere Auffindbarkeit:Im Bereich „Aufgabenkonfiguration“ können Sie die Ausführungsstrategie für diese Aufgabe und die Ausführungsrichtlinie für die nächsten Aufgaben konfigurieren. Weitere Informationen zu diesen Richtlinien finden Sie unter Forks und Joins.
Canvas-Ansicht verwenden
So verwenden Sie die Canvas-Ansicht:
Öffnen Sie den Integrationseditor.
In der Navigationsleiste ist die Canvas-Ansicht automatisch aktiv.
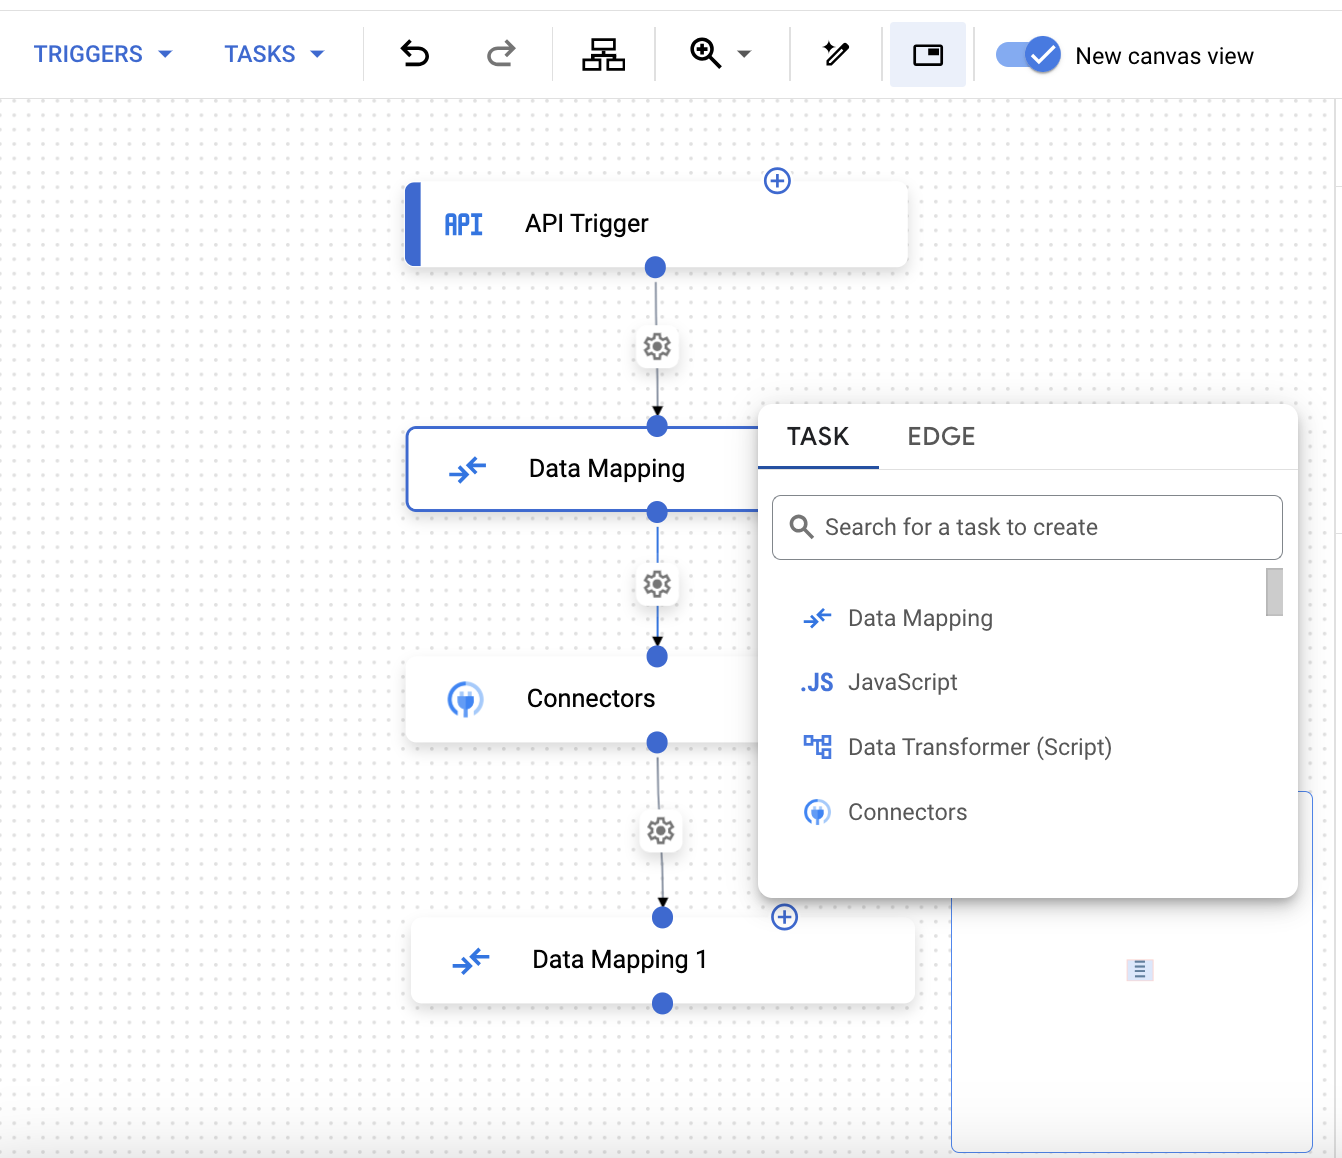
Verwenden Sie den Arbeitsbereich, um Ihren Integrations-Workflow zu erstellen.
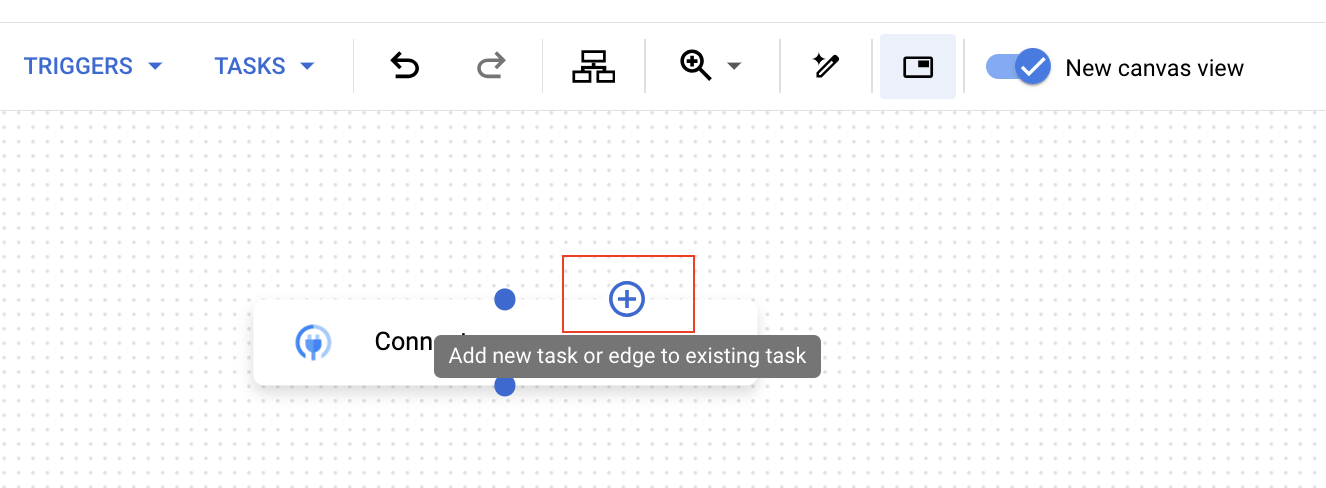
Wenn Sie eine Aufgabe oder einen Link hinzufügen möchten, klicken Sie auf add_circleNeue Aufgabe oder neuen Link zur vorhandenen Aufgabe hinzufügen.
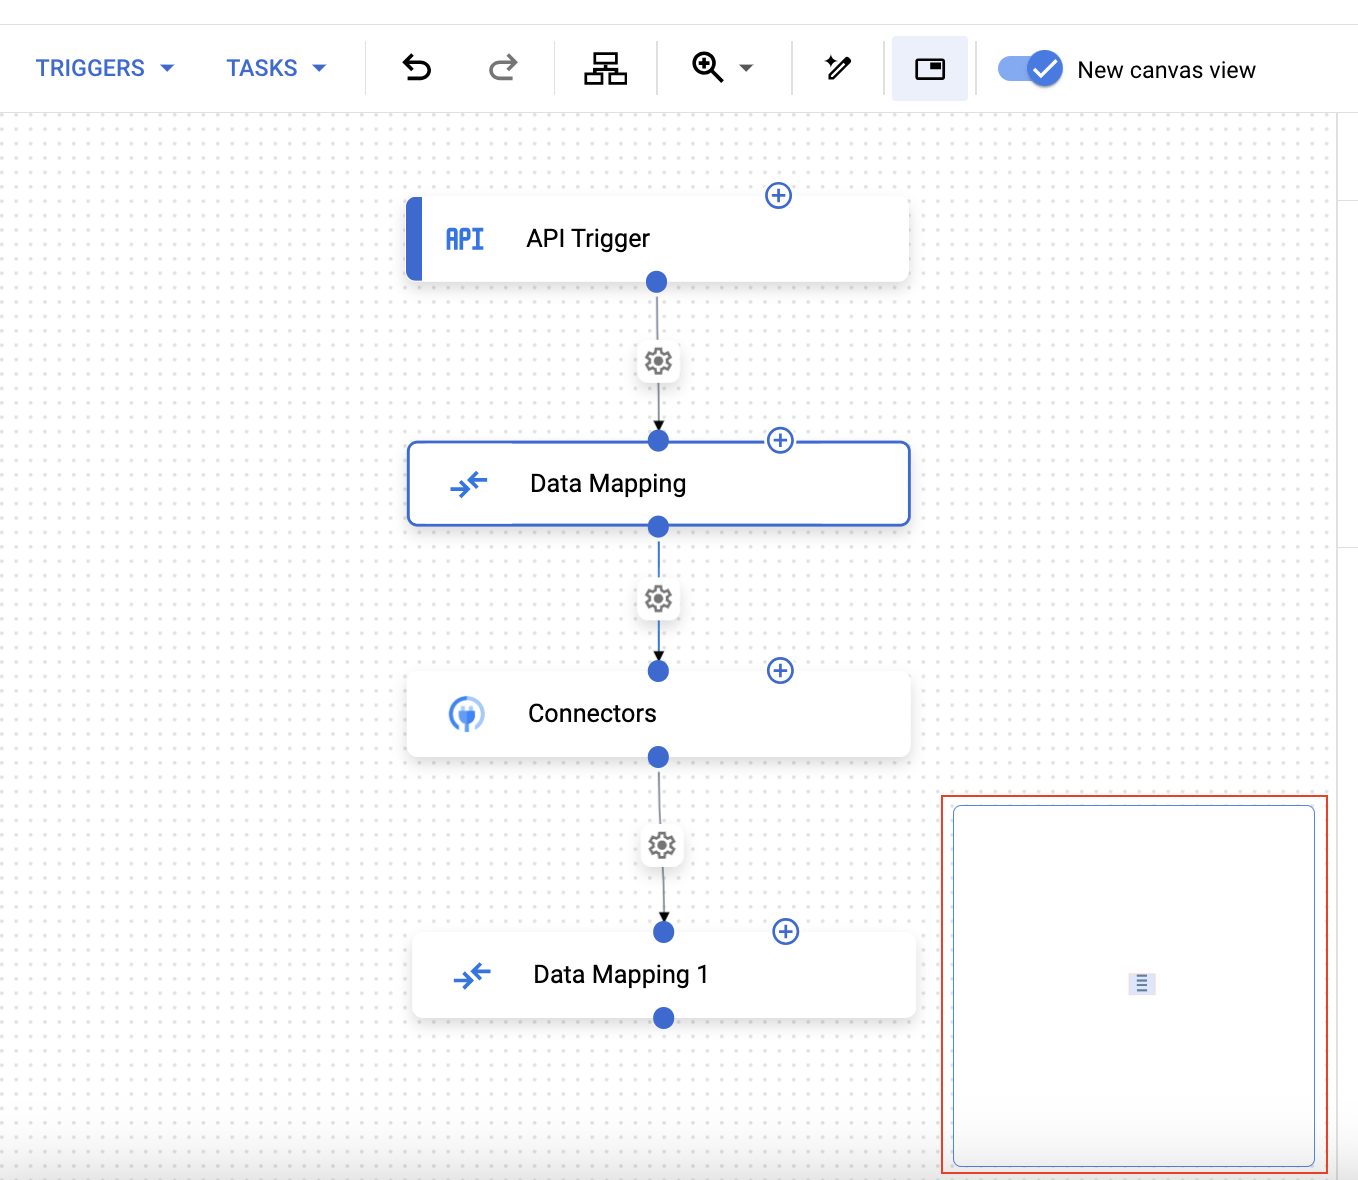
Wenn Sie mehrere Trigger in einer Integration haben, können Sie mit der Übersicht den sichtbaren Bereich im Verhältnis zum Diagramm sehen.
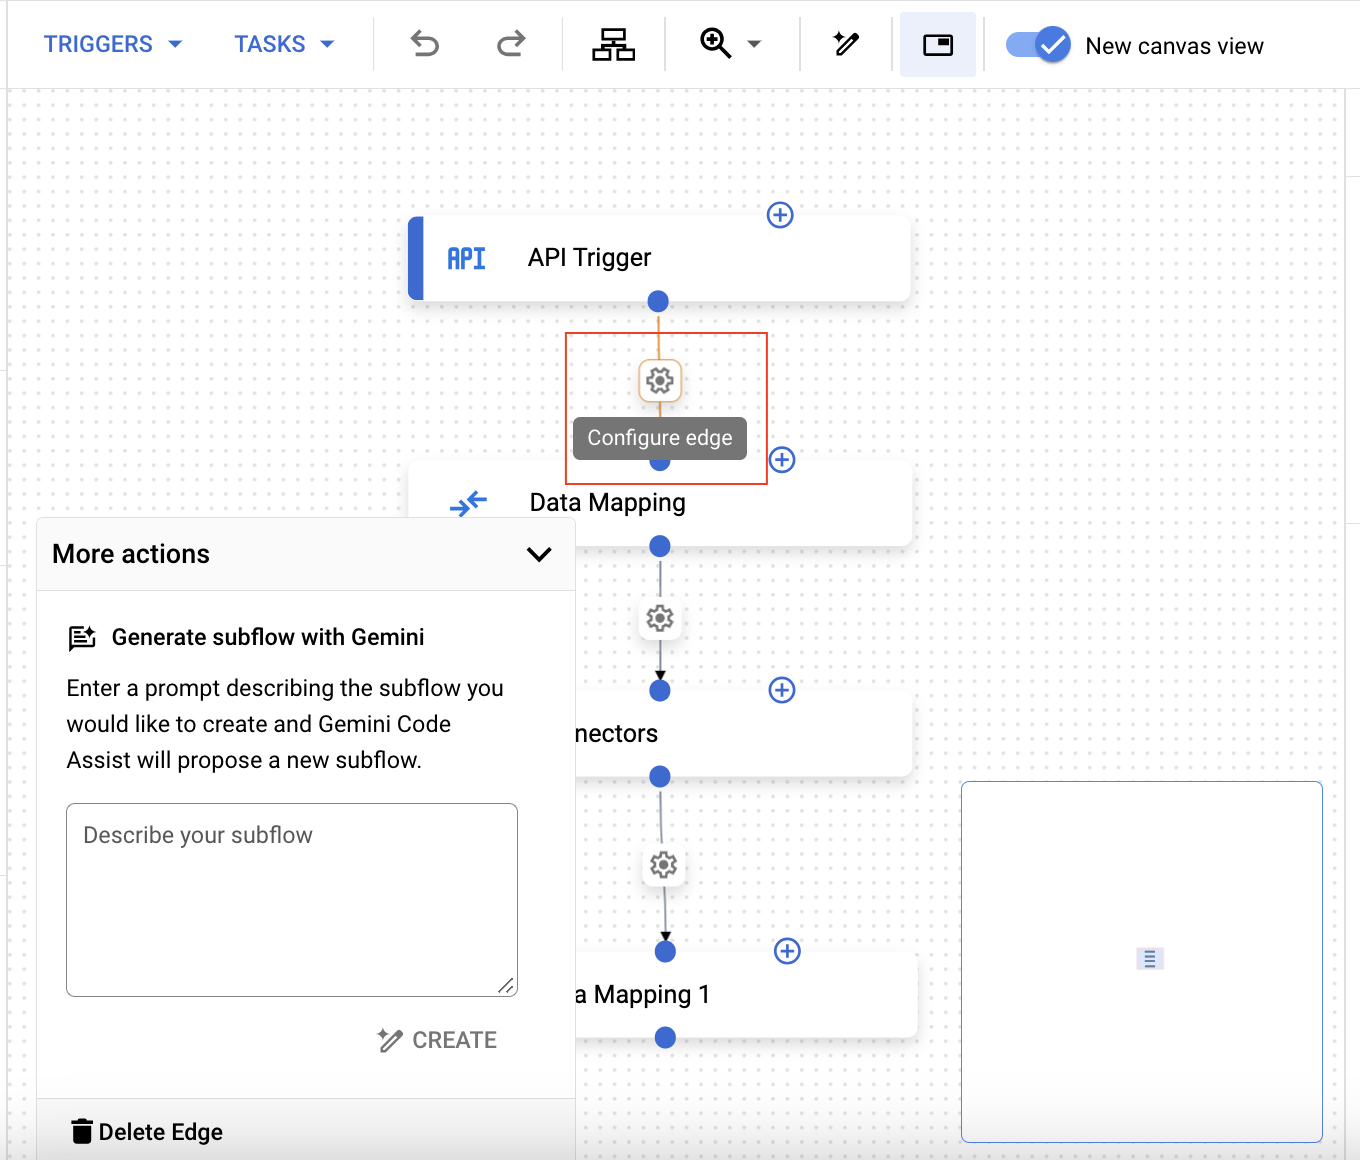
Wenn Sie eine Kante konfigurieren möchten, klicken Sie auf settingsKante konfigurieren. Wenn Sie Gemini aktiviert haben, wird ein Pop-up-Menü ähnlich dem folgenden Bild angezeigt, in dem Sie aufgefordert werden, eine Eingabe zu machen.
Wenn Sie einen Fork hinzufügen möchten, klicken Sie auf die Aufgabe und maximieren Sie dann im Bereich Aufgabenkonfiguration die Ausführungsrichtlinie für nächste Aufgaben.
Optional: Wenn Sie Tastenkürzel verwenden möchten, klicken Sie in der Canvas-Ansicht auf eine Aufgabe oder einen Trigger. Verwenden Sie dann Hotkeys, um den Integrationsworkflow zu aktualisieren.
Hotkeys
Die folgenden Tastenkürzel sind in der Arbeitsbereichansicht verfügbar:
[[["Leicht verständlich","easyToUnderstand","thumb-up"],["Mein Problem wurde gelöst","solvedMyProblem","thumb-up"],["Sonstiges","otherUp","thumb-up"]],[["Schwer verständlich","hardToUnderstand","thumb-down"],["Informationen oder Beispielcode falsch","incorrectInformationOrSampleCode","thumb-down"],["Benötigte Informationen/Beispiele nicht gefunden","missingTheInformationSamplesINeed","thumb-down"],["Problem mit der Übersetzung","translationIssue","thumb-down"],["Sonstiges","otherDown","thumb-down"]],["Zuletzt aktualisiert: 2025-09-03 (UTC)."],[[["\u003cp\u003eThe new canvas view offers an intuitive interface for managing integration workflows, including improved responsiveness for moving tasks and triggers.\u003c/p\u003e\n"],["\u003cp\u003eUsers can easily add new tasks and edges, or create new edges to existing tasks, streamlining the integration building process.\u003c/p\u003e\n"],["\u003cp\u003eThe canvas view features a minimap view to help users navigate complex integrations with multiple triggers, providing a view of the viewport relative to the entire graph.\u003c/p\u003e\n"],["\u003cp\u003eConfiguration of task execution strategies and policies, along with fork additions are made easier from the task configuration pane.\u003c/p\u003e\n"],["\u003cp\u003eThe canvas view supports hotkeys such as copy, paste, undo, redo, and delete for efficient integration workflow management.\u003c/p\u003e\n"]]],[],null,["# Use the canvas view\n\nSee the [supported connectors](/integration-connectors/docs/connector-reference-overview) for Application Integration.\n\nUse the canvas view\n===================\n\nThe canvas view provides an intuitive and user-friendly interface for managing your\nintegration workflows.\n\nBenefits\n--------\n\nThe canvas view offers the following benefits:\n\n- **Improved responsiveness of the canvas interaction:** With the canvas view, you can smoothly move tasks and triggers, making it easier to create complex workflows.\n- **Clearer view of your integration:** The updated visual design provides a clearer view of your integration.\n- **Minimap view:** With the minimap view, you can see the viewport relative to the graph.\n- **Easier to build integrations:** The canvas view provides an intuitive method to add a new child task with a connecting edge or create a new edge to an existing task in your integration.\n\n\n- **Improved discoverability:** In the task configuration pane, you can configure the *Execution strategy for this task* and the *Execution policy for next tasks* . For more information about these policies, see [Forks and joins](/application-integration/docs/forks-joins).\n\nUse the canvas view\n-------------------\n\nTo use the canvas view, follow these steps:\n\n1. Open the integration editor.\n2. In the navigation bar, the canvas view will automatically be active. Use the canvas to create your integration workflow.\n3. To add a task or an edge, click the add_circle **Add new task or edge to the existing task** .\n\n\n4. If you have multiple triggers in an integration, you can use the *Minimap view* to see the viewport relative to the graph.\n\n\n5. To configure an [edge](/application-integration/docs/edge-and-edge-conditions), click the settings **Configure edge** . If you have [enabled Gemini](/application-integration/docs/build-integrations-gemini), then a pop-up menu, similar to the following image appears prompting you to provide an input.\n\n\n6. To add a [fork](/application-integration/docs/forks-joins), click the task and then in the **Task configuration** pane, expand the **Execution policy for next tasks** .\n\n\n7. Optionally, to use [hotkeys](#hotkeys), click a task or a trigger in the canvas view. Then, use hotkeys to update the integration workflow.\n\nHotkeys\n-------\n\nThe following hotkeys are available in the canvas view:\n\nWhat's next\n-----------\n\n- Learn about the [Integration editor layout](/application-integration/docs/integration-designer-layout).\n- Learn about [Application Integration concepts](/application-integration/docs/concepts)."]]