En esta página se describe cómo configurar una canalización de datos para leer datos de una tabla de Microsoft SQL Server.
Almacenar la contraseña de SQL Server como una clave segura
Añade tu contraseña de SQL Server como clave segura en tu instancia de Cloud Data Fusion.
En Cloud Data Fusion, haz clic en Administración del sistema.
Haz clic en la pestaña Configuration (Configuración).
Haz clic en Hacer llamadas HTTP.

Selecciona PUT.
En el campo de ruta, introduce
namespaces/NAMESPACE_ID/securekeys/password.En el campo Cuerpo, introduce
{"data":"password"}. Sustituye password por tu contraseña de SQL Server.Haz clic en Enviar.
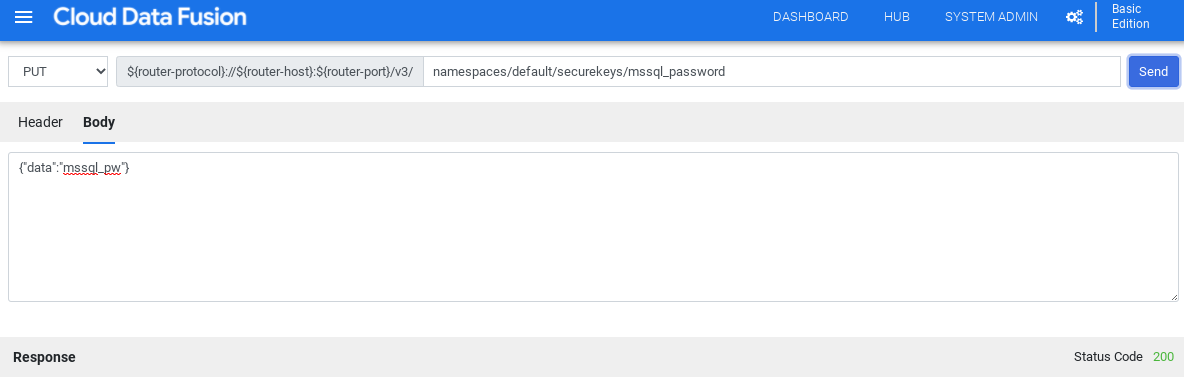
La Response debe tener el código de estado 200 para continuar.
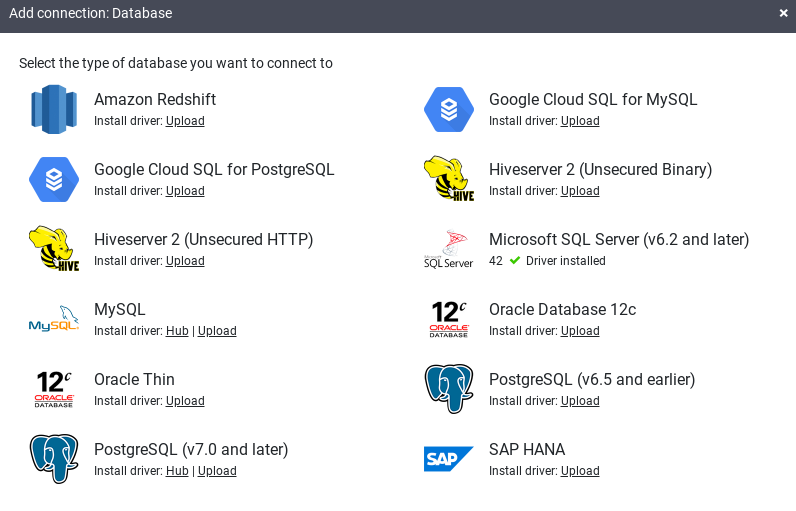
Obtener el controlador JDBC para SQL Server
Puede obtener el controlador desde el centro o en Pipeline Studio en Cloud Data Fusion.
Hub
En la interfaz de Cloud Data Fusion, haz clic en Hub.
En la barra de búsqueda, escribe
SQL Server JDBC Drivery selecciona el controlador.Haz clic en Descargar. Sigue los pasos que se indican para descargarla.
Haz clic en Desplegar. Sube el archivo JAR del paso anterior.
Haz clic en Finalizar.
Pipeline Studio
Ve a Microsoft.com.
Elige la descarga y haz clic en Descargar.
En Cloud Data Fusion, haz clic en menu Menú y ve a la página Pipeline Studio.
Haz clic en Añadir.
En el caso del controlador, haz clic en Subir.
Selecciona el archivo JAR, que se encuentra en la carpeta
jre7.Haz clic en Siguiente.
Para configurar el controlador, introduce un nombre y un nombre de clase.
Haz clic en Finalizar.
Desplegar el complemento de SQL Server
En Cloud Data Fusion, haz clic en Hub.
En la barra de búsqueda, escribe
SQL Server Plugins.Haz clic en Complementos de SQL Server.
Haz clic en Desplegar.
Haz clic en Finalizar.
Haz clic en Crear una canalización.
Conectarse a SQL Server
Puede conectarse a SQL Server desde Cloud Data Fusion en Wrangler o Pipeline Studio.
Wrangler
En Cloud Data Fusion, haga clic en menu Menú y vaya a la página Wrangler.
Haz clic en Añadir conexión.
Se abre la ventana Añadir conexión.
Haz clic en SQL Server para verificar que el controlador esté instalado.
Introduce los detalles en los campos de conexión obligatorios. En el campo Contraseña, selecciona la clave segura que hayas almacenado anteriormente. De esta forma, se asegura de que la contraseña se recupere mediante Cloud KMS.
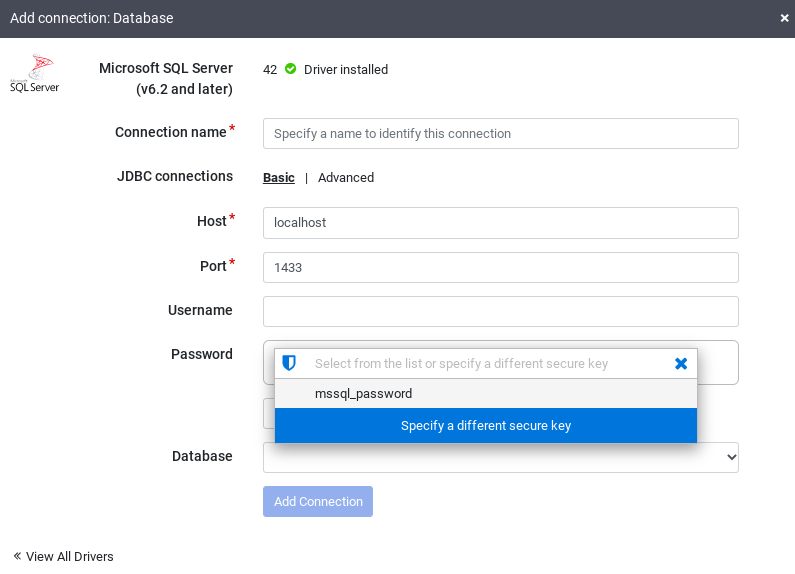
Para comprobar que se puede establecer una conexión con la base de datos, haz clic en Probar conexión.
Haz clic en Añadir conexión.
Una vez que hayas conectado tu base de datos de SQL Server y hayas creado una canalización que lea de tu tabla de SQL Server, podrás aplicar transformaciones y escribir el resultado en un receptor.
Pipeline Studio
Abre tu instancia de Cloud Data Fusion y ve a la página Pipeline Studio.
Despliega el menú Origen y haz clic en SQL Server.
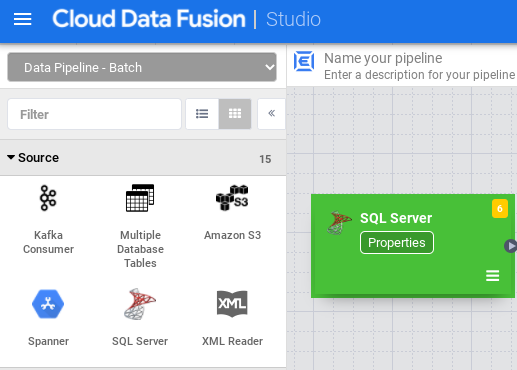
En el nodo SQL Server, haga clic en Propiedades.
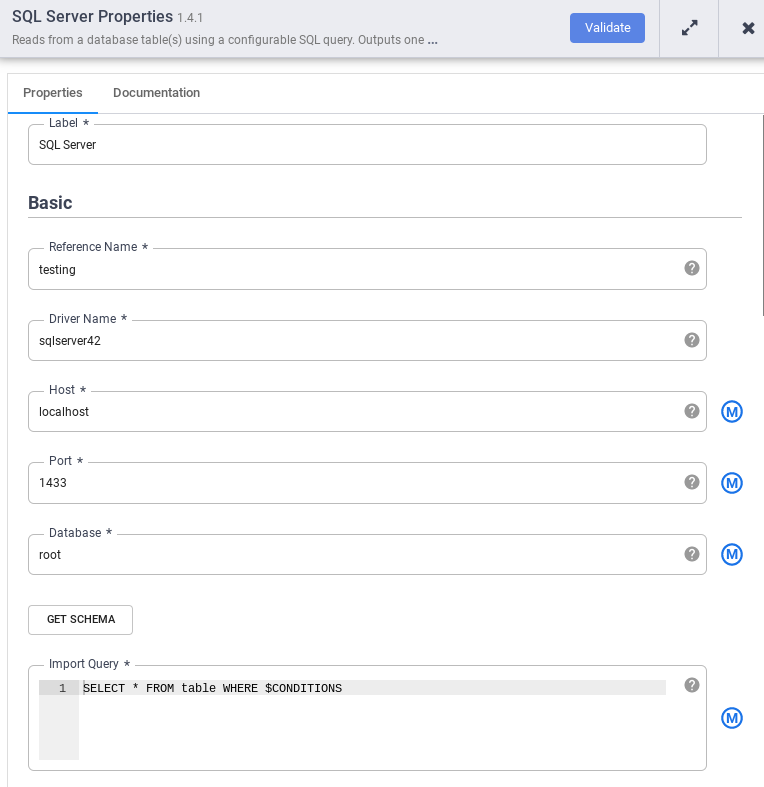
En el campo Nombre de referencia, introduce un nombre que identifique tu origen de SQL Server.
En el campo Base de datos, introduce el nombre de la base de datos a la que quieres conectarte.
En el campo Import query (Importar consulta), introduce la consulta que quieras ejecutar. Por ejemplo,
SELECT * FROM table WHERE $CONDITIONS.Haz clic en Validar.
Haz clic en Cerrar .
Una vez que hayas conectado tu base de datos de SQL Server y hayas creado una canalización que lea de tu tabla de SQL Server, añade las transformaciones que quieras y escribe el resultado en un receptor.