Hinweise
Bevor Sie Cloud Workstations verwenden, müssen Sie die erforderlichen Berechtigungen haben und die folgenden erforderlichen Einrichtungsschritte ausführen:
- Sign in to your Google Cloud account. If you're new to Google Cloud, create an account to evaluate how our products perform in real-world scenarios. New customers also get $300 in free credits to run, test, and deploy workloads.
-
In the Google Cloud console, on the project selector page, select or create a Google Cloud project.
Roles required to select or create a project
- Select a project: Selecting a project doesn't require a specific IAM role—you can select any project that you've been granted a role on.
-
Create a project: To create a project, you need the Project Creator
(
roles/resourcemanager.projectCreator), which contains theresourcemanager.projects.createpermission. Learn how to grant roles.
-
Verify that billing is enabled for your Google Cloud project.
-
Enable the Cloud Workstations API.
Roles required to enable APIs
To enable APIs, you need the Service Usage Admin IAM role (
roles/serviceusage.serviceUsageAdmin), which contains theserviceusage.services.enablepermission. Learn how to grant roles. -
Wenn Sie Administrator sind, müssen Sie die IAM-Rolle Cloud Workstations Admin für das Projekt haben, damit Sie Workstation-Konfigurationen erstellen können.
Wenn Sie Entwickler sind und in der Google Cloud -Konsole keine Workstationkonfigurationen verfügbar sind, bitten Sie den Cloud Workstations-Administrator Ihrer Organisation, eine Workstationkonfiguration für Sie zu erstellen. Alternativ können Sie sich selbst die IAM-Rolle „Cloud Workstations Admin“ für das Projekt zuweisen, damit Sie diese Ressourcen selbst erstellen können. So prüfen Sie Ihre IAM-Rollen: Rufen Sie in der Google Cloud Console die Seite „IAM“ auf:
Suchen Sie Ihren Posit Workbench-Lizenzschlüssel und halten Sie ihn bereit, da Sie ihn in einem späteren Schritt benötigen. Wenn Sie einen Posit Workbench-Lizenzschlüssel benötigen, wenden Sie sich an Ihren Posit-Kundenservicemitarbeiter oder senden Sie eine E-Mail an sales@posit.co.
Folgen Sie der Anleitung zum Erstellen einer Workstationkonfiguration.
Wählen Sie im Schritt Umgebung anpassen die Option Code-Editoren auf Basis-Images aus.
Wählen Sie im Menü Codeeditoren die Option Posit Workbench (einschließlich RStudio Pro) (von Drittanbieter bereitgestellt) aus.
Klicken Sie im Abschnitt Erweiterte Containeroptionen auf den arrow_drop_downPfeil zum Maximierenarrow_drop_down.
Rufen Sie den Bereich Umgebungsvariablen auf und klicken Sie auf Variable hinzufügen.
Geben Sie im Feld Schlüssel
RSW_LICENSEein und fügen Sie Ihren Posit Workbench-Lizenzschlüssel in das Feld Wert ein.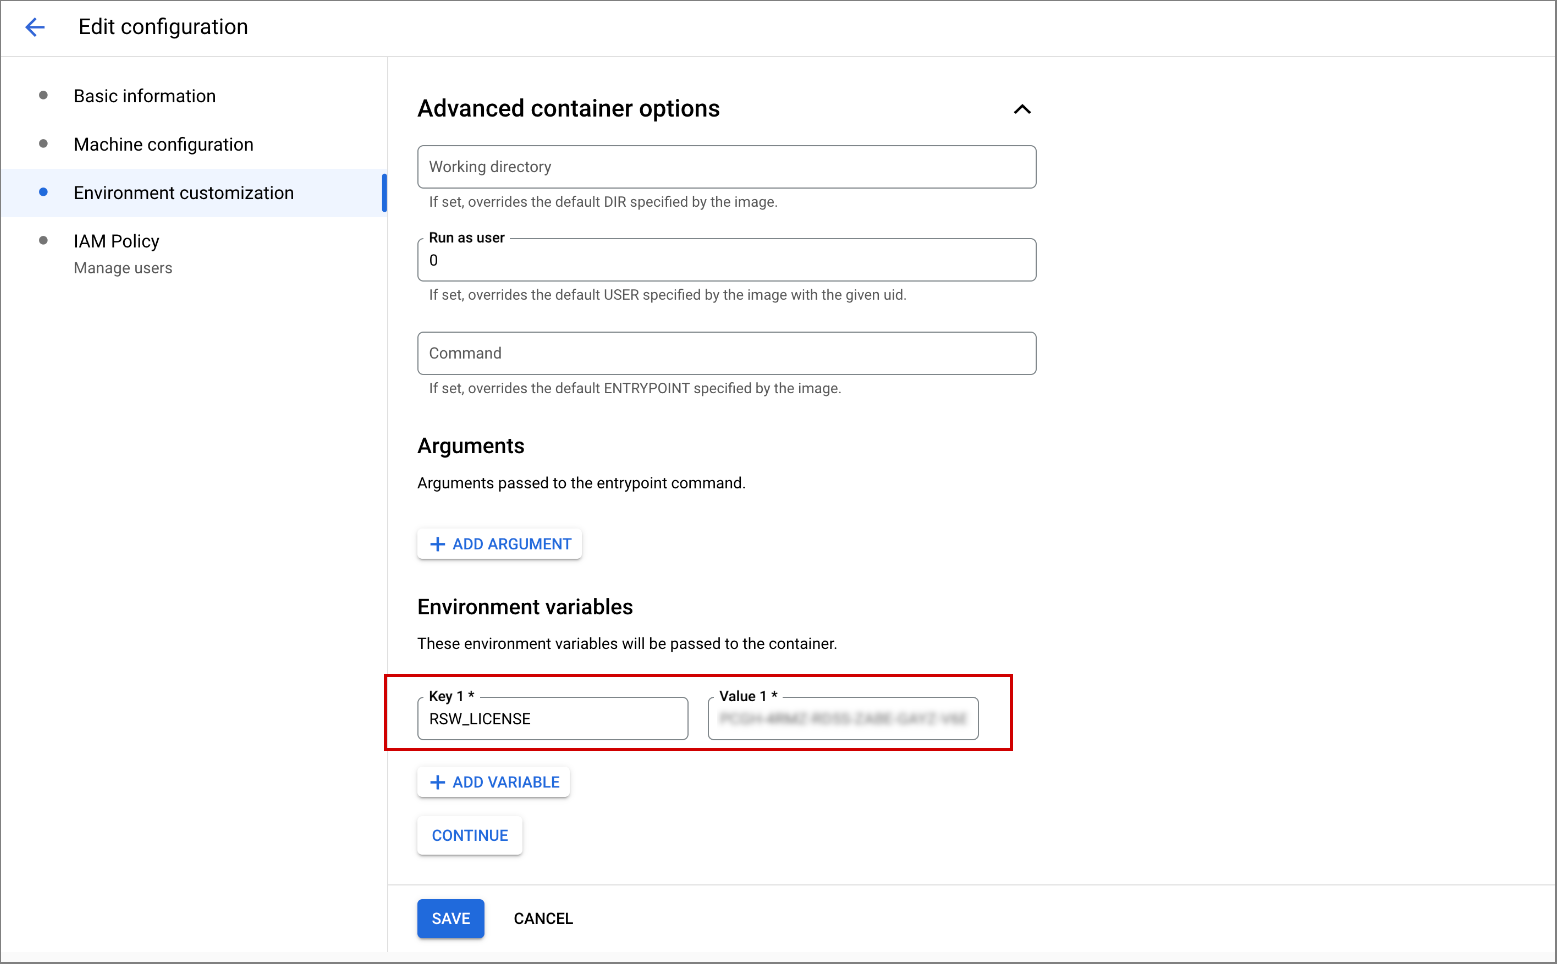
Klicken Sie auf Weiter.
Wenn Sie den Schritt Nutzer hinzufügen erreichen, gewähren Sie Ihren Entwicklern IAM-Zugriffsberechtigungen für Cloud Workstations für die Workstation-Konfiguration.
Klicken Sie auf Erstellen, um Ihre Workstationkonfiguration zu erstellen und diese Nutzer hinzuzufügen.
Wenn Sie sich auch für die Erstellung eines neuen Clusters entschieden haben, kann die Clustererstellung bis zu 20 Minuten dauern.
Entwickler in Ihrem Team sollten jetzt Workstations mit Posit Workbench erstellen können.
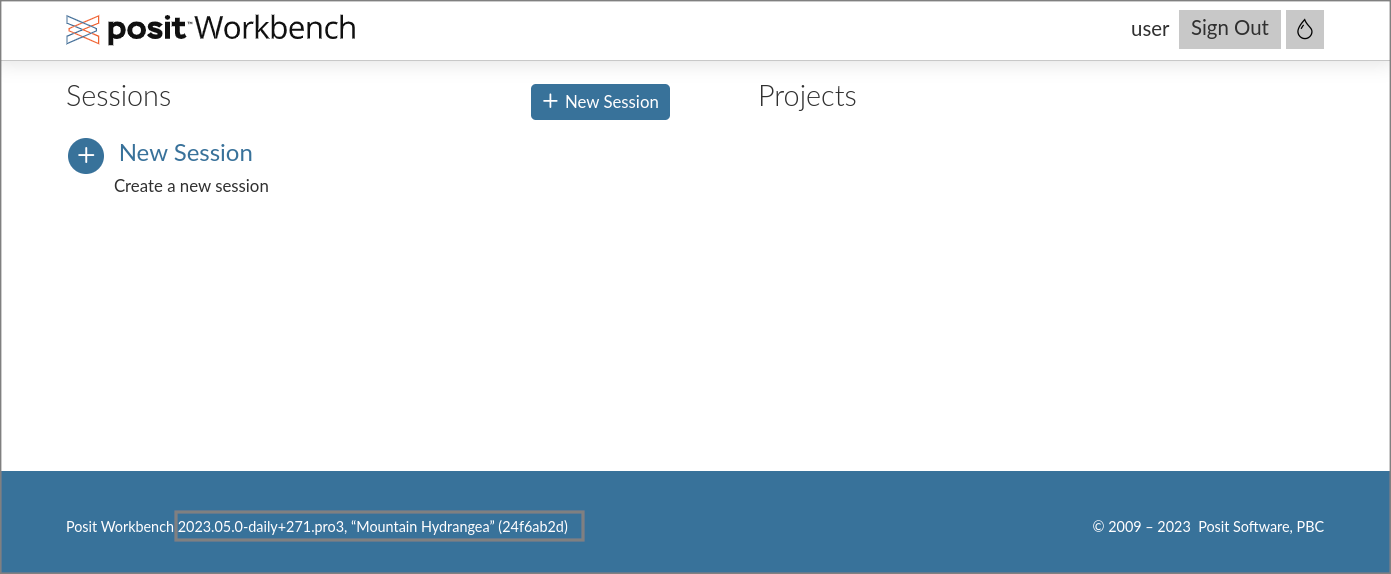
Rufen Sie in der Google Cloud Console die Seite Cloud Workstations > Workstations auf.
Workstations aufrufen
Klicken Sie auf add_boxErstellen.
Der Link Erstellen ist möglicherweise deaktiviert, wenn im Projekt keine Konfigurationen vorhanden sind oder Sie keine Berechtigungen zum Aufrufen dieser Konfigurationen haben. Bitten Sie den Cloud Workstations-Administrator Ihrer Organisation, eine Workstationkonfiguration für Sie zu erstellen.
Geben Sie den Namen Ihrer Workstation ein.
Halten Sie sich an die Namenskonventionen für Compute Engine-Ressourcen und wählen Sie einen Namen aus, der innerhalb des Workstation-Clusters eindeutig ist.
Klicken Sie auf den arrow_drop_downErweiterungspfeil im Feld Konfiguration und wählen Sie die Workstationkonfiguration Posit Workbench (Drittanbieter) aus.
Klicken Sie auf
Erstellen , um die Workstation zu erstellen.- Klicken Sie auf Arbeitsplätze.
- Suchen Sie in der Liste der verfügbaren Workstations nach der von Ihnen erstellten Workstation, setzen Sie ein Häkchen daneben und klicken Sie dann auf Starten. Dadurch wird Ihre Workstation gestartet und mit der Konfiguration der übergeordneten Workstation abgeglichen.
- Wenn Sie aufgefordert werden, die Workstation zu starten, klicken Sie zur Bestätigung auf Starten. Der Status ändert sich zu Wird gestartet und das Statussymbol refresh dreht sich, während der Startvorgang läuft. Es kann einige Minuten dauern, bis die Workstation gestartet ist.
- Wenn Ihre Workstation bereit ist, ändert sich der Status in Wird ausgeführt und das Statussymbol ändert sich in ein check_circle Häkchen.
- Klicken Sie auf Starten.
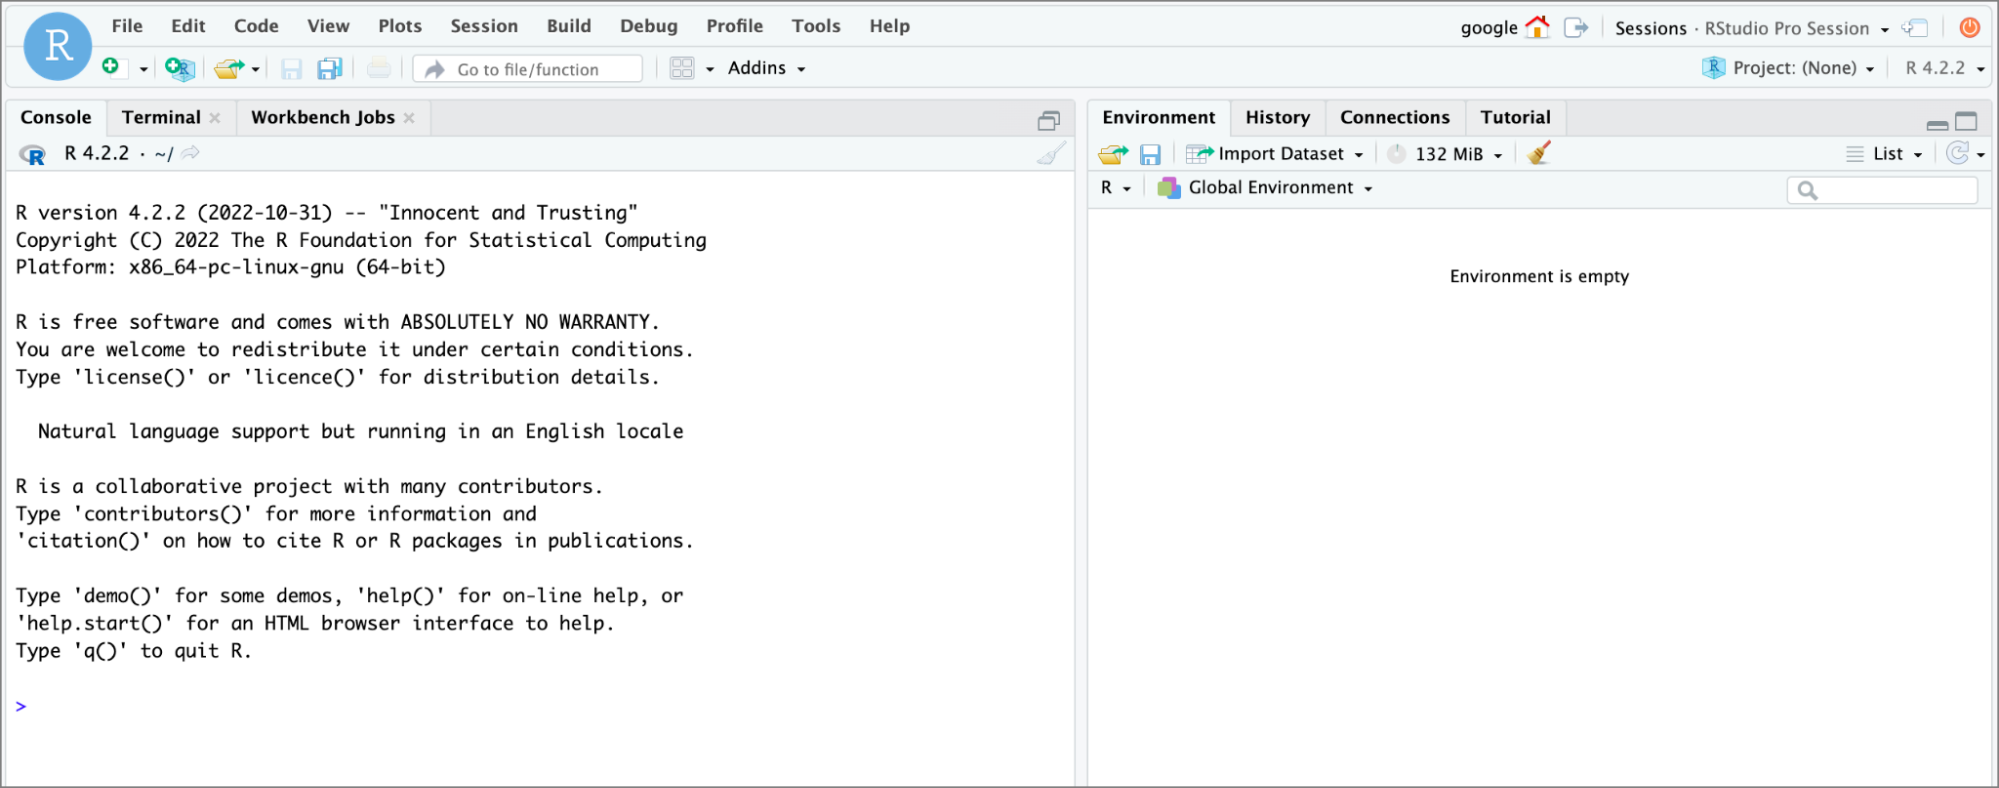
Das folgende Beispiel zeigt die Willkommensseite für Posit Workbench. Ihre Seite kann je nach der Konfiguration Ihres Arbeitsplatzes, die von Ihrer Organisation definiert wurde, unterschiedlich aussehen:
Klicken Sie auf Neue Sitzung.
Wählen Sie RStudio Pro als IDE aus und lassen Sie Cluster auf Lokal eingestellt.
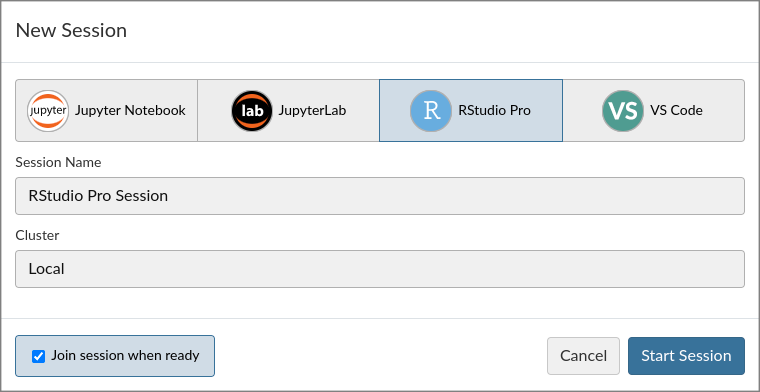
Weitere Informationen zu Posit Workbench und den unterstützten IDEs wie Jupyter Notebook, JupyterLab und VS Code finden Sie in der Posit-Dokumentation.
Klicken Sie auf Sitzung starten.
Warten Sie, bis die Sitzung gestartet wurde, und beginnen Sie dann mit dem Programmieren.
Klicken Sie auf Hochladen, um Dateien von Ihrem lokalen Rechner auf Ihre Workstation hochzuladen.
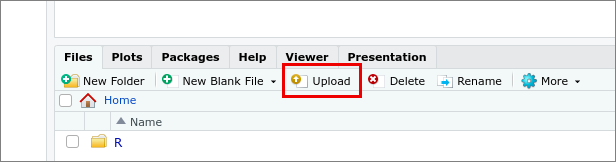
Wählen Sie das Zielverzeichnis aus, in dem Sie Dateien auf Ihrer Workstation speichern möchten.
Klicken Sie auf Datei auswählen, um die hochzuladende Datei auszuwählen.
Klicken Sie auf OK, um den Upload zu starten.
Wenn Sie Dateien von Ihrer Workstation importieren möchten, klicken Sie auf Dataset importieren und wählen Sie den Dataset-Typ aus.
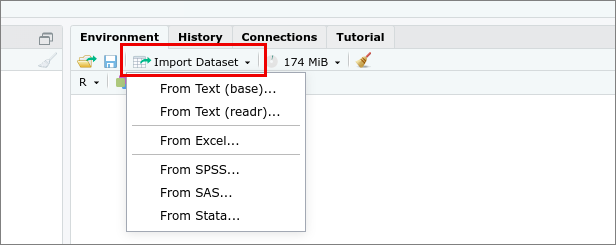
Suchen Sie auf Ihrer Workstation nach dem zu importierenden Dataset und wählen Sie es aus.
Die Posit Workbench-IDE hat Abhängigkeiten von verschiedenen R-Paketen für verschiedene Funktionen. Wenn Sie beispielsweise eine Excel-Datei hochladen, müssen bestimmte Pakete installiert sein. Wenn Sie aufgefordert werden, erforderliche Pakete zu installieren, klicken Sie auf Ja.
Klicken Sie auf Importieren, um den Import zu starten.
Container-Images an die Anforderungen Ihrer Organisation anpassen
Weitere Informationen zu Posit Workbench finden Sie im Dokumentationshub von Posit Software.
Workstationkonfiguration erstellen
Wenn Sie Posit Workbench (einschließlich RStudio Pro) verwenden möchten, müssen Sie eine Workstationkonfiguration für die Entwickler in Ihrer Organisation erstellen:
Workstation einrichten
So erstellen Sie eine Workstation:
Workstation starten
Nachdem Sie die Workstation erstellt haben, können Sie sie starten und dann aktivieren, um mit der Entwicklung zu beginnen.
Posit Workbench RStudio Pro-Sitzung starten
Dateien auf Ihre Workstation hochladen
Wenn Sie mehrere Dateien oder ein Verzeichnis hochladen möchten, erstellen Sie eine ZIP-Datei. Die ZIP-Datei wird nach dem Upload entpackt.
Dateien von Ihrer Workstation importieren
Support bei Problemen mit Posit Workbench
Wenn Sie Probleme mit Posit Workbench oder dem Posit Workbench-Container-Image haben, melden Sie diese an Posit unter support@posit.co.