[](https://ssh.cloud.google.com/cloudshell/open?cloudshell_git_repo=GIT_REPO_URL&cloudshell_tutorial=PATH_TO_MD_FILE)
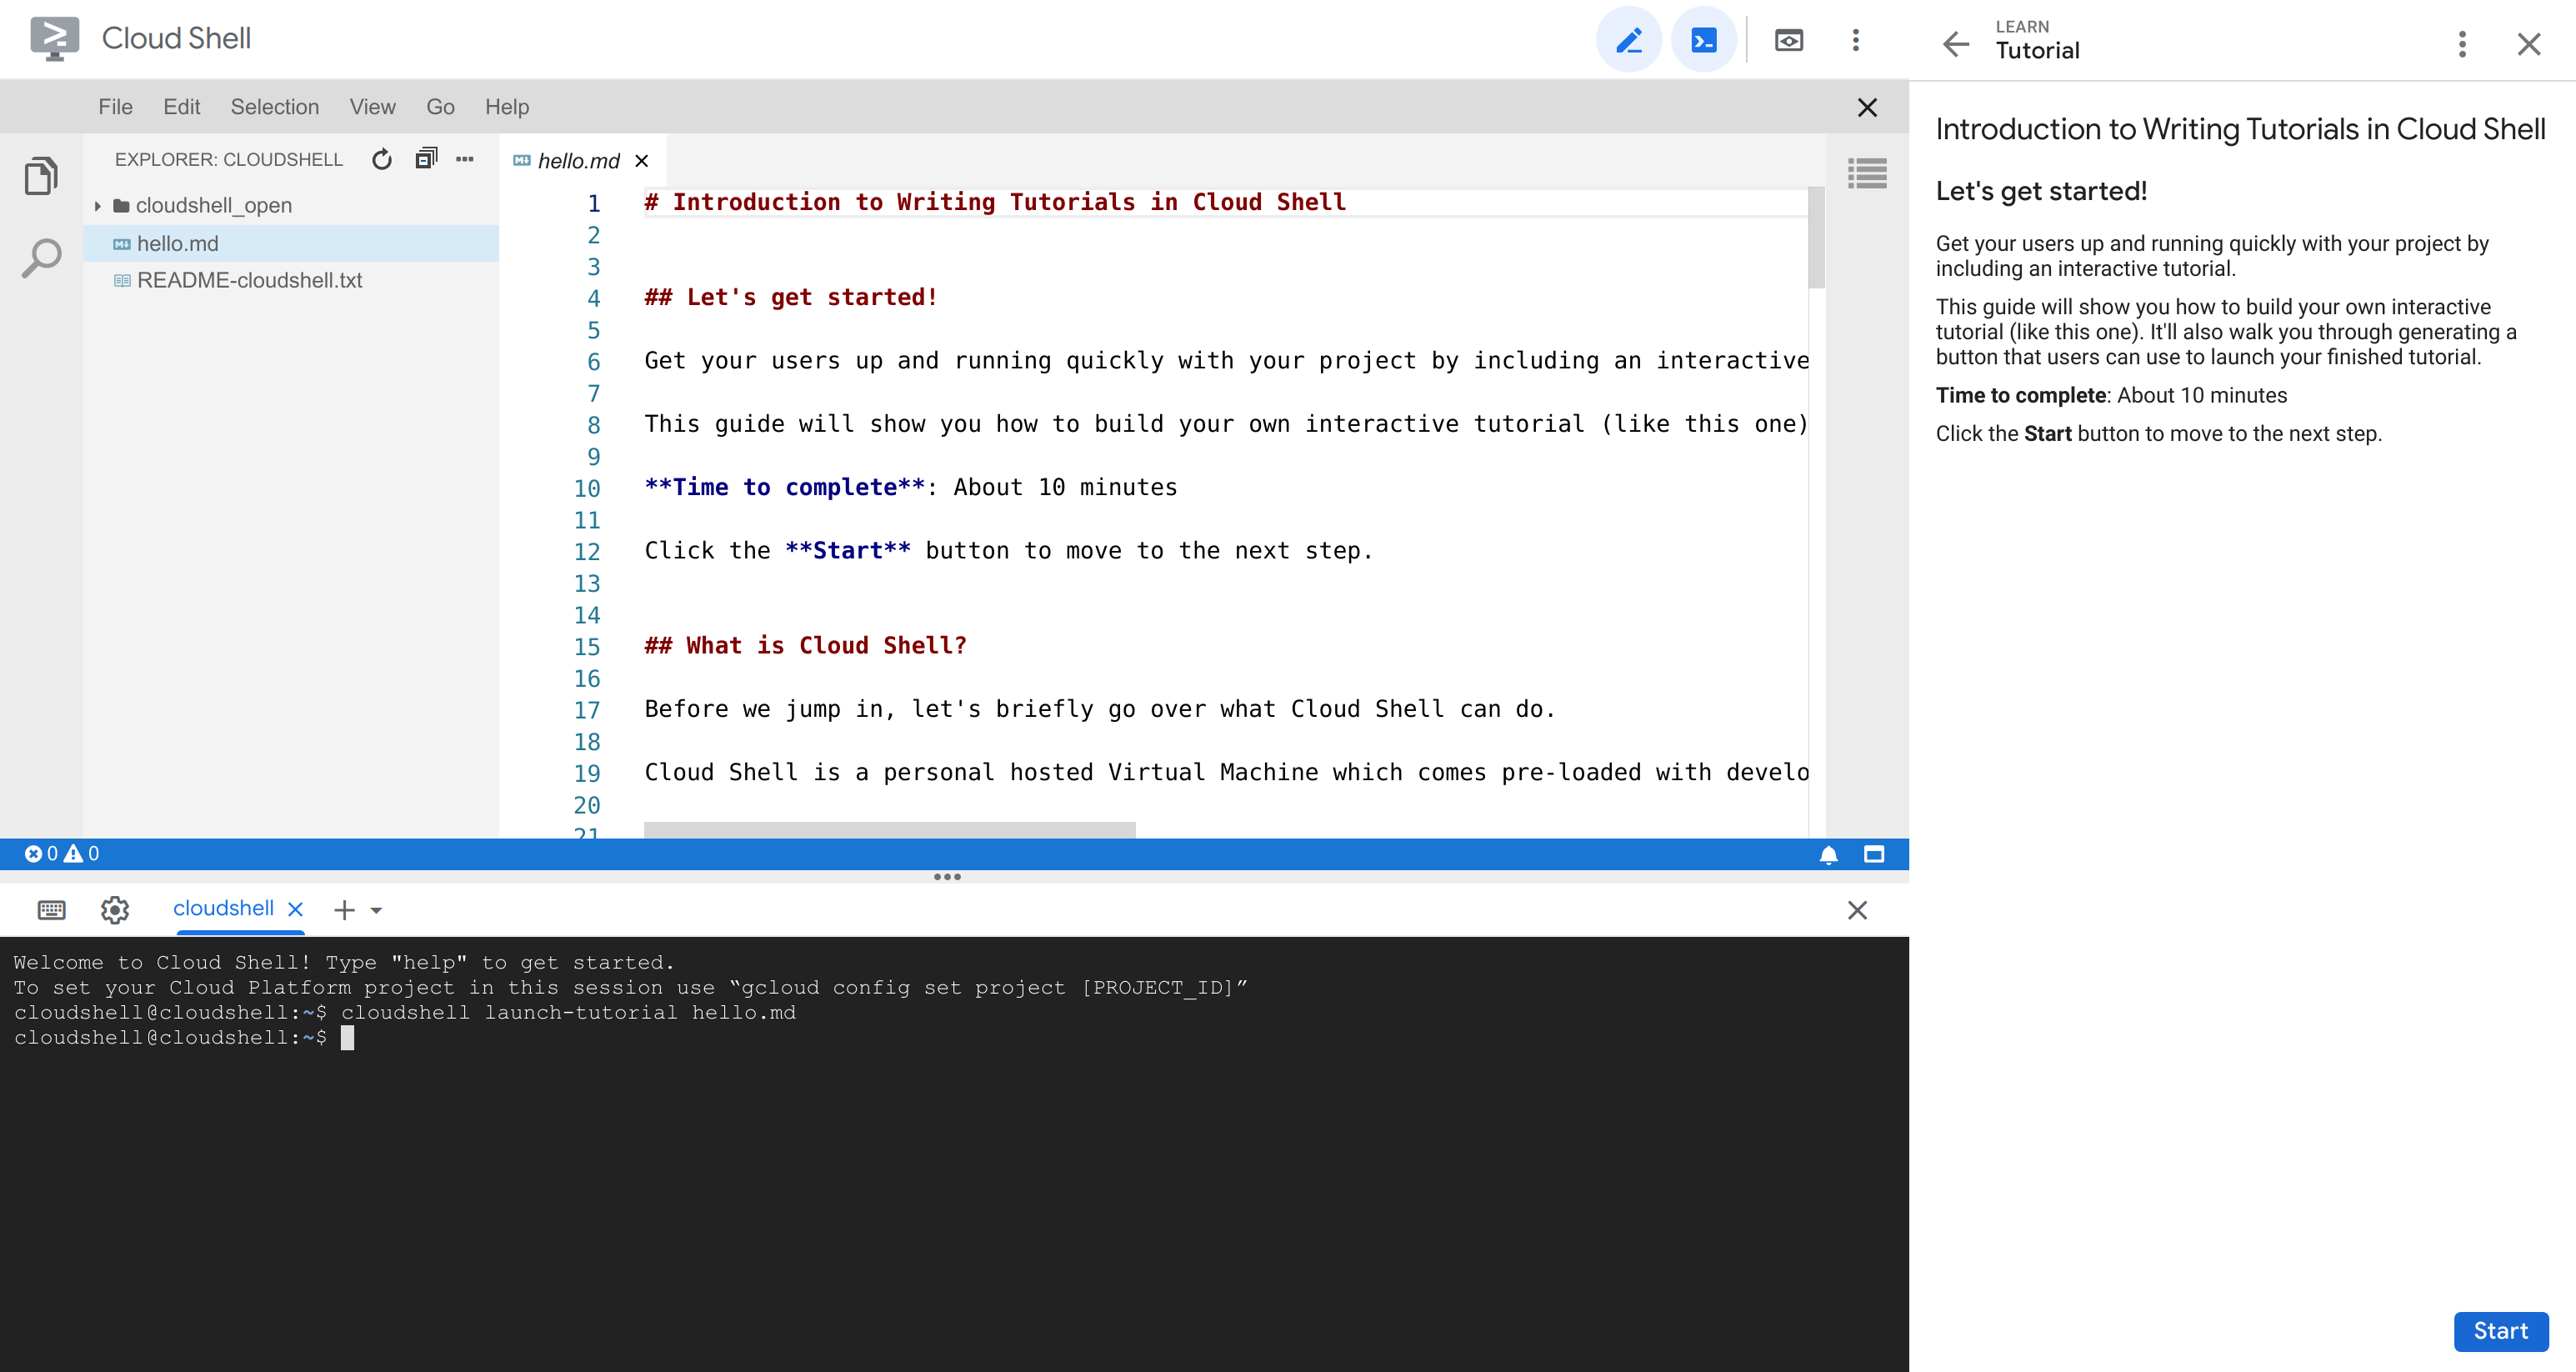
[[["わかりやすい","easyToUnderstand","thumb-up"],["問題の解決に役立った","solvedMyProblem","thumb-up"],["その他","otherUp","thumb-up"]],[["わかりにくい","hardToUnderstand","thumb-down"],["情報またはサンプルコードが不正確","incorrectInformationOrSampleCode","thumb-down"],["必要な情報 / サンプルがない","missingTheInformationSamplesINeed","thumb-down"],["翻訳に関する問題","translationIssue","thumb-down"],["その他","otherDown","thumb-down"]],["最終更新日 2025-04-21 UTC。"],[],[],null,["# Write tutorials in Cloud Shell\n\nCloud Shell supports building and launching tutorials\nto help users familiarize themselves with your project quickly and effectively.\n\nA tutorial is a set of instructions written in Markdown. Cloud Shell\ncreates in-context tutorials from these Markdown files by parsing the text into\nsteps and substeps that are then displayed in a panel in Google Cloud console.\n\nWrite tutorials\n---------------\n\nTutorials are written in\n[CommonMark Markdown](http://commonmark.org/). Additional\n[Markdown extensions](/shell/docs/cloud-shell-tutorials/markdown-extensions) are\nsupported, as are\n[directives](#directives), which include advanced functionality like\n[spotlighting features](/shell/docs/cloud-shell-tutorials/directives-spotlights)\nand adding\n[inline icons](/shell/docs/cloud-shell-tutorials/directives-layout#icons).\n\n### Steps\n\nWhen creating a tutorial, headings are important in determining its structure.\nTo set the correct title, step headings, and underlying instructions, use the\nfollowing hierarchy:\n\n- H1 (#) tags for the tutorial title. There should only be one H1 tag in a tutorial.\n- H2 (##) tags for a step title.\n- H3 (###) tags for a sub-step title.\n\nHere is a sample Markdown file you can use to create a tutorial: \n\n # First tutorial\n\n ## First step\n\n Hello world\n\n ### Part 1\n\n Part one instructions.\n\n ### Part 2\n\n Part two instructions.\n\n ## Conclusion\n\n Done!\n\n### Directives\n\nDirectives enable advanced functionality like spotlighting features and adding\ninline icons.\n\nTo add a directive, use the following format: \n\n \u003cwalkthrough-\u003cvar class=\"readonly\" translate=\"no\"\u003eDIRECTIVE_NAME\u003c/var\u003e \u003cvar class=\"readonly\" translate=\"no\"\u003ePARAMETER\u003c/var\u003e=\"\u003cvar class=\"readonly\" translate=\"no\"\u003ePARAMETER_VALUE\u003c/var\u003e\"\u003e\n \u003c/walkthrough-\u003cvar class=\"readonly\" translate=\"no\"\u003eDIRECTIVE_NAME\u003c/var\u003e\u003e\n\nFor example, if you'd like to use the directive `editor-open-file` and the\nparameter `filePath`, it would be written as follows: \n\n \u003cwalkthrough-editor-open-file filePath=\"test/hello.md\"\u003e\n \u003c/walkthrough-editor-open-file\u003e\n\nFor the available directives, refer to the\n[directives reference](/shell/docs/cloud-shell-tutorials/directives-cloud-shell-editor).\n\nLaunch tutorials in Cloud Shell\n-------------------------------\n\nThere are two ways to kickstart a tutorial in Cloud Shell:\n\n1. **Use the `cloudshell launch-tutorial` command**\n\n Run the following `cloudshell` command in your\n [Cloud Shell session](https://ssh.cloud.google.com/cloudshell) to\n launch a tutorial from an existing Markdown file, `tutorial.md`: \n\n cloudshell launch-tutorial tutorial.md\n\n Alternatively, you can use the `teachme` alias by running the following\n command in your\n [Cloud Shell session](https://ssh.cloud.google.com/cloudshell) to\n launch a tutorial from an existing file, `hello.md`: \n\n teachme hello.md\n\n2. **Use *Open in Cloud Shell***\n\n Alternatively, you can use the\n [*Open in Cloud Shell*](https://cloud.google.com/shell/docs/open-in-cloud-shell)\n feature to guide your users from a website, blog, or open source project to\n your tutorial hosted in a Git repository. The\n *Open in Cloud Shell* feature allows for a\n `cloudshell_tutorial` parameter, which can be added to the end of the URL to\n specify the location of the source Markdown file in the repository. This\n means that the Markdown for a button linked to your tutorial would look like: \n\n [](https://ssh.cloud.google.com/cloudshell/open?cloudshell_git_repo=\u003cvar class=\"readonly\" translate=\"no\"\u003eGIT_REPO_URL\u003c/var\u003e\\&cloudshell_tutorial=\u003cvar class=\"readonly\" translate=\"no\"\u003ePATH_TO_MD_FILE\u003c/var\u003e)\n\nNext steps\n----------\n\n- For a comprehensive list of tutorial-specific Markdown expressions, see the [Tutorial Markdown reference](/shell/docs/cloud-shell-tutorials/markdown-extensions).\n- For guidelines on how to write effective tutorials, see the [Tutorial style guide](/shell/docs/cloud-shell-tutorials/style-guide)."]]