在 Google Cloud 控制台中建立管道和發布版本
本頁說明如何使用 Google Cloud 主控台建立 Cloud Deploy 交付管道,然後為該管道建立版本。
在本快速入門導覽課程中,您將完成下列事項:
事前準備
- Sign in to your Google Cloud account. If you're new to Google Cloud, create an account to evaluate how our products perform in real-world scenarios. New customers also get $300 in free credits to run, test, and deploy workloads.
-
In the Google Cloud console, on the project selector page, select or create a Google Cloud project.
-
Make sure that billing is enabled for your Google Cloud project.
-
Enable the Cloud Deploy, Cloud Build, GKE, Artifact Registry, Cloud Run, and Cloud Storage APIs.
-
Install the Google Cloud CLI.
-
如果您使用外部識別資訊提供者 (IdP),請先 使用聯合身分登入 gcloud CLI。
-
如要初始化 gcloud CLI,請執行下列指令:
gcloud init -
In the Google Cloud console, on the project selector page, select or create a Google Cloud project.
-
Make sure that billing is enabled for your Google Cloud project.
-
Enable the Cloud Deploy, Cloud Build, GKE, Artifact Registry, Cloud Run, and Cloud Storage APIs.
-
Install the Google Cloud CLI.
-
如果您使用外部識別資訊提供者 (IdP),請先 使用聯合身分登入 gcloud CLI。
-
如要初始化 gcloud CLI,請執行下列指令:
gcloud init 在 Google Cloud 控制台中,前往 Cloud Deploy 主頁面。
按一下 [建立]。
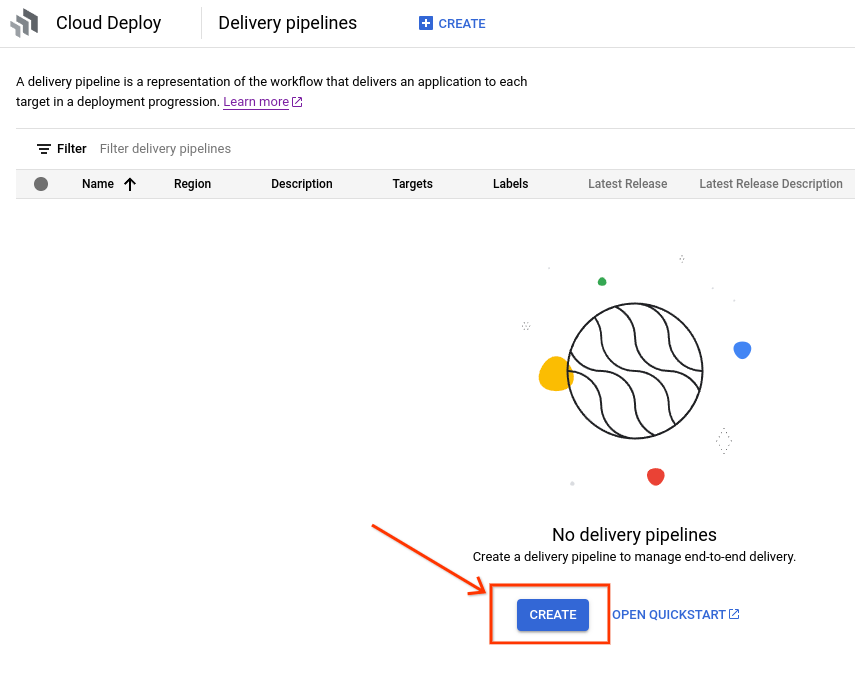
系統會顯示「建立推送 pipeline」表單。
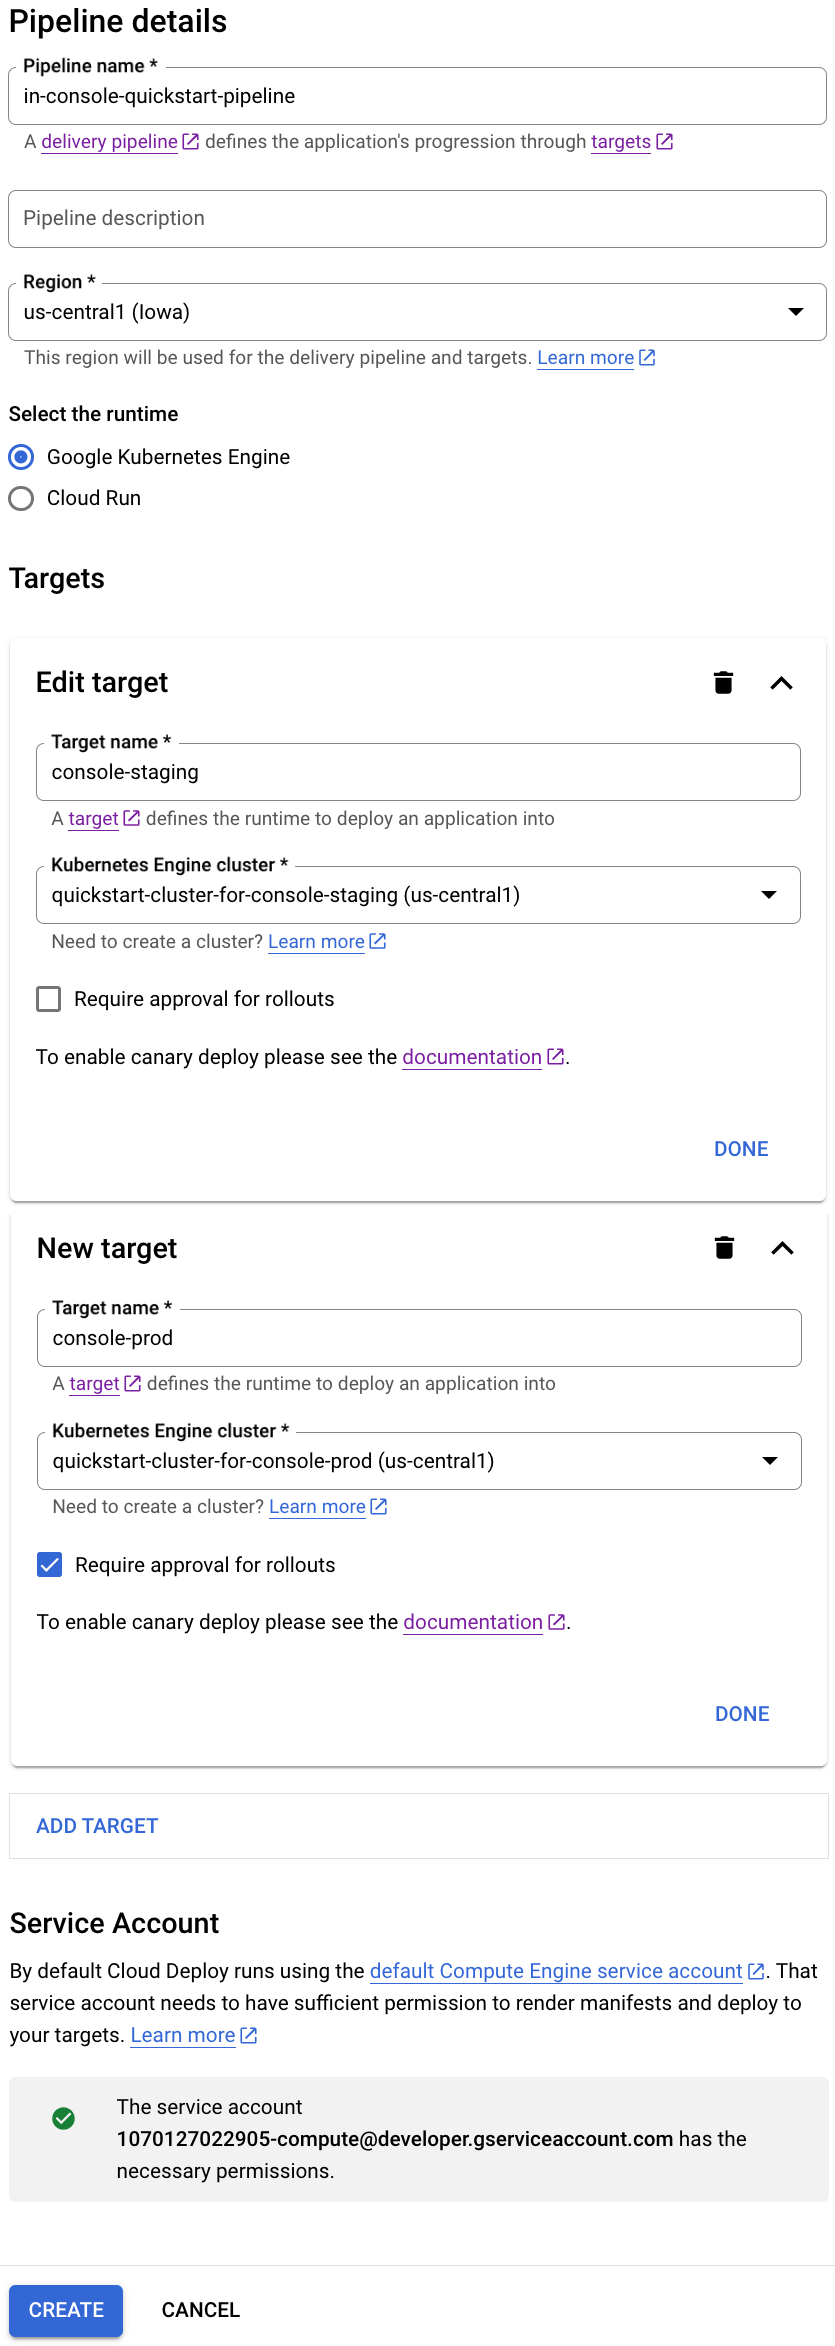
在「Pipeline name」(管道名稱) 欄位中,將預設文字改成
in-console-quickstart-pipeline。視需要輸入這個推送管道的說明。
在「Region」(區域) 下拉式選單中,選取「
us-central1」。選取執行階段。
如要部署至 GKE,請選取「Google Kubernetes Engine」。否則請選取「Cloud Run」。
建立目標:
GKE
在「New target」(新目標) 下方的「Target name」(目標名稱) 欄位中,將預設文字替換為
console-staging。在「Kubernetes Engine 叢集」下拉式選單中,選取
quickstart-cluster-for-console-staging。按一下 [完成]。
按一下「新增目標」。
將「目標名稱」的預設文字替換為
console-prod。從「Kubernetes Engine 叢集」下拉式選單中選取
quickstart-cluster-for-console-prod。選取「須經核准才能執行推出作業」。
在本快速入門導覽中,我們要求核准第二個目標,但第一個目標則不需核准。
按一下「建立」,建立這個推送管道。
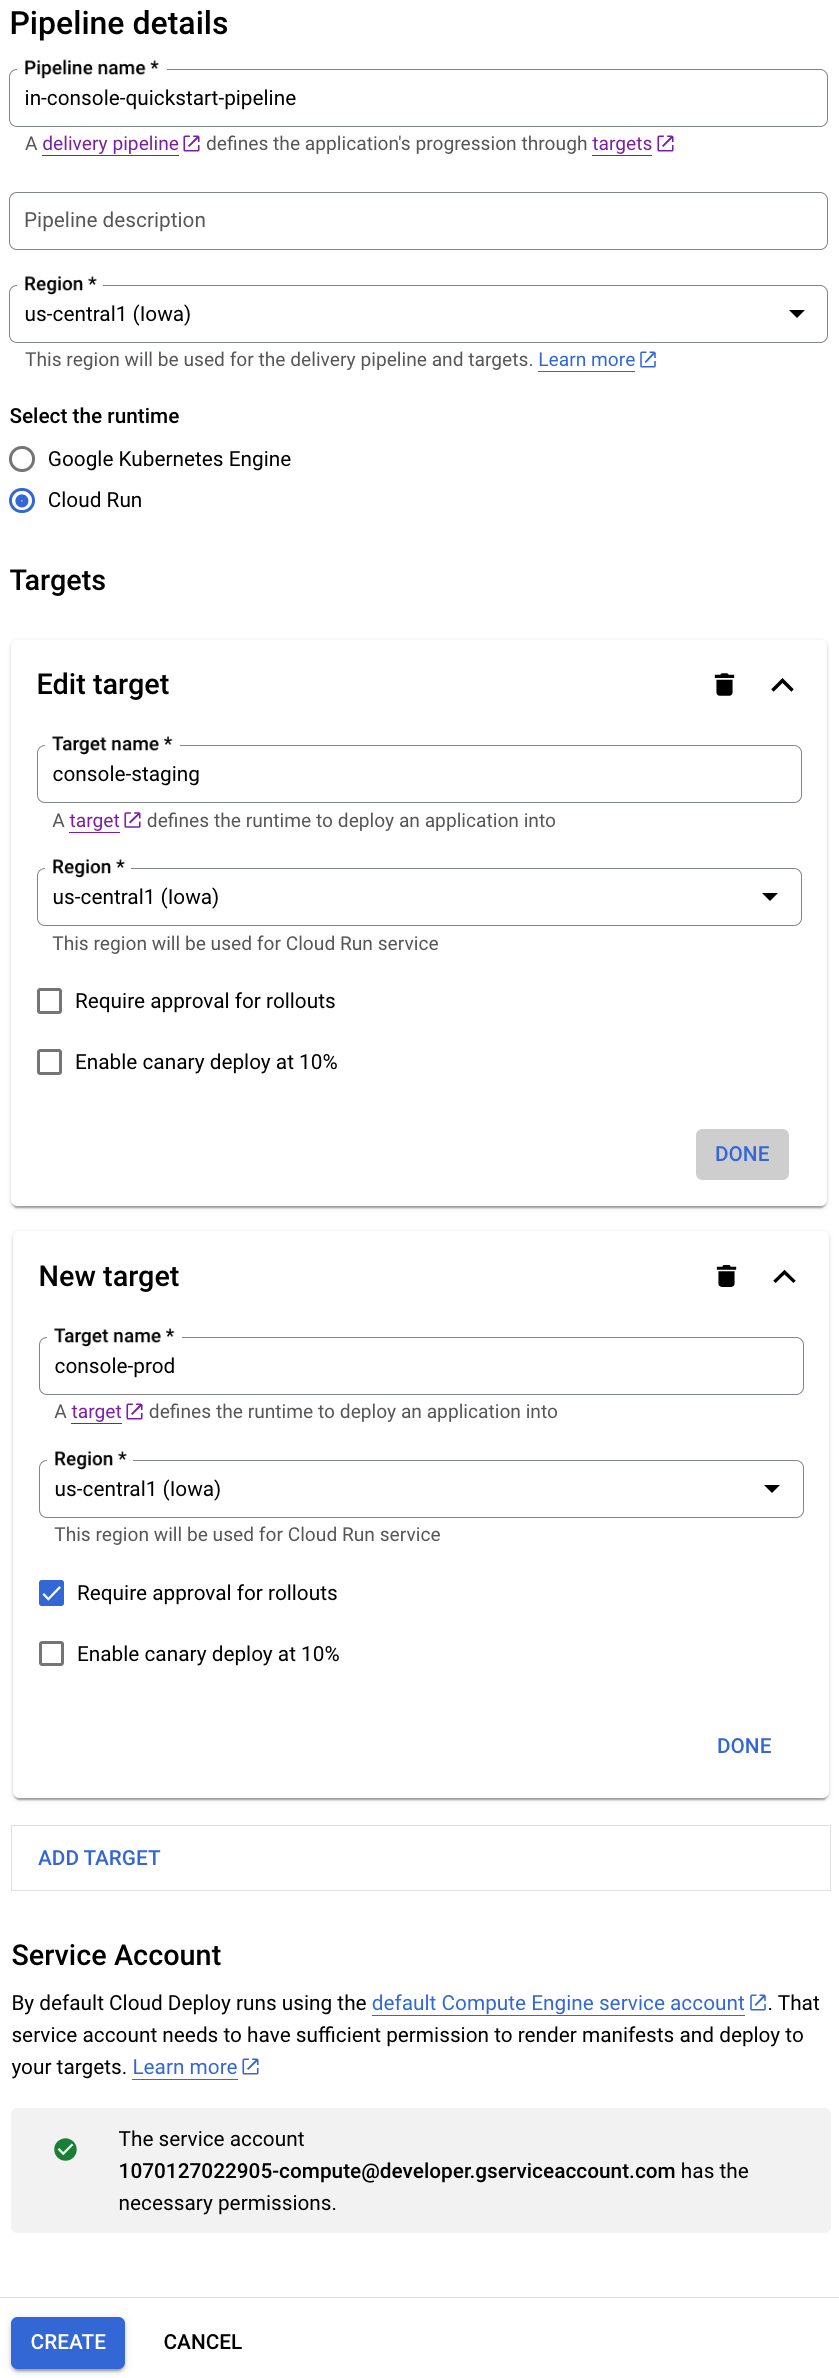
Cloud Run
在「New target」(新目標) 下方的「Target name」(目標名稱) 欄位中,將預設文字替換為
console-staging。從「Region」(區域) 下拉式選單中,選取「
us-central1」。按一下 [完成]。
按一下「新增目標」。
將「目標名稱」的預設文字替換為
console-prod。為這個目標啟用「須經核准才能執行推出作業」核取方塊。
在本快速入門導覽中,我們要求核准第二個目標,但第一個目標則不需核准。
按一下「建立」,建立這個推送管道。
您現在擁有兩個目標的推送管道,可以開始建立發布版本。
系統會顯示管道頁面,其中包含兩個目標,但沒有任何推出作業。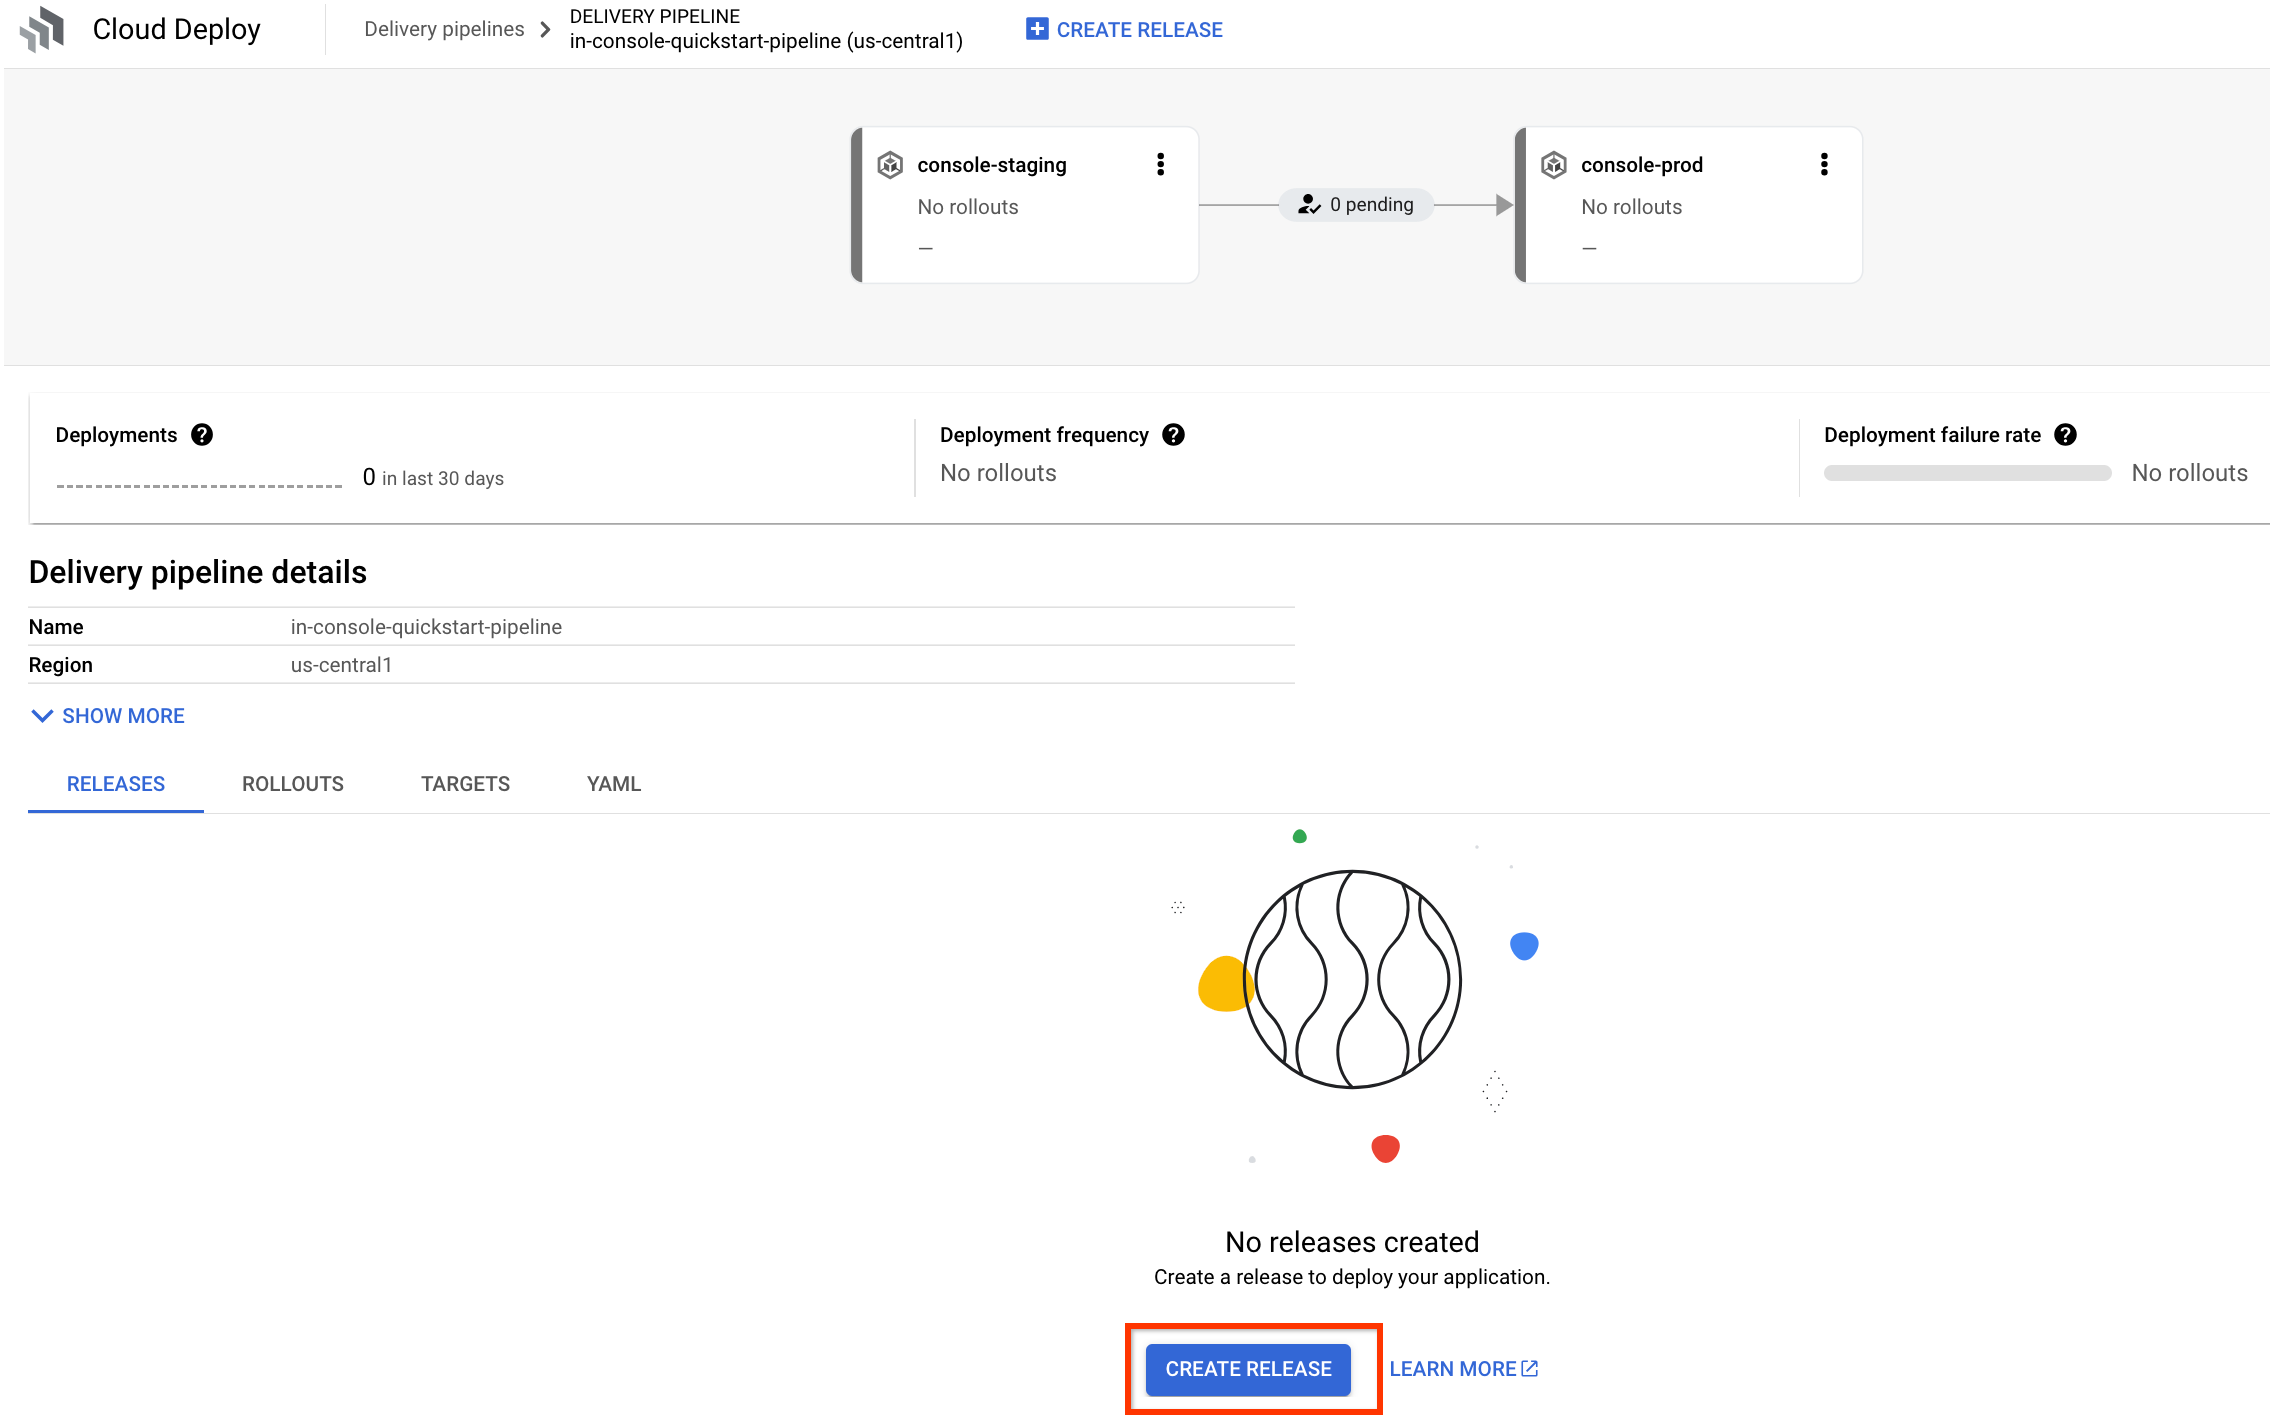
如果尚未前往顯示新發布管道的發布管道頁面
in-console-quickstart-pipeline,請立即前往。系統會顯示管道圖表,但不會顯示任何推出作業。
按一下「建立新版本」按鈕。
系統會顯示「建立發行版本」對話方塊。系統會預先填入大部分欄位。保留這些預設值。
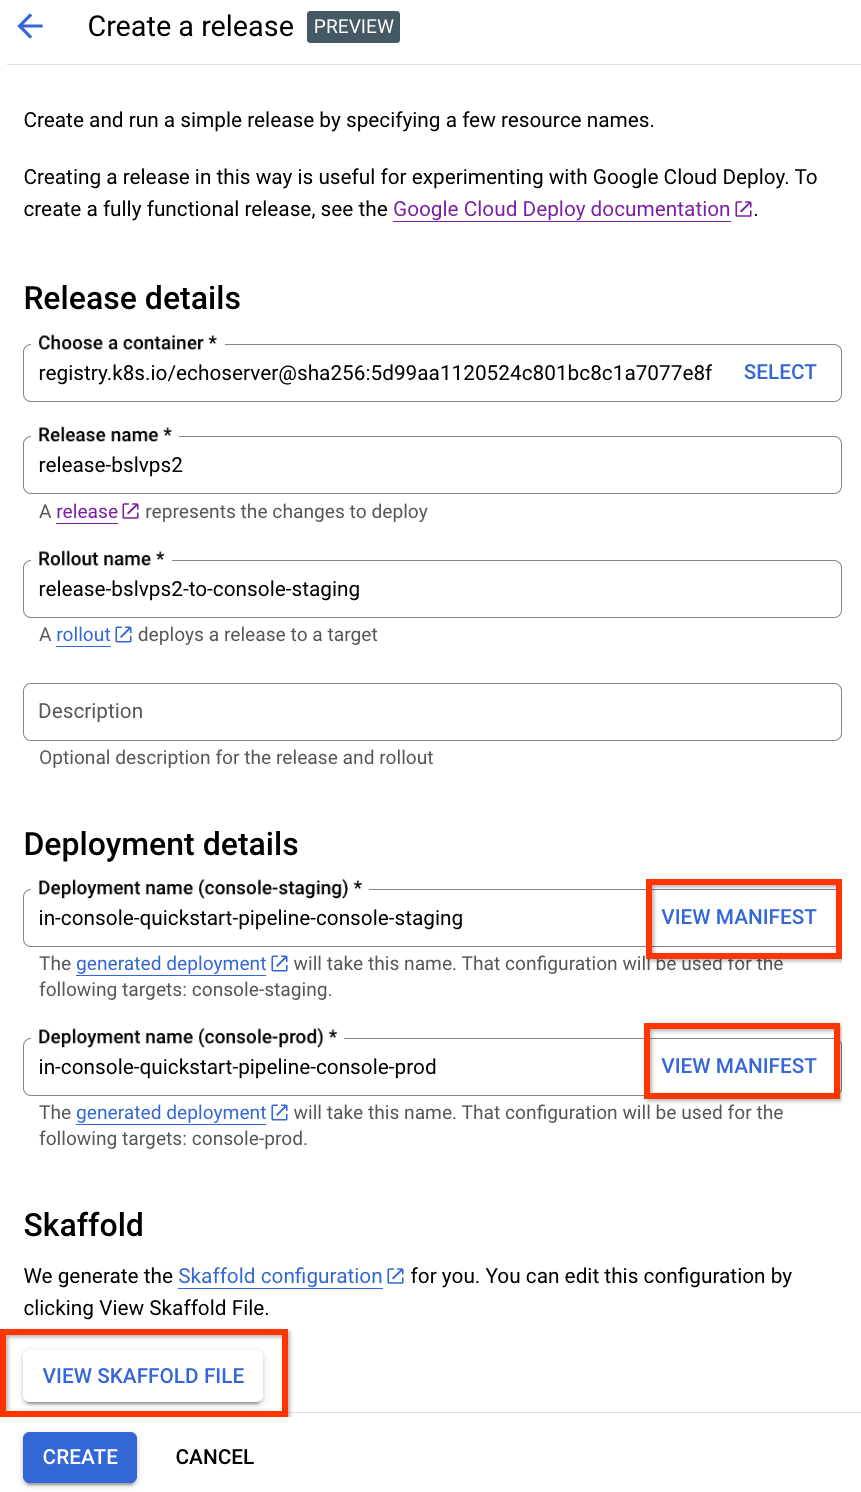
您可以按一下「查看資訊清單」按鈕,查看自動產生的資訊清單 (適用於任一目標),也可以按一下「查看 Skaffold 檔案」查看產生的
skaffold.yaml。您也可以編輯這些設定,但在本快速入門導覽課程中,請保留預設設定。您也可以在「說明」欄位中,為這個版本新增說明。
按一下「建立」即可開始發布。
系統會顯示第一個目標的推出詳細資料頁面,您可以查看推出進度。這項作業會在幾分鐘內完成。推出作業可能需要幾秒鐘的時間才會開始。
第一次推出完成後,按一下推送管道名稱,前往推送管道頁面。

系統會顯示管道圖表,並完成向第一個目標的推出作業。
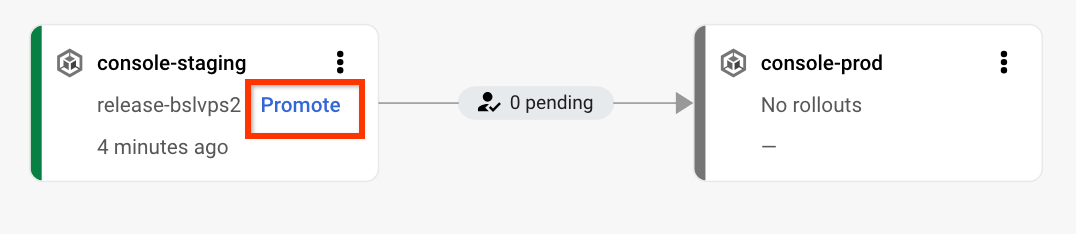
按一下「升級」,開始將版本發布至下一個目標。
系統會顯示「Promote」對話方塊。
保留預設值,視需要新增推出說明,然後按一下「升級」。
由於我們在建立第二個目標時選取了「須經過核准才能推出」,因此這項促銷活動目前處於待核准狀態。
在推送管道的視覺化呈現中,按一下「查看」。
系統會顯示核准頁面。

再次按一下「審查」,然後在核准對話方塊中按一下「核准」。
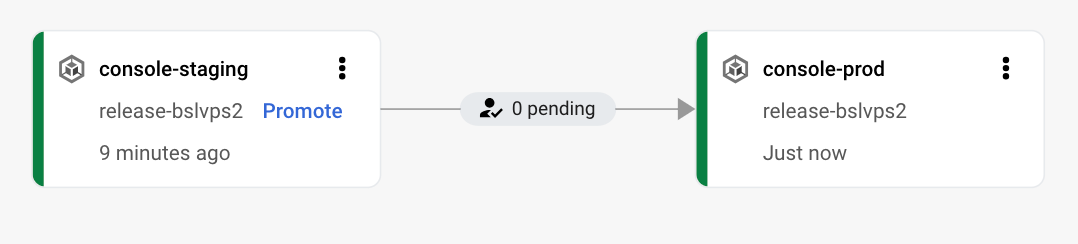
系統會開始為第二個目標推出更新。再次點選交付管道名稱,即可在管道視覺化畫面中查看進度。
刪除 GKE 叢集或 Cloud Run 服務:
GKE
gcloud container clusters delete quickstart-cluster-for-console-staging --region=us-central1 --project=PROJECT_ID \ && gcloud container clusters delete quickstart-cluster-for-console-prod --region=us-central1 --project=PROJECT_IDCloud Run
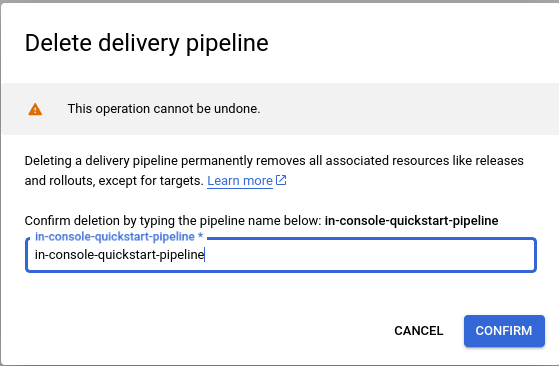
gcloud run services delete in-console-quickstart-pipeline-target-1 --region=us-central1 --project=PROJECT_ID \ && gcloud run services delete in-console-quickstart-pipeline-target-2 --region=us-central1 --project=PROJECT_ID在推送 pipeline 頁面中,按一下「刪除」,即可刪除推送 pipeline、版本和推出作業。
在提供的欄位中輸入管道名稱,然後按一下「確認」,即可完成資源刪除程序。
刪除兩個目標:
gcloud deploy targets delete console-staging --region=us-central1 && \ gcloud deploy targets delete console-prod --region=us-central1刪除 Cloud Deploy 建立的 Cloud Storage bucket。
一個結尾是
_clouddeploy,另一個是[region].deploy-artifacts.[project].appspot.com。
如果已安裝 CLI,請確認您使用的是最新版本:
gcloud components update
建立執行階段環境
如果您要部署至 Cloud Run,可以略過這個指令。
如果是 GKE,請建立兩個叢集:quickstart-cluster-for-console-staging 和 quickstart-cluster-for-console-prod,並採用預設設定。叢集的 Kubernetes API 端點必須可透過公開網際網路存取。根據預設,GKE 叢集可從外部存取。
gcloud container clusters create-auto quickstart-cluster-for-console-staging \
                 --project=PROJECT_ID \
                 --region=us-central1 && \
gcloud container clusters create-auto quickstart-cluster-for-console-prod \
                 --project=PROJECT_ID \
                 --region=us-central1
建立推送管道和兩個目標
您可以根據一或多個 YAML 檔案中指定的設定,使用 Cloud Deploy 建立推送管道和目標。不過,您也可以使用 Google Cloud 控制台建立傳送管道。
在本節中,您將使用 Google Cloud 控制台建立推送管道和兩個目標。使用 Google Cloud 控制台時,您不需要建立任何 YAML 檔案;Cloud Deploy 會為您建立 skaffold.yaml 和資訊清單。
建立發布版本
您現在有推送管道,其中包含兩個目標,分別指向兩個 GKE 叢集或兩個 Cloud Run 服務,可以建立版本,將應用程式部署至第一個目標。
第二次推出完成後,應用程式會部署在第二個目標中,而發布管道也已完成。
清除所用資源
如要避免系統向您的 Google Cloud 帳戶收取本頁所用資源的費用,請按照下列步驟操作。
大功告成,您已經完成本快速入門導覽課程!