이 튜토리얼의 마지막 단계는 Dialogflow 에이전트를 호스팅하는 것입니다. App Engine은 설정과 확장이 간단하므로 호스팅에 사용됩니다. Dialogflow Messenger 통합이 에이전트 사용자 인터페이스에 사용됩니다.
프로젝트 구성
Dialogflow 에이전트와 App Engine 인스턴스 모두 같은 프로젝트에 있는 것이 좋습니다. 또한 Cloud Build API를 사용 설정해야 합니다.
인스턴스를 만들기 전에 Google Cloud 콘솔에서 프로젝트를 선택합니다.
프로젝트에 Cloud Build API를 사용 설정합니다.
환경 설정
App Engine용 Go 애플리케이션을 개발하려면 몇 가지 항목을 설치하고 구성해야 합니다. 개발 환경 설정에서 아직 완료하지 않은 모든 단계를 따릅니다.
웹 서비스 코드 만들기
이 튜토리얼의 예시 코드는 Go로 작성되었지만 App Engine에서 지원되는 모든 언어를 사용할 수 있습니다. 로컬 머신의 원하는 위치에 다음 파일 구조를 만듭니다.
go-app/: Go 서비스용 디렉터리templates/: Go HTML 템플릿용 디렉터리index.html: Go HTML 템플릿
app.yaml: 서비스의 구성 설정main.go: 애플리케이션 코드
다음 3개 섹션에서는 3개 파일의 콘텐츠를 제공합니다.
index.html 파일 콘텐츠
이 Go HTML 템플릿 파일에는 홈페이지의 HTML이 포함되어 있습니다. 이 파일을 다음 콘텐츠로 채웁니다.
<!DOCTYPE html>
<html lang="en-US">
  <head>
    <meta charset="utf-8">
    <meta name="viewport" content="width=device-width">
    <title>Tutorial agent</title>
  </head>
  <body>
    <p>Open the chat window in the bottom right corner.</p>
  </body>
</html>
app.yaml 파일 콘텐츠
서비스의 런타임 환경 설정을 지정하는 구성 파일입니다. Go 1.12+ 런타임 환경 문서를 참조하면 지원되는 Go 버전 목록을 확인할 수 있습니다. 이 파일을 다음 콘텐츠로 채웁니다.
runtime: go116 # or another supported version
main.go 파일 콘텐츠
이 파일에는 애플리케이션 코드가 포함되어 있습니다. 이 파일을 다음 콘텐츠로 채웁니다.
// Package main is the main package
package main

import (
	"log"
	"net/http"
	"os"
	"text/template"
)

var templates *template.Template

func init() {
	templates = template.Must(template.New("").ParseGlob("templates/*"))
}

// indexHandler handles the homepage.
func indexHandler(w http.ResponseWriter, r *http.Request) {
	if r.URL.Path != "/" {
		http.NotFound(w, r)
		return
	}
	if err := templates.ExecuteTemplate(w, "index.html", nil); err != nil {
		log.Fatal(err)
	}
}

func main() {
	// Register the handlers
	http.HandleFunc("/", indexHandler)

	port := os.Getenv("PORT")
	if port == "" {
		port = "8080"
		log.Printf("Defaulting to port %s", port)
	}

	log.Printf("Listening on port %s", port)
	if err := http.ListenAndServe(":"+port, nil); err != nil {
		log.Fatal(err)
	}
}
웹 서비스 배포
이제 코드를 배포할 준비가 되었습니다. 이 단계에서는 배포에 gcloud 도구를 사용합니다.
gcloud가 Dialogflow 에이전트와 동일한 프로젝트로 구성되었는지 확인합니다. 프로젝트를 확인하는 방법은 다음과 같습니다.
gcloud config get-value project
프로젝트를 변경하는 방법은 다음과 같습니다.
gcloud config set project YOUR_PROJECT
app.yaml파일이 있는go-app디렉터리에서 다음 명령어를 사용하여 웹 서비스를 App Engine에 배포합니다.gcloud app deploy
이 명령어를 실행하면 리전을 입력하라는 메시지가 표시됩니다. Dialogflow 에이전트와 동일한 리전을 선택해야 합니다. 이 명령어는 웹 서비스 URL인
target url값을 출력합니다.브라우저를 실행하고 웹 서비스를 보려면 이전 단계의 대상 URL을 열거나 다음 명령어를 실행합니다.
gcloud app browse
Dialogflow Messenger 설정
Dialogflow Messenger를 설정하고 사용 설정하려면 다음 안내를 따르세요.
- Dialogflow ES 콘솔로 이동합니다.
- 왼쪽 사이드바 메뉴에서 통합을 클릭합니다.
- Dialogflow 메신저를 클릭합니다.
- 구성 대화상자가 열립니다.
- 환경을 선택합니다.
- 사용 설정을 클릭합니다.
- 웹사이트에 붙여넣을 삽입 코드를 복사합니다.
- 닫기를 클릭합니다.
웹 서비스에 에이전트 삽입
앞에서 복사한 삽입 코드를 index.html 파일에 붙여넣습니다.
<script> 및 <df-messenger> HTML 요소는 페이지의 <body> 요소에 있어야 합니다.
gcloud로 웹 서비스 앱을 다시 배포합니다. 배포된 후 오른쪽 하단의 채팅 아이콘을 클릭하여 웹페이지를 통해 에이전트와 상호작용할 수 있습니다.
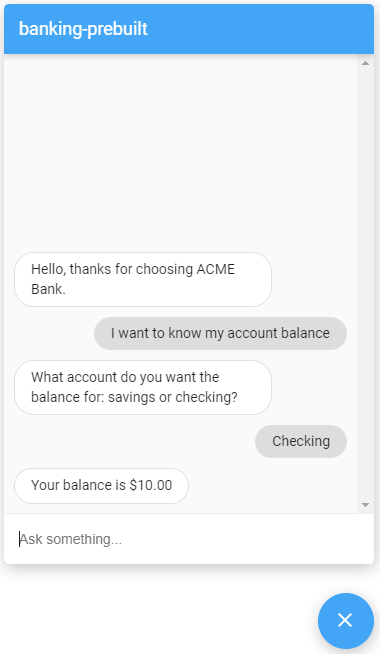
이제 완전하게 배포된 Dialogflow 에이전트가 준비되었습니다. 에이전트와 대화를 시작해 보세요.
삭제
이 튜토리얼의 단계를 진행하는 동안 청구 가능한 리소스를 만들었습니다. Google Cloud 계정에 요금이 추가로 청구되지 않도록 하려면 다음 안내를 따르세요.
- 데이터베이스 인스턴스를 삭제합니다.
함수를 삭제합니다.
gcloud functions delete tutorial-telecommunications-webhook
추가 정보
위 단계에 대한 자세한 내용은 다음을 참조하세요.