This tutorial shows how to configure and test a Binary Authorization policy that requires attestations. This type of policy secures your container-based software supply chain by defining who can deploy container images on Google Kubernetes Engine (GKE) and which container images GKE is allowed to deploy.
At deploy time, Binary Authorization uses attestors to verify digital signatures in attestations. The attestations were created by signers as part of the build process.
In this tutorial, the GKE cluster, attestations, and attestors are all located in a single project. A single-project configuration is mostly useful for testing or experimenting with the service. For a more real-world example, see multi-project configuration.
The steps below describe tasks that you perform from Google Cloud console, as
well as some tasks you perform using gcloud commands. To perform these steps
using gcloud, see Get started using the Google Cloud CLI.
Objectives
In this tutorial, you learn how to:
- Create a (GKE) cluster with Binary Authorization enabled
- Create an attestor that the Binary Authorization enforcer uses to verify the signature on an attestation
- Configure a policy that requires an attestation
- Create a cryptographic key pair to sign attestations and later verify them
- Sign a container image digest, creating a signature
- Create an attestation using the signature
- Test the policy by deploying a container image to GKE
Costs
In this document, you use the following billable components of Google Cloud:
To generate a cost estimate based on your projected usage,
use the pricing calculator.
Before you begin
- Sign in to your Google Cloud account. If you're new to Google Cloud, create an account to evaluate how our products perform in real-world scenarios. New customers also get $300 in free credits to run, test, and deploy workloads.
-
In the Google Cloud console, on the project selector page, select or create a Google Cloud project.
Roles required to select or create a project
- Select a project: Selecting a project doesn't require a specific IAM role—you can select any project that you've been granted a role on.
-
Create a project: To create a project, you need the Project Creator
(
roles/resourcemanager.projectCreator), which contains theresourcemanager.projects.createpermission. Learn how to grant roles.
-
Verify that billing is enabled for your Google Cloud project.
-
Enable the Container Registry, Artifact Analysis and Binary Authorization APIs.
Roles required to enable APIs
To enable APIs, you need the Service Usage Admin IAM role (
roles/serviceusage.serviceUsageAdmin), which contains theserviceusage.services.enablepermission. Learn how to grant roles. -
Install the Google Cloud CLI.
-
If you're using an external identity provider (IdP), you must first sign in to the gcloud CLI with your federated identity.
-
To initialize the gcloud CLI, run the following command:
gcloud init -
In the Google Cloud console, on the project selector page, select or create a Google Cloud project.
Roles required to select or create a project
- Select a project: Selecting a project doesn't require a specific IAM role—you can select any project that you've been granted a role on.
-
Create a project: To create a project, you need the Project Creator
(
roles/resourcemanager.projectCreator), which contains theresourcemanager.projects.createpermission. Learn how to grant roles.
-
Verify that billing is enabled for your Google Cloud project.
-
Enable the Container Registry, Artifact Analysis and Binary Authorization APIs.
Roles required to enable APIs
To enable APIs, you need the Service Usage Admin IAM role (
roles/serviceusage.serviceUsageAdmin), which contains theserviceusage.services.enablepermission. Learn how to grant roles. -
Install the Google Cloud CLI.
-
If you're using an external identity provider (IdP), you must first sign in to the gcloud CLI with your federated identity.
-
To initialize the gcloud CLI, run the following command:
gcloud init - Install
kubectl.
Set the default project
To facilitate commands that follow, store your Google Cloud project ID in an environment variable as follows:
PROJECT_ID=PROJECT_ID
where PROJECT_ID is the name of your project.
If the default project is not selected, set it now:
gcloud config set project ${PROJECT_ID}
Create a cluster with Binary Authorization enabled
Create the cluster
Now you can create a GKE cluster with Binary Authorization
enabled. Here, you create a cluster named test-cluster in the
GKE zone us-central1-a.
To create the cluster, follow these steps:
Visit the GKE menu in Google Cloud console.
Click Create Cluster.
Enter
test-clusterin the Name field.Select Zonal in the Location type options.
Select
us-central1-afrom the Zone drop-down list.Click Availability, networking, security, and additional features.
In the Security section, select Enable Binary Authorization.
Select Enforce-only.
Click Create.
Configure kubectl
You must also update the local kubeconfig file for your kubectl
installation. This provides the credentials and endpoint information required to
access the cluster in GKE.
To update the local kubeconfig file, follow these steps:
gcloud container clusters get-credentials \
    --zone us-central1-a \
    test-cluster
View the default policy
A policy in Binary Authorization is a set of rules that govern the deployment of container images. You can have one policy per project. By default, the policy is configured to allow all container images to be deployed.
To view the default policy, follow these steps:
Go to the Binary Authorization page in the Google Cloud console.
Click Edit Policy.
In Project Default Rule, the option Allow All Images is displayed.
Click Save Policy.
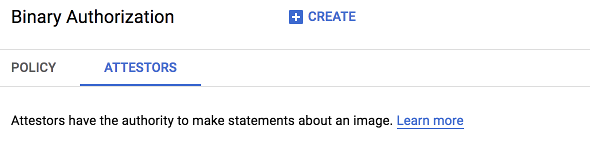
Create an attestor
An attestor is the verification authority that the Binary Authorization enforcer uses at deploy time to decide whether to allow GKE to deploy the corresponding signed container image. The attestor contains the public key and is typically managed by people responsible for software supply chain security.
Creating an attestor requires you to:
- Create the attestor itself in Binary Authorization
- Auto-generate an associated attestor note in Artifact Analysis to store trusted attestation metadata used in the authorization process
For this tutorial, you have one attestor named test-attestor. In a real-world
scenario, you can have any number of attestors, each one representing a party
that participates in the authorization process for the image.
Generate a key pair
Binary Authorization uses cryptographic keys to securely verify the identity of signers. This ensures that only authorized container images can deploy. The key pair consists of a private key and a public key. The signer uses the private key to sign the container image digest, producing a signature that is then stored in an attestation. The public key is stored in the attestor. At deploy time, the Binary Authorization enforcer uses the attestor's public key to verify the signature in the attestation before allowing the container to deploy.
In this tutorial, you use Public-Key Infrastructure (X.509) (PKIX) format for cryptographic keys. This tutorial uses the recommended Elliptic Curve Digital Signature Algorithm (ECDSA) to generate a PKIX key pair. You can also use RSA or PGP keys for signing. See Key purposes and algorithms for more information on signing algorithms.
The keys generated and stored by Cloud Key Management Service (Cloud KMS) are PKIX-compliant. See Creating attestors using the CLI for more information on using PKIX keys and Cloud KMS.
To generate a PKIX key pair, do the following:
Create the private key:
PRIVATE_KEY_FILE="/tmp/ec_private.pem"
openssl ecparam -genkey -name prime256v1 -noout -out ${PRIVATE_KEY_FILE}
Extract the public key from the private key:
PUBLIC_KEY_FILE="/tmp/ec_public.pem"
openssl ec -in ${PRIVATE_KEY_FILE} -pubout -out ${PUBLIC_KEY_FILE}
Create the attestor
Now you can create the attestor itself in Binary Authorization and associate the public key that you created.
To create the attestor, do the following:
Return to the Binary Authorization page in the Google Cloud console.
In the Attestors tab, click Create.
Fill out the fields as follows:
Enter
test-attestorin the Attestor name field.Verify Automatically create a Artifact Analysis note is checked.
Click Add a PKIX Public Key.
Open
/tmp/ec_public.pemin a text editor. This is the public key file that you created in the previous step. Copy the contents of the file to the Public key material text box.Click
Elliptic Curve P-256 - SHA256 Digestin the Signature algorithm pull down.Click Done.
Click Create to create the attestor.
Store the public key ID.
To view your attestor's public key ID after adding it to the attestor, use
gcloud container binauthz attestors describe ${ATTESTOR_NAME}. To create an environment variable to store the public key ID, execute the following command:ATTESTOR_NAME=test-attestor PUBLIC_KEY_ID=$(gcloud container binauthz attestors describe ${ATTESTOR_NAME}\ --format='value(userOwnedGrafeasNote.publicKeys[0].id)')
Configure the policy
Now, you can configure your policy:
Return to the Binary Authorization page in Google Cloud console.
In the Policy tab, click Edit Policy.
Select Allow Only Images That Have Been Approved By the Following Attestors.
Click Add Attestors.
Click Add by project and attestor name.
Enter PROJECT_ID in the Project name field.
Enter
test-attestorin the Attestor name field.Click Add 1 Attestor.
Click Save Policy.
For more information, see Configuring a Policy Using the Console.
Test the policy
You can test the policy you configured above by trying to deploy a sample container image to the cluster. The policy will block deployment because the required attestation has not been made.
For this tutorial, you can use sample images from
Artifact Registry. The image from Artifact Registry is located
at the path us-docker.pkg.dev/google-samples/containers/gke/hello-app:1.0.
The path contains a public image created by Google that contains a "Hello,
World!" sample application.
To try to deploy the image, execute the following command:
kubectl run hello-server --image us-docker.pkg.dev/google-samples/containers/gke/hello-app:1.0 --port 8080
Now, verify that the deployment was blocked by Binary Authorization:
kubectl get pods
The command prints the following message, which indicates that the image was not deployed:
No resources found.
You can get further details about the deployment:
kubectl get event --template \
'{{range.items}}{{"\033[0;36m"}}{{.reason}}:{{"\033[0m"}}\{{.message}}{{"\n"}}{{end}}'
You see a response that resembles the following:
FailedCreate: Error creating: pods POD_NAME is forbidden: admission webhook "imagepolicywebhook.image-policy.k8s.io" denied the request: Image IMAGE_NAME denied by Binary Authorization default admission rule. Image IMAGE_NAME denied by ATTESTOR_NAME: No attestations found
In this output:
- POD_NAME: the name of the Pod.
- IMAGE_NAME: the name of the image.
- ATTESTOR_NAME: the name of the attestor.
Make sure to delete the deployment so you can continue to the next step:
kubectl delete deployment hello-server
Create an attestation
An attestation is a digital document created by a signer that certifies that GKE is allowed to deploy the associated container image. The process of creating an attestation is sometimes called "signing an image."
In this tutorial, you create an attestation for example images from Artifact Registry.
To create an attestation, do the following:
Set variables that store the registry path and digest of the image, and the attestor name:
Artifact Registry
IMAGE_PATH="us-docker.pkg.dev/google-samples/containers/gke/hello-app"
IMAGE_DIGEST="sha256:37e5287945774f27b418ce567cd77f4bbc9ef44a1bcd1a2312369f31f9cce567"
ATTESTOR="test-attestor"
IMAGE_TO_ATTEST=${IMAGE_PATH}@${IMAGE_DIGEST}
Generate the attestation payload:
Artifact Registry
gcloud container binauthz create-signature-payload \
--artifact-url=${IMAGE_PATH}@${IMAGE_DIGEST} > /tmp/generated_payload.json
The payload JSON file has the following contents:
{
"critical": {
  "identity": {
    "docker-reference": "us-docker.pkg.dev/google-samples/containers/gke/hello-app"
  },
  "image": {
    "docker-manifest-digest": "sha256:37e5287945774f27b418ce567cd77f4bbc9ef44a1bcd1a2312369f31f9cce567"
  },
  "type": "Google cloud binauthz container signature"
}
}
Sign the payload with your PKIX private key and output a signature file:
openssl dgst -sha256 -sign ${PRIVATE_KEY_FILE} /tmp/generated_payload.json > /tmp/ec_signatureThe signature file is a digitally-signed version of the payload JSON file you created above.
Create and validate the attestation:
gcloud container binauthz attestations create \
    --project="${PROJECT_ID}" \
    --artifact-url="${IMAGE_TO_ATTEST}" \
    --attestor="projects/${PROJECT_ID}/attestors/${ATTESTOR_NAME}" \
    --signature-file=/tmp/ec_signature \
    --public-key-id="${PUBLIC_KEY_ID}" \
    --validate
where
PUBLIC_KEY_IDis the public key id that you found in Generate a PKIX key pair above.The
validateflag checks that the attestation can be verified by the attestor you configured in your policy.Verify that the attestation was created:
gcloud container binauthz attestations list \
    --attestor=$ATTESTOR_NAME --attestor-project=$PROJECT_ID
For more information on creating attestations, see Creating Attestations.
Retest the policy
Again, test the policy by deploying a sample container image to the cluster.
This time, you must deploy the image using the digest rather than a tag like
1.0 or latest, as Binary Authorization will use the digest to look up
attestations. Here, Binary Authorization allows the image to be deployed because
the required attestation has been made.
To deploy the image, execute the following command:
kubectl run hello-server --image ${IMAGE_PATH}@${IMAGE_DIGEST} --port 8080
To verify that the image was deployed, execute the following command:
kubectl get pods
The command prints a message similar to the following, which indicates that deployment was successful:
NAME                            READY     STATUS    RESTARTS   AGE
hello-server-579859fb5b-h2k8s   1/1       Running   0          1m
To delete the pod, execute the following command:
kubectl delete pod hello-server
Clean up
To avoid incurring charges to your Google Cloud account for the resources used in this tutorial, either delete the project that contains the resources, or keep the project and delete the individual resources.
Delete the cluster that you created in GKE:
gcloud container clusters delete \
    --zone=us-central1-a \
    test-cluster