Nach einer Bereitstellung und nachdem Vorhersagen gemacht wurden, können Sie die Bereitstellung des Modells manuell rückgängig zu machen, damit keine weiteren Kosten anfallen.
Bereitstellung von Codebeispielen rückgängig machen
Web-UI
Öffnen Sie Vision Dashboard und wählen Sie in der linken Navigationsleiste den Tab Modelle mit dem Glühbirnensymbol aus, um die verfügbaren Modelle anzuzeigen.
Wenn Sie die Modelle für ein anderes Projekt ansehen möchten, wählen Sie das Projekt in der Drop-down-Liste rechts oben in der Titelleiste aus.
- Klicken Sie auf die Zeile für das Modell, das Sie verwenden möchten, um die Bilder mit Labels zu versehen.
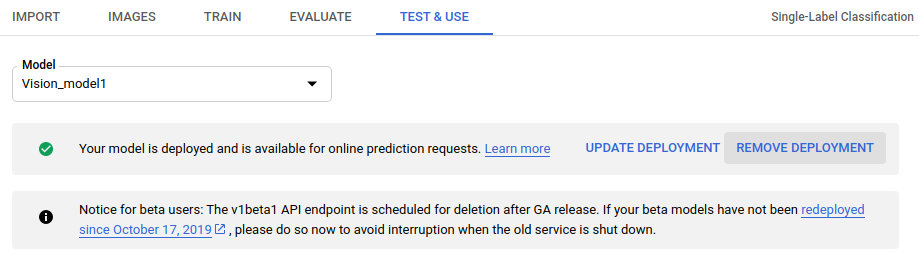
- Wählen Sie den Tab Test und Nutzung direkt unter der Titelleiste aus.
-
Wählen Sie aus dem Banner unterhalb des Modellnamens Deployment entfernen aus, um das Fenster zum Aufheben der Bereitstellung zu öffnen.
-
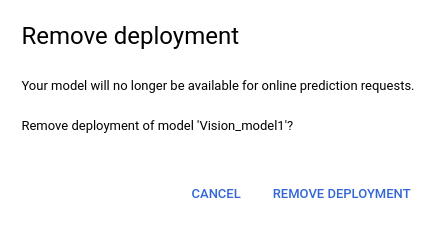
Wählen Sie Remove deployment (Deployment entfernen) aus, um die Bereitstellung des Modells zu entfernen.
-
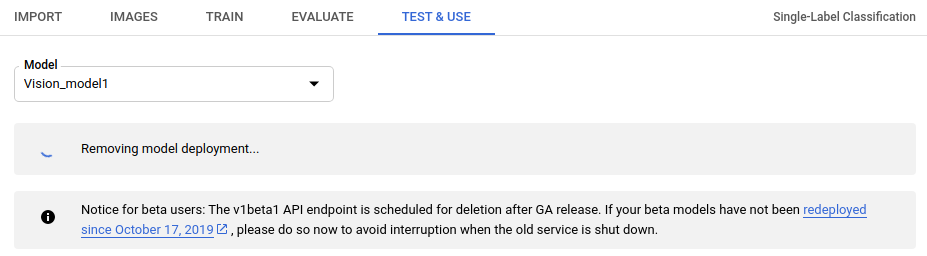
Sie erhalten eine E-Mail, wenn die Bereitstellung vollständig entfernt wurde.
REST
Ersetzen Sie dabei folgende Werte für die Anfragedaten:
- project-id: die ID Ihres GCP-Projekts.
- model-id: die ID Ihres Modells aus der Antwort beim Erstellen des Modells. Sie ist das letzte Element des Modellnamens.
Beispiel:
- Modellname:
projects/project-id/locations/location-id/models/IOD4412217016962778756 - Modell-ID:
IOD4412217016962778756
- Modellname:
HTTP-Methode und URL:
POST https://automl.googleapis.com/v1/projects/PROJECT_ID/locations/us-
central1/models/MODEL_ID:undeploy
Senden Sie die Anfrage mithilfe einer der folgenden Optionen:
curl
Führen Sie folgenden Befehl aus:
curl -X POST \
     -H "Authorization: Bearer $(gcloud auth print-access-token)" \
     -H "x-goog-user-project: project-id" \
     -H "Content-Type: application/json; charset=utf-8" \
     -d "" \
     "https://automl.googleapis.com/v1/projects/PROJECT_ID/locations/us-
central1/models/MODEL_ID:undeploy"
PowerShell
Führen Sie folgenden Befehl aus:
$cred = gcloud auth print-access-token
$headers = @{ "Authorization" = "Bearer $cred"; "x-goog-user-project" = "project-id" }

Invoke-WebRequest `
    -Method POST `
    -Headers $headers `
    -Uri "https://automl.googleapis.com/v1/projects/PROJECT_ID/locations/us-
central1/models/MODEL_ID:undeploy" | Select-Object -Expand Content
{
  "name": "projects/PROJECT_ID/locations/us-central1/operations/OPERATION_ID",
  "metadata": {
    "@type": "type.googleapis.com/google.cloud.automl.v1.OperationMetadata",
    "createTime": "2019-08-07T22:19:50.828033Z",
    "updateTime": "2019-08-07T22:19:50.828033Z",
    "undeployModelDetails": {}
  }
}
Sie können den Status eines Vorgangs mit der folgenden HTTP-Methode und URL abrufen:
GET https://automl.googleapis.com/v1/projects/PROJECT_ID/locations/us-central1/operations/OPERATION_ID
Der Status eines abgeschlossenen Vorgangs sieht ungefähr so aus:
{
  "name": "projects/PROJECT_ID/locations/us-central1/operations/OPERATION_ID",
  "metadata": {
    "@type": "type.googleapis.com/google.cloud.automl.v1.OperationMetadata",
    "createTime": "2019-06-21T16:47:21.704674Z",
    "updateTime": "2019-06-21T17:01:00.802505Z",
    "deployModelDetails": {}
  },
  "done": true,
  "response": {
    "@type": "type.googleapis.com/google.protobuf.Empty"
  }
}
Go
Bevor Sie dieses Beispiel ausprobieren, folgen Sie der Einrichtungsanleitung für diese Sprache auf der Seite Clientbibliotheken.
Java
Bevor Sie dieses Beispiel ausprobieren, folgen Sie der Einrichtungsanleitung für diese Sprache auf der Seite Clientbibliotheken.
Node.js
Bevor Sie dieses Beispiel ausprobieren, folgen Sie der Einrichtungsanleitung für diese Sprache auf der Seite Clientbibliotheken.
Python
Bevor Sie dieses Beispiel ausprobieren, folgen Sie der Einrichtungsanleitung für diese Sprache auf der Seite Clientbibliotheken.
Weitere Sprachen
C#: Folgen Sie der Anleitung zur Einrichtung von C# auf der Seite der Clientbibliotheken und rufen Sie dann die AutoML Vision-Referenzdokumentation für .NET auf.
PHP: Folgen Sie der Anleitung zur Einrichtung von PHP auf der Seite der Clientbibliotheken und rufen Sie dann die AutoML Vision-Referenzdokumentation für PHP auf.
Ruby: Folgen Sie der Anleitung zur Einrichtung von Ruby auf der Seite der Clientbibliotheken und rufen Sie dann die AutoML Vision-Referenzdokumentation für Ruby auf.