Pelajari cara menggunakan fitur pembuatan teks ke gambar dari Imagen di Vertex AI dan memverifikasi watermark digital (SynthID) pada gambar yang dihasilkan. Panduan memulai ini menunjukkan cara menggunakan pembuatan gambar Imagen di konsolGoogle Cloud .
Harga Gambar di Vertex AI didasarkan pada fitur yang Anda gunakan. Untuk mengetahui informasi selengkapnya, lihat Harga.
Sebelum memulai
- Sign in to your Google Cloud account. If you're new to Google Cloud, create an account to evaluate how our products perform in real-world scenarios. New customers also get $300 in free credits to run, test, and deploy workloads.
-
In the Google Cloud console, on the project selector page, select or create a Google Cloud project.
Roles required to select or create a project
- Select a project: Selecting a project doesn't require a specific IAM role—you can select any project that you've been granted a role on.
-
Create a project: To create a project, you need the Project Creator
(
roles/resourcemanager.projectCreator), which contains theresourcemanager.projects.createpermission. Learn how to grant roles.
-
Verify that billing is enabled for your Google Cloud project.
-
Enable the Vertex AI API.
Roles required to enable APIs
To enable APIs, you need the Service Usage Admin IAM role (
roles/serviceusage.serviceUsageAdmin), which contains theserviceusage.services.enablepermission. Learn how to grant roles. -
Make sure that you have the following role or roles on the project: Vertex AI User
Check for the roles
-
In the Google Cloud console, go to the IAM page.
Go to IAM - Select the project.
-
In the Principal column, find all rows that identify you or a group that you're included in. To learn which groups you're included in, contact your administrator.
- For all rows that specify or include you, check the Role column to see whether the list of roles includes the required roles.
Grant the roles
-
In the Google Cloud console, go to the IAM page.
Buka IAM - Pilih project.
- Klik Grant access.
-
Di kolom New principals, masukkan ID pengguna Anda. Biasanya berupa alamat email untuk Akun Google.
- Di daftar Select a role, pilih peran.
- Untuk memberikan peran tambahan, klik Tambahkan peran lain, lalu tambahkan setiap peran tambahan.
- Klik Simpan.
-
-
In the Google Cloud console, on the project selector page, select or create a Google Cloud project.
Roles required to select or create a project
- Select a project: Selecting a project doesn't require a specific IAM role—you can select any project that you've been granted a role on.
-
Create a project: To create a project, you need the Project Creator
(
roles/resourcemanager.projectCreator), which contains theresourcemanager.projects.createpermission. Learn how to grant roles.
-
Verify that billing is enabled for your Google Cloud project.
-
Enable the Vertex AI API.
Roles required to enable APIs
To enable APIs, you need the Service Usage Admin IAM role (
roles/serviceusage.serviceUsageAdmin), which contains theserviceusage.services.enablepermission. Learn how to grant roles. -
Make sure that you have the following role or roles on the project: Vertex AI User
Check for the roles
-
In the Google Cloud console, go to the IAM page.
Go to IAM - Select the project.
-
In the Principal column, find all rows that identify you or a group that you're included in. To learn which groups you're included in, contact your administrator.
- For all rows that specify or include you, check the Role column to see whether the list of roles includes the required roles.
Grant the roles
-
In the Google Cloud console, go to the IAM page.
Buka IAM - Pilih project.
- Klik Grant access.
-
Di kolom New principals, masukkan ID pengguna Anda. Biasanya berupa alamat email untuk Akun Google.
- Di daftar Select a role, pilih peran.
- Untuk memberikan peran tambahan, klik Tambahkan peran lain, lalu tambahkan setiap peran tambahan.
- Klik Simpan.
-
Di Google Cloud konsol, buka halaman Vertex AI > Media Studio .
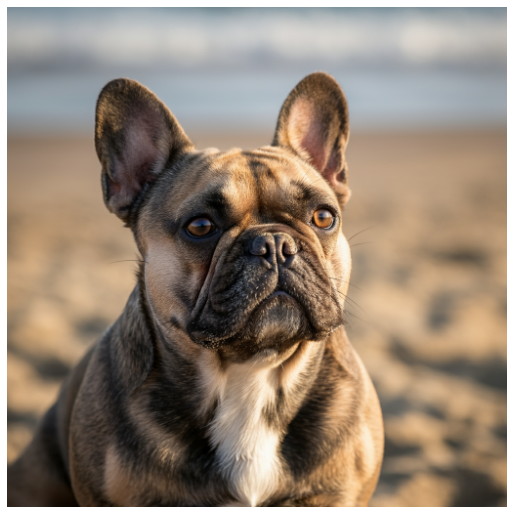
Di kolom Prompt (Write your prompt here), masukkan perintah berikut:
portrait of a french bulldog at the beach, 85mm f/2.8Jika belum dipilih, di kotak Opsi model di panel Parameter, pilih
Imagen 3.Jika belum dipilih, di bagian Rasio aspek pada panel Parameter, pilih
1:1.Di bagian Number of results, ubah Number of results menjadi
2.Klik Generate.
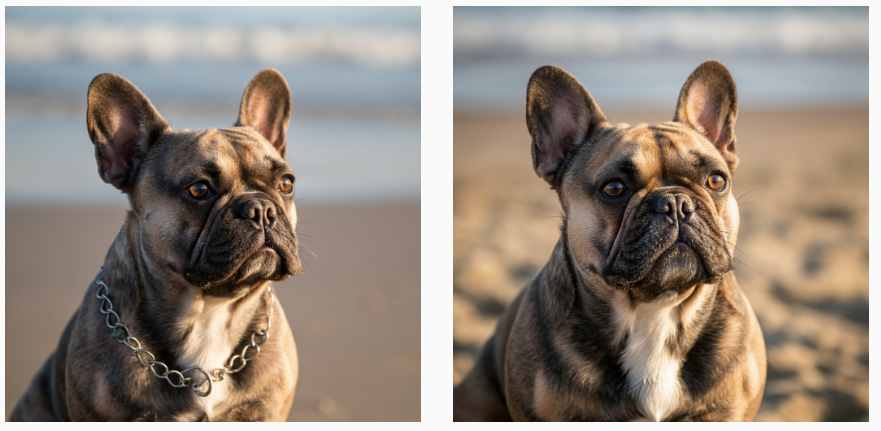
Membuat gambar akan menghasilkan gambar yang mirip dengan gambar berikut:
Untuk menyimpan salinan lokal gambar, klik salah satu gambar.
Di jendela Image details yang terbuka, klik Export.
Di kotak dialog Export image, klik Export.
Di jendela Image detail, klik Export.
Di panel bawah, klik Verifikasi.
Klik Upload gambar.
Pilih gambar yang dihasilkan dan disimpan secara lokal.

- In the Google Cloud console, go to the Manage resources page.
- In the project list, select the project that you want to delete, and then click Delete.
- In the dialog, type the project ID, and then click Shut down to delete the project.
- Pelajari semua fitur AI generatif gambar dalam ringkasan Imagen di Vertex AI.
- Baca panduan penggunaan untuk Imagen di Vertex AI.
- Jelajahi model yang telah dilatih sebelumnya di Model Garden.
- Pelajari praktik terbaik responsible AI dan filter keamanan Vertex AI.
Membuat gambar dan menyimpan salinan lokal
Mengirim permintaan pembuatan teks ke gambar menggunakan Google Cloud konsol.
Memverifikasi watermark digital gambar
Setelah membuat gambar yang diberi watermark, Anda dapat memverifikasi watermark digital dari gambar baru.
Selamat! Anda baru saja menggunakan fitur pembuatan teks ke gambar Imagen untuk membuat gambar baru dan memverifikasi watermark digital salah satu gambar.
Pembersihan
Agar akun Google Cloud Anda tidak dikenai biaya untuk resource yang digunakan di halaman ini, ikuti langkah-langkah berikut.