Vertex AI のテキストから画像を生成する機能で Imagen を使用し、生成された画像のデジタル透かし(SynthID)を検証する方法について説明します。このクイックスタートでは、Google Cloud コンソールで Imagen 画像生成機能を使用する方法について説明します。
Vertex AI で Imagen を使用する場合の料金は、使用する機能によって異なります。詳細については、料金をご覧ください。
始める前に
- Sign in to your Google Cloud account. If you're new to Google Cloud, create an account to evaluate how our products perform in real-world scenarios. New customers also get $300 in free credits to run, test, and deploy workloads.
-
In the Google Cloud console, on the project selector page, select or create a Google Cloud project.
Roles required to select or create a project
- Select a project: Selecting a project doesn't require a specific IAM role—you can select any project that you've been granted a role on.
-
Create a project: To create a project, you need the Project Creator
(
roles/resourcemanager.projectCreator), which contains theresourcemanager.projects.createpermission. Learn how to grant roles.
-
Verify that billing is enabled for your Google Cloud project.
-
Enable the Vertex AI API.
Roles required to enable APIs
To enable APIs, you need the Service Usage Admin IAM role (
roles/serviceusage.serviceUsageAdmin), which contains theserviceusage.services.enablepermission. Learn how to grant roles. -
Make sure that you have the following role or roles on the project: Vertex AI User
Check for the roles
-
In the Google Cloud console, go to the IAM page.
Go to IAM - Select the project.
-
In the Principal column, find all rows that identify you or a group that you're included in. To learn which groups you're included in, contact your administrator.
- For all rows that specify or include you, check the Role column to see whether the list of roles includes the required roles.
Grant the roles
-
In the Google Cloud console, go to the IAM page.
IAM に移動 - プロジェクトを選択します。
- [ アクセスを許可] をクリックします。
-
[新しいプリンシパル] フィールドに、ユーザー ID を入力します。 これは通常、Google アカウントのメールアドレスです。
- [ロールを選択] リストでロールを選択します。
- 追加のロールを付与するには、 [別のロールを追加] をクリックして各ロールを追加します。
- [保存] をクリックします。
-
-
In the Google Cloud console, on the project selector page, select or create a Google Cloud project.
Roles required to select or create a project
- Select a project: Selecting a project doesn't require a specific IAM role—you can select any project that you've been granted a role on.
-
Create a project: To create a project, you need the Project Creator
(
roles/resourcemanager.projectCreator), which contains theresourcemanager.projects.createpermission. Learn how to grant roles.
-
Verify that billing is enabled for your Google Cloud project.
-
Enable the Vertex AI API.
Roles required to enable APIs
To enable APIs, you need the Service Usage Admin IAM role (
roles/serviceusage.serviceUsageAdmin), which contains theserviceusage.services.enablepermission. Learn how to grant roles. -
Make sure that you have the following role or roles on the project: Vertex AI User
Check for the roles
-
In the Google Cloud console, go to the IAM page.
Go to IAM - Select the project.
-
In the Principal column, find all rows that identify you or a group that you're included in. To learn which groups you're included in, contact your administrator.
- For all rows that specify or include you, check the Role column to see whether the list of roles includes the required roles.
Grant the roles
-
In the Google Cloud console, go to the IAM page.
IAM に移動 - プロジェクトを選択します。
- [ アクセスを許可] をクリックします。
-
[新しいプリンシパル] フィールドに、ユーザー ID を入力します。 これは通常、Google アカウントのメールアドレスです。
- [ロールを選択] リストでロールを選択します。
- 追加のロールを付与するには、 [別のロールを追加] をクリックして各ロールを追加します。
- [保存] をクリックします。
-
Google Cloud コンソールで、[Vertex AI] > [Media Studio] ページに移動します。
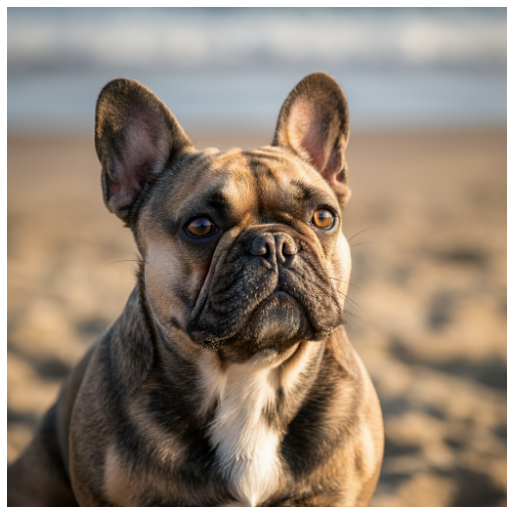
[プロンプト](ここにプロンプトを入力します)フィールドに、次のプロンプトを入力します。
portrait of a french bulldog at the beach, 85mm f/2.8選択されていない場合は、[パラメータ] パネルの [モデル オプション] ボックスで、
Imagen 3を選択します。選択されていない場合は、[パラメータ] パネルの [アスペクト比] セクションで
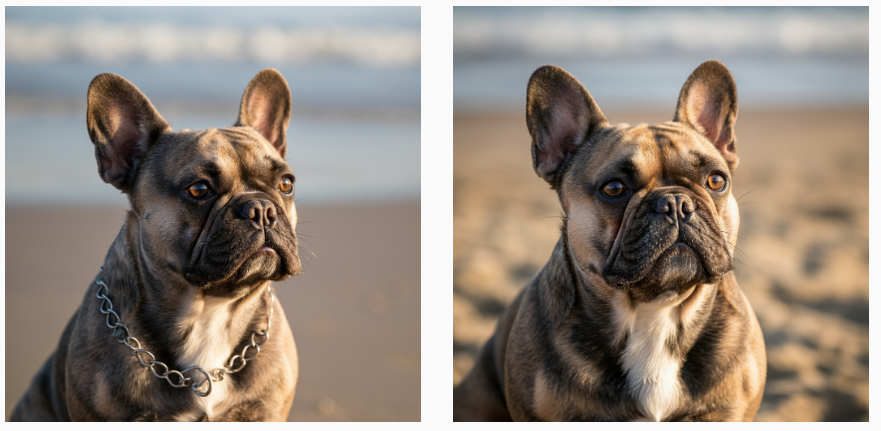
1:1を選択します。[検索結果の表示件数] セクションで、[検索結果の表示件数] を
2に変更します。[生成] をクリックします。
画像を生成すると、次のような画像が生成されます。
画像のローカルコピーを保存するには、いずれかの画像をクリックします。
表示された [画像の詳細] ウィンドウで、[エクスポート] をクリックします。
[画像のエクスポート] ダイアログ ボックスで、[エクスポート] をクリックします。
[画像の詳細] ウィンドウで [エクスポート] をクリックします。
下部パネルで [確認] をクリックします。
[画像をアップロード] をクリックします。
ローカルに保存された生成済み画像を選択します。
- In the Google Cloud console, go to the Manage resources page.
- In the project list, select the project that you want to delete, and then click Delete.
- In the dialog, type the project ID, and then click Shut down to delete the project.
- Vertex AI の Imagen の概要で、画像生成 AI のすべての機能について学習する。
- Vertex AI の Imagen の使用上のガイドラインを確認する。
- Model Garden で、その他の事前トレーニング済みモデルを確認する。
- 責任ある AI のベスト プラクティスと Vertex AI の安全フィルタについて学習する。
画像を生成してローカルコピーを保存する
Google Cloud コンソールを使用して、テキストから画像への生成リクエストを送信します。
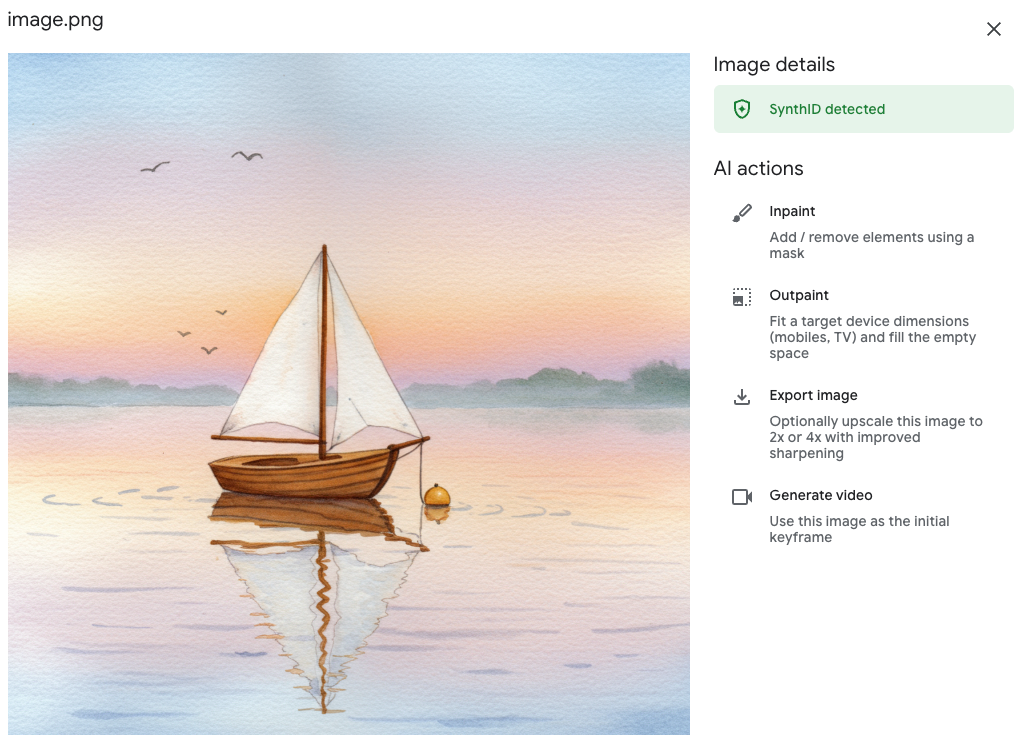
画像のデジタル透かしを確認する
透かし付き画像を生成した後、新しい画像のデジタル透かしを確認できます。
これで完了です。テキストから画像を生成する Imagen の機能を使用して新しい画像を作成し、その画像のデジタル透かしを確認できました。
クリーンアップ
このページで使用したリソースについて、 Google Cloud アカウントに課金されないようにするには、次の操作を行います。