This tutorial walks you through setting up a set of applications that communicate by sending messages through Pub/Sub rather than synchronous RPCs. By decoupling applications, messaging:
- Makes applications more robust
- Might simplify development
For example, the caller (publisher) does not need the receiver (subscriber) to be up and available. The publisher sends a message to Pub/Sub. The publisher doesn't need to know which and how many subscriber applications need to receive the message. As a result, the service can be relied upon to deliver the message to one or more subscriber applications whenever they are available.
System overview
In this tutorial, you start a publisher application that sends a "Hello, World!" message to two subscribers using one-to-many communication, as illustrated in the following diagram:

The two subscriber applications use the same code, but you start them at different times. This process demonstrates how Pub/Sub enables asynchronous communication. To build this system, you complete the following steps:
- Create an IAM service account that the applications use for authentication.
- Set up IAM permissions.
- Create a Pub/Sub topic and a subscription.
- Start three independent applications: one publisher and two subscribers.
Before you begin
- Sign in to your Google Cloud account. If you're new to Google Cloud, create an account to evaluate how our products perform in real-world scenarios. New customers also get $300 in free credits to run, test, and deploy workloads.
-
Install the Google Cloud CLI.
-
If you're using an external identity provider (IdP), you must first sign in to the gcloud CLI with your federated identity.
-
To initialize the gcloud CLI, run the following command:
gcloud init -
Create or select a Google Cloud project.
Roles required to select or create a project
- Select a project: Selecting a project doesn't require a specific IAM role—you can select any project that you've been granted a role on.
-
Create a project: To create a project, you need the Project Creator
(
roles/resourcemanager.projectCreator), which contains theresourcemanager.projects.createpermission. Learn how to grant roles.
-
Create a Google Cloud project:
gcloud projects create PROJECT_ID
Replace
PROJECT_IDwith a name for the Google Cloud project you are creating. -
Select the Google Cloud project that you created:
gcloud config set project PROJECT_ID
Replace
PROJECT_IDwith your Google Cloud project name.
-
Verify that billing is enabled for your Google Cloud project.
-
Enable the Pub/Sub API:
Roles required to enable APIs
To enable APIs, you need the Service Usage Admin IAM role (
roles/serviceusage.serviceUsageAdmin), which contains theserviceusage.services.enablepermission. Learn how to grant roles.gcloud services enable pubsub.googleapis.com
-
Create local authentication credentials for your user account:
gcloud auth application-default login
If an authentication error is returned, and you are using an external identity provider (IdP), confirm that you have signed in to the gcloud CLI with your federated identity.
-
Grant roles to your user account. Run the following command once for each of the following IAM roles:
roles/pubsub.publisher, roles/pubsub.subscribergcloud projects add-iam-policy-binding PROJECT_ID --member="user:USER_IDENTIFIER" --role=ROLE
Replace the following:
PROJECT_ID: Your project ID.USER_IDENTIFIER: The identifier for your user account. For example,myemail@example.com.ROLE: The IAM role that you grant to your user account.
-
Install the Google Cloud CLI.
-
If you're using an external identity provider (IdP), you must first sign in to the gcloud CLI with your federated identity.
-
To initialize the gcloud CLI, run the following command:
gcloud init -
Create or select a Google Cloud project.
Roles required to select or create a project
- Select a project: Selecting a project doesn't require a specific IAM role—you can select any project that you've been granted a role on.
-
Create a project: To create a project, you need the Project Creator
(
roles/resourcemanager.projectCreator), which contains theresourcemanager.projects.createpermission. Learn how to grant roles.
-
Create a Google Cloud project:
gcloud projects create PROJECT_ID
Replace
PROJECT_IDwith a name for the Google Cloud project you are creating. -
Select the Google Cloud project that you created:
gcloud config set project PROJECT_ID
Replace
PROJECT_IDwith your Google Cloud project name.
-
Verify that billing is enabled for your Google Cloud project.
-
Enable the Pub/Sub API:
Roles required to enable APIs
To enable APIs, you need the Service Usage Admin IAM role (
roles/serviceusage.serviceUsageAdmin), which contains theserviceusage.services.enablepermission. Learn how to grant roles.gcloud services enable pubsub.googleapis.com
-
Create local authentication credentials for your user account:
gcloud auth application-default login
If an authentication error is returned, and you are using an external identity provider (IdP), confirm that you have signed in to the gcloud CLI with your federated identity.
-
Grant roles to your user account. Run the following command once for each of the following IAM roles:
roles/pubsub.publisher, roles/pubsub.subscribergcloud projects add-iam-policy-binding PROJECT_ID --member="user:USER_IDENTIFIER" --role=ROLE
Replace the following:
PROJECT_ID: Your project ID.USER_IDENTIFIER: The identifier for your user account. For example,myemail@example.com.ROLE: The IAM role that you grant to your user account.
Install Python
This tutorial uses the Pub/Sub Client Libraries, which requires Python 3.7 or higher. Complete the instructions for installing Python.
Set up your Pub/Sub project
To manage message flow between publishing and subscribing applications, you create a topic and two different subscriptions.
Create a Pub/Sub topic
Create a topic with the ID hello_topic:
gcloud pubsub topics create hello_topic
Create Pub/Sub subscriptions
Create two subscriptions and attach them to your topic.
These subscriptions are a StreamingPull subscription, which is a type of pull subscription.
Subscription 1
Create a subscription with the ID sub_one and attach it to hello_topic.
gcloud pubsub subscriptions create sub_one --topic=hello_topic
Subscription 2
Create a subscription with the ID sub_two and attach it to hello_topic.
gcloud pubsub subscriptions create sub_two --topic=hello_topic
Build the one-to-many system
Download the publisher and subscriber code
Download the Pub/Sub Python files needed for this tutorial.
git clone https://github.com/googleapis/python-pubsub.git
Close any open terminals before proceeding.
Set up three terminals
Start one terminal for each tutorial application (one publisher and two subscribers). For convenience, this tutorial calls these terminals:
- publisher terminal
- sub_one terminal
- sub_two terminal
In the publisher terminal, create and activate a Python virtual environment named
pyenv-qs.Bash
python -m venv pyenv-qs
source pyenv-qs/bin/activate
PowerShell
py -m venv pyenv-qs
.\pyenv-qs\Scripts\activate
In the sub_one and sub_two terminals, run the following command:
Bash
source pyenv-qs/bin/activate
PowerShell
.\pyenv-qs\Scripts\activate
After you run the activate command, your command prompt includes the following value
(pyenv-qs) $.In the publisher terminal, install the Pub/Sub Python client library using
pip:python -m pip install --upgrade google-cloud-pubsub
In all three terminals, set up an environment variable with your current project ID. This gcloud command determines your selected project ID and sets it as a variable:
Bash
export PROJECT=`gcloud config get-value project`
PowerShell
$env:PROJECT=$(gcloud config get-value project)
In all three terminals, change to the project path that contains the sample code.
cd python-pubsub/samples/snippets/quickstart/
Start the apps and observe message flow
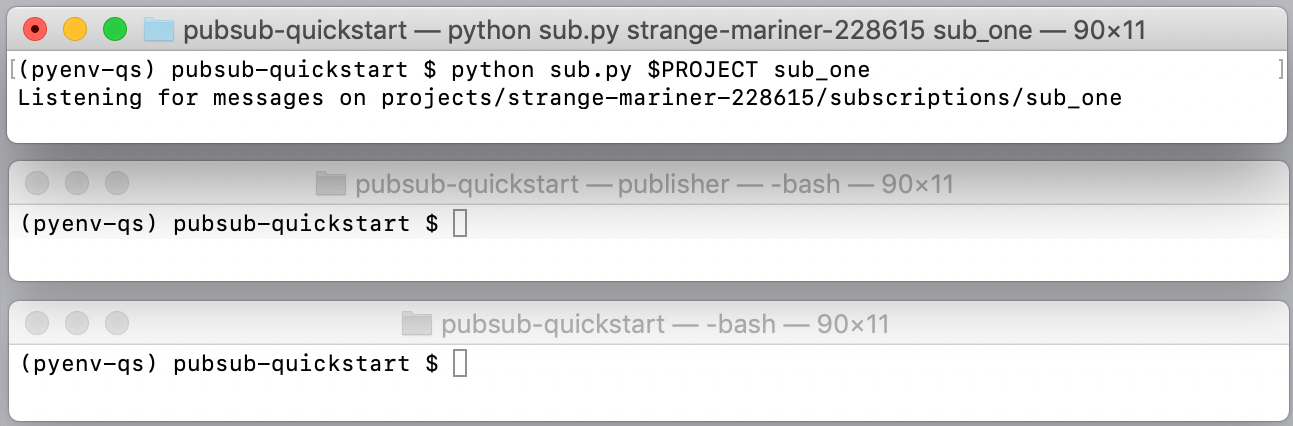
Start the Subscriber 1 application
In the sub_one terminal, start Subscriber 1:
Bash
python sub.py $PROJECT sub_one
PowerShell
py sub.py $env:PROJECT sub_one
Once started, this application opens a bidirectional streaming connection with the server. Pub/Sub delivers messages over the stream.
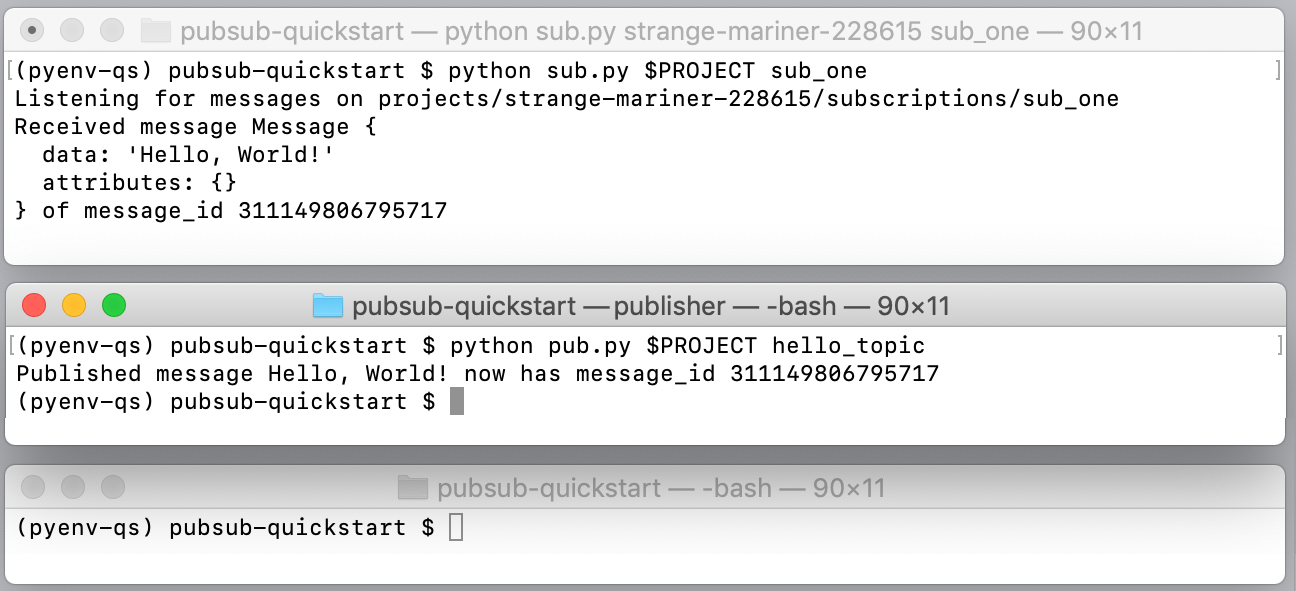
Start the Publisher application
In the publisher terminal, start the Publisher application:
Bash
python pub.py $PROJECT hello_topic
PowerShell
py pub.py $env:PROJECT hello_topic
After the publisher application starts, the Pub/Sub system does the following:
The Publisher application sends a "Hello, World!" message to Pub/Sub while remaining unaware of any existing subscriptions. The server also assigns a message ID.
The Subscriber 1 application receives the 'Hello World' message, prints it, and sends an acknowledgment to Pub/Sub.
The Publisher application prints the acknowledgment. The acknowledgment tells Pub/Sub that the message has been processed successfully and does not need to be re-sent to this or any other sub_one subscriber.
Pub/Sub removes the message from sub_one.
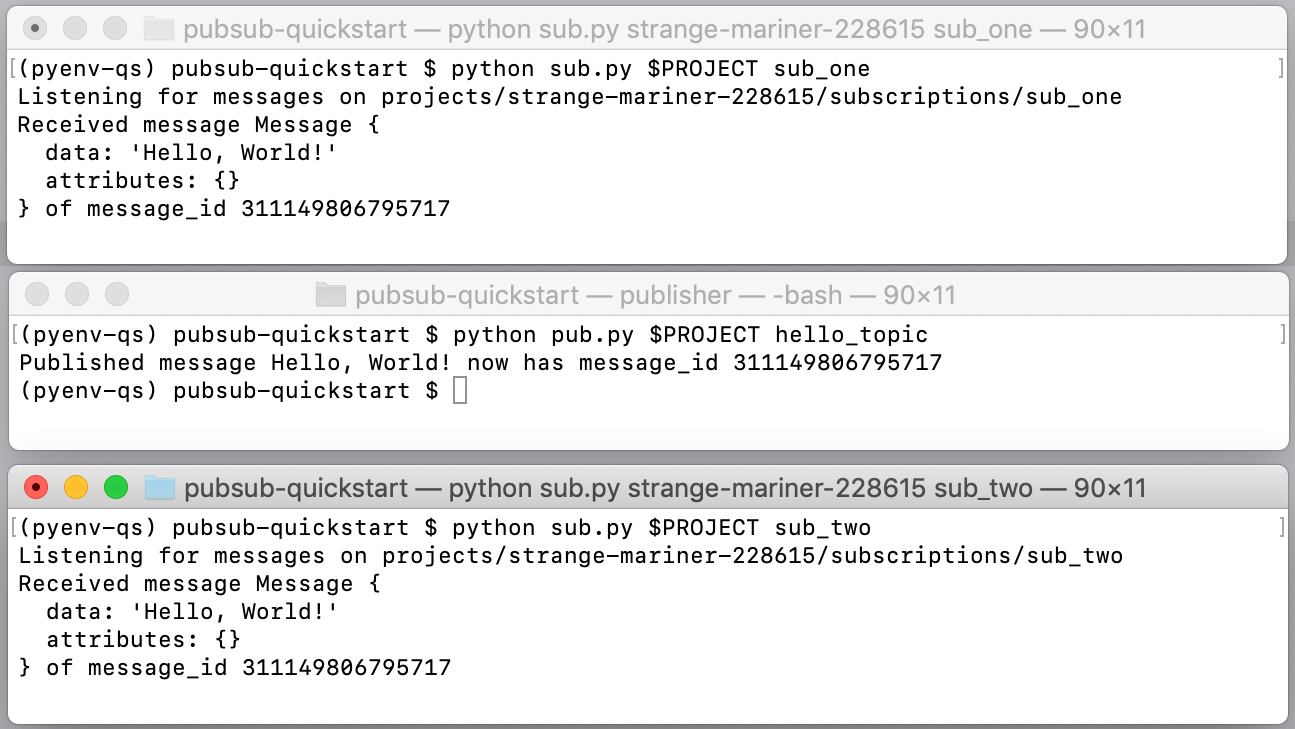
Start the Subscriber 2 application
In the sub_two terminal, start Subscriber 2:
Bash
python sub.py $PROJECT sub_two
PowerShell
py sub.py $env:PROJECT sub_two
This subscriber receives messages delivered to the sub_two subscription.
Subscriber 2 reuses the sub.py script. The difference is that Subscriber
2 isn't started until after the Publisher has sent the message to the topic
and subscriptions. If Publisher were calling Subscriber 2 directly, the
publishing application would either have to wait until Subscriber 2 comes up
or it would have to time out. Pub/Sub manages this process by
effectively saving the message for Subscriber 2.
You are now ready to develop with Pub/Sub!
How did it go?
Additional resources and links are available on the Pub/Sub support page.
Clean up
- Stop all running applications.
- Delete the sample code directory from your local environment.
Delete the topic.
gcloud pubsub topics delete hello_topic
Delete the subscriptions.
gcloud pubsub subscriptions delete sub_one
gcloud pubsub subscriptions delete sub_two
Shut down the tutorial project in the IAM & admin section of the Google Cloud console.
-
Optional: Revoke the authentication credentials that you created, and delete the local credential file.
gcloud auth application-default revoke
-
Optional: Revoke credentials from the gcloud CLI.
gcloud auth revoke
What's next
Here are some things that you can try:
Examine the tutorial's
pub.pyandsub.pycode and browse other Pub/Sub samples on GitHub. As an exercise, create a version ofpub.pythat publishes the local time every second.Learn to batch messages.
Using Push subscriptions, receive messages that trigger App Engine endpoints or Cloud Functions.
Retrieve previously acknowledged messages using replay. By default, Pub/Sub removes acknowledged messages from subscriptions. In this tutorial, for instance, you wouldn't be able to rerun
sub.pyto receive the "Hello, World!" message again. The replay feature lets you set up subscriptions so that you can receive messages after they have been acknowledged.Get started with client libraries in other languages.