Modelle verwalten

Ein Modell wird mithilfe eines von Ihnen bereitgestellten, vorbereiteten Datasets trainiert. Das AutoML Video Intelligence-Objekt-Tracking verwendet die Elemente aus Ihrem Dataset, um die Leistung des Modells zu verbessern, zu testen und evaluate. Als Nächstes sollten Sie die Ergebnisse prüfen, das Trainings-Dataset nach Bedarf anpassen und mithilfe des verbesserten Datasets ein neues Modell trainieren.

Das Trainieren eines Modells kann mehrere Stunden dauern. Mit der AutoML API haben Sie die Möglichkeit, den Status des Trainings zu prüfen.

AutoML Video Intelligence Object Tracking erstellt jedes Mal ein neues Modell, wenn Sie mit dem Training beginnen. Daher kann das Projekt zahlreiche Modelle enthalten. Sie können eine Liste der verfügbaren Modelle in Ihrem Projekt abrufen und nicht mehr benötigte Modelle löschen.

Ein Modell hat eine Lebensdauer von höchstens zwei Jahren. Sie müssen ein neues Modell erstellen und trainieren, um Objekte nach dieser Zeit weiter verfolgen zu können.

cURL oder PowerShell verwenden

Legen Sie die folgende Umgebungsvariable fest, um die Ausführung der curl- oder PowerShell-Beispiele in diesem Thema zu vereinfachen. Ersetzen Sie project-id durch den Namen Ihres Google Cloud-Projekts.

export PROJECT_ID="project-id"

Modelle trainieren

Wenn Sie ein Dataset mit einer ausreichenden Anzahl von Trainingselementen mit Labels haben, können Sie das Modell erstellen und trainieren.

Web-UI

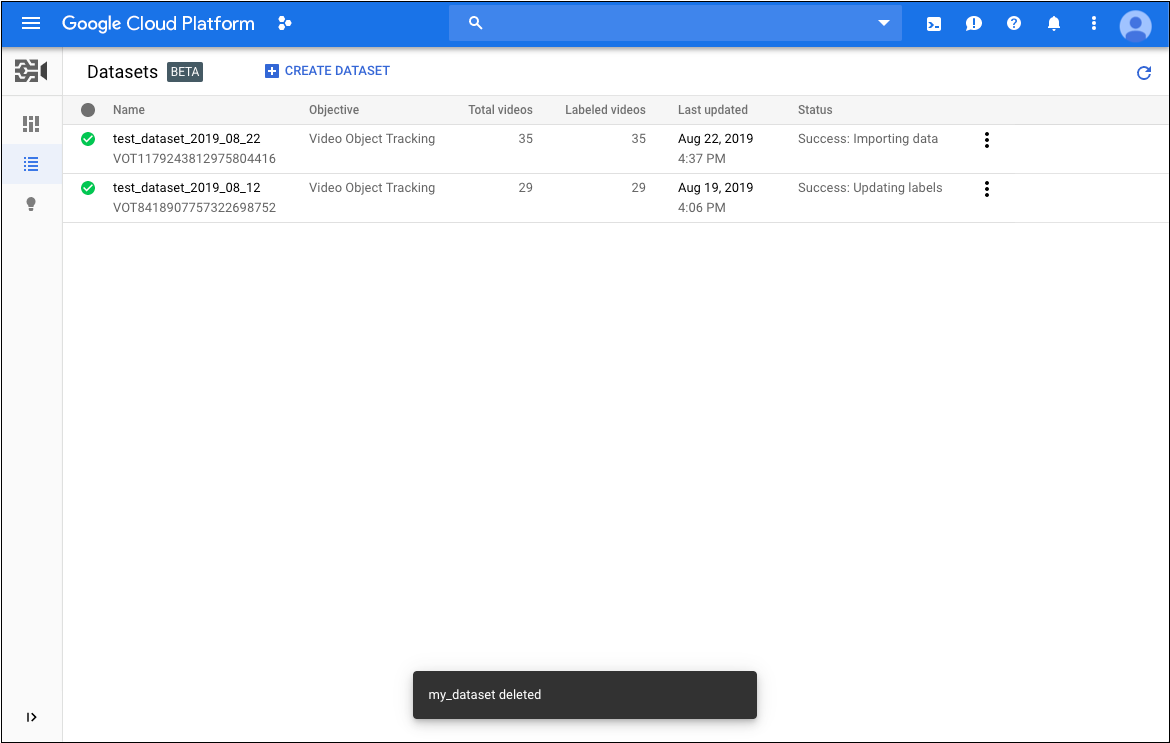
  1. Öffnen Sie die AutoML Video Object Tracking-UI und rufen Sie die Seite Datasets auf.

    Seite „Datasets“ in der Google Cloud Console
  2. Wählen Sie das Dataset aus, das Sie zum Trainieren des Modells verwenden möchten.

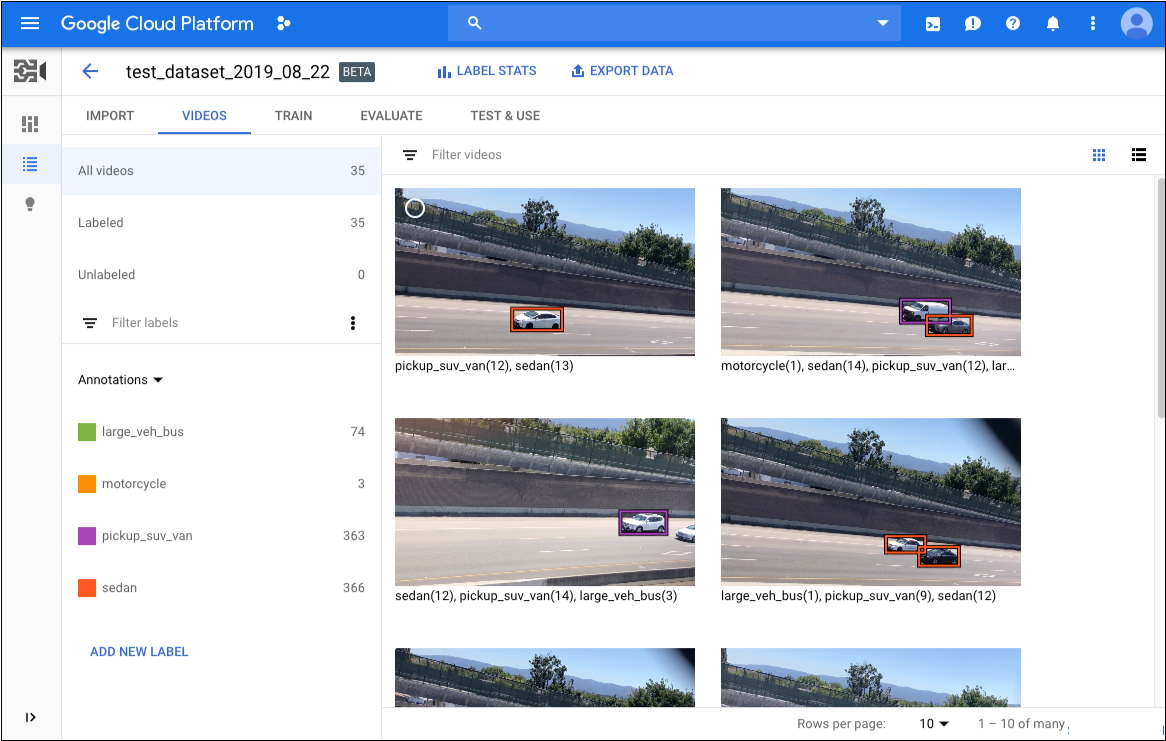
    Der Anzeigename des ausgewählten Datasets wird in der Titelleiste angezeigt. Die einzelnen Elemente im Dataset werden zusammen mit ihren Labels aufgelistet.

    Tab "Videos" mit zwei Videos
  3. Nachdem Sie die Datasets überprüft haben, klicken Sie unterhalb der Titelleiste auf den Tab Trainieren.

    Auf der Seite "Training" können Sie eine grundlegende Analyse des Datasets ausführen. Hier finden Sie auch Informationen darüber, ob das Dataset für das Training geeignet ist. Wenn vom AutoML Video-Objekt-Tracking Änderungen vorgeschlagen werden, sollten Sie eventuell zur Seite Videos zurückkehren und Elemente oder Labels hinzufügen.

  4. Wenn das Dataset fertig ist, klicken Sie auf Training starten, um ein neues Modell zu erstellen. Sie können auch auf Neues Modell trainieren klicken, wenn Sie ein zusätzliches Modell erstellen möchten.

REST

Bevor Sie die Anfragedaten verwenden, ersetzen Sie die folgenden Werte:

  • dataset-id: Der Name des Ziel-Datasets. Beispiel: Anzeigename my_dataset_01.
  • model-name: Ersetzen Sie diesen Wert durch einen Namen, den Sie für Ihr Modell auswählen.
  • Hinweis:
    • project-number: Nummer Ihres Projekts
    • location-id: Die Cloud-Region, in der die Annotation erfolgen soll. Unterstützte Cloud-Regionen sind: us-east1, us-west1, europe-west1, asia-east1. Wenn keine Region angegeben ist, wird eine Region basierend auf dem Speicherort der Videodatei festgelegt.

HTTP-Methode und URL:

POST https://automl.googleapis.com/v1beta1/projects/project-number/locations/location-id/models

JSON-Text der Anfrage:

{
  "datasetId": "dataset-id",
  "displayName": "model-name",
  "videoObjectTrackingModelMetadata": {},
}

Wenn Sie die Anfrage senden möchten, wählen Sie eine der folgenden Optionen aus:

curl

Speichern Sie den Anfragetext in einer Datei mit dem Namen request.json und führen Sie den folgenden Befehl aus:

curl -X POST \
-H "Authorization: Bearer $(gcloud auth print-access-token)" \
-H "x-goog-user-project: project-number" \
-H "Content-Type: application/json; charset=utf-8" \
-d @request.json \
"https://automl.googleapis.com/v1beta1/projects/project-number/locations/location-id/models"

PowerShell

Speichern Sie den Anfragetext in einer Datei mit dem Namen request.json und führen Sie den folgenden Befehl aus:

$cred = gcloud auth print-access-token
$headers = @{ "Authorization" = "Bearer $cred"; "x-goog-user-project" = "project-number" }

Invoke-WebRequest `
-Method POST `
-Headers $headers `
-ContentType: "application/json; charset=utf-8" `
-InFile request.json `
-Uri "https://automl.googleapis.com/v1beta1/projects/project-number/locations/location-id/models" | Select-Object -Expand Content
Sie sollten eine Vorgangs-ID für das Modelltraining erhalten. Das obige Beispiel zeigt eine Antwort, die die ID des Modelltrainings VOT1741767155885539328 enthält.

Java

Zur Authentifizierung bei AutoML Video Object Tracking richten Sie Standardanmeldedaten für Anwendungen ein. Weitere Informationen finden Sie unter Authentifizierung für eine lokale Entwicklungsumgebung einrichten.

import com.google.api.gax.longrunning.OperationFuture;
import com.google.cloud.automl.v1beta1.AutoMlClient;
import com.google.cloud.automl.v1beta1.LocationName;
import com.google.cloud.automl.v1beta1.Model;
import com.google.cloud.automl.v1beta1.OperationMetadata;
import com.google.cloud.automl.v1beta1.VideoObjectTrackingModelMetadata;
import java.io.IOException;
import java.util.concurrent.ExecutionException;

class VideoObjectTrackingCreateModel {

  public static void main(String[] args)
      throws IOException, ExecutionException, InterruptedException {
    // TODO(developer): Replace these variables before running the sample.
    String projectId = "YOUR_PROJECT_ID";
    String datasetId = "YOUR_DATASET_ID";
    String displayName = "YOUR_DATASET_NAME";
    createModel(projectId, datasetId, displayName);
  }

  // Create a model
  static void createModel(String projectId, String datasetId, String displayName)
      throws IOException, ExecutionException, InterruptedException {
    // Initialize client that will be used to send requests. This client only needs to be created
    // once, and can be reused for multiple requests. After completing all of your requests, call
    // the "close" method on the client to safely clean up any remaining background resources.
    try (AutoMlClient client = AutoMlClient.create()) {
      // A resource that represents Google Cloud Platform location.
      LocationName projectLocation = LocationName.of(projectId, "us-central1");
      // Set model metadata.
      VideoObjectTrackingModelMetadata metadata =
          VideoObjectTrackingModelMetadata.newBuilder().build();
      Model model =
          Model.newBuilder()
              .setDisplayName(displayName)
              .setDatasetId(datasetId)
              .setVideoObjectTrackingModelMetadata(metadata)
              .build();

      // Create a model with the model metadata in the region.
      OperationFuture<Model, OperationMetadata> future =
          client.createModelAsync(projectLocation, model);
      // OperationFuture.get() will block until the model is created, which may take several hours.
      // You can use OperationFuture.getInitialFuture to get a future representing the initial
      // response to the request, which contains information while the operation is in progress.
      System.out.format("Training operation name: %s%n", future.getInitialFuture().get().getName());
      System.out.println("Training started...");
    }
  }
}

Node.js

Zur Authentifizierung bei AutoML Video Object Tracking richten Sie Standardanmeldedaten für Anwendungen ein. Weitere Informationen finden Sie unter Authentifizierung für eine lokale Entwicklungsumgebung einrichten.

/**
 * TODO(developer): Uncomment these variables before running the sample.
 */
// const projectId = 'YOUR_PROJECT_ID';
// const location = 'us-central1';
// const dataset_id = 'YOUR_DATASET_ID';
// const displayName = 'YOUR_DISPLAY_NAME';

// Imports the Google Cloud AutoML library
const {AutoMlClient} = require('@google-cloud/automl').v1beta1;

// Instantiates a client
const client = new AutoMlClient();

async function createModel() {
  // Construct request
  const request = {
    parent: client.locationPath(projectId, location),
    model: {
      displayName: displayName,
      datasetId: datasetId,
      videoObjectTrackingModelMetadata: {},
    },
  };

  // Don't wait for the LRO
  const [operation] = await client.createModel(request);
  console.log(`Training started... ${operation}`);
  console.log(`Training operation name: ${operation.name}`);
}

createModel();

Python

Zur Authentifizierung bei AutoML Video Object Tracking richten Sie Standardanmeldedaten für Anwendungen ein. Weitere Informationen finden Sie unter Authentifizierung für eine lokale Entwicklungsumgebung einrichten.

from google.cloud import automl_v1beta1 as automl

def create_model(
    project_id="YOUR_PROJECT_ID",
    dataset_id="YOUR_DATASET_ID",
    display_name="your_models_display_name",
):
    """Create a automl video classification model."""
    client = automl.AutoMlClient()

    # A resource that represents Google Cloud Platform loacation.
    project_location = f"projects/{project_id}/locations/us-central1"
    # Leave model unset to use the default base model provided by Google
    metadata = automl.VideoObjectTrackingModelMetadata()
    model = automl.Model(
        display_name=display_name,
        dataset_id=dataset_id,
        video_object_tracking_model_metadata=metadata,
    )

    # Create a model with the model metadata in the region.
    response = client.create_model(parent=project_location, model=model)

    print(f"Training operation name: {response.operation.name}")
    print("Training started...")

Status eines Vorgangs abrufen

Sie können bei Bedarf den Status einer lang andauernden Aufgabe wie das Importieren von Elementen in ein Dataset oder das Trainieren eines Modells prüfen. Verwenden Sie hierfür die Vorgangs-ID aus der Antwort zu Beginn der Aufgabe.

REST

Bevor Sie die Anfragedaten verwenden, ersetzen Sie die folgenden Werte:

  • operation-id: Die ID des lang andauernden Vorgangs, der für die Anfrage erstellt und in der Antwort beim Start des Vorgangs angegeben wurde, z. B. VOT12345....
  • Hinweis:
    • project-number: Nummer Ihres Projekts
    • location-id: Die Cloud-Region, in der die Annotation erfolgen soll. Unterstützte Cloud-Regionen sind: us-east1, us-west1, europe-west1, asia-east1. Wenn keine Region angegeben ist, wird eine Region basierend auf dem Speicherort der Videodatei festgelegt.

HTTP-Methode und URL:

GET https://automl.googleapis.com/v1beta1/projects/project-number/locations/location-id/operations/operation-id

Senden Sie die Anfrage mithilfe einer der folgenden Optionen:

curl

Führen Sie folgenden Befehl aus:

curl -X GET \
-H "Authorization: Bearer $(gcloud auth print-access-token)" \
-H "x-goog-user-project: project-number" \
"https://automl.googleapis.com/v1beta1/projects/project-number/locations/location-id/operations/operation-id"

PowerShell

Führen Sie folgenden Befehl aus:

$cred = gcloud auth print-access-token
$headers = @{ "Authorization" = "Bearer $cred"; "x-goog-user-project" = "project-number" }

Invoke-WebRequest `
-Method GET `
-Headers $headers `
-Uri "https://automl.googleapis.com/v1beta1/projects/project-number/locations/location-id/operations/operation-id" | Select-Object -Expand Content
Der Importvorgang kann einige Zeit in Anspruch nehmen. Wenn der Import abgeschlossen ist, wird im Vorgangsstatus angezeigt und es sollten keine Fehler aufgelistet sein, wie im obigen Beispiel zu sehen.done: true
  • operation-name: Der Name des Vorgangs, der von der AutoML Video Intelligence Object Tracking API zurückgegeben wird. Der Vorgangsname hat das Format projects/project-number/locations/location-id/operations/operation-id.

Java

Zur Authentifizierung bei AutoML Video Object Tracking richten Sie Standardanmeldedaten für Anwendungen ein. Weitere Informationen finden Sie unter Authentifizierung für eine lokale Entwicklungsumgebung einrichten.

import com.google.cloud.automl.v1beta1.AutoMlClient;
import com.google.longrunning.Operation;
import java.io.IOException;

class GetOperationStatus {

  static void getOperationStatus() throws IOException {
    // TODO(developer): Replace these variables before running the sample.
    String operationFullId = "projects/[projectId]/locations/us-central1/operations/[operationId]";
    getOperationStatus(operationFullId);
  }

  // Get the status of an operation
  static void getOperationStatus(String operationFullId) throws IOException {
    // Initialize client that will be used to send requests. This client only needs to be created
    // once, and can be reused for multiple requests. After completing all of your requests, call
    // the "close" method on the client to safely clean up any remaining background resources.
    try (AutoMlClient client = AutoMlClient.create()) {
      // Get the latest state of a long-running operation.
      Operation operation = client.getOperationsClient().getOperation(operationFullId);

      // Display operation details.
      System.out.println("Operation details:");
      System.out.format("\tName: %s%n", operation.getName());
      System.out.format("\tMetadata Type Url: %s%n", operation.getMetadata().getTypeUrl());
      System.out.format("\tDone: %s%n", operation.getDone());
      if (operation.hasResponse()) {
        System.out.format("\tResponse Type Url: %s%n", operation.getResponse().getTypeUrl());
      }
      if (operation.hasError()) {
        System.out.println("\tResponse:");
        System.out.format("\t\tError code: %s%n", operation.getError().getCode());
        System.out.format("\t\tError message: %s%n", operation.getError().getMessage());
      }
    }
  }
}

Node.js

Zur Authentifizierung bei AutoML Video Object Tracking richten Sie Standardanmeldedaten für Anwendungen ein. Weitere Informationen finden Sie unter Authentifizierung für eine lokale Entwicklungsumgebung einrichten.

/**
 * TODO(developer): Uncomment these variables before running the sample.
 */
// const projectId = 'YOUR_PROJECT_ID';
// const location = 'us-central1';
// const operationId = 'YOUR_OPERATION_ID';

// Imports the Google Cloud AutoML library
const {AutoMlClient} = require('@google-cloud/automl').v1beta1;

// Instantiates a client
const client = new AutoMlClient();

async function getOperationStatus() {
  // Construct request
  const request = {
    name: `projects/${projectId}/locations/${location}/operations/${operationId}`,
  };

  const [response] = await client.operationsClient.getOperation(request);

  console.log(`Name: ${response.name}`);
  console.log('Operation details:');
  console.log(response);
}

getOperationStatus();

Python

Zur Authentifizierung bei AutoML Video Object Tracking richten Sie Standardanmeldedaten für Anwendungen ein. Weitere Informationen finden Sie unter Authentifizierung für eine lokale Entwicklungsumgebung einrichten.

from google.cloud import automl_v1beta1 as automl

def get_operation_status(
    operation_full_id="projects/YOUR_PROJECT_ID/locations/us-central1/"
    "operations/YOUR_OPERATION_ID",
):
    """Get operation status."""
    client = automl.AutoMlClient()

    # Get the latest state of a long-running operation.
    response = client._transport.operations_client.get_operation(operation_full_id)

    print(f"Name: {response.name}")
    print("Operation details:")
    print(response)

Vorgang abbrechen

Sie können eine Import-, Trainings- oder Batchvorhersageaufgabe mithilfe der Vorgangs-ID abbrechen.

REST

Bevor Sie die Anfragedaten verwenden, ersetzen Sie die folgenden Werte:

  • operation id: Wird in der Antwort beim Start des Vorgangs angegeben, z. B. VOT123....
  • Hinweis:
    • project-id: ID Ihres GCP-Projekts
    • location-id: Die Cloud-Region, in der die Annotation erfolgen soll. Unterstützte Cloud-Regionen sind: us-east1, us-west1, europe-west1, asia-east1. Wenn keine Region angegeben ist, wird eine Region basierend auf dem Speicherort der Videodatei festgelegt.

HTTP-Methode und URL:

POST https://automl.googleapis.com/v1beta1/projects/project-id/locations/location-id/operations/operation-id:cancel

Wenn Sie die Anfrage senden möchten, maximieren Sie eine der folgenden Optionen:

Sie sollten einen erfolgreichen Statuscode (2xx) und eine leere Antwort als Ausgabe erhalten.

Java

Zur Authentifizierung bei AutoML Video Object Tracking richten Sie Standardanmeldedaten für Anwendungen ein. Weitere Informationen finden Sie unter Authentifizierung für eine lokale Entwicklungsumgebung einrichten.


import com.google.cloud.automl.v1beta1.AutoMlClient;
import io.grpc.StatusRuntimeException;
import java.io.IOException;

class CancelOperation {

  static void cancelOperation() throws IOException, InterruptedException, StatusRuntimeException {
    // TODO(developer): Replace these variables before running the sample.
    String projectId = "YOUR_PROJECT_ID";
    String location = "us-central1";
    String operationId = "YOUR_OPERATION_ID";
    String operationFullId =
        String.format("projects/%s/locations/%s/operations/%s", projectId, location, operationId);
    cancelOperation(operationFullId);
  }

  static void cancelOperation(String operationFullId)
      throws IOException, InterruptedException, StatusRuntimeException {
    // Initialize client that will be used to send requests. This client only needs to be created
    // once, and can be reused for multiple requests. After completing all of your requests, call
    // the "close" method on the client to safely clean up any remaining background resources.
    try (AutoMlClient client = AutoMlClient.create()) {
      client.getOperationsClient().cancelOperation(operationFullId);
      System.out.println("Operation cancelled");
    }
  }
}

Informationen zu einem Modell abrufen

Wenn das Training abgeschlossen ist, können Sie Informationen zu dem neu erstellten Modell abrufen.

Bei den Beispielen in diesem Abschnitt werden die grundlegenden Metadaten zu einem Modell zurückgegeben. Weitere Informationen zur Treffsicherheit und Einsatzfähigkeit eines Modells finden Sie unter Modelle bewerten.

Web-UI

  1. Rufen Sie in der AutoML Video Object Tracking-UI die Seite Models (Modelle) auf.

    Seite "Modelle" mit einem Modell
  2. Klicken Sie auf den Namen des Modells, das Sie anzeigen möchten.

REST

Bevor Sie die Anfragedaten verwenden, ersetzen Sie die folgenden Werte:

  • model-id: Die ID Ihres Modells aus der Antwort beim Erstellen des Modells. Sie ist das letzte Element des Modellnamens. Beispiel:
    • Modellname: projects/project-number/locations/location-id/models/model-id
    • model id: model-id
  • dataset-id: Ersetzen Sie diesen Wert durch die Dataset-ID für Ihr Dataset (nicht den Anzeigenamen). Beispiel: VOT3940649673949184000
  • project-number: Die Nummer Ihres Projekts

HTTP-Methode und URL:

GET https://automl.googleapis.com/v1beta1/projects/project-id/locations/location-id/models/model-id

JSON-Text der Anfrage:

{
  "displayName": "display-name",
  "dataset_id": "dataset-id",
  "videoClassificationModelMetadata": {}
}

Wenn Sie die Anfrage senden möchten, maximieren Sie eine der folgenden Optionen:

Sie sollten in etwa folgende JSON-Antwort erhalten:

Java

Zur Authentifizierung bei AutoML Video Object Tracking richten Sie Standardanmeldedaten für Anwendungen ein. Weitere Informationen finden Sie unter Authentifizierung für eine lokale Entwicklungsumgebung einrichten.

import com.google.cloud.automl.v1beta1.AutoMlClient;
import com.google.cloud.automl.v1beta1.Model;
import com.google.cloud.automl.v1beta1.ModelName;
import io.grpc.StatusRuntimeException;
import java.io.IOException;

class GetModel {

  static void getModel() throws IOException, StatusRuntimeException {
    // TODO(developer): Replace these variables before running the sample.
    String projectId = "YOUR_PROJECT_ID";
    String modelId = "YOUR_MODEL_ID";
    getModel(projectId, modelId);
  }

  // Get a model
  static void getModel(String projectId, String modelId)
      throws IOException, StatusRuntimeException {
    // Initialize client that will be used to send requests. This client only needs to be created
    // once, and can be reused for multiple requests. After completing all of your requests, call
    // the "close" method on the client to safely clean up any remaining background resources.
    try (AutoMlClient client = AutoMlClient.create()) {
      // Get the full path of the model.
      ModelName modelFullId = ModelName.of(projectId, "us-central1", modelId);
      Model model = client.getModel(modelFullId);

      // Display the model information.
      System.out.format("Model name: %s%n", model.getName());
      // To get the model id, you have to parse it out of the `name` field. As models Ids are
      // required for other methods.
      // Name Format: `projects/{project_id}/locations/{location_id}/models/{model_id}`
      String[] names = model.getName().split("/");
      String retrievedModelId = names[names.length - 1];
      System.out.format("Model id: %s%n", retrievedModelId);
      System.out.format("Model display name: %s%n", model.getDisplayName());
      System.out.println("Model create time:");
      System.out.format("\tseconds: %s%n", model.getCreateTime().getSeconds());
      System.out.format("\tnanos: %s%n", model.getCreateTime().getNanos());
      System.out.format("Model deployment state: %s%n", model.getDeploymentState());
    }
  }
}

Node.js

Zur Authentifizierung bei AutoML Video Object Tracking richten Sie Standardanmeldedaten für Anwendungen ein. Weitere Informationen finden Sie unter Authentifizierung für eine lokale Entwicklungsumgebung einrichten.

/**
 * TODO(developer): Uncomment these variables before running the sample.
 */
// const projectId = 'YOUR_PROJECT_ID';
// const location = 'us-central1';
// const modelId = 'YOUR_MODEL_ID';

// Imports the Google Cloud AutoML library
const {AutoMlClient} = require('@google-cloud/automl').v1beta1;

// Instantiates a client
const client = new AutoMlClient();

async function getModel() {
  // Construct request
  const request = {
    name: client.modelPath(projectId, location, modelId),
  };

  const [response] = await client.getModel(request);

  console.log(`Model name: ${response.name}`);
  console.log(
    `Model id: ${
      response.name.split('/')[response.name.split('/').length - 1]
    }`
  );
  console.log(`Model display name: ${response.displayName}`);
  console.log('Model create time');
  console.log(`\tseconds ${response.createTime.seconds}`);
  console.log(`\tnanos ${response.createTime.nanos / 1e9}`);
  console.log(`Model deployment state: ${response.deploymentState}`);
}

getModel();

Python

Zur Authentifizierung bei AutoML Video Object Tracking richten Sie Standardanmeldedaten für Anwendungen ein. Weitere Informationen finden Sie unter Authentifizierung für eine lokale Entwicklungsumgebung einrichten.

from google.cloud import automl_v1beta1 as automl

# TODO(developer): Uncomment and set the following variables
# project_id = "YOUR_PROJECT_ID"
# model_id = "YOUR_MODEL_ID"

client = automl.AutoMlClient()
# Get the full path of the model.
model_full_id = client.model_path(project_id, "us-central1", model_id)
model = client.get_model(name=model_full_id)

# Retrieve deployment state.
if model.deployment_state == automl.Model.DeploymentState.DEPLOYED:
    deployment_state = "deployed"
else:
    deployment_state = "undeployed"

# Display the model information.
print(f"Model name: {model.name}")
print("Model id: {}".format(model.name.split("/")[-1]))
print(f"Model display name: {model.display_name}")
print(f"Model create time: {model.create_time}")
print(f"Model deployment state: {deployment_state}")

Modelle auflisten

Ein Projekt kann zahlreiche Modelle enthalten. In diesem Abschnitt wird beschrieben, wie Sie eine Liste der verfügbaren Modelle für ein Projekt abrufen können.

Web-UI

Rufen Sie in der Benutzeroberfläche des AutoML Video Object Tracking die Seite Models (Modelle) auf, um die Modelle in Ihrem Projekt anzusehen.

Seite "Modelle" mit einem Modell in der Liste

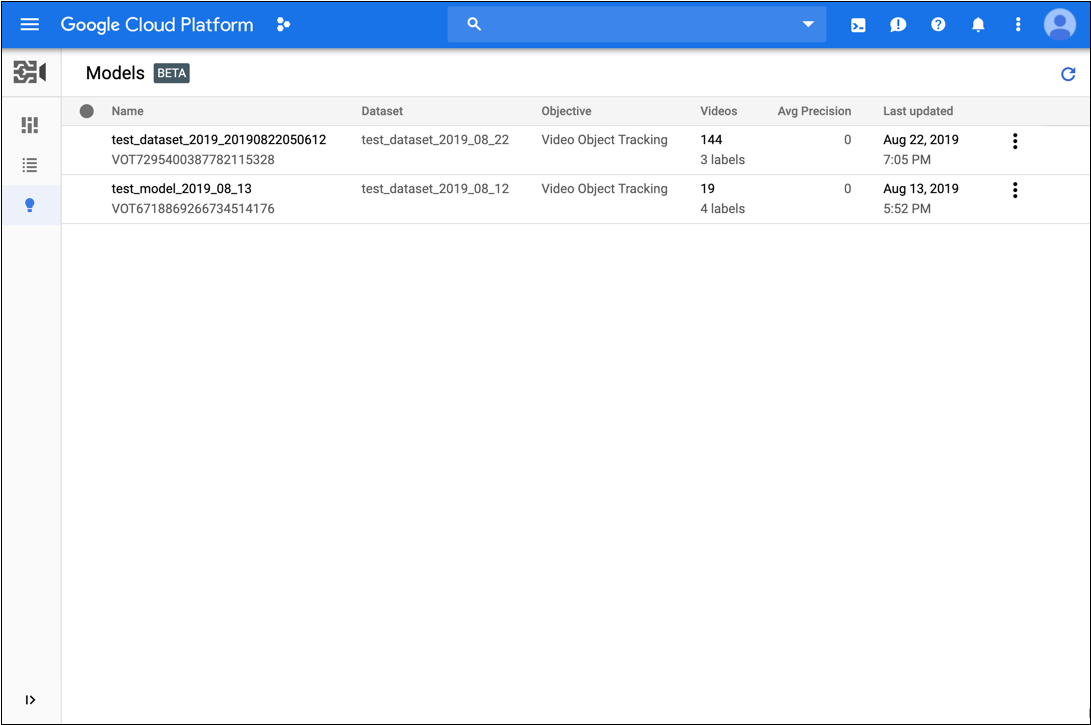
Wenn Sie die Modelle für ein anderes Projekt anzeigen möchten, wählen Sie das Projekt in der Drop-down-Liste oben rechts in der Titelleiste aus.

REST

Bevor Sie die Anfragedaten verwenden, ersetzen Sie die folgenden Werte:

  • project-number: Die Nummer Ihres Projekts
  • location-id: Die Cloud-Region, in der die Annotation stattfinden soll. Unterstützte Cloud-Regionen sind: us-east1, us-west1, europe-west1, asia-east1. Wenn keine Region angegeben ist, wird eine Region basierend auf dem Speicherort der Videodatei festgelegt.

HTTP-Methode und URL:

GET https://automl.googleapis.com/v1beta1/projects/project-number/locations/location-id/models

Wenn Sie die Anfrage senden möchten, maximieren Sie eine der folgenden Optionen:

Sie sollten eine JSON-Antwort ähnlich wie diese erhalten:

Java

Zur Authentifizierung bei AutoML Video Object Tracking richten Sie Standardanmeldedaten für Anwendungen ein. Weitere Informationen finden Sie unter Authentifizierung für eine lokale Entwicklungsumgebung einrichten.

import com.google.cloud.automl.v1beta1.AutoMlClient;
import com.google.cloud.automl.v1beta1.ListModelsRequest;
import com.google.cloud.automl.v1beta1.LocationName;
import com.google.cloud.automl.v1beta1.Model;
import java.io.IOException;

class ListModels {

  static void listModels() throws IOException {
    // TODO(developer): Replace these variables before running the sample.
    String projectId = "YOUR_PROJECT_ID";
    listModels(projectId);
  }

  // List the models available in the specified location
  static void listModels(String projectId) throws IOException {
    // Initialize client that will be used to send requests. This client only needs to be created
    // once, and can be reused for multiple requests. After completing all of your requests, call
    // the "close" method on the client to safely clean up any remaining background resources.
    try (AutoMlClient client = AutoMlClient.create()) {
      // A resource that represents Google Cloud Platform location.
      LocationName projectLocation = LocationName.of(projectId, "us-central1");

      // Create list models request.
      ListModelsRequest listModelsRequest =
          ListModelsRequest.newBuilder()
              .setParent(projectLocation.toString())
              .setFilter("")
              .build();

      // List all the models available in the region by applying filter.
      System.out.println("List of models:");
      for (Model model : client.listModels(listModelsRequest).iterateAll()) {
        // Display the model information.
        System.out.format("Model name: %s%n", model.getName());
        // To get the model id, you have to parse it out of the `name` field. As models Ids are
        // required for other methods.
        // Name Format: `projects/{project_id}/locations/{location_id}/models/{model_id}`
        String[] names = model.getName().split("/");
        String retrievedModelId = names[names.length - 1];
        System.out.format("Model id: %s%n", retrievedModelId);
        System.out.format("Model display name: %s%n", model.getDisplayName());
        System.out.println("Model create time:");
        System.out.format("\tseconds: %s%n", model.getCreateTime().getSeconds());
        System.out.format("\tnanos: %s%n", model.getCreateTime().getNanos());
        System.out.format("Model deployment state: %s%n", model.getDeploymentState());
      }
    }
  }
}

Node.js

Zur Authentifizierung bei AutoML Video Object Tracking richten Sie Standardanmeldedaten für Anwendungen ein. Weitere Informationen finden Sie unter Authentifizierung für eine lokale Entwicklungsumgebung einrichten.

/**
 * TODO(developer): Uncomment these variables before running the sample.
 */
// const projectId = 'YOUR_PROJECT_ID';
// const location = 'us-central1';

// Imports the Google Cloud AutoML library
const {AutoMlClient} = require('@google-cloud/automl').v1beta1;

// Instantiates a client
const client = new AutoMlClient();

async function listModels() {
  // Construct request
  const request = {
    parent: client.locationPath(projectId, location),
    filter: 'translation_model_metadata:*',
  };

  const [response] = await client.listModels(request);

  console.log('List of models:');
  for (const model of response) {
    console.log(`Model name: ${model.name}`);
    console.log(`
      Model id: ${model.name.split('/')[model.name.split('/').length - 1]}`);
    console.log(`Model display name: ${model.displayName}`);
    console.log('Model create time');
    console.log(`\tseconds ${model.createTime.seconds}`);
    console.log(`\tnanos ${model.createTime.nanos / 1e9}`);
    console.log(`Model deployment state: ${model.deploymentState}`);
  }
}

listModels();

Python

Zur Authentifizierung bei AutoML Video Object Tracking richten Sie Standardanmeldedaten für Anwendungen ein. Weitere Informationen finden Sie unter Authentifizierung für eine lokale Entwicklungsumgebung einrichten.

from google.cloud import automl_v1beta1 as automl

# TODO(developer): Uncomment and set the following variables
# project_id = "YOUR_PROJECT_ID"

client = automl.AutoMlClient()
# A resource that represents Google Cloud Platform location.
project_location = f"projects/{project_id}/locations/us-central1"
request = automl.ListModelsRequest(parent=project_location, filter="")
response = client.list_models(request=request)

print("List of models:")
for model in response:
    # Display the model information.
    if model.deployment_state == automl.Model.DeploymentState.DEPLOYED:
        deployment_state = "deployed"
    else:
        deployment_state = "undeployed"

    print(f"Model name: {model.name}")
    print("Model id: {}".format(model.name.split("/")[-1]))
    print(f"Model display name: {model.display_name}")
    print(f"Model create time: {model.create_time}")
    print(f"Model deployment state: {deployment_state}")

Modell löschen

Im folgenden Beispiel wird ein Modell gelöscht.

Web-UI

  1. Rufen Sie in der AutoML Video Object Tracking-UI die Seite Models (Modelle) auf.

    Seite "Modelle" mit einem Modell
  2. Klicken Sie auf das Dreipunkt-Menü ganz rechts in der Zeile, die Sie löschen möchten, und wählen Sie Löschen aus.
  3. Klicken Sie im Bestätigungsdialogfeld auf Bestätigen.

REST

Bevor Sie die Anfragedaten verwenden, ersetzen Sie die folgenden Werte:

  • project-number: Die Nummer Ihres Projekts
  • location-id: Die Cloud-Region, in der die Annotation stattfinden soll. Unterstützte Cloud-Regionen sind: us-east1, us-west1, europe-west1, asia-east1. Wenn keine Region angegeben ist, wird eine Region basierend auf dem Speicherort der Videodatei festgelegt.
  • Ersetzen Sie model-id durch die ID für Ihr Modell.

HTTP-Methode und URL:

DELETE https://automl.googleapis.com/v1beta1/projects/project-number/locations/location-id/models/model-id

Wenn Sie die Anfrage senden möchten, maximieren Sie eine der folgenden Optionen:

Sie sollten einen erfolgreichen Statuscode (2xx) und eine leere Antwort als Ausgabe erhalten.

Java

Zur Authentifizierung bei AutoML Video Object Tracking richten Sie Standardanmeldedaten für Anwendungen ein. Weitere Informationen finden Sie unter Authentifizierung für eine lokale Entwicklungsumgebung einrichten.

import com.google.cloud.automl.v1beta1.AutoMlClient;
import com.google.cloud.automl.v1beta1.ModelName;
import com.google.protobuf.Empty;
import java.io.IOException;
import java.util.concurrent.ExecutionException;

class DeleteModel {

  public static void main(String[] args)
      throws IOException, ExecutionException, InterruptedException {
    // TODO(developer): Replace these variables before running the sample.
    String projectId = "YOUR_PROJECT_ID";
    String modelId = "YOUR_MODEL_ID";
    deleteModel(projectId, modelId);
  }

  // Delete a model
  static void deleteModel(String projectId, String modelId)
      throws IOException, ExecutionException, InterruptedException {
    // Initialize client that will be used to send requests. This client only needs to be created
    // once, and can be reused for multiple requests. After completing all of your requests, call
    // the "close" method on the client to safely clean up any remaining background resources.
    try (AutoMlClient client = AutoMlClient.create()) {
      // Get the full path of the model.
      ModelName modelFullId = ModelName.of(projectId, "us-central1", modelId);

      // Delete a model.
      Empty response = client.deleteModelAsync(modelFullId).get();

      System.out.println("Model deletion started...");
      System.out.println(String.format("Model deleted. %s", response));
    }
  }
}

Node.js

Zur Authentifizierung bei AutoML Video Object Tracking richten Sie Standardanmeldedaten für Anwendungen ein. Weitere Informationen finden Sie unter Authentifizierung für eine lokale Entwicklungsumgebung einrichten.

/**
 * TODO(developer): Uncomment these variables before running the sample.
 */
// const projectId = 'YOUR_PROJECT_ID';
// const location = 'us-central1';
// const modelId = 'YOUR_MODEL_ID';

// Imports the Google Cloud AutoML library
const {AutoMlClient} = require('@google-cloud/automl').v1beta1;

// Instantiates a client
const client = new AutoMlClient();

async function deleteModel() {
  // Construct request
  const request = {
    name: client.modelPath(projectId, location, modelId),
  };

  const [response] = await client.deleteModel(request);
  console.log(`Model deleted: ${response}`);
}

deleteModel();

Python

Zur Authentifizierung bei AutoML Video Object Tracking richten Sie Standardanmeldedaten für Anwendungen ein. Weitere Informationen finden Sie unter Authentifizierung für eine lokale Entwicklungsumgebung einrichten.

from google.cloud import automl_v1beta1 as automl

# TODO(developer): Uncomment and set the following variables
# project_id = "YOUR_PROJECT_ID"
# model_id = "YOUR_MODEL_ID"

client = automl.AutoMlClient()
# Get the full path of the model.
model_full_id = client.model_path(project_id, "us-central1", model_id)
response = client.delete_model(name=model_full_id)

print(f"Model deleted. {response.result()}")